
 TECH
TECH
 IMAGES BY THE AUTHOR
his is no fabricated war story. The potentially fatal incident we will describe happened to a good friend at the dragstrip. He was at a local track in Texas with his two young sons. They had been sitting in the wooden grandstands watching the races while waiting for their car to cool down. After watching a few cars make passes, they return to the pits. Just after they vacated their seats, a car on the track experienced a significant explosion. They returned to the stands and found a 6-inch portion of ring gear teeth from a flexplate buried in the wooden grandstands near where they had been sitting. That shrapnel could have caused severe bodily harm or death to anyone who would have been unlucky enough to be in its path.
With that sobering image firmly planted in your head, there’s much to discuss regarding proper flexplate safety and installation. Because it is so easy to make four-digit horsepower and torque numbers, other related devices can sometimes be overlooked. The focus for this story will be on that under-appreciated component that completes the connection between the crankshaft and the torque converter.
Enthusiasts rarely take into consideration the violent nature of high-performance machines with hefty power numbers. Let’s take a glance at Chevrolet Performance’s new 632 big-block crate engine. The engine is capable of every bit of its rated 1,004 hp and 876 lb-ft of torque. This is an engine capable of 600 lb-ft of torque at 3,000 rpm. If that twisting energy is hooked to an automatic like a TH400, all that power is transmitted through the flexplate.
On the other side of the coin is the dilemma of the bucks-down enthusiast who has spent his money on a 5.3 LS engine emboldened with a single turbocharger. With a little boost, that engine is capable of 900 to 1,000 hp or more but because his budget is tight, he’s chosen a no-name flexplate he found online.
The issue is whether the quality of this cheap part is worth the risk, especially with a potentially high-rpm combination. When you consider the massive amount of damage that will result from a fractured flexplate, it seems the risk is much higher than the small reward of the reduced price.
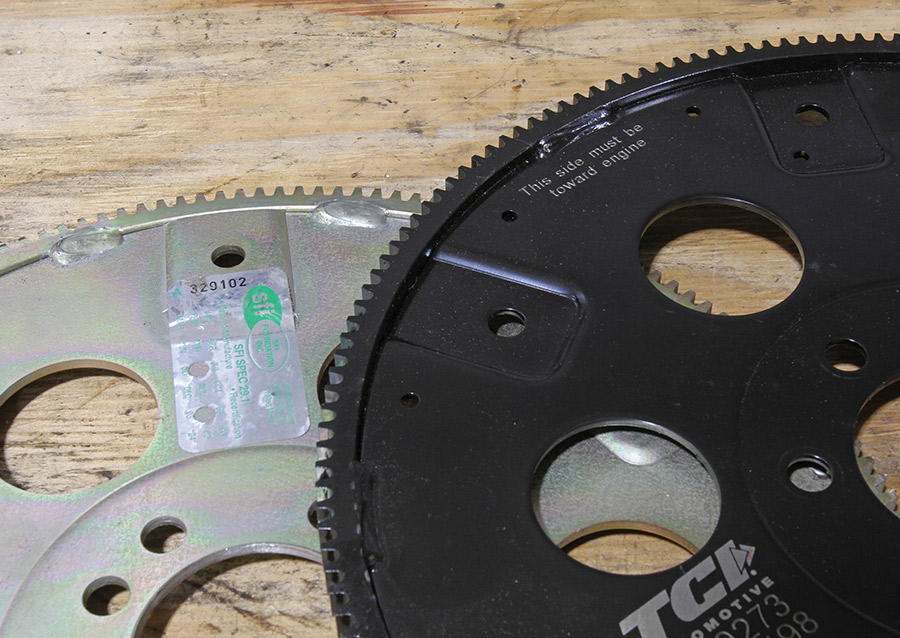
This issue has been addressed by sanctioning bodies like the NHRA that require an SFI Foundation flexplate certification to be allowed to compete. Specifically, NHRA rules require an SFI 29.1 spec flexplate for any car running 9.99 seconds or quicker in the quarter-mile (or if the trap speed exceeds 135 mph) or 6.39 in the eighth-mile. This is a requirement that is established to ensure the safety of everyone involved.
There are two different SFI specs, 29.1 and 29.2. As an example of the difference between these two specs, TCI offers an SFI spec 29.1 flexplate that uses a stronger alloy steel center than stock units with the ring gear welded on both sides. Moving up to the 29.2 SFI spec, TCI then uses a 4140-steel alloy and the entire flexplate is CNC-machined from this billet material. This includes the ring gear teeth, so welding is not required because the teeth are an integral portion of the wheel. The companies offering quality 29.2 SFI flexplates include Meziere, FTI, TCI, and others.
One notable fact is that SFI-spec flexplates used for NHRA competition are only accepted for three years. After this time, SFI mandates that the flexplate be returned to the manufacturer for inspection and recertification. This is only essential when using these flexplates in NHRA competition.
While street performance may not demand an SFI flexplate, most flexplate companies highly recommend this simply for the safety factor. There are many flexplates that are both affordable and carry an SFI certification. As one example, Summit carries a neutral balance 168-tooth small-block Chevy flexplate under PN G100SFI, which carries an SFI spec yet sells for under $100. Even if you never plan on making a pass at your local dragstrip, using a quality flexplate is worth the peace of mind.
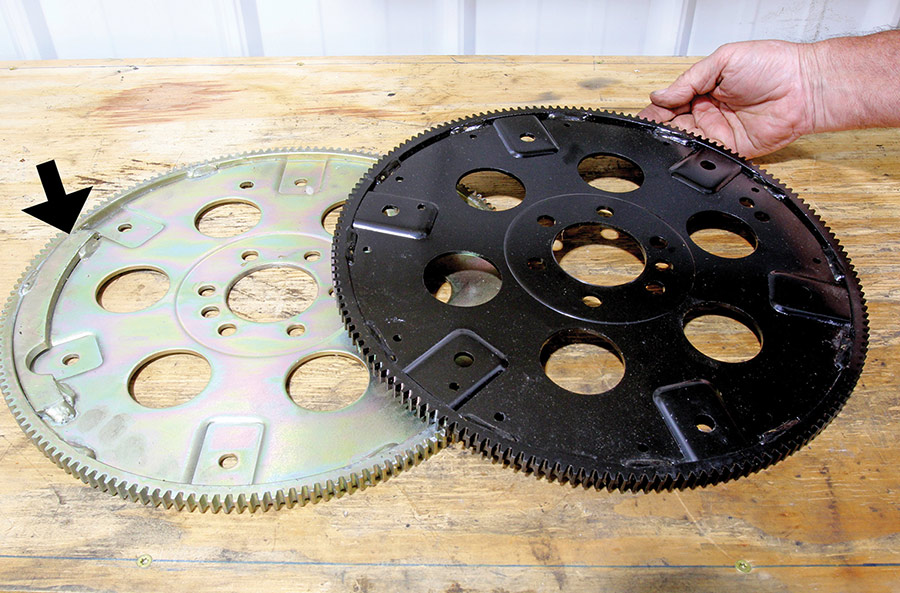
There are multiple companies offering high-quality flexplates, including TCI, B&M, QuickTime, Meziere, Summit, and others, which are all good choices. Most of these are stamped steel units using slightly thicker material along with a steel ring gear that is heated, bent, and welded to the center portion.
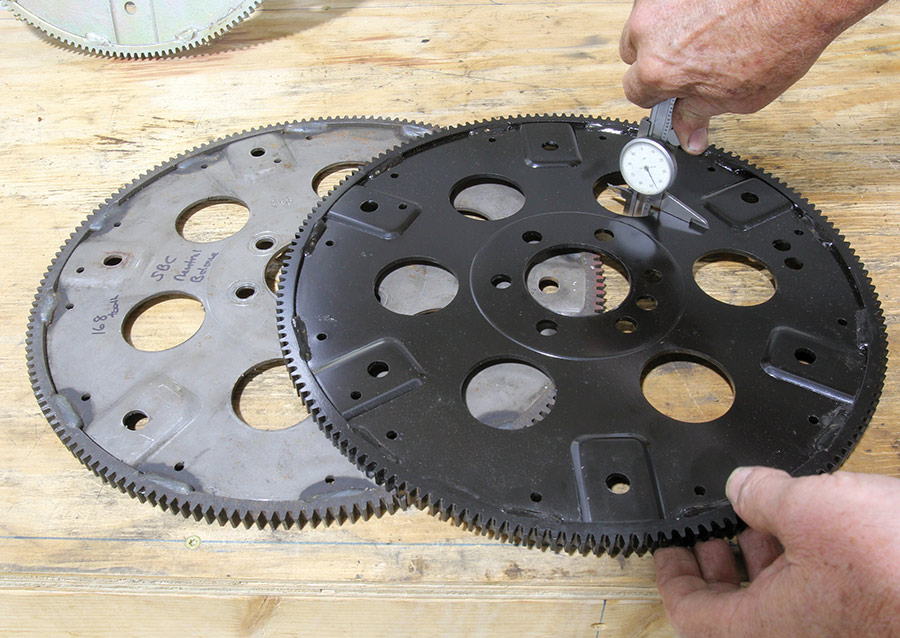
This is also how stock replacement flexplates are constructed but they tend to use weaker materials and often these cheap flexplates will exhibit excessive radial ring gear runout or perhaps lateral runout. One way to check this is to set up a dial indicator on a magnetic base and rotate the crankshaft to different positions to check the position of the flexplate. You should see no more than 0.005- to 0.010-inch runout either radially or laterally. A more accurate test would be to bolt the converter to the flexplate and check the runout.
The main difference between the two SFI specs is the 29.2 version is aimed at high-horsepower cars. The test procedure, however, is the same: spinning the flexplate on a test bench at between 12,500 and 13,500 rpm for one hour. The higher 29.2 spec similar is designed for higher-output vehicles and targets billet flexplates using stronger materials. This would certainly be something to consider if you are into power-adder combinations using lots of nitrous or high boost applications.
Beyond the quality and safety issues, most flexplate problems center around either misapplication or poor installation techniques. For small- and big-block Chevys, one common error revolves around external versus internal balance engines. Most small-block Chevy engines were internally balanced, which means no external or offset weights are applied to the flexplate or flywheel. The exceptions to this rule include the 400ci small-block and the production 454 MK IV and Gen V/VI big-block Chevys. These engines required an external weight attached to the flexplate to properly balance the rotating assembly. Using an externally balanced flexplate on an internally balanced engine (or the opposite of using a neutral balance flexplate on an externally balanced engine) will cause severe vibrations.
One addition to the above rule is the 1986 and later small-block Chevy using the one-piece rear main seal. The original small-block used a small offset weight on the crank flange. The one-piece flange does not have this offset weight so the flexplate (or flywheel) for these engines uses a small weight that duplicates the original two-piece rear main seal small-block.
We’ll just touch briefly on torque converter patterns because that’s an entire story unto itself, especially when dealing with engine or transmission swaps. Keeping it simple, there are four different GM converter mounting patterns that expand from a three-bolt 10.5-inch circle to the large 11.5-inch circle for the 4L80E that includes six bolts rather than three.
The Gen III and IV LS engines all used a standard six-bolt crankshaft flange that continued until the LSA supercharged engine expanded that pattern to an eight-bolt flange. That eight-bolt plan was then expanded in 2009 with the first Gen V LT engines. There’s also the oddball LS9 that uses a nine-bolt flange.
Determining when or if you might need a better flexplate can be a bit more subtle. The obvious clues that a budget flexplate has been abused is when the hub is cracked or perhaps one section of the center is deflected for bent. This is becoming more common with increased power levels. Elongated converter mounting holes are another area where a flexplate can experience problems, although it is acceptable to slightly elongate the mounting holes for certain metric converter engine swaps.
There are also flexplates designed specifically for engine swaps using LS and LT engines. For example, it’s common to use a TH400 behind an LS engine. This will require an LS-style flexplate to bolt to the standard six-bolt crank flange but will also require a crankshaft hub extension and snout adapter to connect the TH400 converter to the flexplate. The spacer (Merziere PN FPS174A) is necessary because the LS crankshaft flange is 0.400-inch shorter than a typical small- or big-block Chevy. Hub adapters are common across the internet with FTI under PN FCALS.
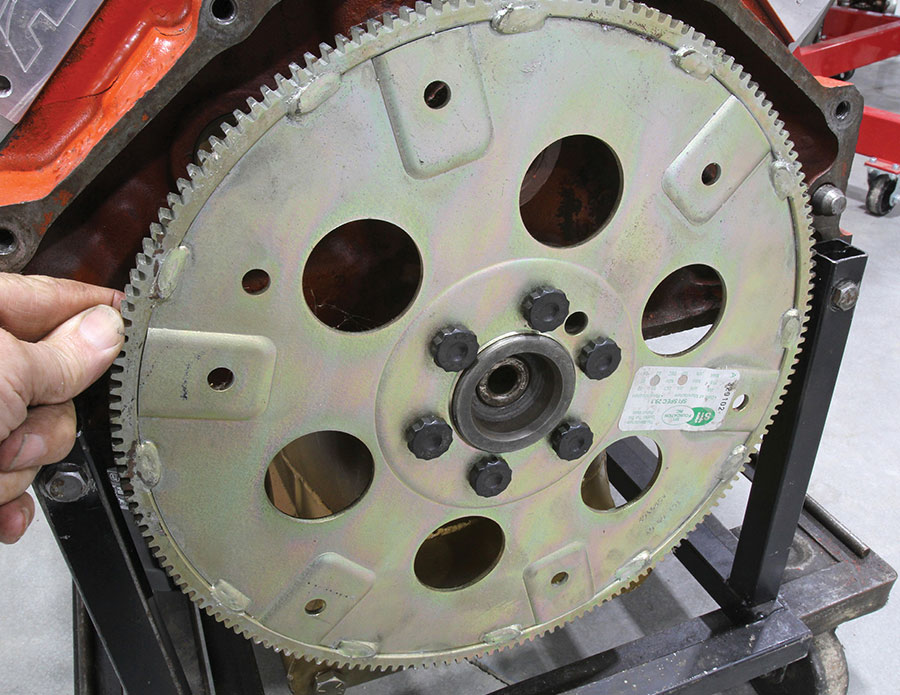
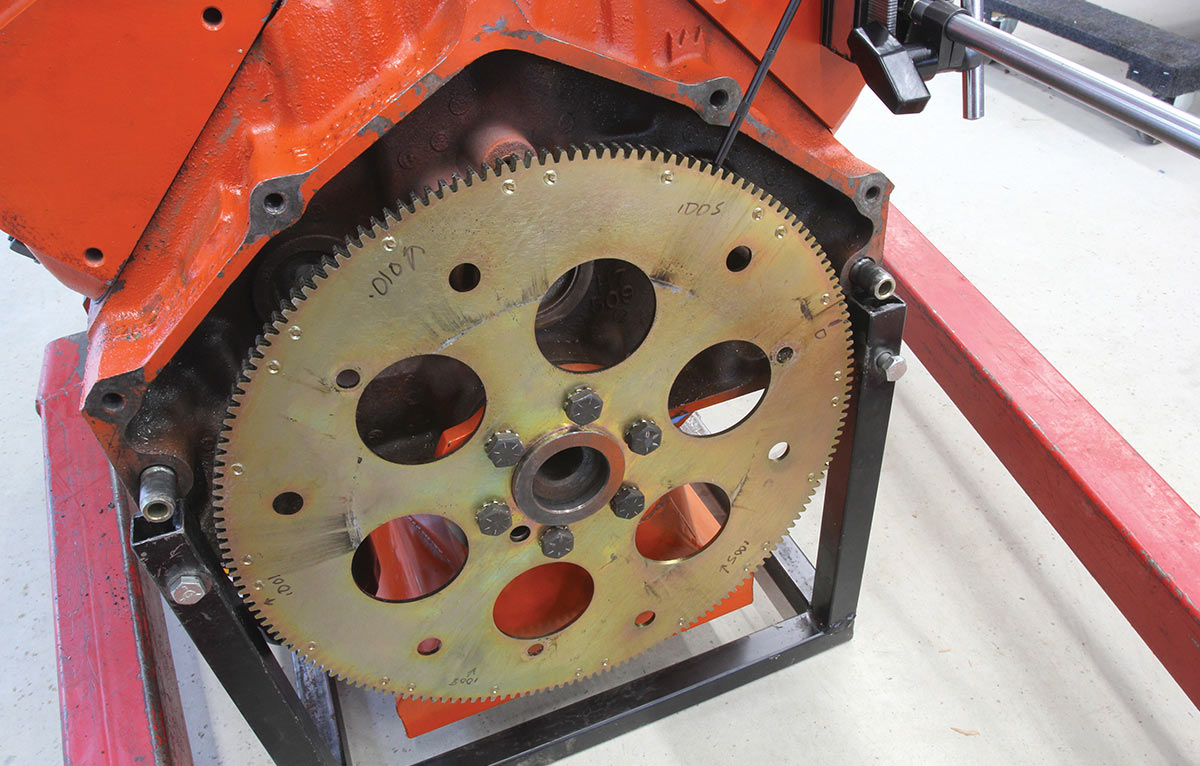
While flexplate installation may seem basic, there are still ways to make a mistake. Among the most common is that all flexplates are designed to be mounted in only one direction. This usually has the converter mounting pads facing the torque converter. Some billet flexplates may not feature these pads but will indicate which side faces the engine and converter. It’s very easy, however, to install a traditional flexplate backward and you may not notice the mistake until the transmission is bolted in place. Save yourself the extra effort and always mount the flexplate with the raised converter pads facing the converter.
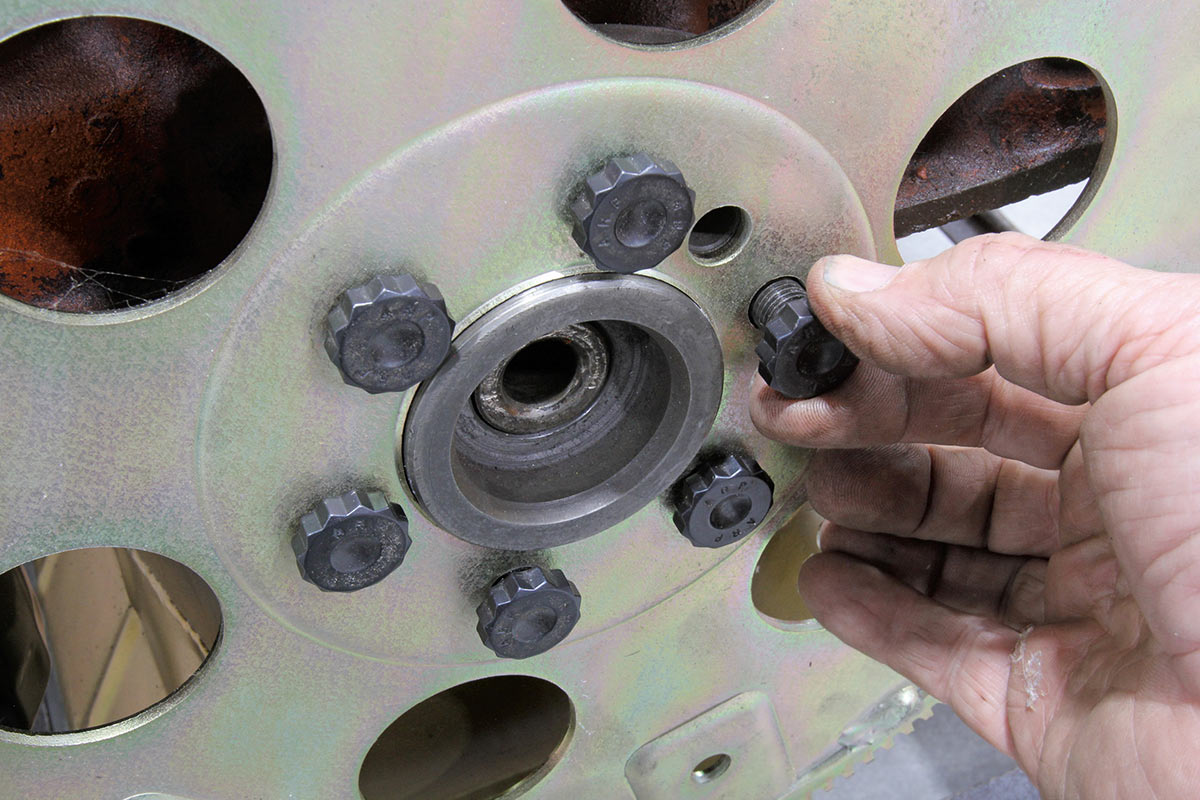
If you find that it is difficult to install the flexplate over the crankshaft flange, inspect the flange for rust, debris, or perhaps a nick or gouge that might prevent the flexplate from slipping on. It’s important that the flange fit tightly on the crankshaft hub for proper register. With the crank hub clean and smooth but the flexplate still does not easily slip over the center hub, line up all the boltholes and start all the bolts with two or three threads. Then, apply alternating pressure on opposite sides of the flexplate to use leverage to slip the flexplate over the hub. If this does not work, then you can use a small sanding disc on the inside of the flexplate hub to very slightly open the register.
Anytime you do transmission service, it’s a good idea to visually inspect the flexplate for cracks or any signs of distress, especially around the outside of the mounting bolt circle. By virtue of their name, flexplates are designed to bend slightly in response to high converter pressures and heat. This is normal. But excessive converter pressure or ballooning can lead to flexplate damage that may not be evident. This is why close inspection is a good idea anytime the converter is removed.
We’ve covered quite a bit of ground with this story and perhaps also offered some insight into the challenges present to the flexplate. If there are big power numbers in your future, a strong, quality-built flexplate should be part of any build.