

ACP department heading TECH
InTheGarageMedia.com
A mechanic works on a gold-painted LS engine equipped with dual FiTech fuel injection throttle bodies and chrome air cleaners.
Dress to Impress
Dress to Impress
Chris Cerce Customs Gives an LS3 a Vintage Vibe
By Chuck Vranas Images by The Author
S

etting up the heartbeat for any project leaves you an endless possibility of performance options, starting with your chosen power nailed to the chassis. Should you go old school with a hopped-up small-block, heavy-breathing big-block, or a more modern LS? If you’re looking for a vintage vibe with a modern twist, there are plenty of options to bring that cutting-edge modern engine a nod to the past that’ll have viewers scratching their heads when sneaking a peek under the hood of your classic Chevy.

On a recent visit to Chris Cerce Customs in Taunton, Massachusetts, we met with shop owner, Chris Cerce, who had just taken delivery of a fresh Chevrolet Performance 430hp LS3 long-block packed with a speed shop full of factory go-fast goods. Deep inside a cast-aluminum block with six-bolt, cross-bolted main caps, you’ll find a nodular iron crank linked to powdered metal rods wearing hypereutectic aluminum pistons generating a solid 10.7:1 compression. A hydraulic roller cam sets the beat while a set of cast-aluminum rectangle port heads with 68cc chambers generates plenty of power. To get the updates rolling, an Ultra Low Profile FiTech Plus LS Swap Oil Pan replaced the factory unit. This updated the system to a 6.10-quart capacity with high-quality, cast-aluminum unit construction, complete with sump baffle, pickup tube, sump plug, oil filter stud, and oil passage cover.

With the goods in place, it was time to pick a theme and start choosing options. Wanting to bring a perfect balance of vintage style to the build, Cerce looked into the offerings from FiTech to create a late-’60s-to-early-’70s muscle car aesthetic. Nothing sets the road ablaze better that their Dual Quad Retro Cast LS Port System available in classic gold or matte black finish. It’s engineered to handle high-performance applications through modern EFI technology with dual throttle bodies for increased airflow of 1,800 cfm and self-tuning capabilities able to support up to 1,000 hp. The system is all inclusive, showcasing everything needed to complete the upgrade. This includes fuel rails with 80-lb/hr injectors and crossover, complete throttle linkage, fuel pressure regulator with gauge, external ECU, all related wiring, sensors, and 4.5-inch display to allow for real-time tuning, monitoring, and adjustments. The system is also E85-compatible. With our application being for the LS3, we contacted ICT Billet for a set of their billet LS Rectangle Port Head to Cathedral Port Intake manifold adapters to make the application seamless. To complement the top end, Cerce also added one of ICT’s Low-Profile Valley Pans complete with oil pressure sensor port, O-ring gaskets, and installation hardware. The crowning touch arrived with a pair of polished, finned, cast-aluminum Mohawk air cleaners by OTB Gear to add an air of elegance, specifically designed for dual-quad systems.

With the induction dialed in, it was time to focus on maintaining the vintage theme with a set of high-polished finned aluminum FiTech Plus two-piece, tall valve covers, designed for most high-lift valvetrain options. They come complete with O-ringed oil filler cap, gaskets, and all mounting hardware. Nestled inside, you’ll find FiTech’s Go-Spark ignition coils, which add optimum output over the OEM versions and feature built-in LED lights for when the coils are firing. To complete the ignition, FiTech offers their matching Go-Spark Ceramic Spark Plug Pre-Made Wire kit featuring 8mm wires and ceramic spark plug boot material able to withstand 2,000 degrees F, making them ideal for applications with close-tolerance headers.

Rounding out the build, you’ll find a set of Flowtech LS Turbo headers. Crafted from heavy-duty, 16-gauge 304SS stainless with CNC mandrel-bent tubes and a 3-inch collector, they arrive complete with matching V-bands, clamps, and premium aluminum header gaskets to complete the job.

An assortment of automotive parts for an oil pan installation, including the pan, gasket, pickup tube, tray, and hardware.
1. FiTech Plus offers an excellent alternative to the factory LS3 oil pan with their Ultra Low Profile LS Swap kit (PN 130203), featuring a 6.10-quart capacity with filter. It arrives with everything needed to complete the update, including cast-aluminum pan, sump baffle, oil pickup tube, sump plug, oil filter stud, and oil passage cover.
A mechanic aligns a gold-painted oil pan to the bottom of a matching gold LS engine block on an engine stand.
2. Chris Cerce, of Chris Cerce Customs, started off by removing the factory pan from the engine.
Close-up of a mechanic using a red power tool to secure a windage tray and oil pickup tube to the bottom of an engine.
3. The factory oil pickup tube was then removed from the oil pump and replaced with the FiTech Plus oil pickup tube.
A person installs a metal baffle plate into a silver aluminum oil pan before mounting it to the engine.
4. Next, replace the factory sump baffle with the FiTech Plus unit and follow by installing the supplied oil pan gasket to the pan.
Hand using a socket wrench to tighten the mounting bolts of a black textured oil pan onto a gold engine block.
5. Prepare the engine block surface by cleaning the bottom area as well as the timing cover and rear cover with lacquer thinner. Cerce adds a dab of Permatex Oil Resistant Gasket Maker to the bottom surface areas for a perfect seal. Install the drain plug with a coating of Loctite 545 to the threads and follow by installing the pan to the block using the provided hardware.
A person carefully applies a thin bead of red RTV sealant along the edge of a silver aluminum engine valley cover.
6. Remove the factory valley cover. Prepare the new ICT Billet aluminum valley cover by first installing the provided O-rings and perimeter gasket into the bottom side of the cover.
A mechanic lowers a silver ICT Billet valley cover onto the top of a gold-painted LS engine block.
7. After cleaning the top block surface with lacquer thinner, align the valley cover to the top surface of the block.
Using a small hand ratchet to tighten the countersunk hex bolts on a silver aluminum engine valley cover.
8. Using the stainless hardware provided, hand-thread each bolt in place and follow with a 5mm Allen head socket to secure.
Top view of a gold-painted LS engine block with a silver ICT Billet valley cover fully installed.
9. Here you can see the installed oil pressure sensor adapter and the stunning visual impact the new valley cover has on the engine.
Hand pressing a black rubber O-ring into the machined groove of a silver intake manifold adapter plate.
10. The Chevrolet Performance 6.2L Gen IV LS3 features cast-aluminum, rectangle-port cylinder heads. In order to adapt for the new FiTech system designed for cathedral-port heads, a call was placed to ICT Billet for a set of their billet aluminum adapters. To prepare the adapters for installation, first put in the provided O-ring seals.
Gold LS engine block with silver valley cover and intake manifold adapter plates installed.
11. Follow by installing the adapters to the individual cylinder heads by first coating the bolt threads with antiseize. Continue by hand-threading the 5mm Allen head stainless bolts in place, then tightening till secure.
Layout of gold intake manifolds, FiTech throttle bodies, black fuel rails, injectors, and gaskets on a table.
12. For plenty of nostalgic looks fused with cutting-edge performance, FiTech’s Dual Quad Retro Cast LS Port System comes complete with everything to handle the installation, including intake, dual classic gold throttle bodies (with matte black available) 55-lb/hr injectors, fuel rails, crossover, and all related sensors, hardware, and electronics. The intake here has been color-matched to the engine in satin gold by Cerce.
Hand holding a gold intake manifold to show the black O-ring seals seated in the intake ports.
13. With the intake flipped over on the bench, install the provided O-rings into the sealing grooves on the intake flange.
Mechanic lowering a gold intake manifold with black FiTech spacers onto the gold engine block.
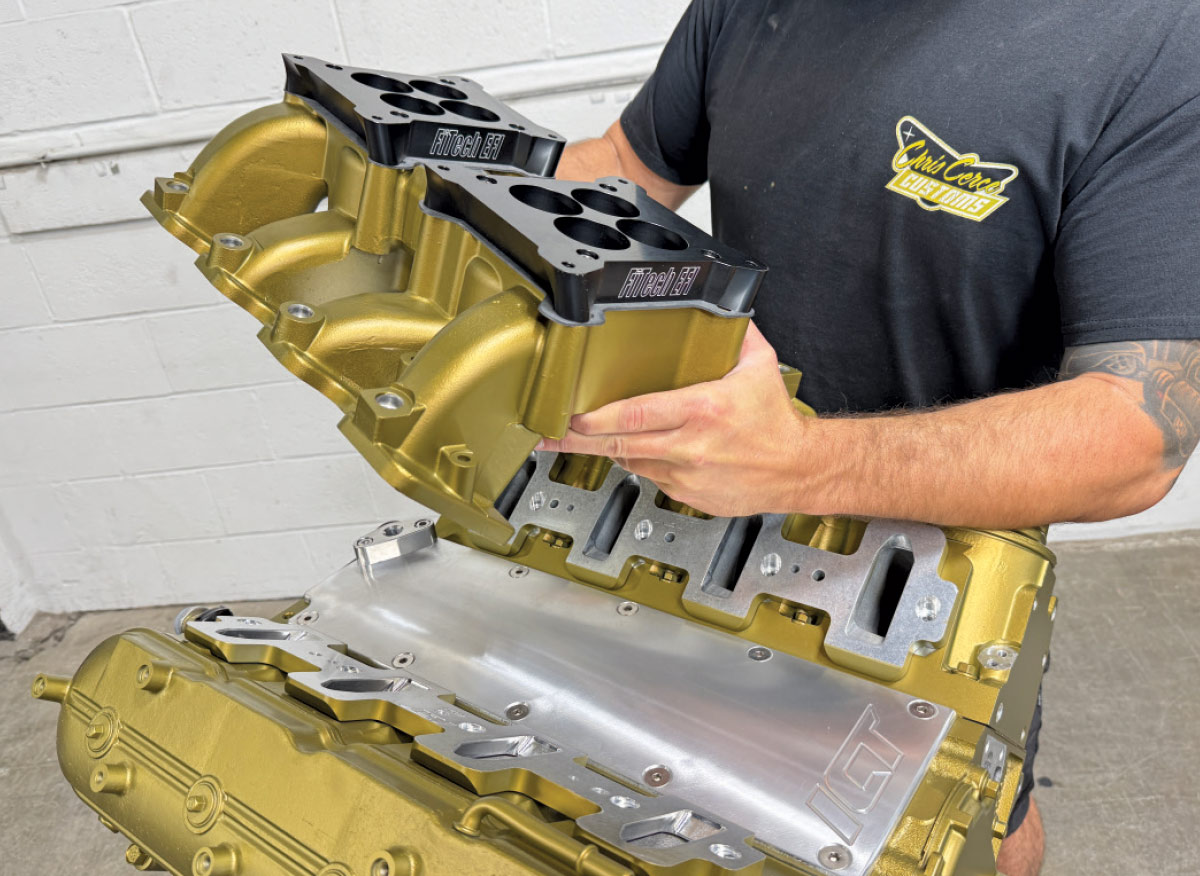
14. After installing the throttle body mounting flanges and gaskets to the intake, carefully lower the intake manifold in place, making sure all O-rings remain in their grooves.
Hand using a ratchet to tighten the mounting bolts of the gold intake manifold on the engine.
15. Using the supplied intake manifold bolts and washers, noting there are two different sizes for correct placement, use a dab of engine oil on the threads before threading them into place and tightening with a 5mm Allen socket and wrench. Be sure to use the included chart with torque values and proper tightening sequence to complete the installation.
Hand installing silver mounting studs into the black FiTech throttle body spacers on the manifold.
16. Hand-thread the throttle body mounting studs into the mounting flanges and tighten in place.
Hand using a socket wrench to secure the dual FiTech throttle bodies to the intake manifold.
17. Install the dual throttle bodies to the intake, making sure the throttle linkages on each are facing to the front of the engine. Secure in place using the provided washers and nuts, tightening till snug.
Hand holding a black fuel injector above the intake port on a gold LS engine manifold.
18. Apply a dab of oil to the upper and lower O-rings on each injector. Follow by carefully installing each into the intake manifold ports noting to have the electrical connectors facing upward to the outside of the engine.
Hands aligning a black FiTech fuel rail over the installed fuel injectors on the gold engine.
19. Assemble each fuel rail with the included mounting hardware using a 13mm socket. Then carefully settle the complete fuel rail onto the top of the injectors by aligning them first and lightly pressing down on the rail to set them in place. Be cautious as not to bind any of the injectors or connectors.
Hand using a ratchet to tighten a mounting bolt on the black FiTech fuel rail of a gold-painted engine manifold.
20. Secure the fuel rails in place and torque to 20 ft-lb.
Mechanic using an open-end wrench to secure a stainless steel braided fuel line to the black fuel rail.
21. Next, install the fuel rail crossover in place.
Hand adjusting the throttle linkage rod between two FiTech throttle bodies on a gold intake manifold.
22. At this point we began assembly of the complete dual-quad throttle linkage assembly included with the system.
Close-up of dual FiTech fuel injection throttle bodies with chrome air cleaners and a central linkage rod.
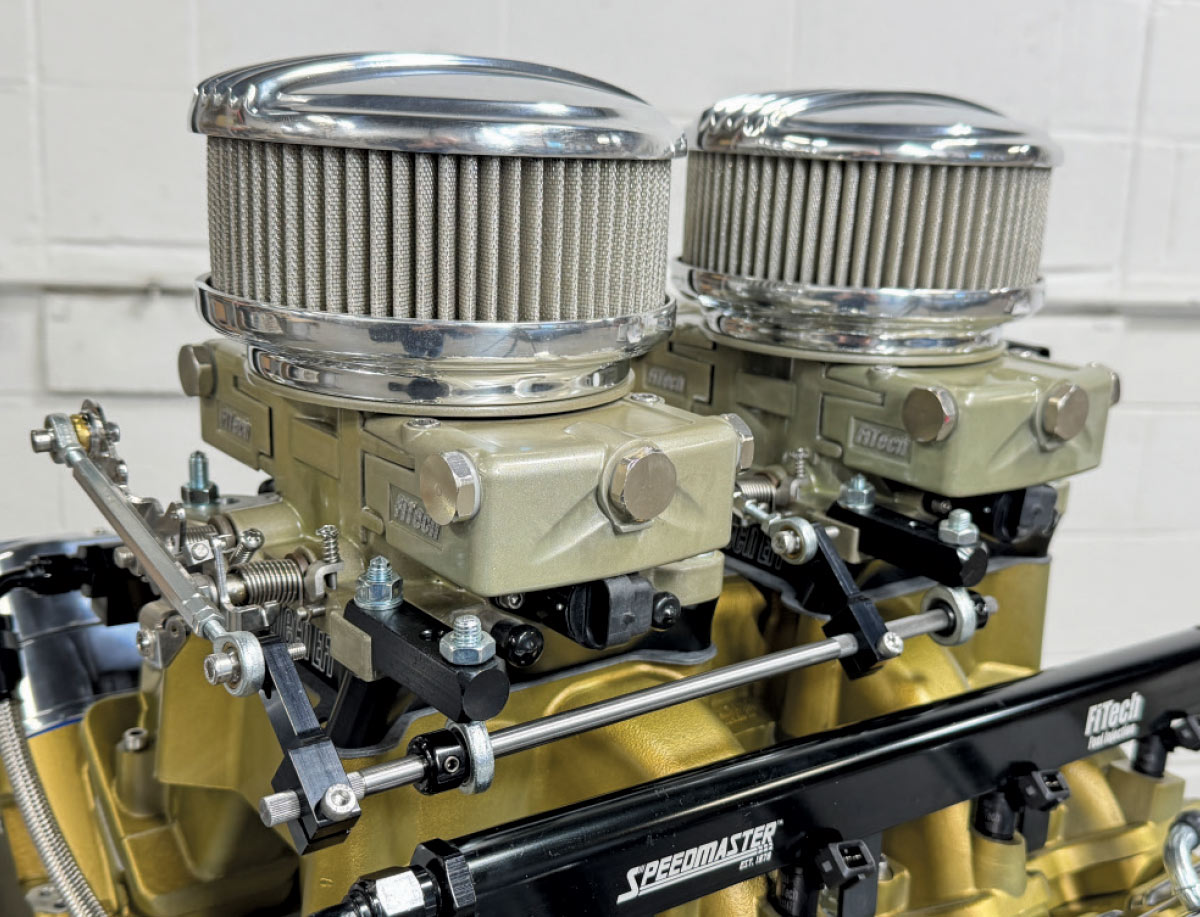
23. Here you can see just how perfectly engineered the completed throttle linkage is. Check out how cool the system looks, including the final icing from OTB Gear with a set of their elegantly polished, finned, cast-aluminum Mohawk air cleaners, specifically designed for dual-quad applications.
Hand inserting a silver mounting bolt and rubber grommet into a hole on a plain silver engine valve cover.
24. To dial in the dazzle, FiTech offers an excellent option to give your LS a clean look with their FiTech Plus two-piece, tall valve covers with internal coil mounts. After removing the factory covers, clean and prep the area and start by adding the supplied fresh valve cover gaskets and install using the included hardware.
Using a ratchet to tighten a center-bolt on a plain silver valve cover on a gold-painted engine block.
25. Tighten the valve cover base to the block.
Hand using a ratchet to bolt black ignition coils onto a silver valve cover on a gold LS engine block.
26. We followed with a set of FiTech Go-Spark Ignition Coils for plenty of energy and set them in place with the supplied 10mm bolts.
Mechanic using a ratchet to secure polished chrome finned valve covers onto the cylinder head.
27. We really dig the high-polished finned aluminum top covers completing the look once fastened in place.
Front three-quarter view of a gold LS engine featuring dual FiTech injection and polished finned valve covers.
28. The FiTech upgrades clearly transform the LS, infusing it with classic visual appeal and an unmistakable early-era vibe that makes it a true engine-bay standout.
Hands positioning polished chrome exhaust headers onto the exhaust ports of a gold-painted engine block.
29. To handle the exhaust, Cerce chose a set of Flowtech stainless LS turbo headers, fashioned from heavy-duty 16-gauge 304SS stainless with CNC mandrel-bent tubing for improved flow and smooth engine breathing.
Hand using a socket wrench to tighten mounting bolts on polished chrome headers attached to a gold engine block.
30. Installation was a snap with the provided premium aluminum header gaskets. The kit even includes 3-inch V-band clamps for when you are completing the exhaust system.
Hand connecting black spark plug wires to an engine featuring chrome valve covers and polished exhaust headers.
31. To wrap up the build, a set of FiTech Go Spark Ceramic 8mm spark plug wires sealed the deal. Each set is crafted to deliver optimal energy delivery and ensure peak performance in your muscle car or hot rod.