ACP department heading TECH
InTheGarageMedia.com
1. Jason Scudellari puts the finishing touch on his ’63 Chevy II by installing all-new glass. It’s already got a ProCharger-equipped LSX376-B8 from Chevrolet Performance for power and a Pro Touring chassis from Schwartz Performance.
Small, but Mighty
Replacing Window Regulators, Side Glass, and Weatherstripping on a Chevy II
BY Ron Ceridono Photography by Jason Scudellari
W

hen the first Chevy II rolled off the assembly line in 1962, few people, including those at General Motors who designed and built it, would have guessed that 60 years later these cars would still be sought after.

The Chevy II came about because Chevrolet needed to fill a void in their product line. In 1960 Ford introduced the Falcon as a small, affordable option to a fullsize car. General Motors’ pre-shrunk auto option that year was the Corvair. But despite the fact the motoring press praised Chevy’s bold new offering (the Corvair was Motor Trend magazine’s 1960 Car of the Year), the buying public wasn’t as enthusiastic. By the time Ralph Nader expressed his disdain for the air-cooled, rear-engine Corvair, Chevrolet desperately needed a “Falcon fighter”—and the first series Chevy II (1962-1967) was it.

While the Chevy II was initially marketed as a compact car, when a V-8 option was introduced in 1964, performance enthusiasts took notice (the horsepower high point being the ’66 RPO L79 350hp 327). However, the little Chevy would soon be overshadowed by the Camaro and Chevelle, in part thanks to the powers at GM deciding to eliminate the Chevy II’s 350-horse option. Nonetheless, the ’62-67 Chevy IIs are still a favorite with Chevy performance fans. The ’63 Jason Scudellari built for his wife, Randi, proves just how cool they can be.

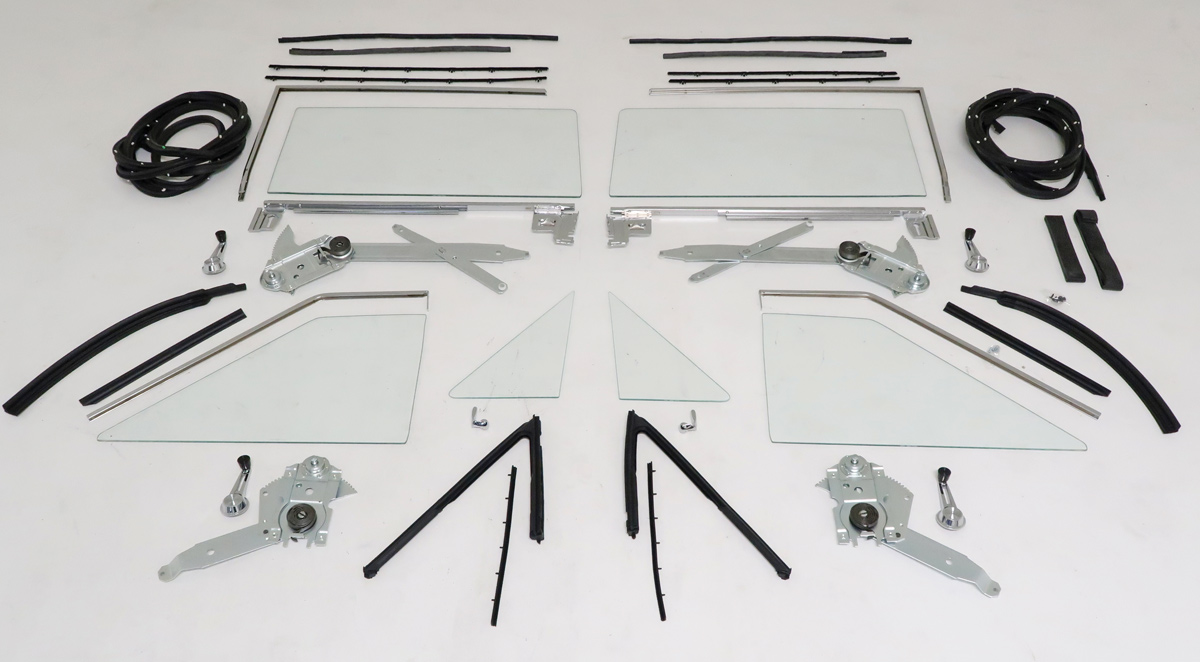
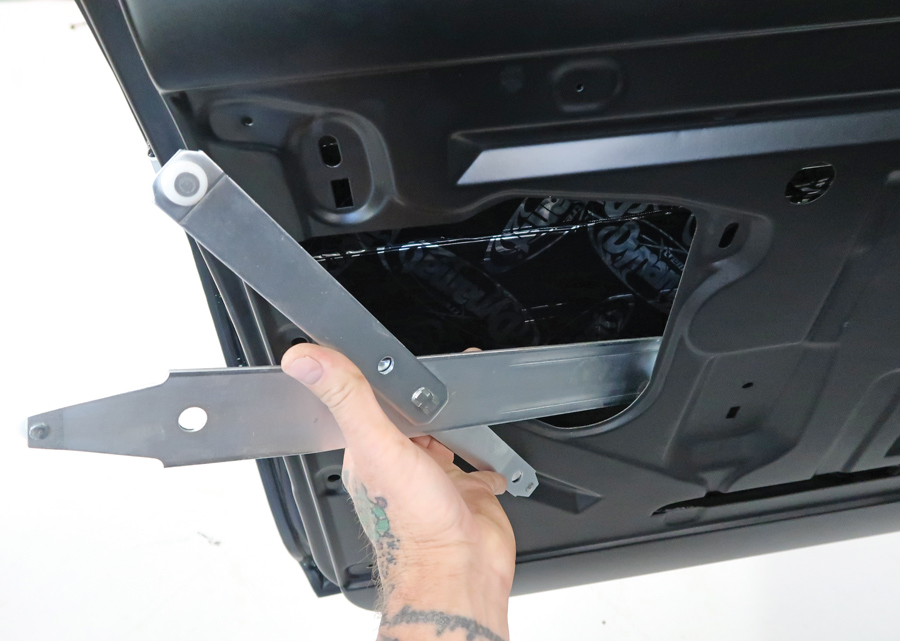
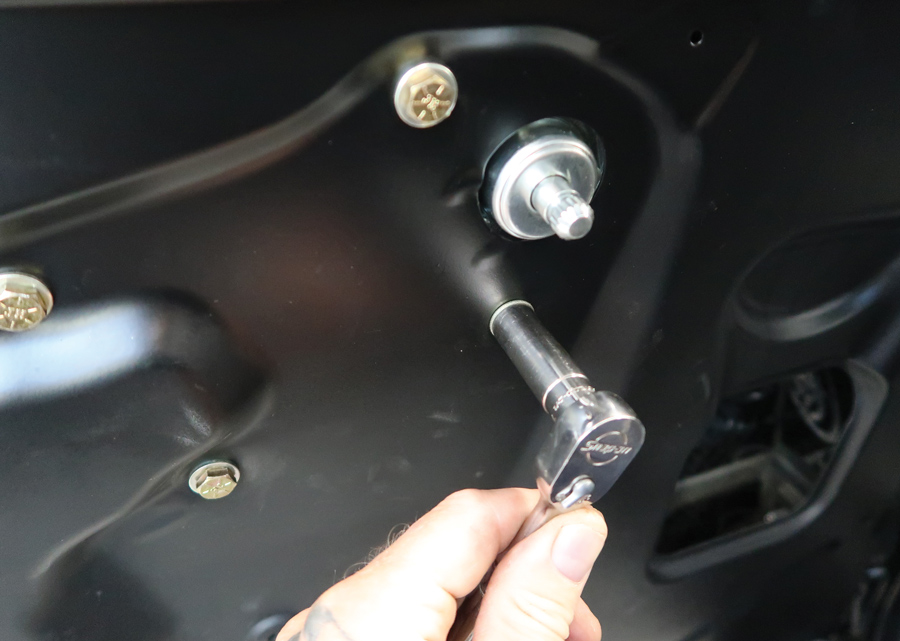
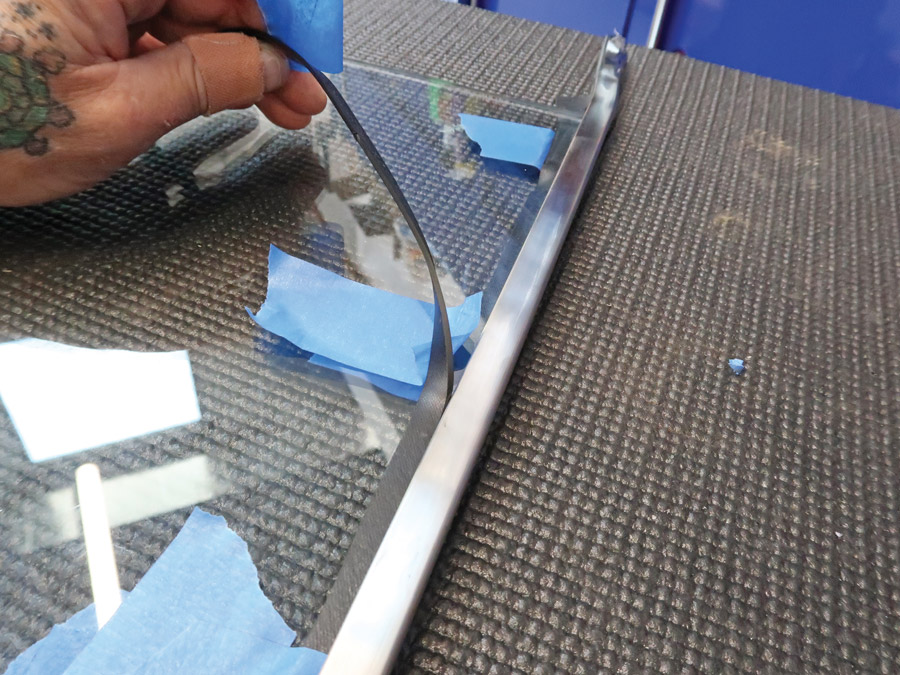
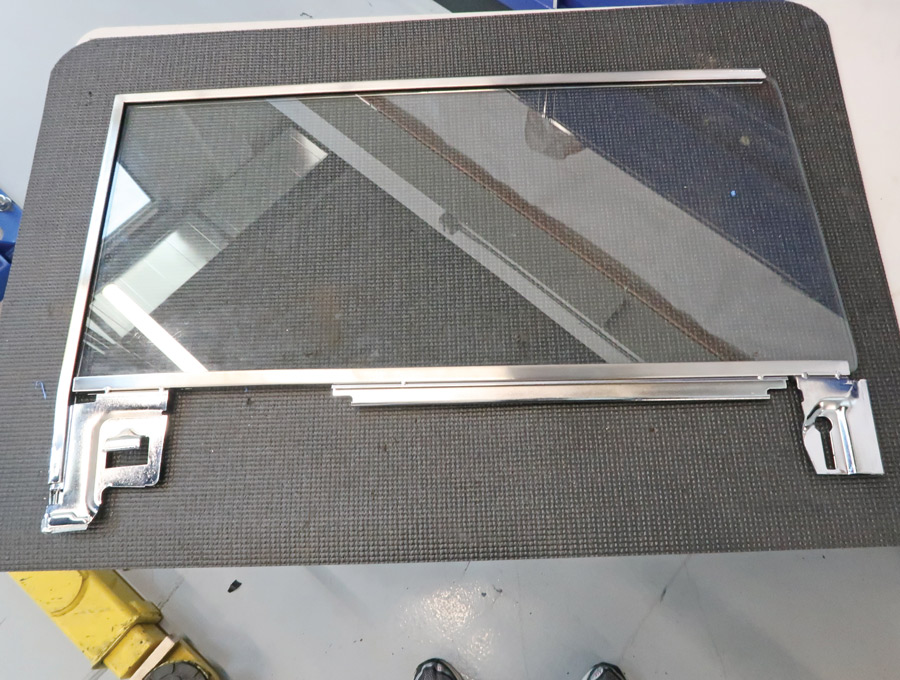
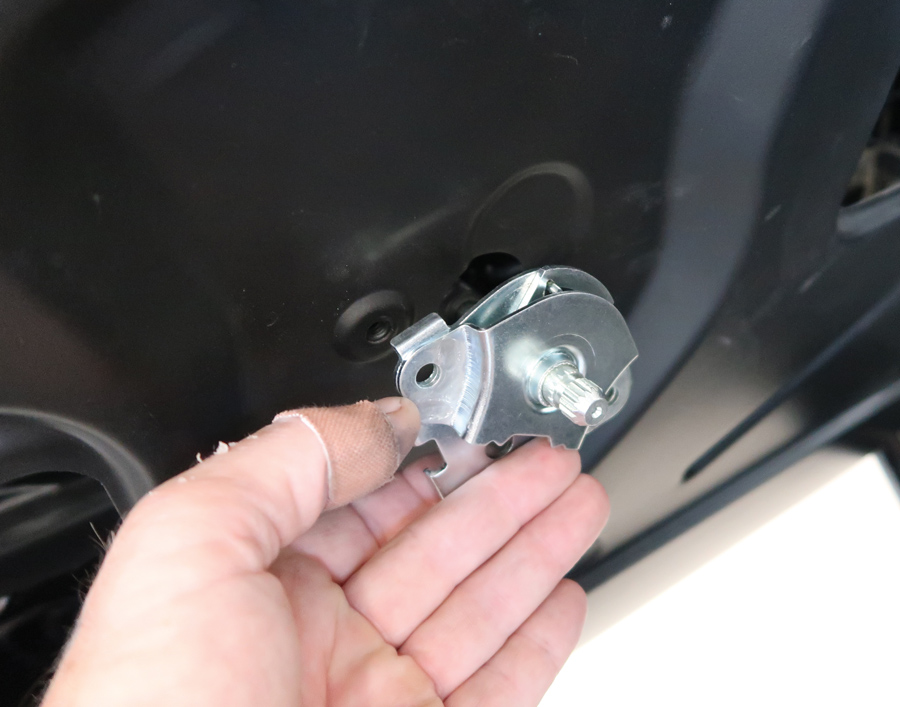
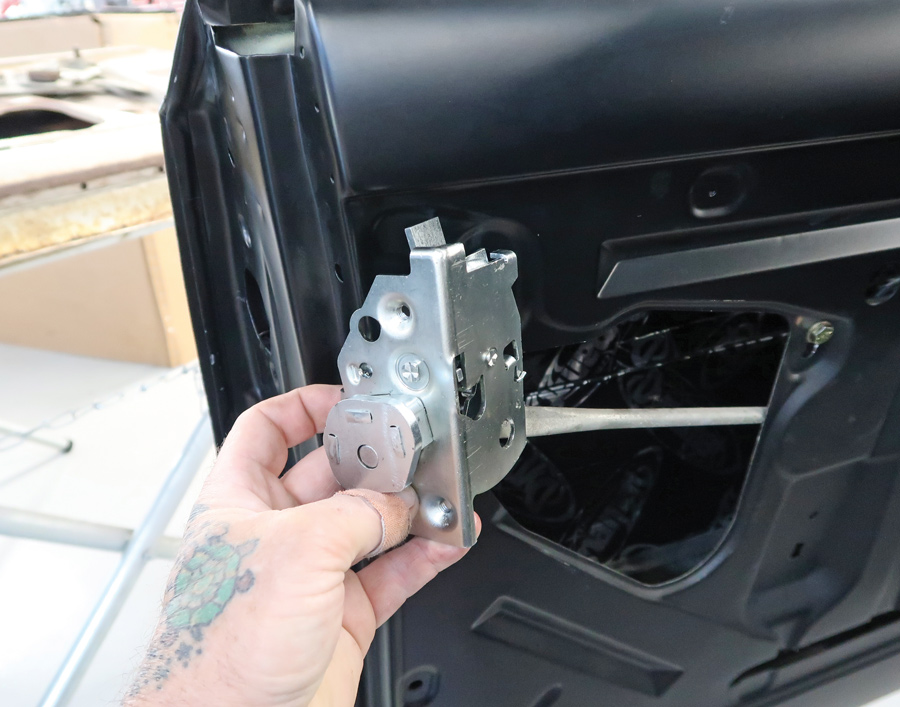
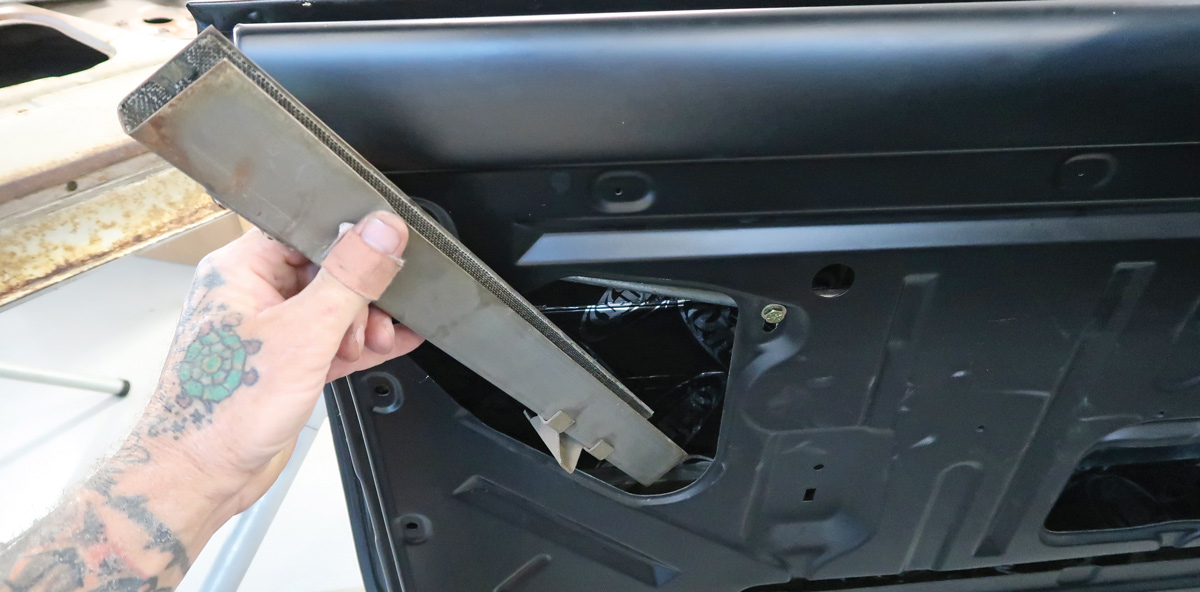
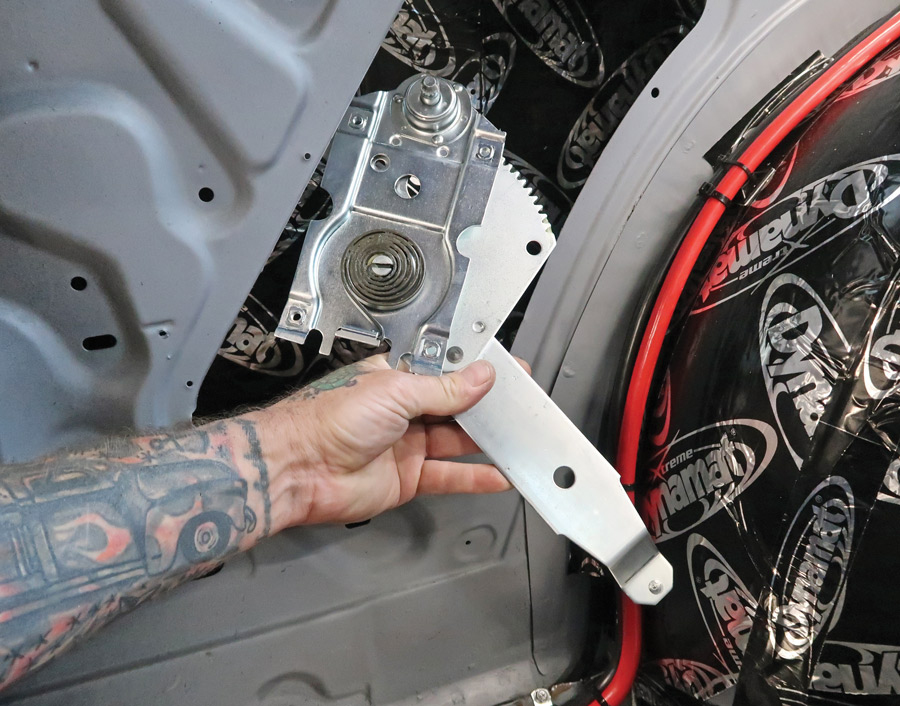
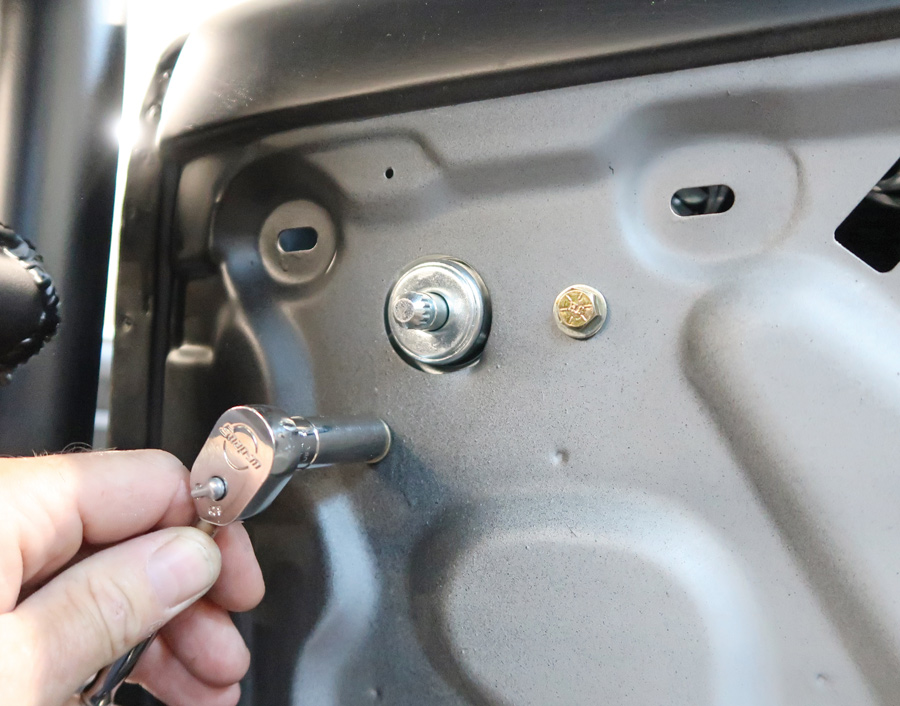
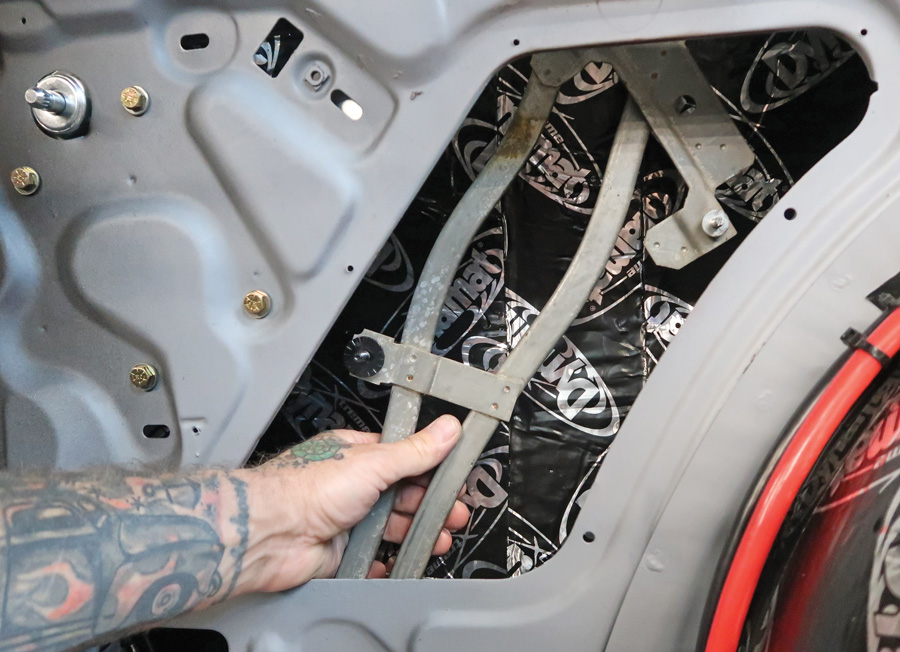
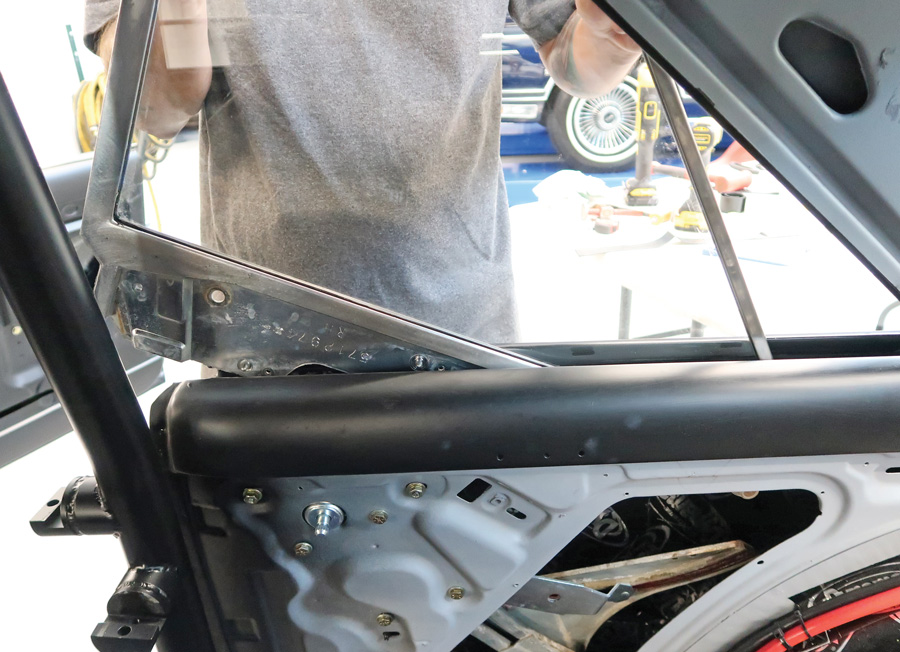
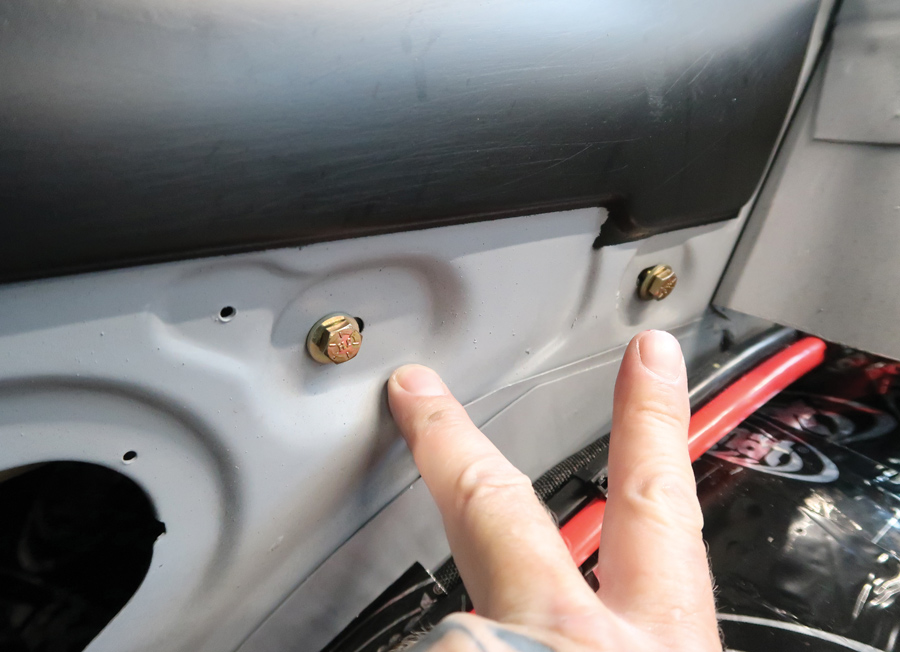
Although it’s impossible to tell now, Scudellari started out with a car that was rough. In fact, it was so rough he got it for free. But tenacity paid off and with the chassis and running gear done and with the body- and paintwork finished, the time came for final assembly. That meant Scudellari had to replace all the glass, door latches, and weatherstripping. None of the original glass was usable so he went to Classic Industries for a ’62-65 Chevy II, six-piece clear side glass kit. It included glass for the right and left vents, doors, and quarter windows. In addition, new window regulators and door latch hardware to replace the worn-out originals were also sourced from Classic Industries.

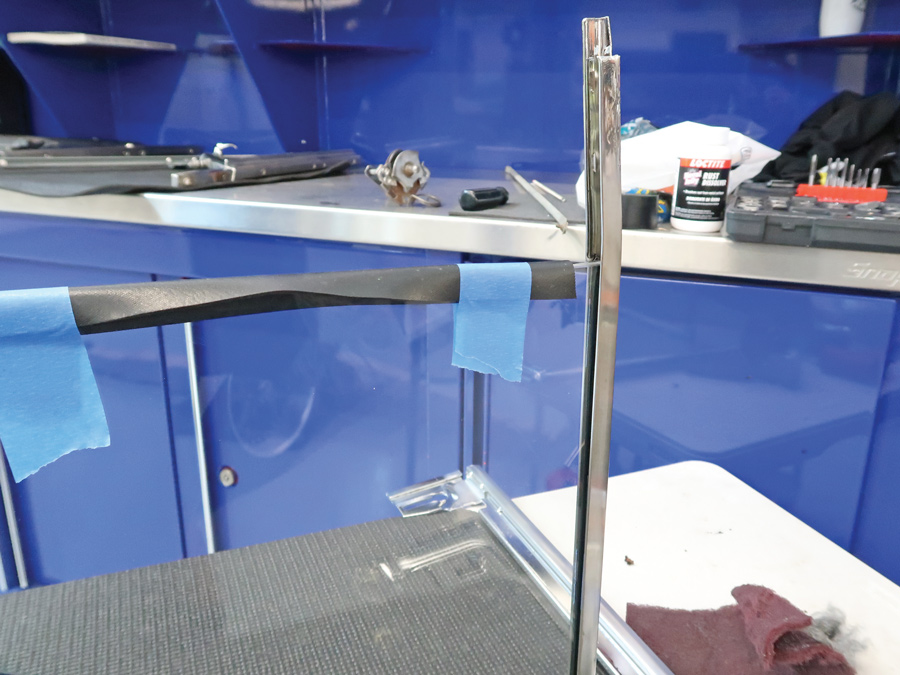
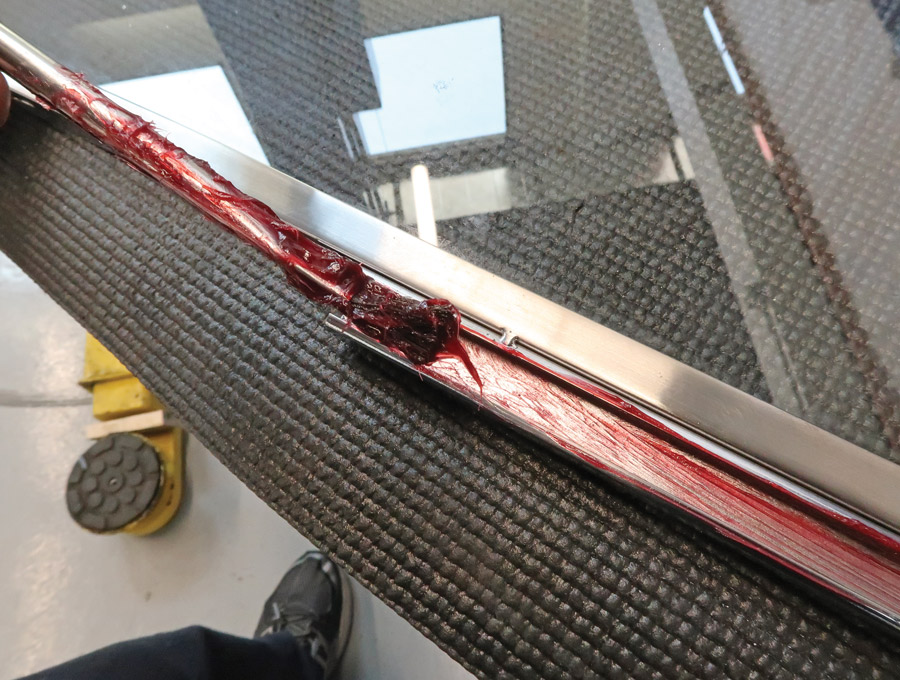
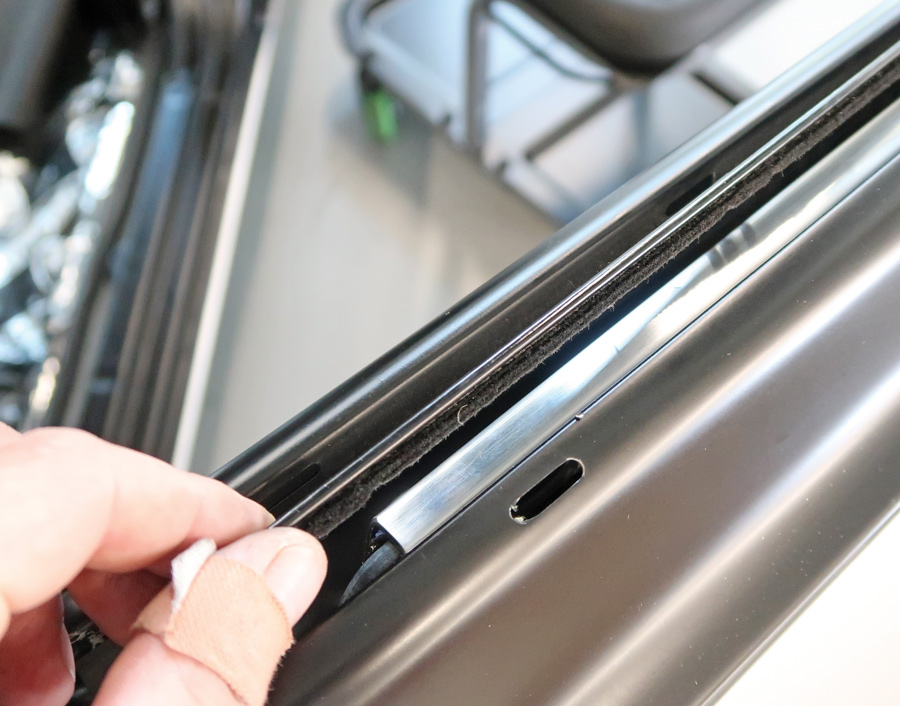
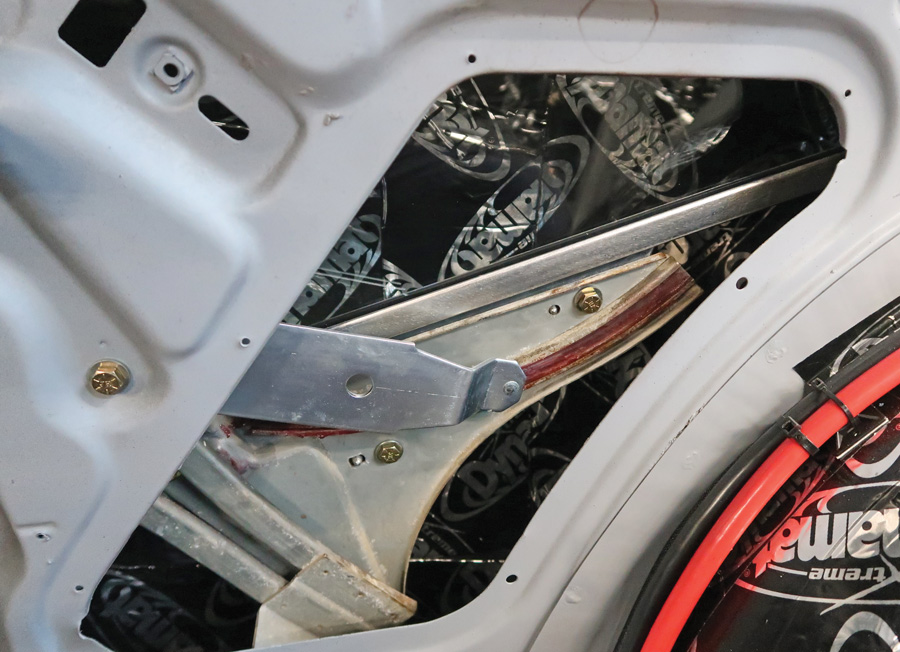
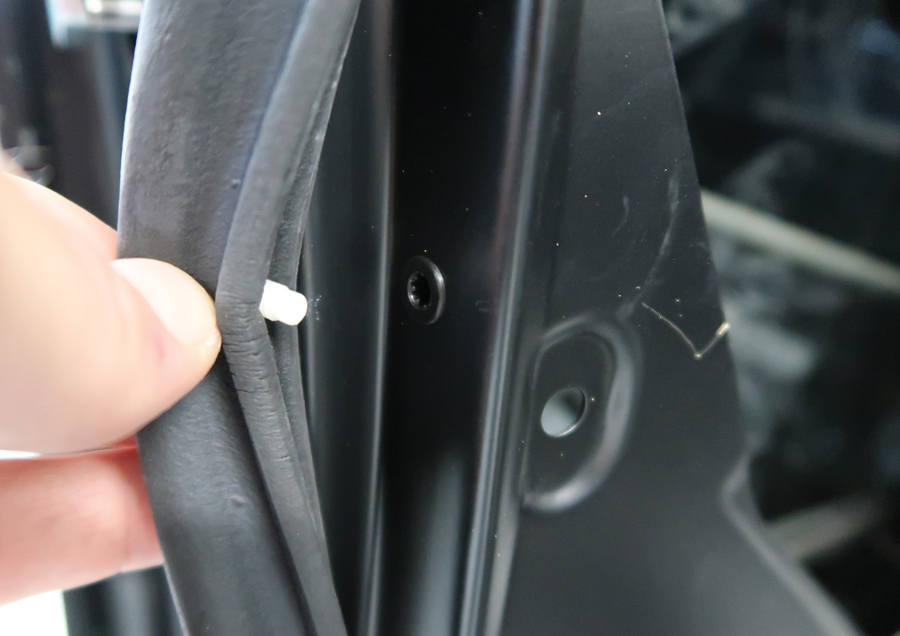
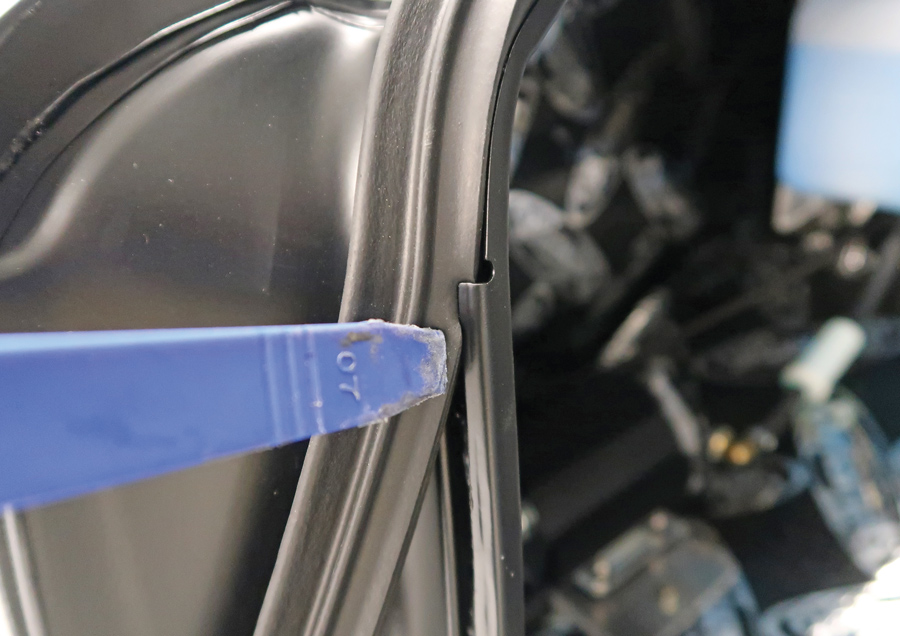
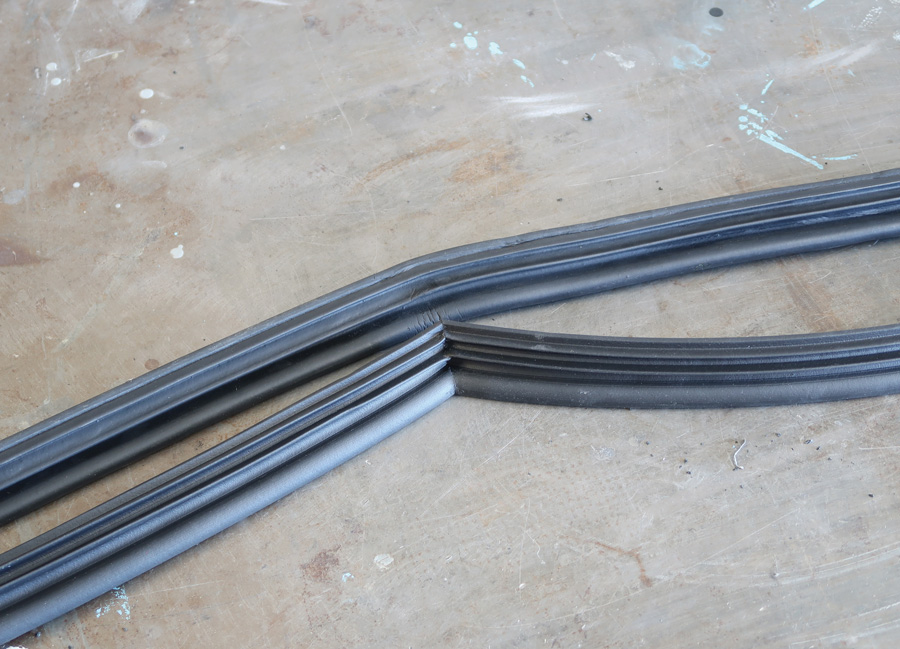
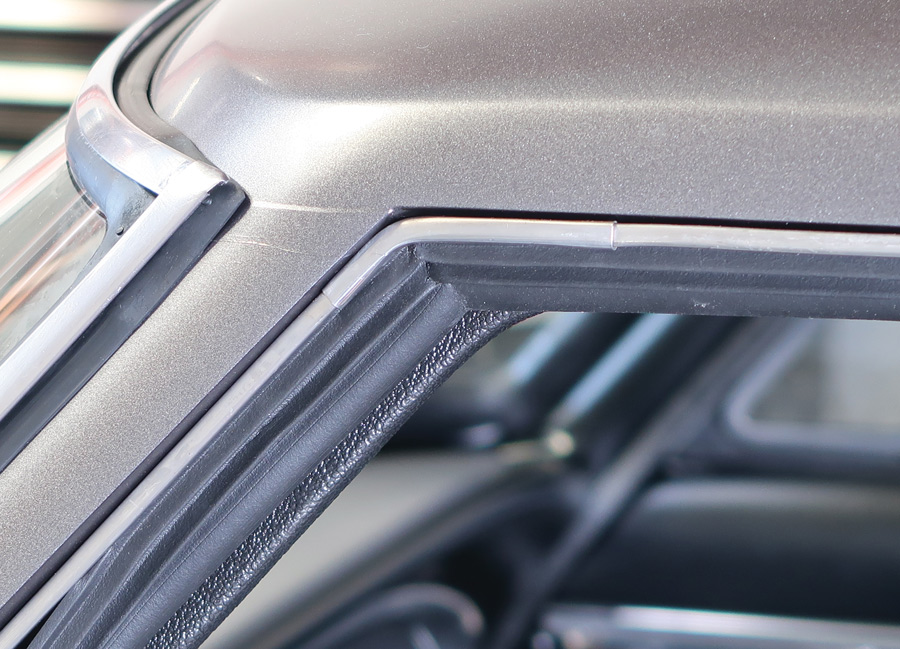
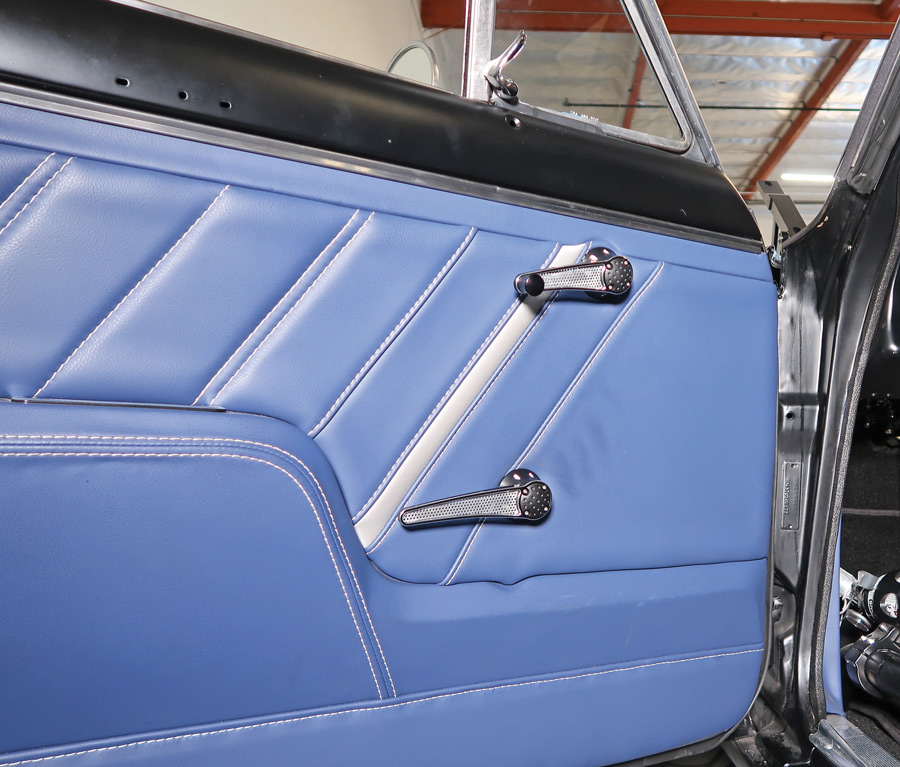
One of the final steps in rejuvenating the Chevy was replacing the weatherstripping. While that seems simple enough, problems like water leaks, wind noise, and difficult-to-close doors are seldom the result of the installation process, rather the design and composition of inferior weatherstripping. To ensure the rubber seals would all fit and function as they should, Scudellari turned to Steele Rubber Products for a Body Weatherstrip Kit (PN 90-3046-90). Included are side window leading edge seals, hardtop roof rail weatherstrip, trunk weatherstrip, and door weatherstrips. The finishing touch was added by a set of Lokar billet aluminum door and window crank handles.

The first series Chevy IIs may have been one of the littlest offerings of their day that wore a Bowtie, but they proved beyond a shadow of a doubt that good things come in small packages.

The replacement glass is from Classic Industries, as are the regulators and door hardware. Steele Rubber Products supplied the weatherstripping.
2. The replacement glass is from Classic Industries, as are the regulators and door hardware. Steele Rubber Products supplied the weatherstripping.
Classic Industries supplied the replacements for the worn-out door window regulators. The ’62-65 body style uses PN 4842001 on the driver side and PN 484200 on the passenger side.
3. Classic Industries supplied the replacements for the worn-out door window regulators. The ’62-65 body style uses PN 4842001 on the driver side and PN 484200 on the passenger side.
Installing the window regulators can be challenging. With the vent window in place, the regulator is temporarily with one bolt. Once the glass is in the door the regulator can be moved to the rear of the door, and once the rollers are in the guide on the bottom of the glass, the regulator can be bolted in place.
4. Installing the window regulators can be challenging. With the vent window in place, the regulator is temporarily with one bolt. Once the glass is in the door the regulator can be moved to the rear of the door, and once the rollers are in the guide on the bottom of the glass, the regulator can be bolted in place.
To secure the framework to the door windows, the edge of the glass is wrapped in setting tape. The frame is then gently tapped onto the glass with a mallet.
5. To secure the framework to the door windows, the edge of the glass is wrapped in setting tape. The frame is then gently tapped onto the glass with a mallet.
Once the framework is in place, the excess setting tape is trimmed off.
6. Once the framework is in place, the excess setting tape is trimmed off.
The lower window track fits on the bottom of the glass and has a channel that the regulator’s roller rides in. Classic Industries’ replacements for ’62-65 first series Chevy IIs are PN C2386 for the left and PN CS2385 for the right.
7. The lower window track fits on the bottom of the glass and has a channel that the regulator’s roller rides in. Classic Industries’ replacements for ’62-65 first series Chevy IIs are PN C2386 for the left and PN CS2385 for the right.
To ensure smooth operation, Scudellari coated the sash channel with waterproof lubricant. With the door glass installed, the vent window assembly is tightened and the top and bottom stops that limit the window’s travel can be installed and adjusted.
8. To ensure smooth operation, Scudellari coated the sash channel with waterproof lubricant. With the door glass installed, the vent window assembly is tightened and the top and bottom stops that limit the window’s travel can be installed and adjusted.
This is the door latch release control. They often have a broken spring, and the shafts are usually loose, allowing the door handle to flop around.
9. This is the door latch release control. They often have a broken spring, and the shafts are usually loose, allowing the door handle to flop around.
Door latch assemblies are the same for all first-generation ’63-65 Chevy II models and second-generation ’65-67 coupes and sedans. Lefthand doors use PN 14335; rights use PN 14336. It’s easier to put these in before the glass is installed.
10. Door latch assemblies are the same for all first-generation ’63-65 Chevy II models and second-generation ’65-67 coupes and sedans. Lefthand doors use PN 14335; rights use PN 14336. It’s easier to put these in before the glass is installed.
This is the vertical glass guide that attaches to the rear of the doorframe. It supports the glass when it’s rolled down.
11. This is the vertical glass guide that attaches to the rear of the doorframe. It supports the glass when it’s rolled down.
Window felts fit horizontally on the inner and outer section of the front and rear side door window openings.
12. Window felts fit horizontally on the inner and outer section of the front and rear side door window openings.
This is a ’62 quarter window regulator from Classic Industries. The left side is PN 4846611, the right is PN 4846610. Window regulators have a clear zinc finish to resist corrosion.
13. This is a ’62 quarter window regulator from Classic Industries. The left side is PN 4846611, the right is PN 4846610. Window regulators have a clear zinc finish to resist corrosion.
The quarter window regulators attach the inner panel of the rear quarters with two bolts. The two slotted holes are for the glass guides.
14. The quarter window regulators attach the inner panel of the rear quarters with two bolts. The two slotted holes are for the glass guides.
When the quarter windows are lowered a pair of guides make the move to the rear as they drop.
15. When the quarter windows are lowered a pair of guides make the move to the rear as they drop.
It’s a wise idea to cover all painted surfaces with masking tape when installing the side windows; it can take lots of jiggling and the occasional mumbled comment.
16. It’s a wise idea to cover all painted surfaces with masking tape when installing the side windows; it can take lots of jiggling and the occasional mumbled comment.
Here one of the curved guides can be seen with the regulator roller in place.
17. Here one of the curved guides can be seen with the regulator roller in place.
The second set of guides for the quarter windows also bolt to the inner body panel. Note the attachment holes are slotted for adjustment.
18. The second set of guides for the quarter windows also bolt to the inner body panel. Note the attachment holes are slotted for adjustment.
Steele’s door seals are easy to install and stay secure thanks to the integral pins that snap into plastic grommets in the body.
19. Steele’s door seals are easy to install and stay secure thanks to the integral pins that snap into plastic grommets in the body.
 In those areas where the weatherstripping fits into crimps in the sheetmetal, a flat plastic “tuck tool” should be used. Never use a screwdriver as the rubber may be damaged.
20. In those areas where the weatherstripping fits into crimps in the sheetmetal, a flat plastic “tuck tool” should be used. Never use a screwdriver as the rubber may be damaged.
Compare the Steele weatherstrip with a formed corner to a generic brand that must be bent to fit—the result is never a good fit.
21. Compare the Steele weatherstrip with a formed corner to a generic brand that must be bent to fit—the result is never a good fit.
Here’s the Steele weatherstrip in place—it fits just like the OEM piece.
22. Here’s the Steele weatherstrip in place—it fits just like the OEM piece.
With the glass installed and the door panels in place, Scudellari added door handles and window cranks from Lokar. They’re offered in a variety of styles and finishes.
23. With the glass installed and the door panels in place, Scudellari added door handles and window cranks from Lokar. They’re offered in a variety of styles and finishes.
Tech Center
Classic Industries
(714) 847-6887
classicindustries.com
Lokar Performance Products
(877) 469-7440
lokar.com
Steele Rubber Products
(800) 447-0849
steelerubber.com