ACP department heading TECH
InTheGarageMedia.com
A high-performance rear suspension assembly on a classic Chevrolet Camaro, featuring silver coilover shocks, a black heavy-duty rear differential, and dual exhaust pipes, supported by orange jack stands in a professional garage
1. QA1’s handling kit for second-gen F-bodies replaces the old leaf spring setup for a modern four-link suspension with tons of adjustability. We even went with QA1’s fabricated 9-inch rearend housing and extra beefy axles to handle tons of power.
The Camaro Plan
1978 Project Camaro: Reworking the Rear Suspension
By Jeff Huneycutt Images by THE AUTHOR
I

n the first installment of our 1978 Camaro buildup, we laid out our plans for a complete suspension upgrade thanks to a Level Two handling kit from QA1 along with a massive upgrade in braking capabilities and an all-new system from Wilwood. By the way, we’re also using a built third member for our 9-inch rearend from Quick Performance and new 18-inch wheels from Rocket Racing Wheel.

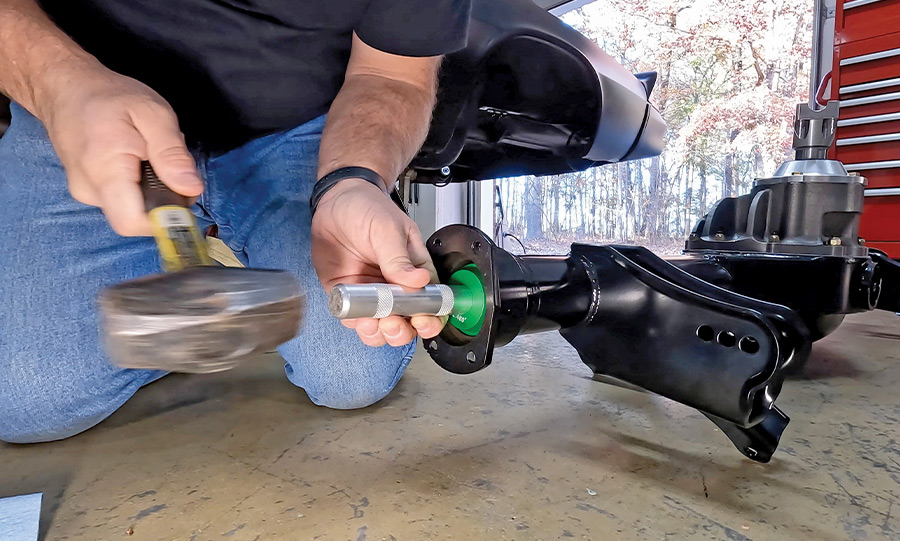
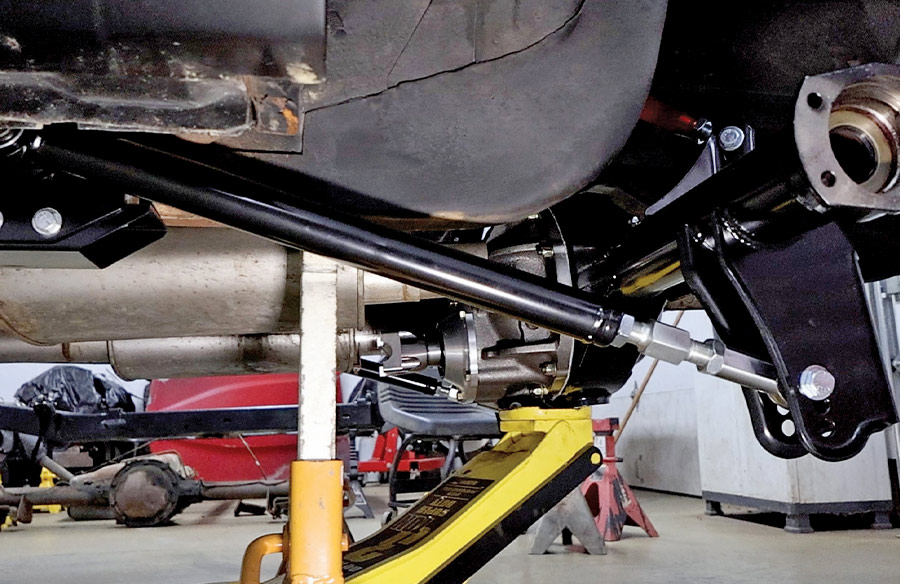
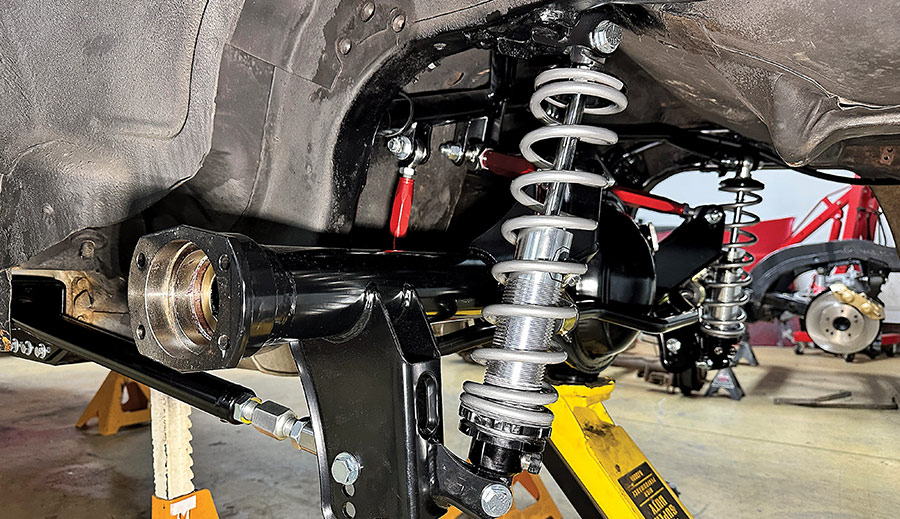
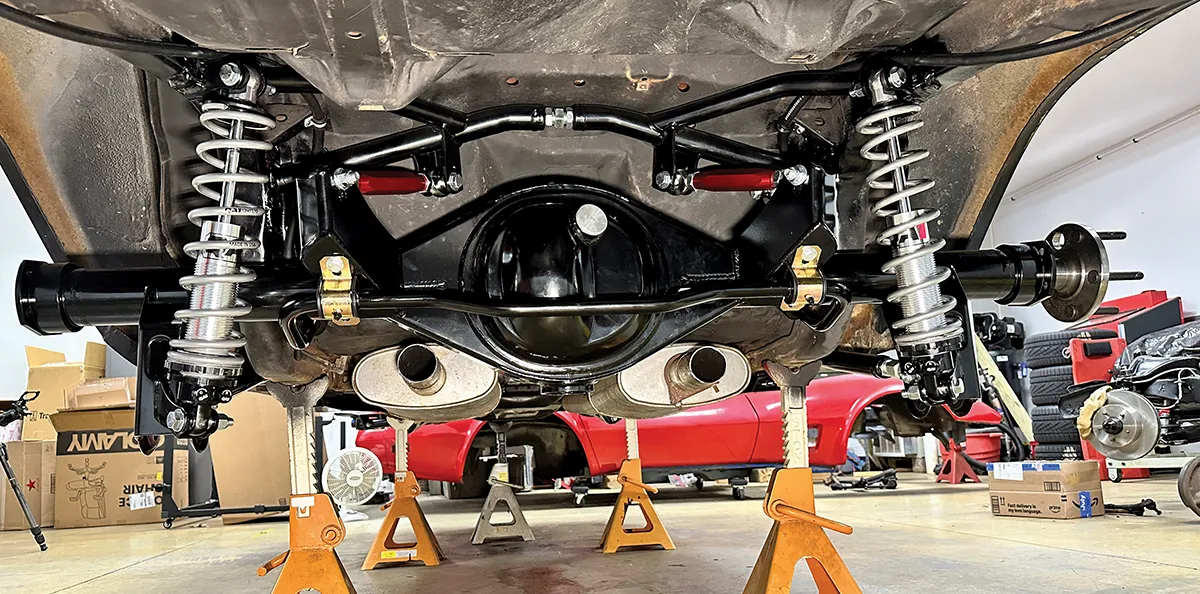
In that issue, we also managed to do a few baseline braking tests, stripped the old stock suspension out from under the Camaro, and even got the new QA1 suspension installed up front. This time around we’re tackling the rear suspension and also installing the new, high-strength 9-inch rearend.

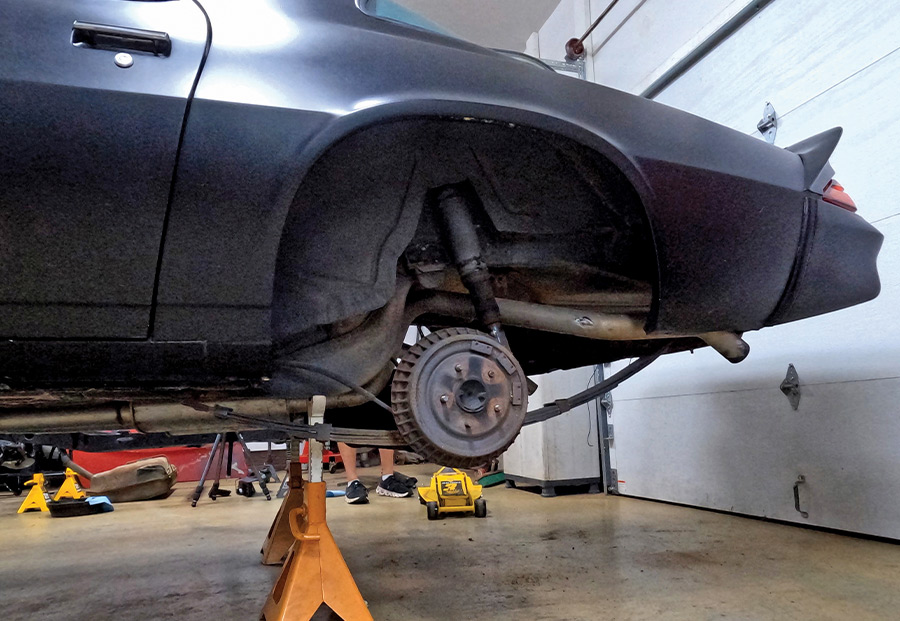
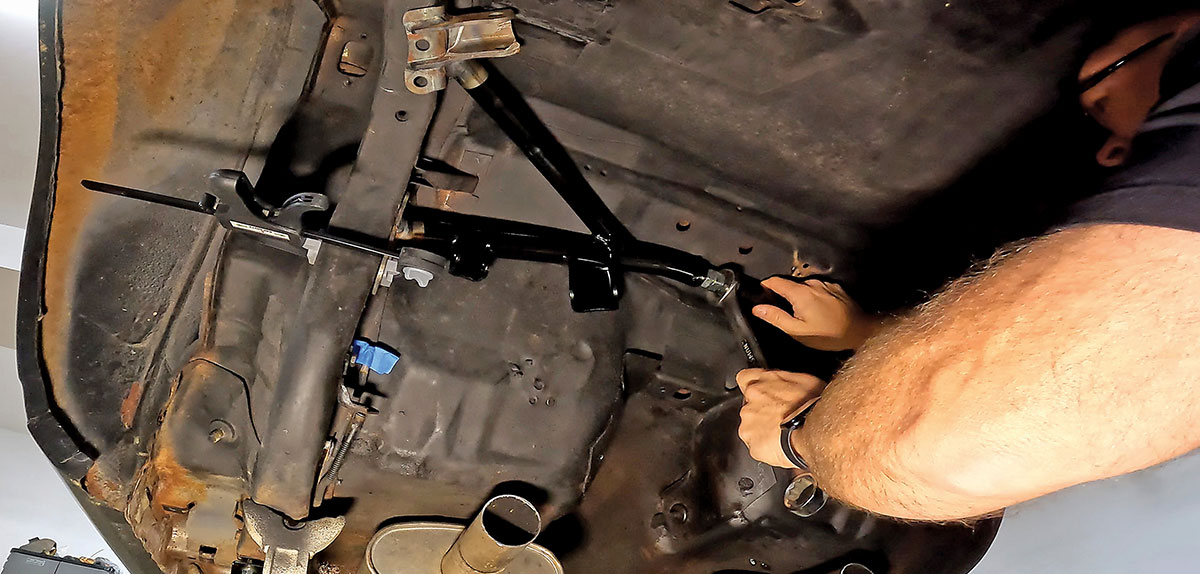
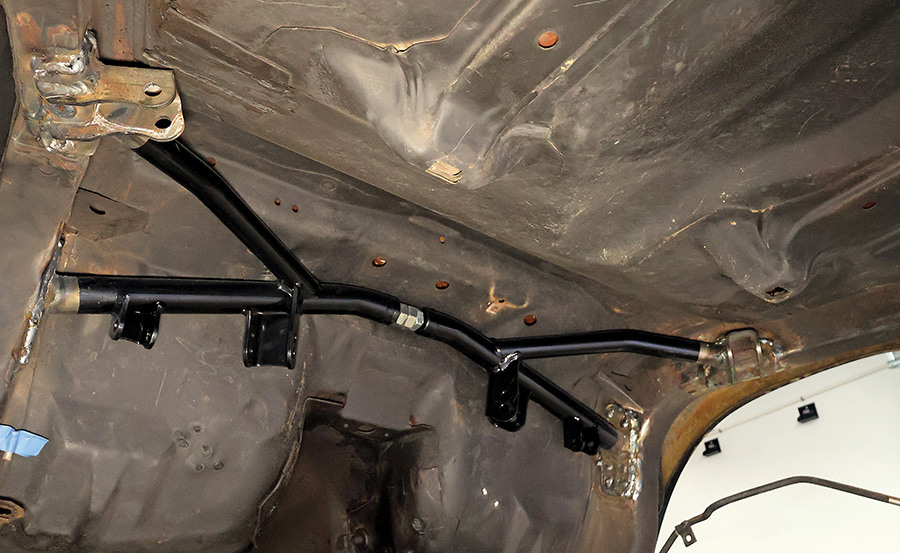
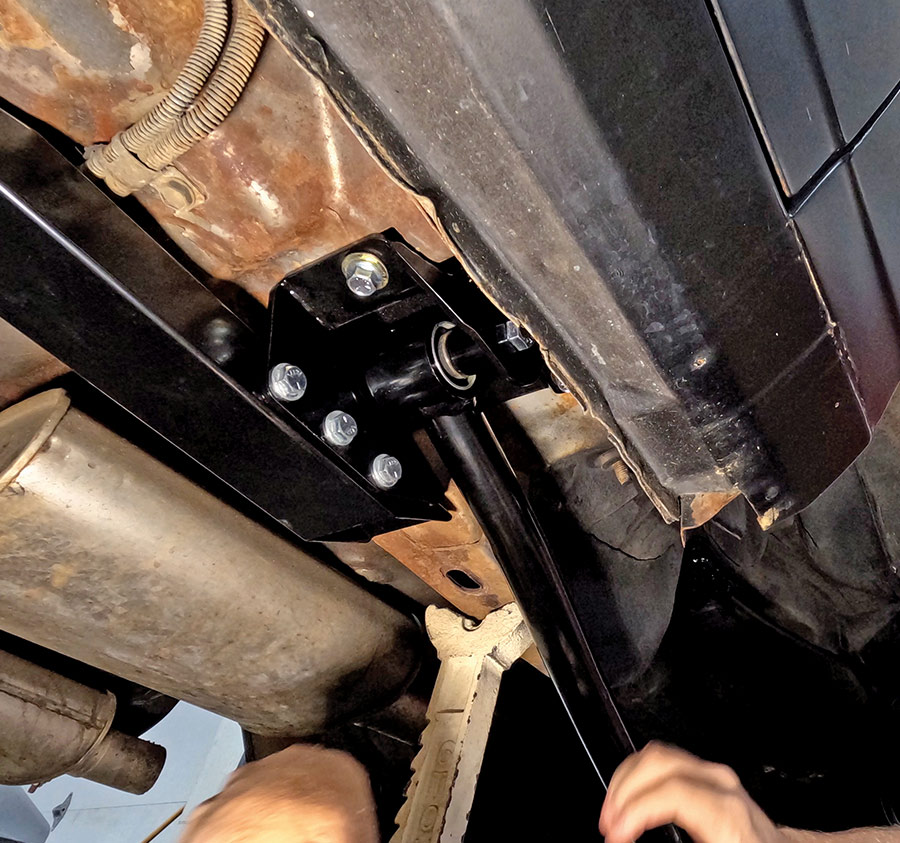
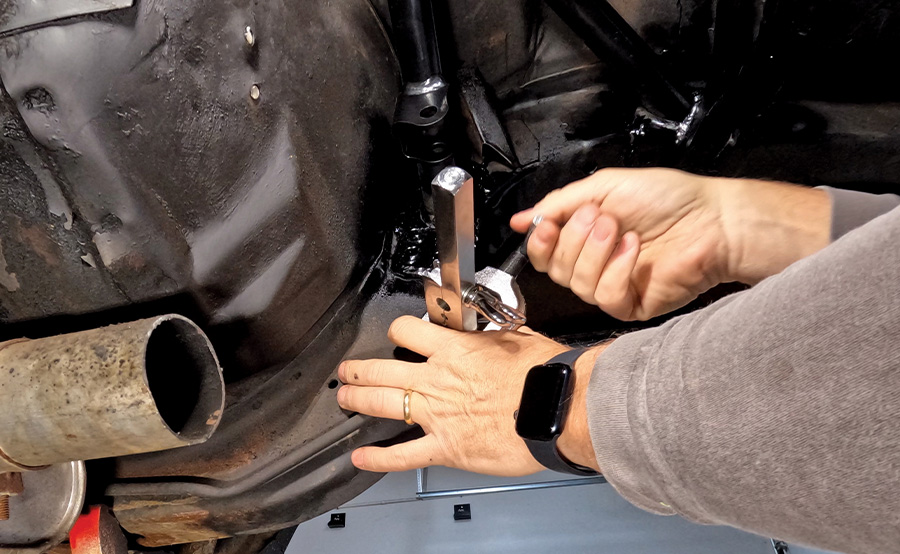
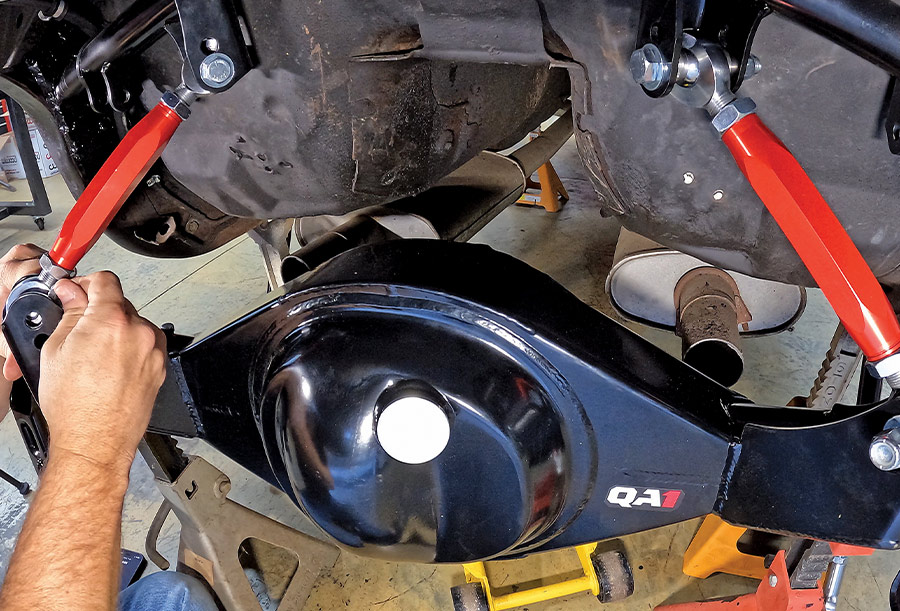
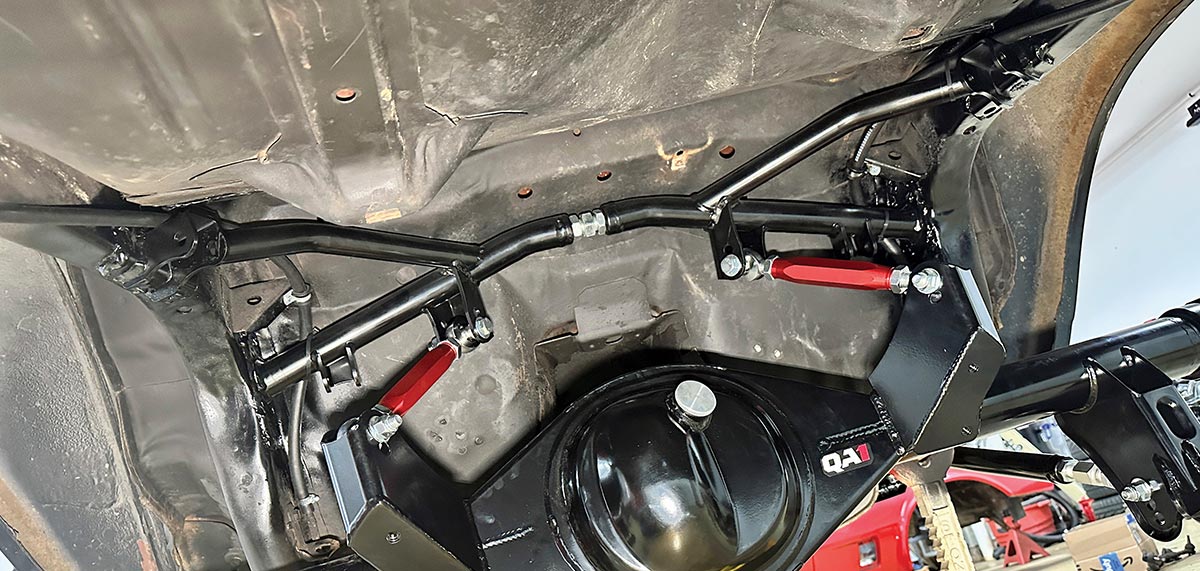
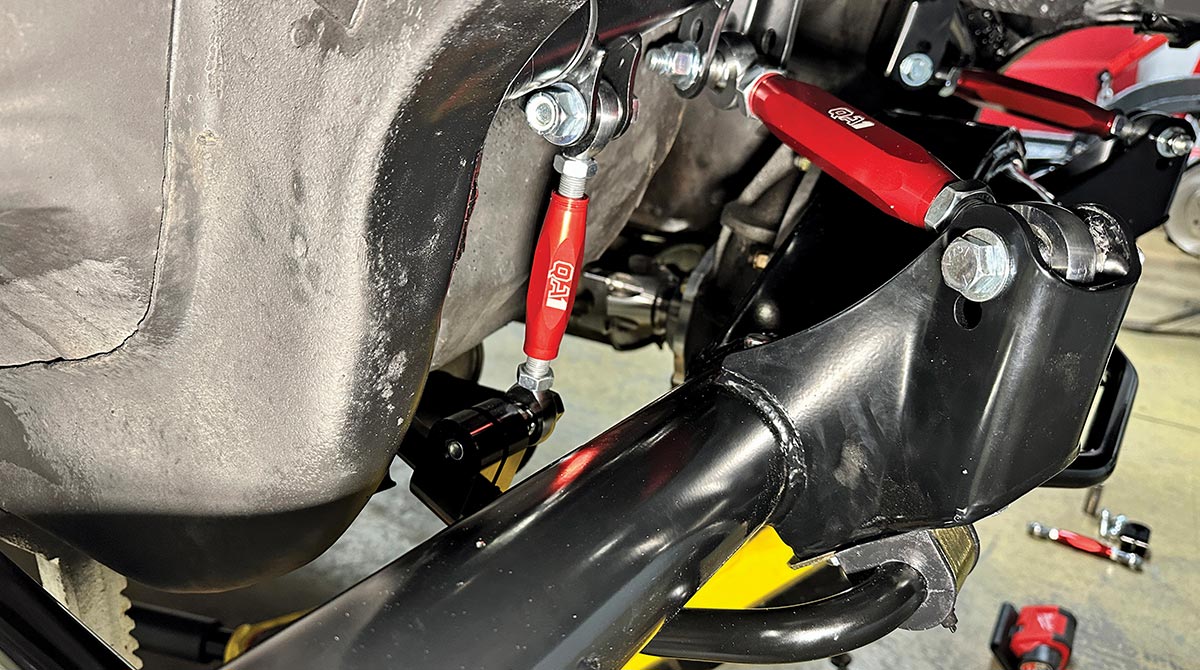
This is also the first point in our build we’ve run into that requires a bit more than simple hand tools. To get the absolute most out of the Camaro, QA1 switches out the dated leaf-spring rear suspension for a very cool, adjustable four-link. This should make the handling capabilities much better. But in order to make it happen, a cradle must be installed that provides mounting points for the upper trailing arms, shocks, and even the new rear sway bar endlinks. The cradle must be welded in place between the car’s framerails, so if you don’t already own a welder or aren’t comfortable using one, you may need to bribe a friend who is a competent welder to help out. This fact, however, doesn’t keep this from being a very doable build for practically anyone with moderate mechanical skills. As you can see, we’re doing it ourselves with the car on jackstands in an ordinary garage. 

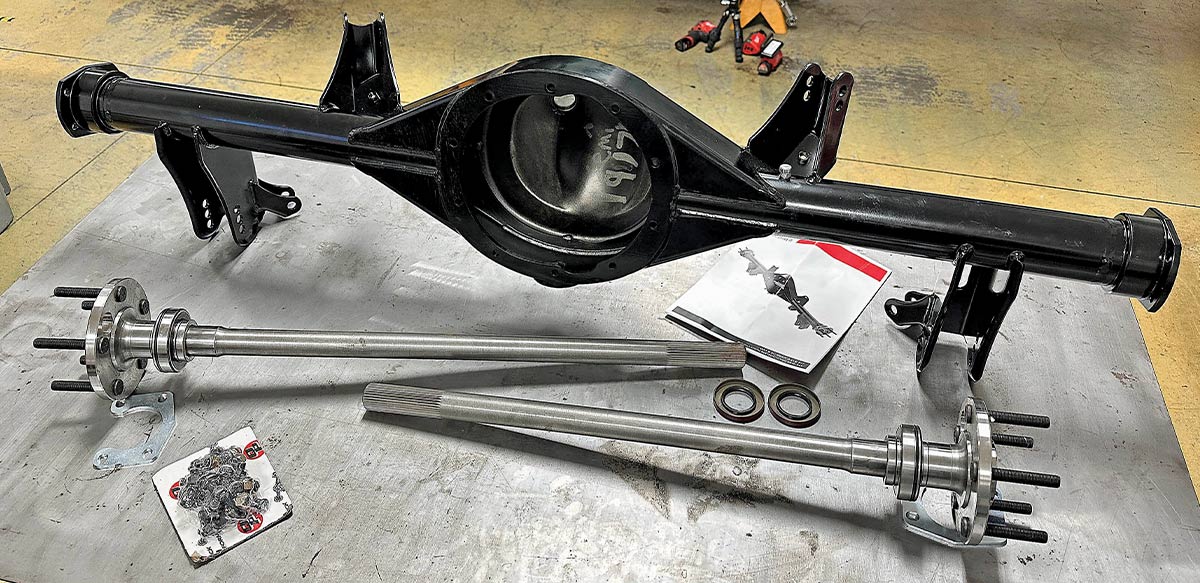
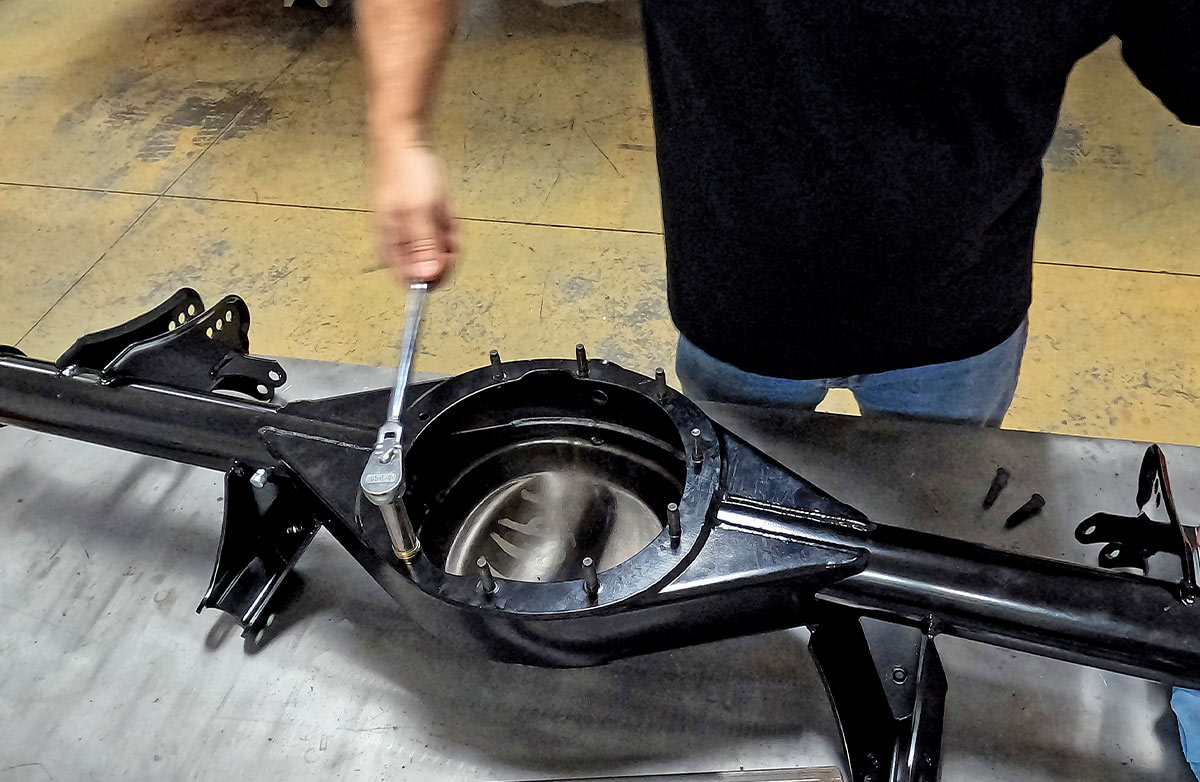
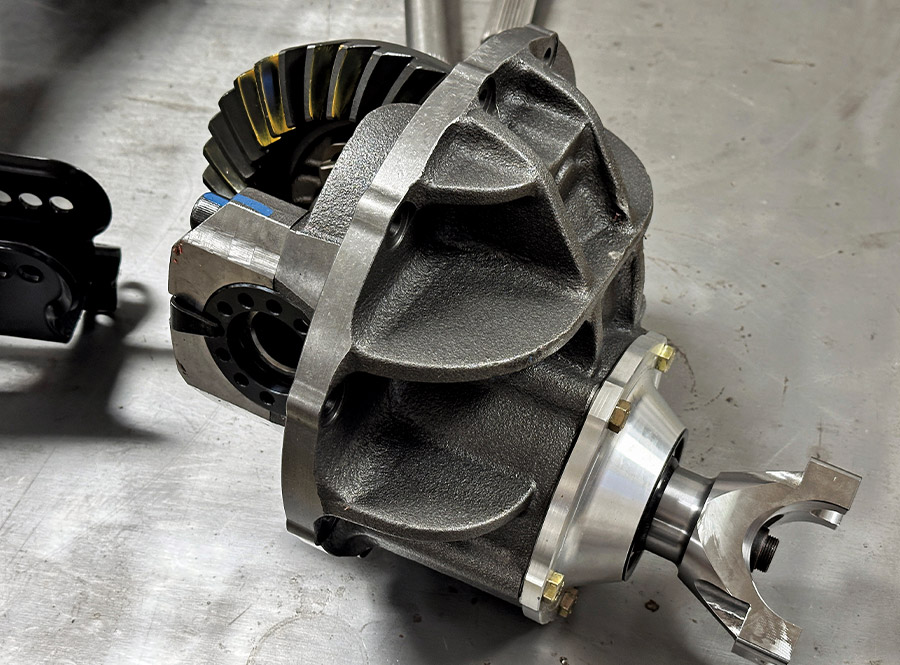
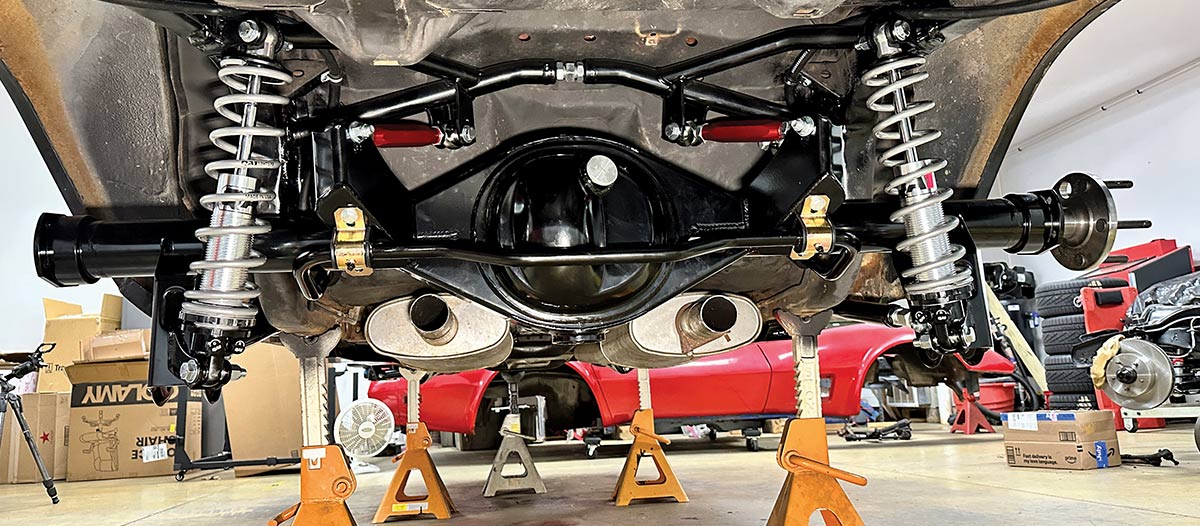
Practically, the only component you will see in this chapter of the buildup not from QA1 is the centersection from Quick Performance. The gearset is a 3.70:1 ratio using a Motive Performance ring-and-pinion. It all goes together in a nodular iron Yukon Gear and Axle Case with the high-performance “Daytona” pinion support. And critical for us, they set it up with an Eaton Truetrac differential. These units lock the rearend using sets of helical gears, so there are no clutches to wear out or require regular service. Under light load, they operate as comfortably as an open diff, but when the go pedal is mashed, they drive both rear wheels reliably. Anyhow, the unit comes from Quick Performance assembled with the proper lash, and all we need to do is drop it in place. 

Follow along as we get one big step closer to turning our dated and well-worn Camaro into a wicked-handling street machine.

Side profile of a black 1970s Chevrolet Camaro project car on jack stands, showing the rear wheel well, leaf spring suspension, and original drum brakes during a restoration
2. The original stock setup with leaf springs, a GM 10-bolt rearend, and drum brakes.
A mechanic using a Milwaukee M12 FUEL cordless impact wrench to remove a shackle bolt from a rusty leaf spring assembly on a classic Chevrolet Camaro restoration project
3. Up the front, the stock leaf spring mount completely unbolts from the car and is replaced by new ones from QA1.
A view of a classic car undercarriage during a restoration project, showing the removal of the rear axle and suspension, leaving only the dual exhaust system and fuel tank area supported by jack stands
4. Switching from a leaf spring suspension to a modern four-link is a big change, and it’s impossible for it not to affect other systems. This definitely applies to the exhaust system, which gets in the way of the new suspension components. I cut off the exhaust just behind the mufflers and likely will run exits just in front of the rear wheels once everything is complete.
A mechanic installing a black powder-coated torque arm and chassis reinforcement bar on the undercarriage of a classic car project using a hand wrench
5. Just about everything on the new rear suspension locates off this fabricated crossmember. QA1’s instructions provide specific measurements for locating the crossmember, and a really nice touch is it’s built in two pieces so you can adjust the width to fit your specific car. Once it is in the right spot, we marked the mounting locations then removed the crossmember and ground away the paint and any undercoating to get to bare metal.
A professional welder wearing a fire-patterned welding helmet using a MIG welder to secure a new suspension torque arm to the chassis of a classic car restoration project
6. Most of the crossmember is powdercoated but QA1 leaves the mounting flanges bare to encourage a clean weld. There are also lots of holes cut into the mounting flanges for additional welding area. Working with the car on jackstands makes for some difficult overhead welding positions, but it can be done. Just remember, a strong weld is better than a pretty weld eight days a week.
A newly installed black powder-coated rear suspension torque arm and crossmember reinforcement professionally welded into the chassis of a classic car project
7. Here is the crossmember finish welded into place and ready for a good coat of paint over the bare metal areas.
Installation of a heavy-duty black subframe connector on a classic car chassis to improve structural rigidity, featuring grade 8 mounting bolts and a silver jack stand for safety
8. The lower trailing arm bolts into the car with its own mounting box and connects to the QA1 subframe connector with three fasteners for extra rigidity.
A dismantled high-performance rear axle assembly for a classic car project, featuring a black powder-coated differential housing, two long steel axle shafts with wheel studs, and new seals laid out on a workshop table
9. QA1’s 9-inch rearend housing is quality throughout. This includes a fabricated centersection, 3.0-inch steel axles tubes that are 1/4-inch thick. Proper, high-strength mounting flanges already welded into place, new-style Torino flanges that work with popular aftermarket brake systems, and more. They also include beefy 31-spline axles that are rated to handle up to 650 hp.
A mechanic using a socket wrench to tighten mounting bolts on a black powder-coated Ford 9-inch rear differential housing during a high-performance classic car restoration
10. A third member isn’t included because there are just too many variables when it comes to gear ratio, differential type, and so on, but practically everything else needed to get up and running is included. Here, we are seating the housing studs so that we can bolt up the third member. We prefer to do this by hand rather than with an impact just to minimize the chance of warping the mounting face.
A detailed view of a differential center section assembly showcasing the ring gear with yellow marking compound, a reinforced casting, and a silver aluminum pinion support on a metal workbench
11. Quick Performance was our choice for a third member. It arrived built to spec with a 3.70:1 gearset, high-strength nodular iron case with a Daytona pinion support from Yukon Gear and an Eaton Truetrac diff that works like a locker without the maintenance necessary for clutches.
A mechanic using a digital torque wrench to precisely tighten the third member mounting bolts on a black powder-coated Ford 9-inch rear axle housing
12. The third member drops right into place and secured with nuts torqued to 33 ft-lb on the studs.
A mechanic using a dead-blow hammer and a seal driver tool to install rear axle seals into a new black powder-coated Ford 9-inch housing for a classic car project
13. QA1 provides a set of axle seals with the kit. They popped right in place with a few taps from a seal driver.
A view of a classic car’s rear wheel well and undercarriage featuring a newly installed black chassis reinforcement brace, professionally welded and painted with a protective high-gloss black finish
14. Before we can install the rearend and the new upper trailing arms, something must be done with the fuel lines. The stock hardlines are routed along the inside of the passenger-side framerail, which will no longer work with the crossmember welded in place.
A mechanic using a specialized tap and die tool to clean and chase threads on a classic car chassis after welding and painting, ensuring smooth installation of performance suspension hardware
15. After cutting the fuel line, we needed some type of ridge in the end of the line to keep the flex line from popping off. No matter how tight you squeeze the hose clamp, never trust a smooth hardline. We were able to put a small bump into the end of the line using a brake flaring tool and just clamped it into the 5/16-inch fitting and gave it a couple of turns until the line started stretching. No need to put in a complete flare. Now we can slide on some flex line and route it behind the crossmember.
A mechanic installing a heavy-duty QA1 Ford 9-inch rear axle housing into a classic car, connecting it to adjustable red powder-coated torque arms and a custom chassis crossmember
16. The upper trailing arms are fully adjustable and use machined spacers on either side of the Heim joints to allow for lots of articulation without binding.
A side view of a pro-touring suspension installation on a classic car, featuring a black torque arm connected to a Ford 9-inch rear axle housing and supported by a yellow floor jack
17. The lower trailing arms are also adjustable and outfitted with low-drag Heim joints. These are also super beefy to hold up to plenty of hard launches and intense cornering.
A wide-angle view of the completed QA1 rear suspension conversion on a classic car, showing the Ford 9-inch axle housing, red adjustable torque arms, and black chassis reinforcement crossmember
18. The four-link rear suspension locates the rearend through full suspension travel without requiring a lateral Panhard bar. Compared to the leaf spring rear that was in the car, it is much less prone to wheel hop, eliminates axle wrap, makes the car more predictable, and improves ride quality.
A detailed undercarriage view of the final installation of a QA1 rear suspension system on a classic car, featuring adjustable red panhard rods and a black powder-coated axle housing
19. In this photo the rear sway bar has been installed. Originally, the Camaro had no rear sway bar at all, which should make for a big improvement. The endlinks are fully adjustable both for length and position on the sway bar. If you want the sway bar to feel softer, just slide the connectors closer to the end of the bar. Want it stiffer? Move it away from the ends to shorten the sway bar’s arms.
Close-up of a QA1 adjustable coilover shock absorber featuring dual adjustment knobs for compression and rebound tuning on a performance suspension system
20. The rear coilover QA1 shocks are independently adjustable for both compression and rebound. We’re using their optional thrust bearing kit with needle bearings to significantly smooth out ride height adjustments by spinning the collars up and down the body of the coilover shocks.
A detailed view of a newly installed QA1 rear coilover suspension on a classic Chevrolet Camaro, featuring silver coil springs, adjustable shock absorbers, and a black Ford 9-inch rear axle housing
21. The lower trailing arms are also adjustable and outfitted with low-drag Heim joints. These are also super beefy to hold up to plenty of hard launches and intense cornering.
A wide-angle undercarriage view of a completed QA1 rear suspension conversion on a classic car, featuring a black Ford 9-inch axle, silver adjustable coilover shocks, red torque arms, and a heavy-duty sway bar
22. The rear suspension assembled. We’ve just got one of the high-strength 31-spline axles slid in place because they will have to come out again to install the Wilwood brakes system. That’s coming up next, so stay tuned!