ACP department heading TECH
InTheGarageMedia.com

By Taylor Kempkes Photography by The Author

Simple, Modern, Better
WHY YOU WANT A SERPENTINE SYSTEM FOR YOUR SMALL-BLOCK CHEVY (AND HOW TO INSTALL ONE)
T

here is no engine platform more ubiquitous in the hot-rodding community than the small-block Chevy. Of that engine family, the Gen I holds on as the longest running and most popular—sorry to break it to you, LS. With small-block Chevy production starting for the ’55 model year, the basic technology of this engine is, admittedly, old. But the magic of the small-block lies in its overwhelming aftermarket support. Sixty-eight years later, companies are still finding ways to make better products to support these engines.

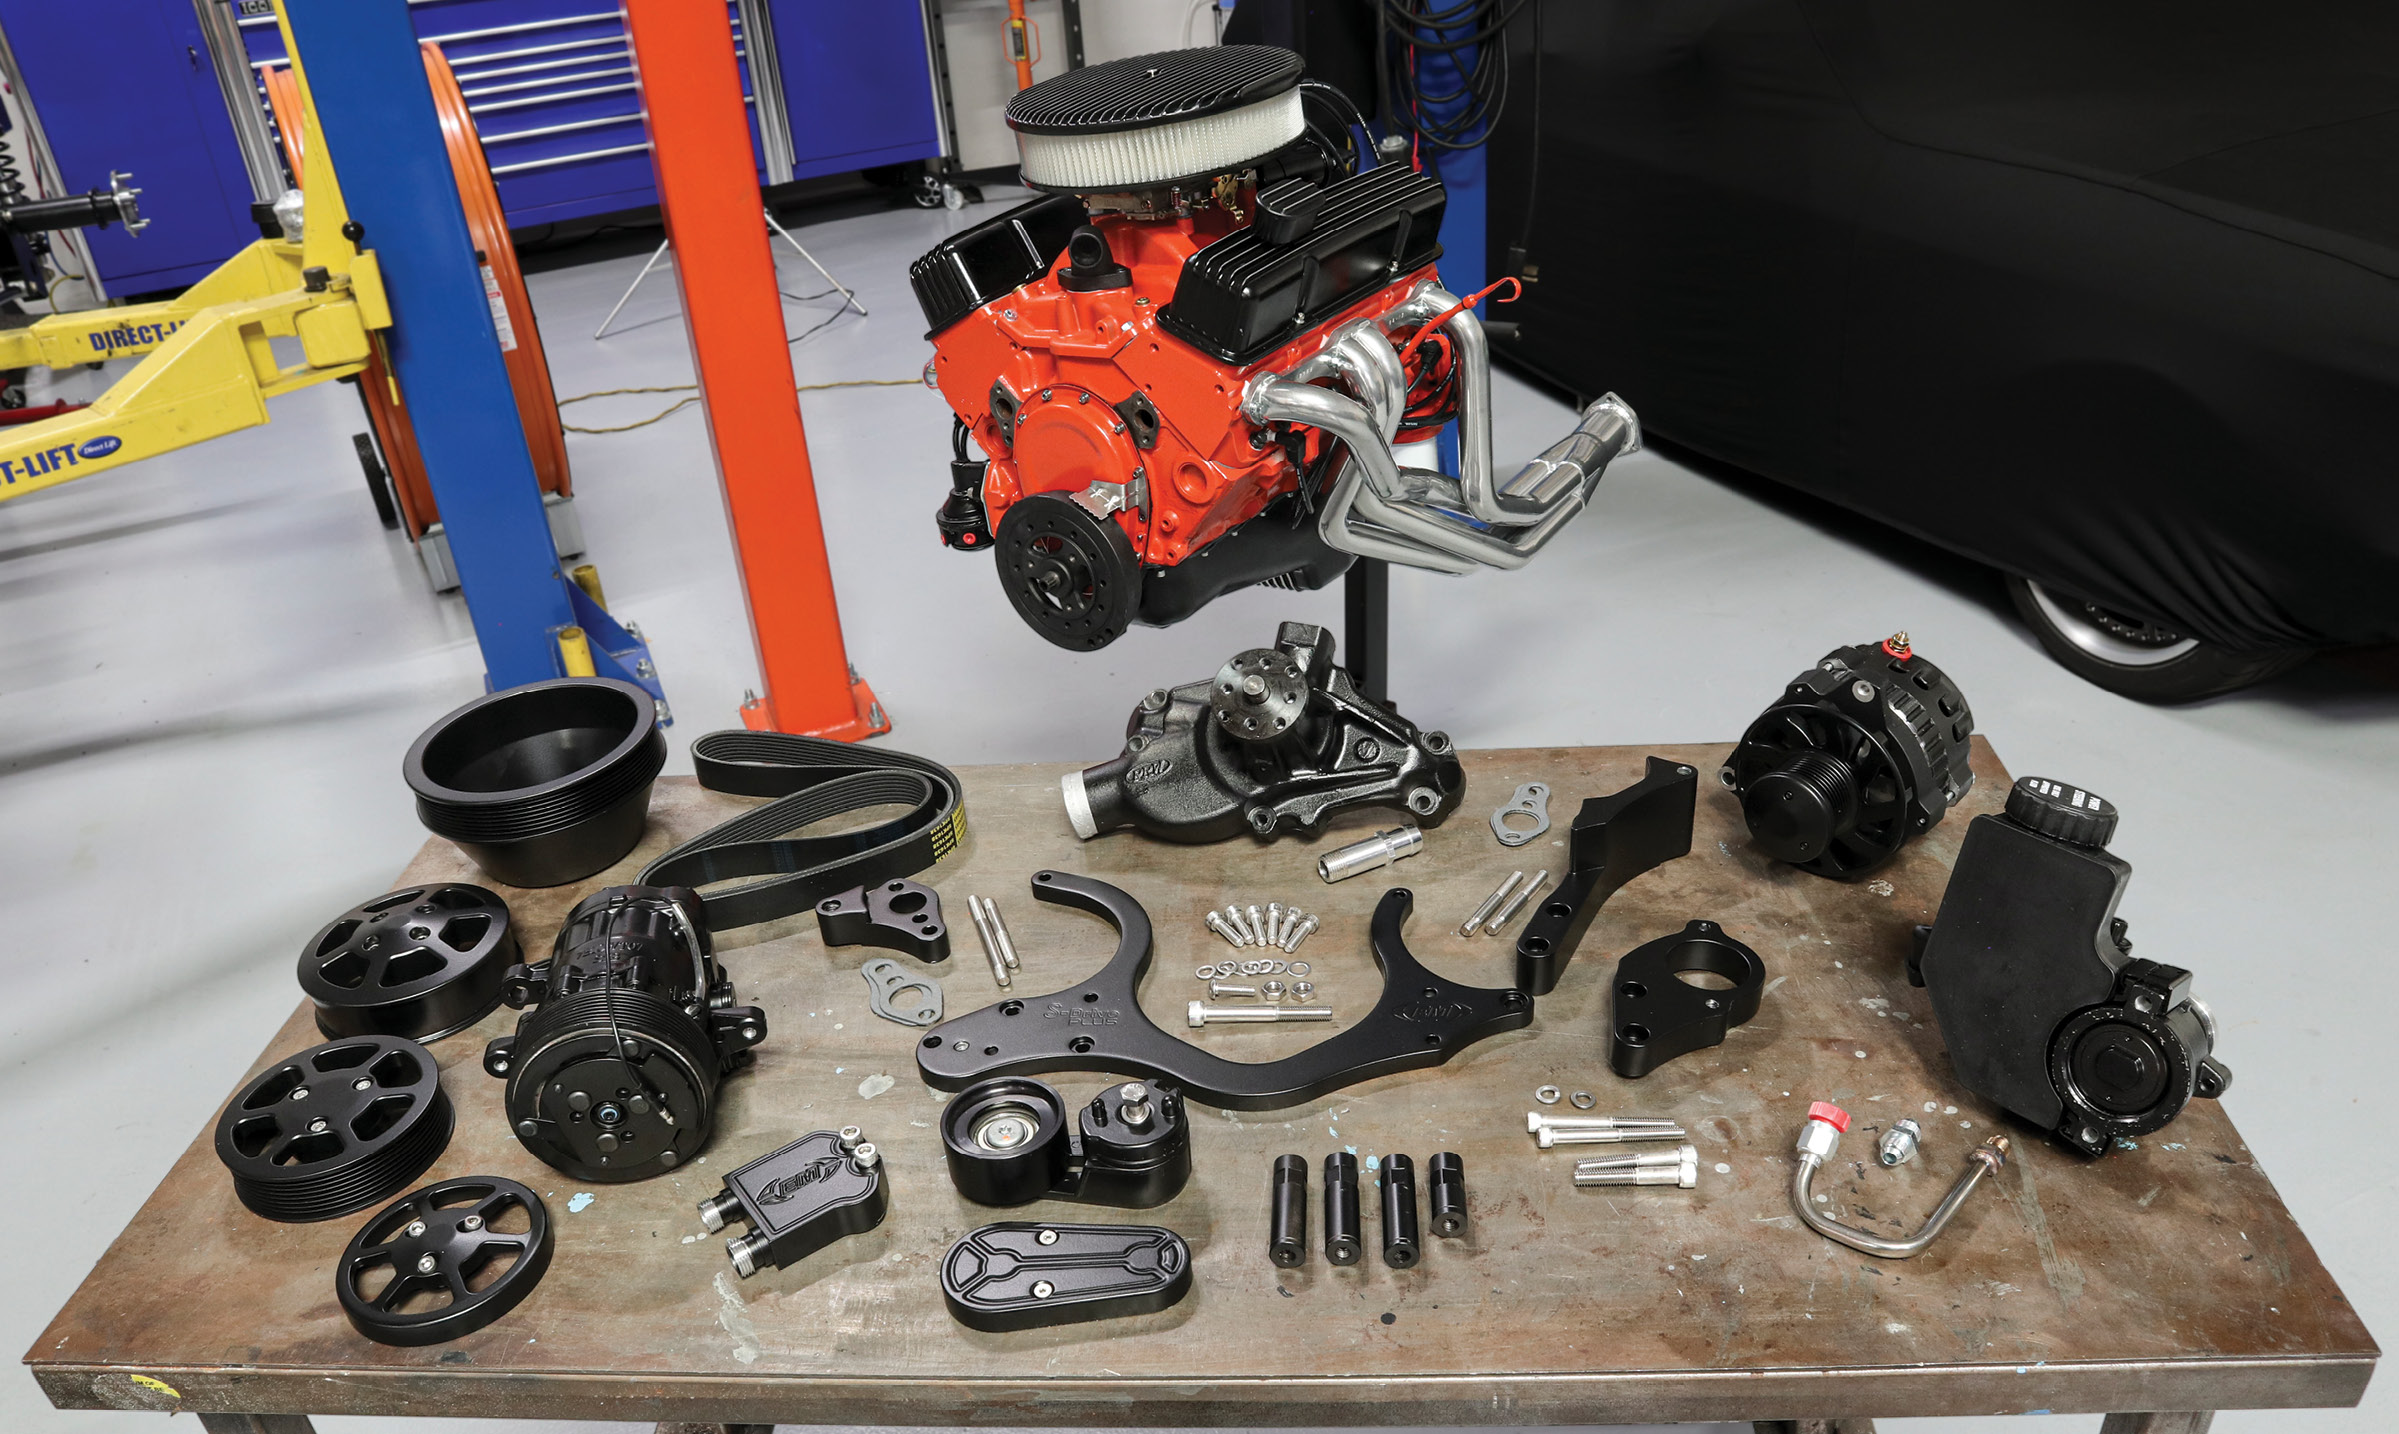
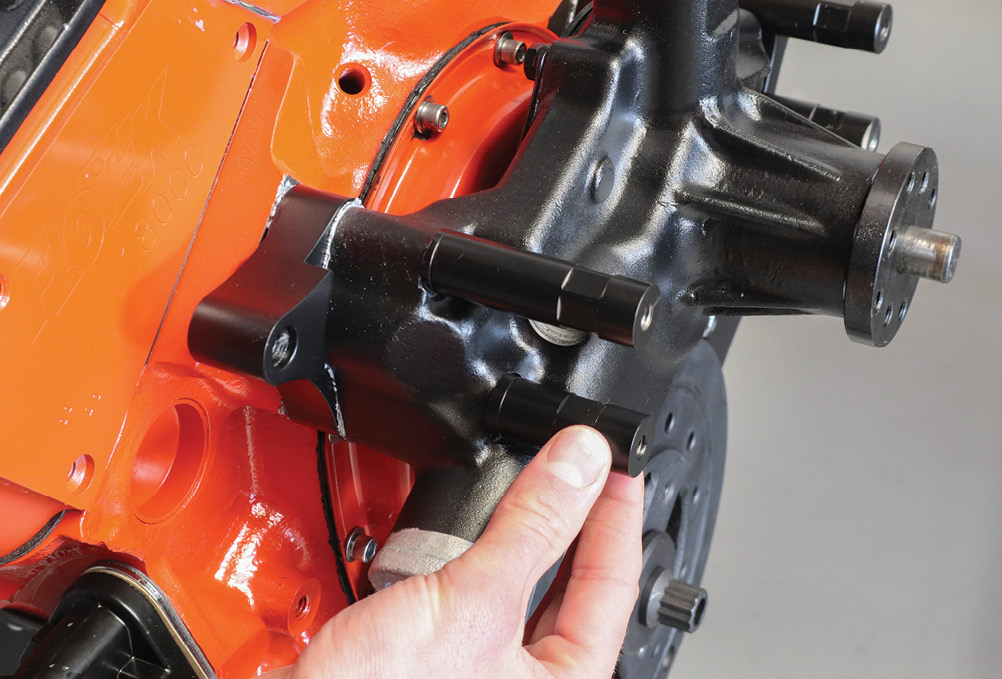
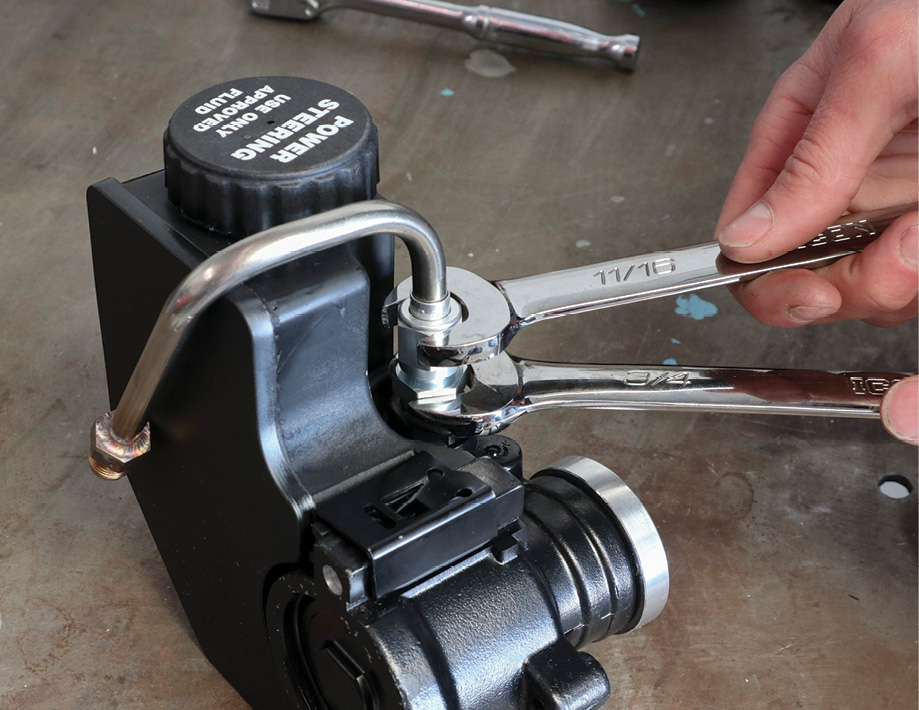
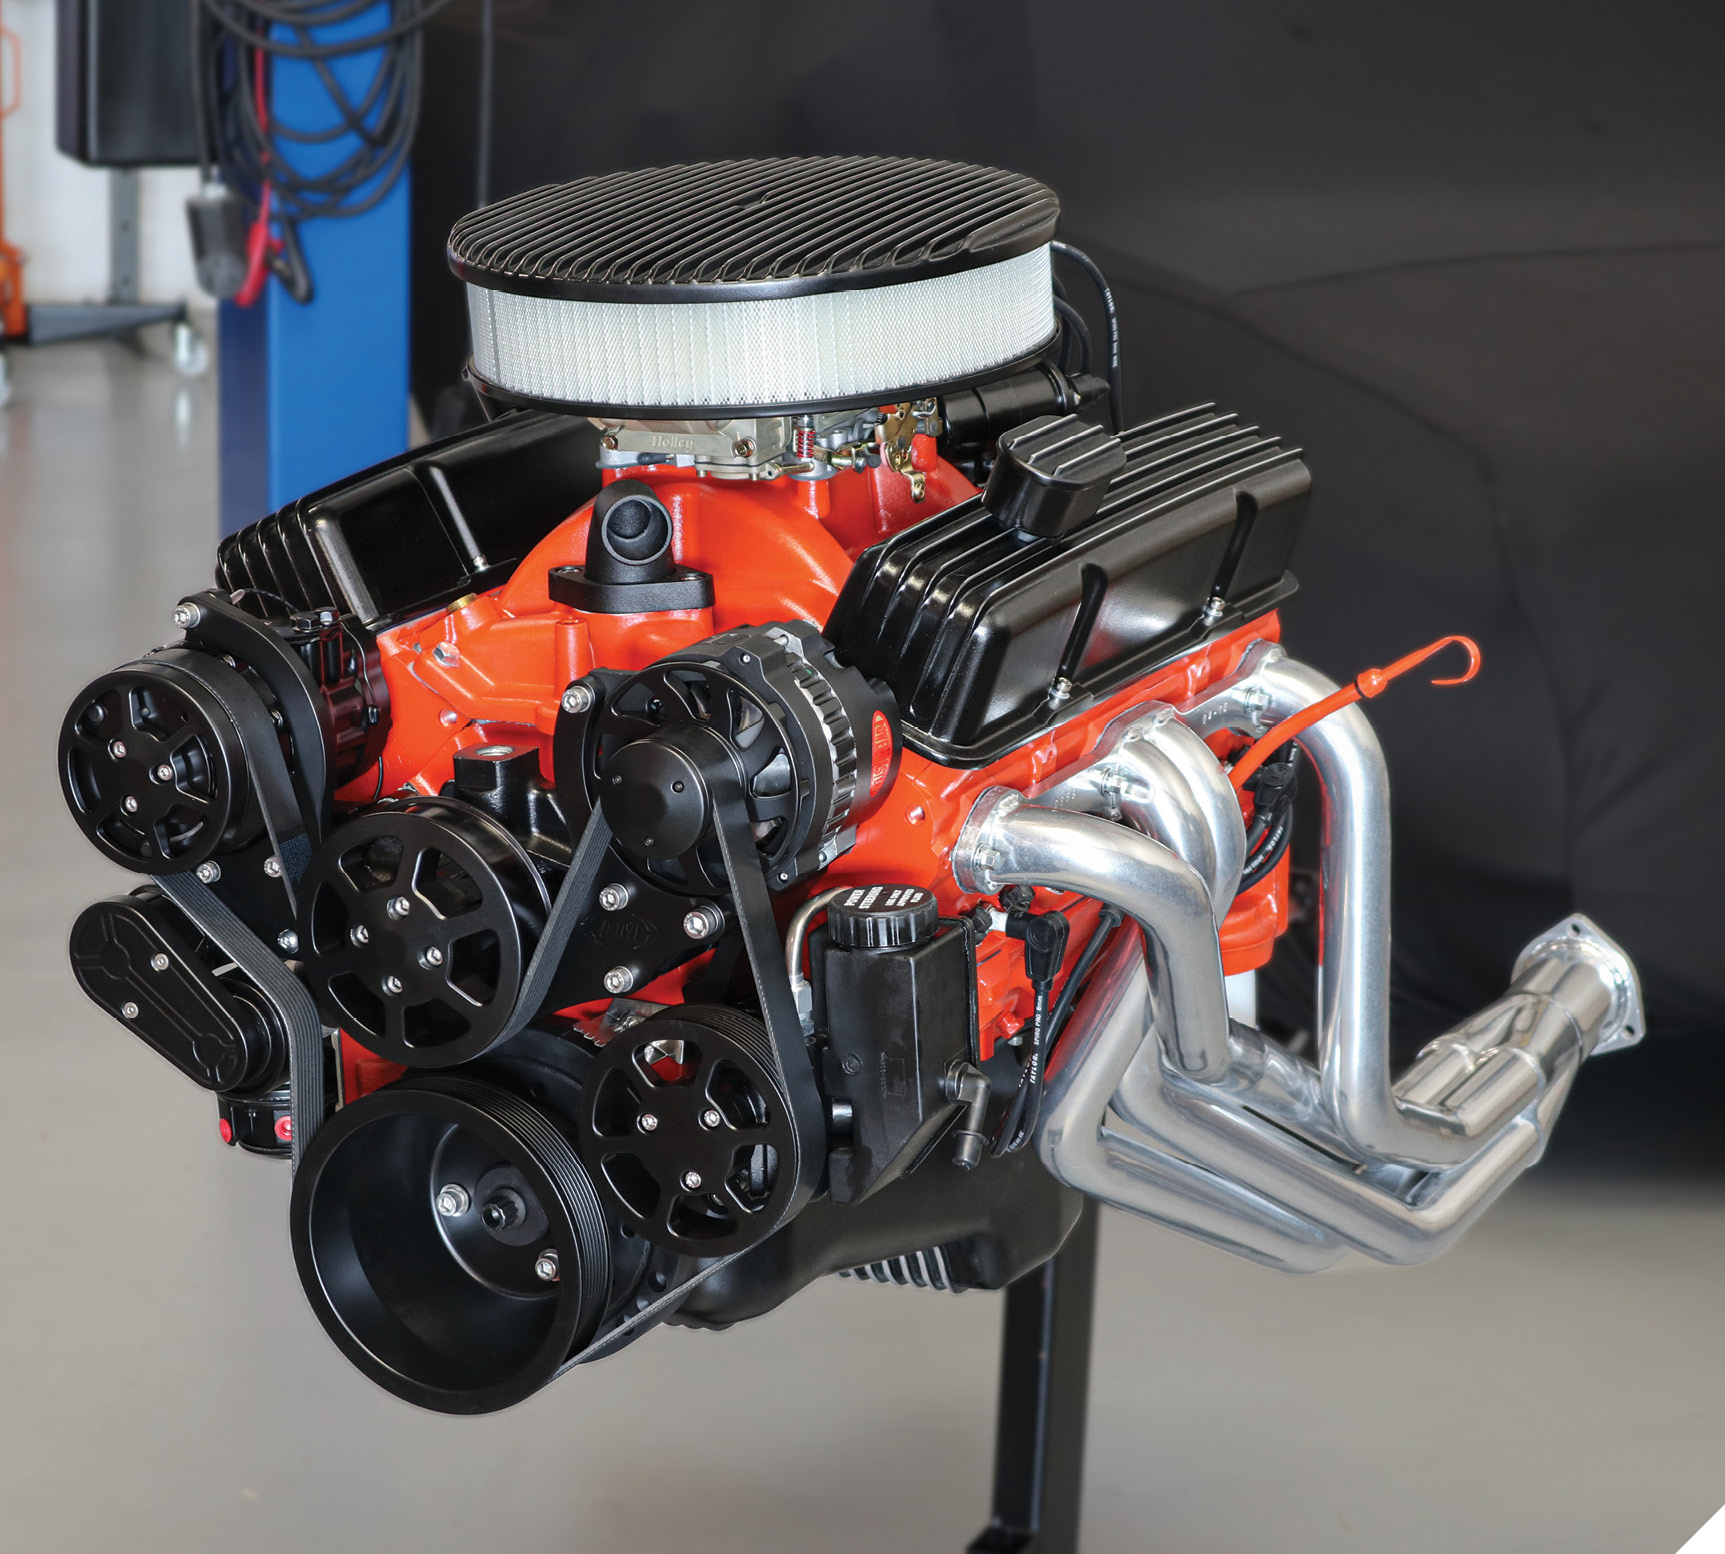
All that said, we were nearing the end of our 383 stroker build (you can read part one and two in previous issues of All Chevy Performance) when we realized our small-block wouldn’t be complete without accessories. Cleaning up and reusing the factory brackets is always an option. Well, we say always, but in our case the stamped-steel bracketry hanging the alternator and power steering pump in our ’69 Nova were pretty bent out of whack, leading to poor pulley alignment. Then, just to give us more reason to switch things up, our power steering pump conveniently decided to throw in the towel a few weeks ago.

We needed something better. We needed something to integrate more modern components in a simpler manner that would result in far superior reliability. Turns out our friends at Eddie Motorsports had the answer.

Actually, they had a few answers, ranging from an updated V-belt setup to a truly modern serpentine system. With just about every configuration of power steering or no power steering, with or without an A/C compressor, full chrome or flat black, we felt like a kid in a video game store.

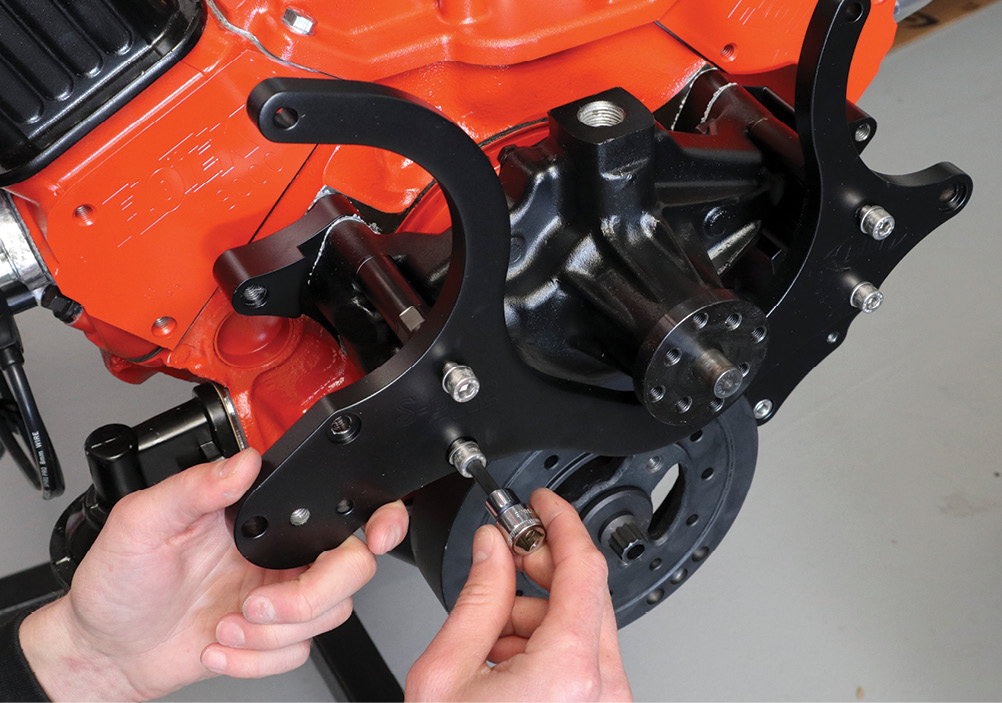
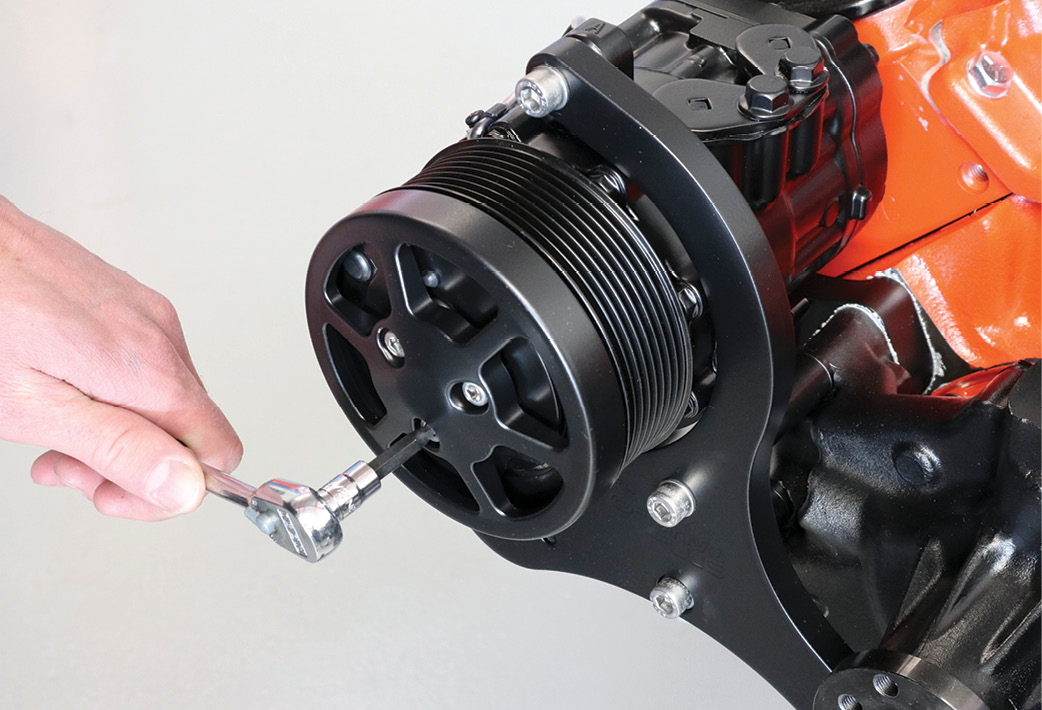
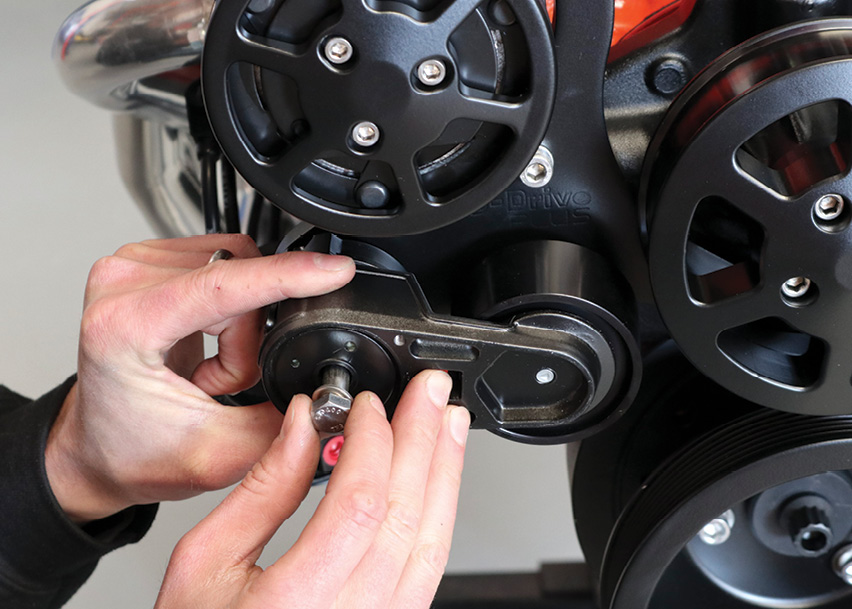
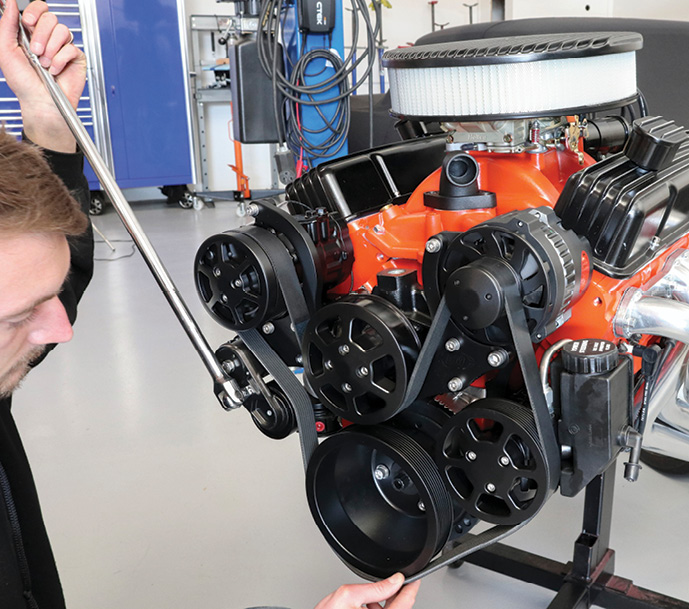
We decided to max out on modernity and go with a serpentine system. Using a single belt gives the setup a more organized and coherent look while also being functionally simple. The compact design should fit nicely in the engine bay of our Nova without having an alternator or compressor hanging unnecessarily high above the block. Another great feature of Eddie Motorsports’ serpentine system is the belt tensioner. There’s no more guessing how tight to make your drivebelt—let alone needing to set the tension on multiple belts—and it’s easy to install or remove, too. The tensioner is also a common GM part that you can pick up at a local auto parts store if it ever needs replacing. Then, deciding between the six- and eight-rib options, we opted for the latter. Eddie Motorsports claims the wider belt can handle 33 percent more torque, which is especially helpful for vehicles with wider front tires that like to hit the autocross course every now and then.

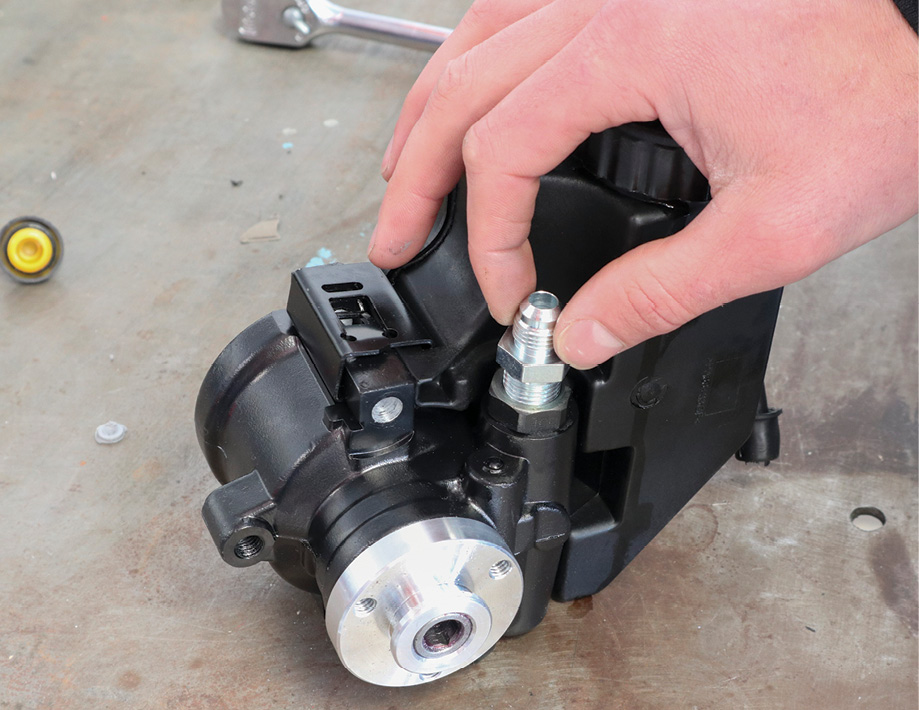
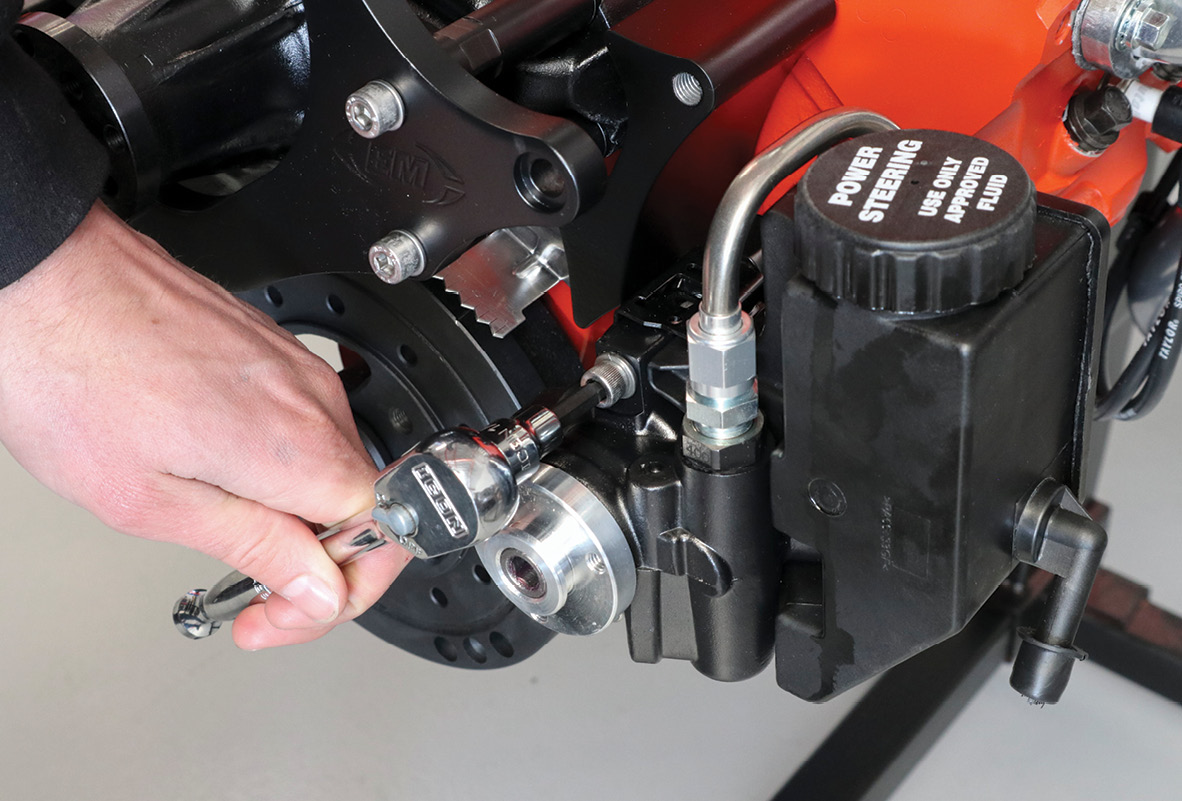
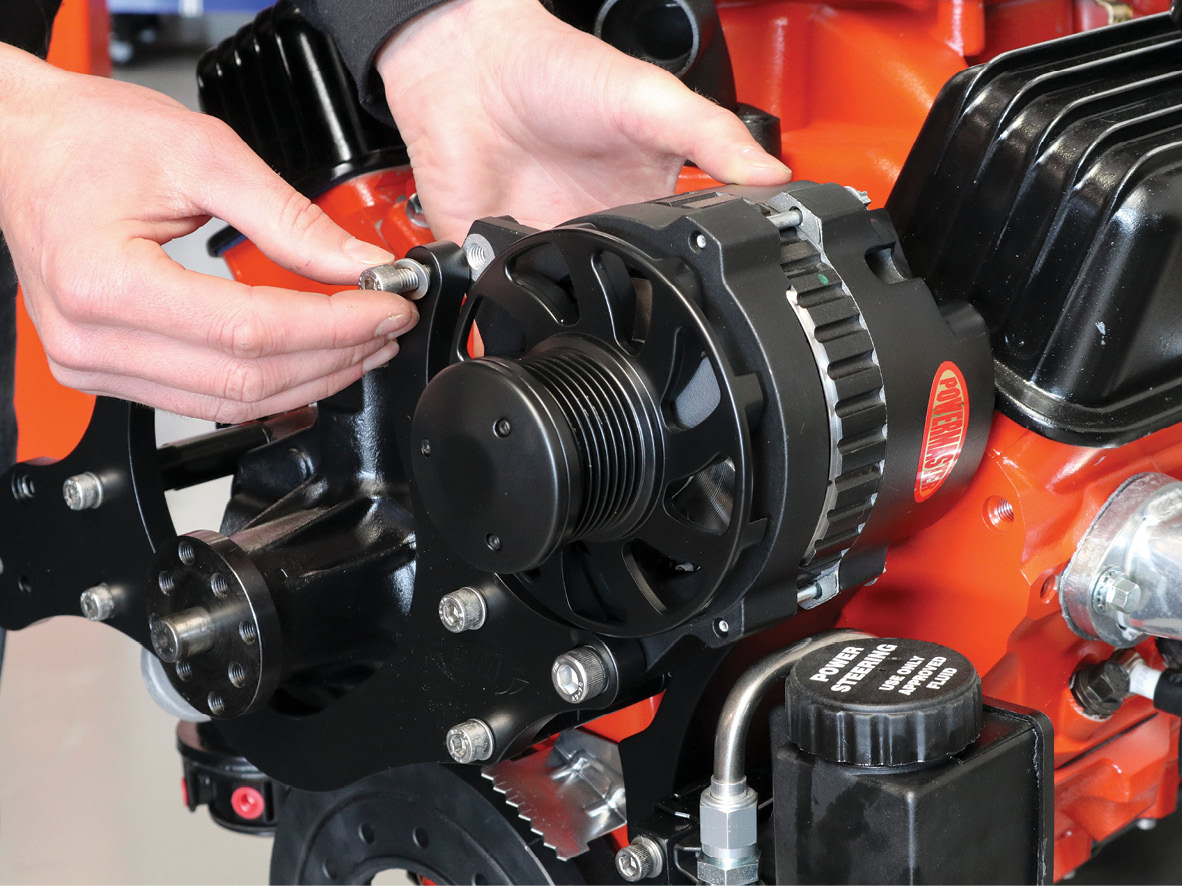
For accessories, we definitely needed a power steering pump; having a GM Type II pump is a plus in terms of reliability and compactness. We were happy with the standard plastic reservoir, although a billet aluminum version was also available. The alternator that comes with the kit is a 170-amp, single-wire unit from Powermaster. This will give us way more output than we need for our current, mostly stock electrical system but gives plenty of overhead for future upgrades.

Finally, we hemmed and hawed for a bit over getting the A/C compressor. On one hand, our Nova is a Southern California cruiser and we’re unlikely to put in the effort to install a complete climate-control system anytime soon. On the other hand, it’s a small additional investment to at least give us the option in the future. If you looked at the feature image of this article you probably already spotted our decision.

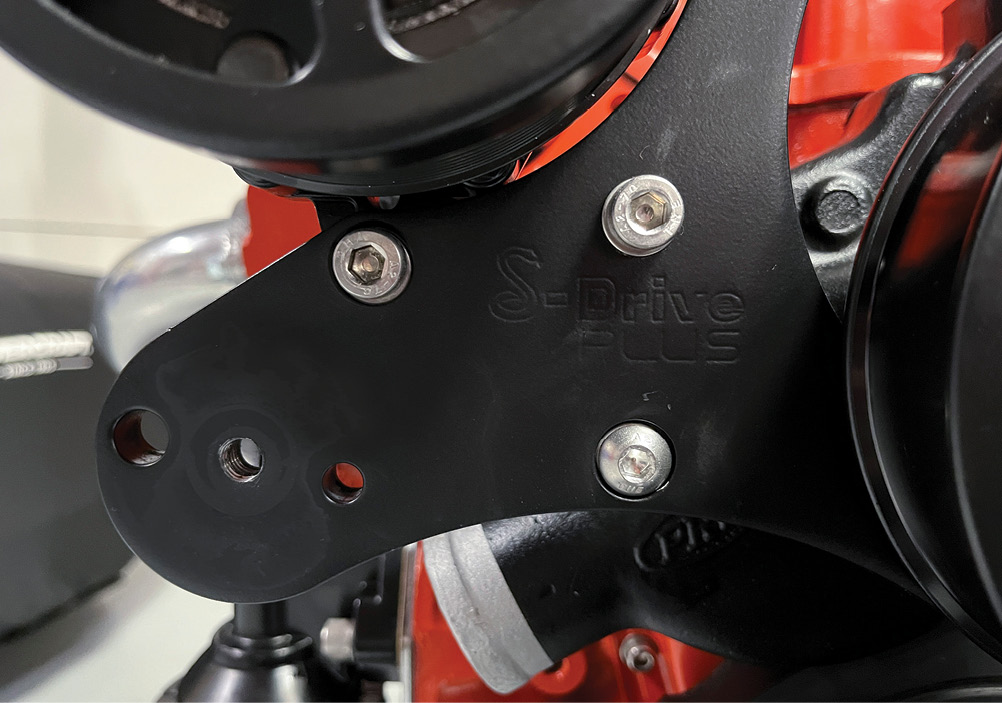
The next fun choice we got to make was the finish (or color) of our serpentine system. Eddie Motorsports offers a plethora of finishes, ranging from raw to polished to black anodized and more. Already having played a bold move by painting our entire aluminum-headed engine Chevy Red-Orange, we felt the need to offset all that color. Eddie Motorsports’ Raven Series was just what we were looking for. More specifically, we decided to go with their Matte Black Fusioncoat.

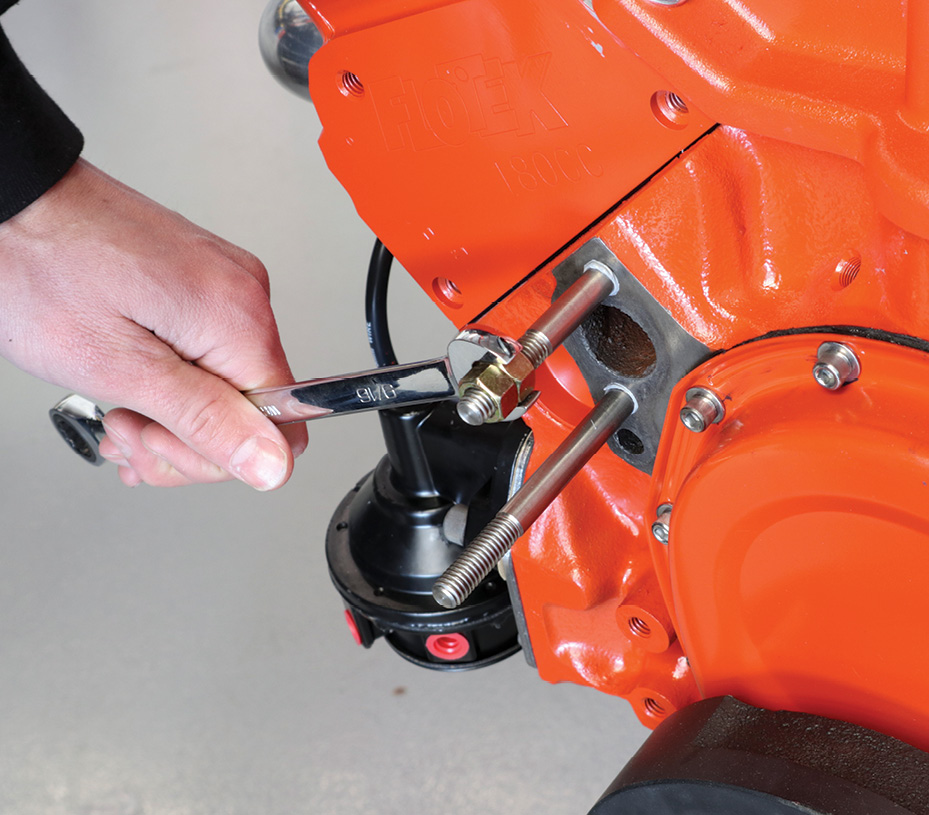
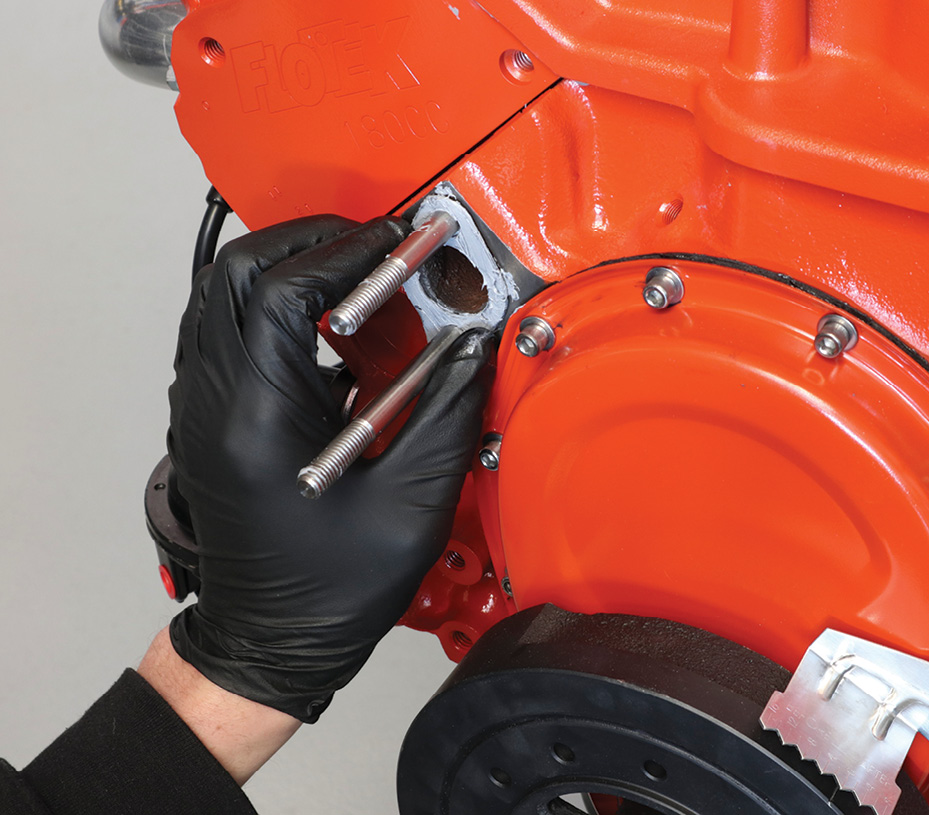
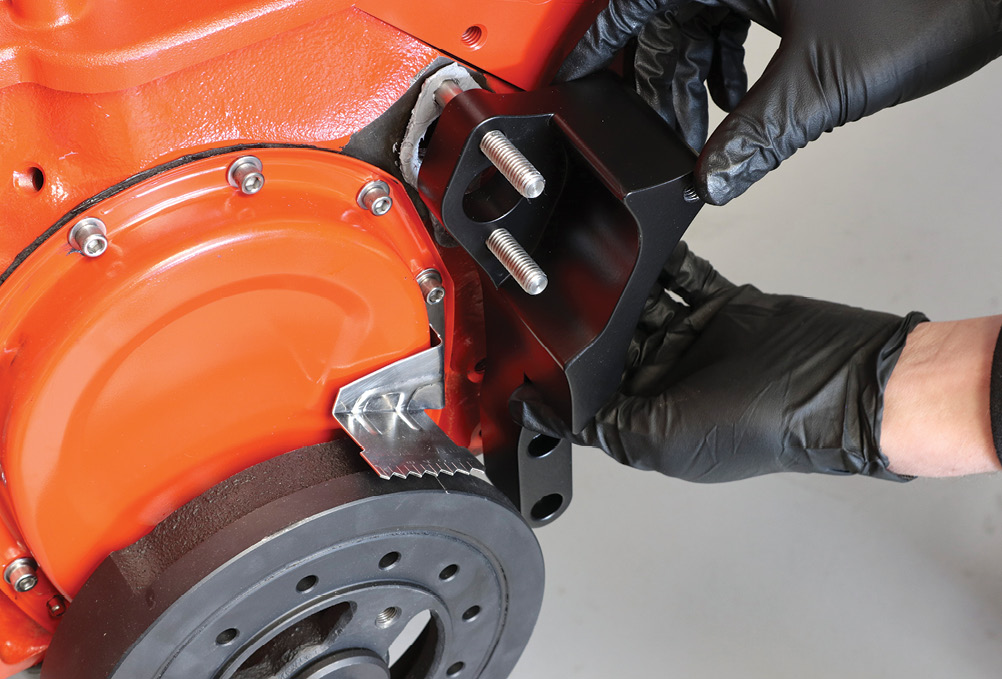
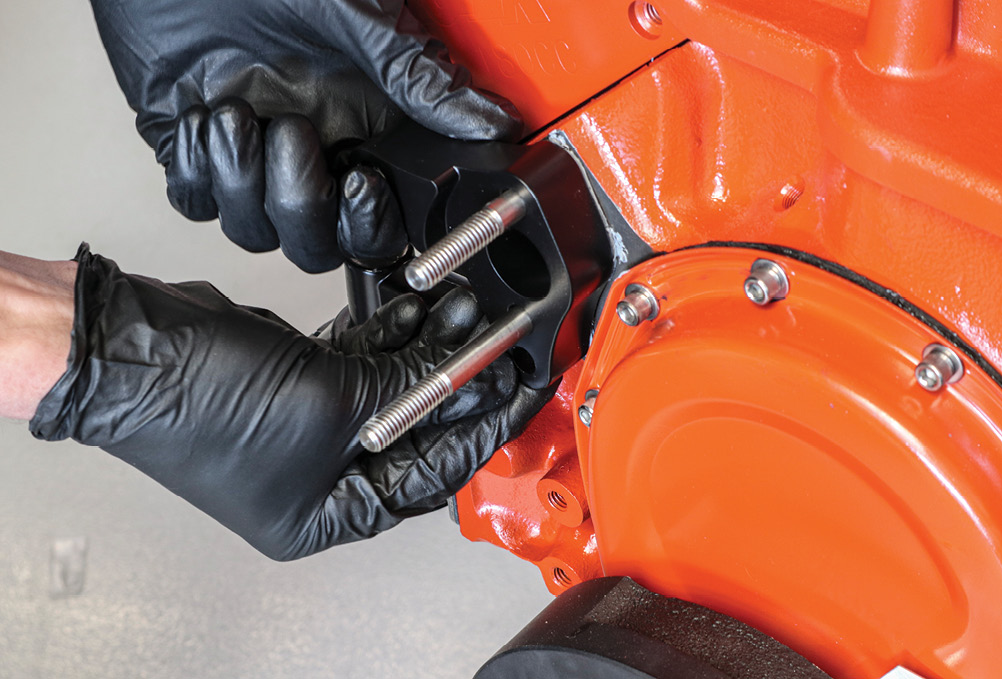
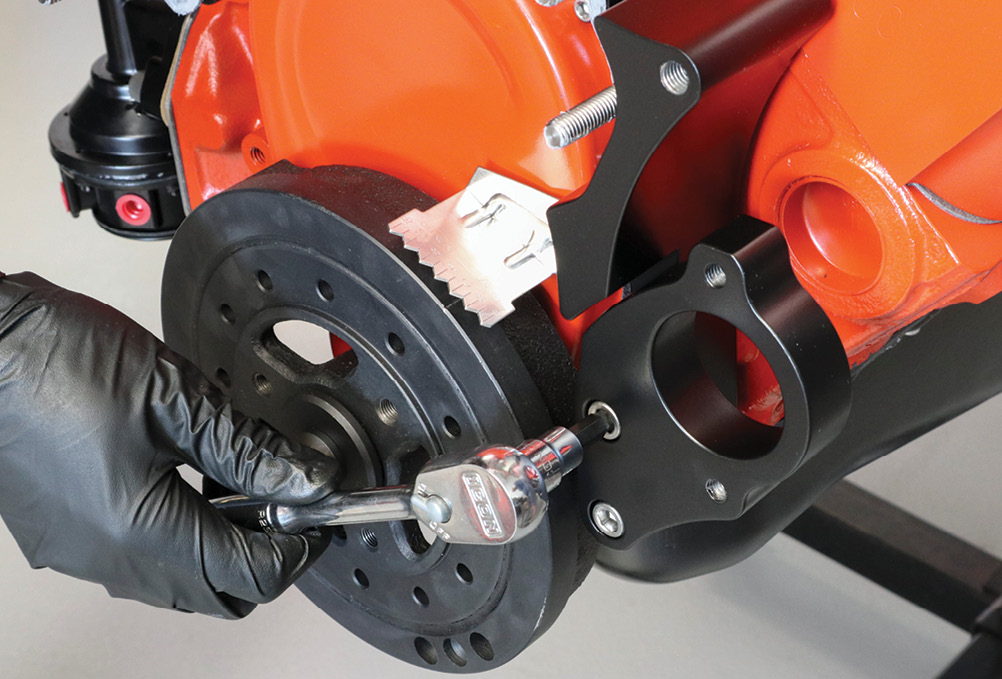
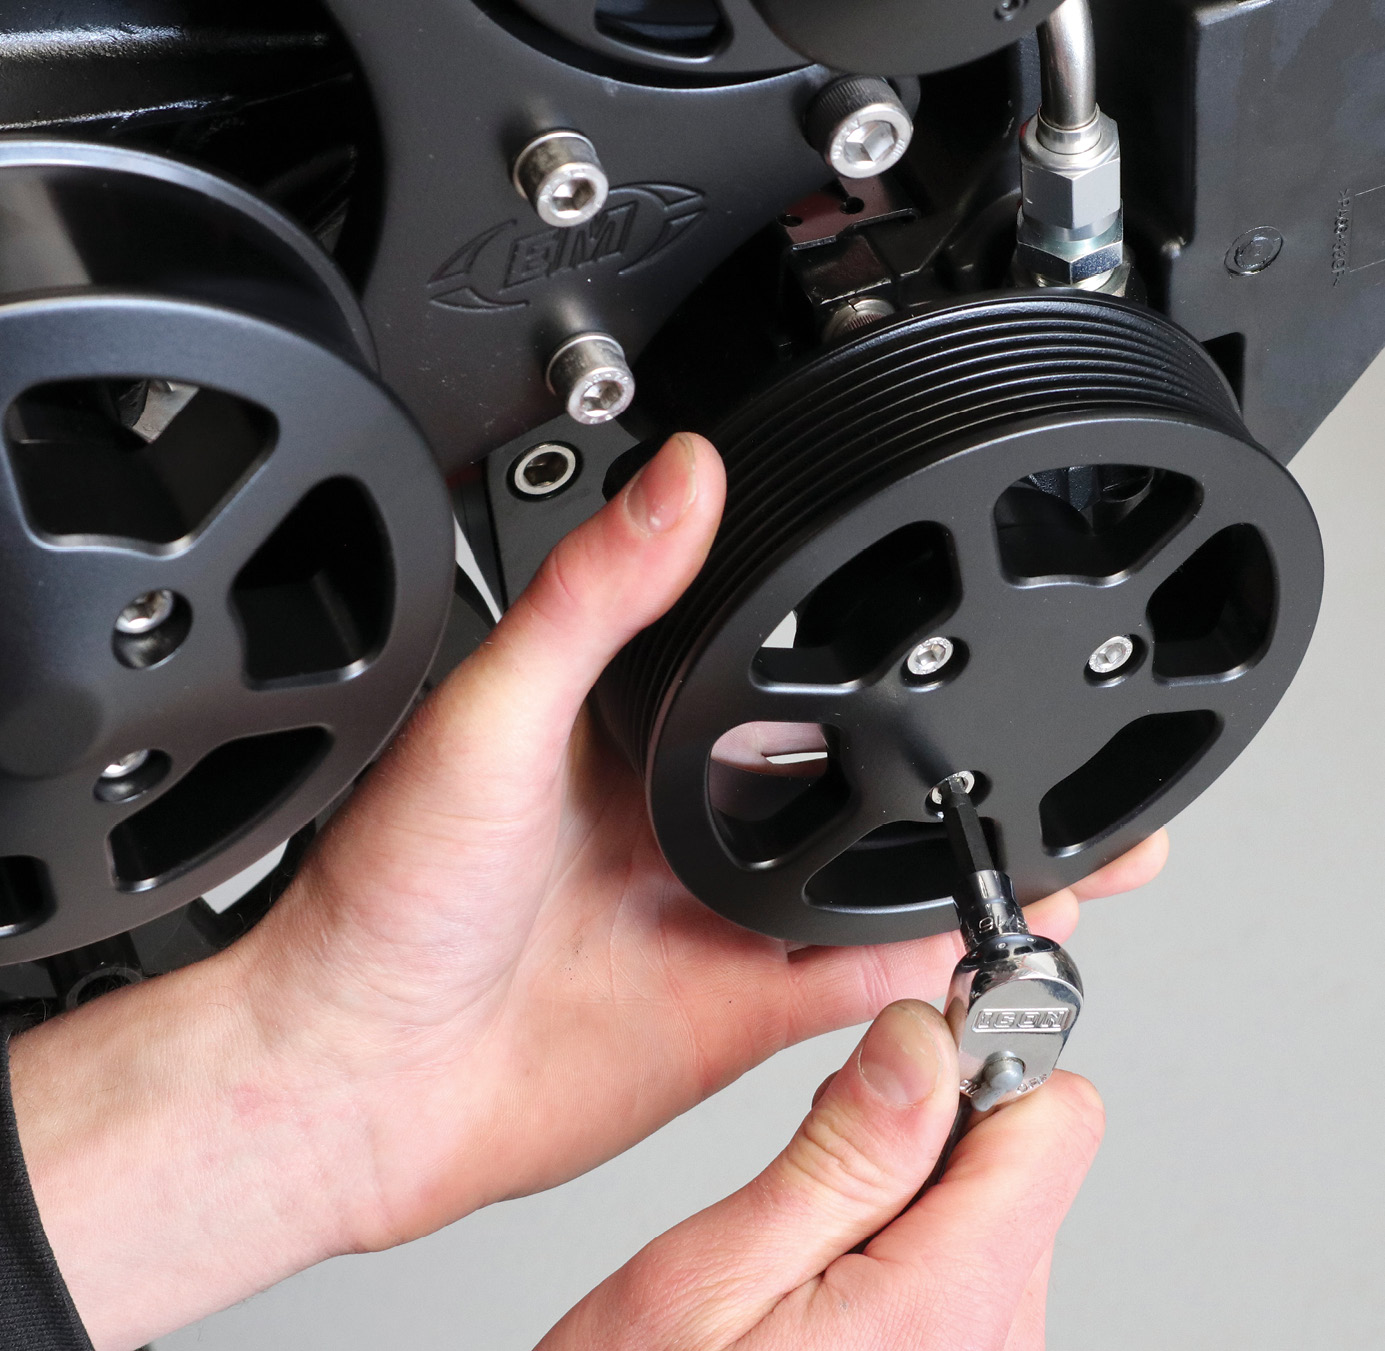
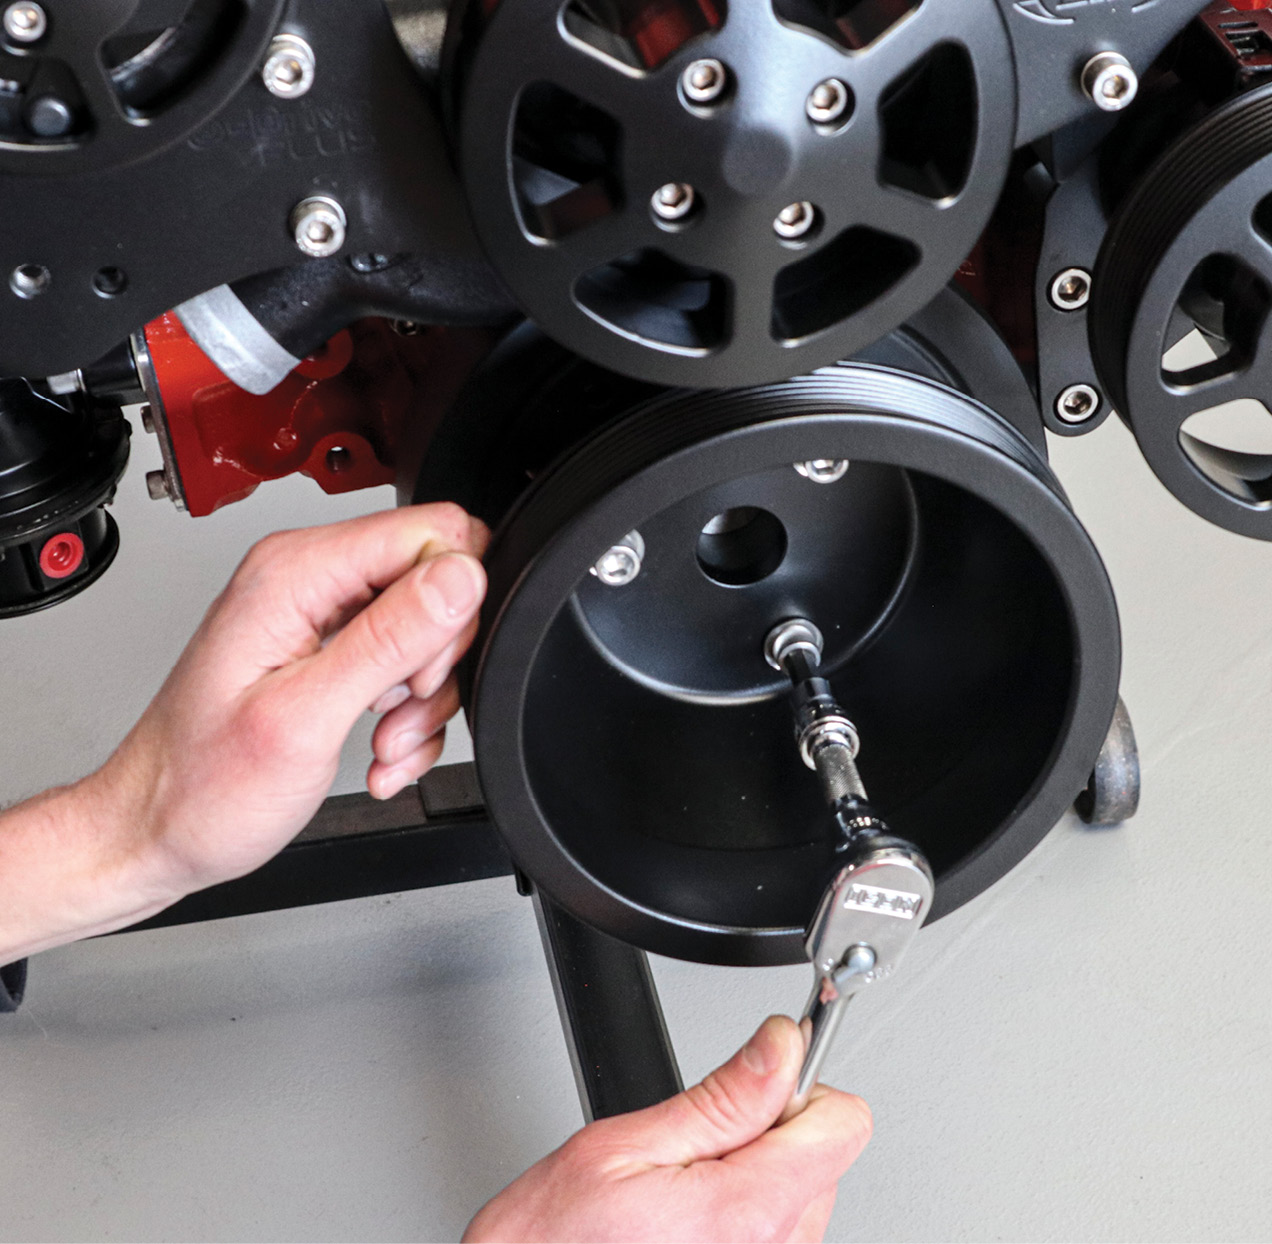
The installation process was refreshingly simple, no specialty tools needed, and it only took a leisurely couple of hours on a Saturday morning to complete.

The Eddie Motorsports serpentine system comes with all the parts needed to install from the hardware to the pulleys and even the belt. All we needed to grab was RTV, antiseize, thread-locker, and some basic hand tools.
1. The Eddie Motorsports serpentine system comes with all the parts needed to install from the hardware to the pulleys and even the belt. All we needed to grab was RTV, antiseize, thread-locker, and some basic hand tools.
Step one was installing the provided studs using two nuts jammed together to tighten each stud. Since these go to water, make sure to use some RTV or thread sealant to prevent leaks. Note: the longest stud goes in the lower passenger side hole, as shown.
2. Step one was installing the provided studs using two nuts jammed together to tighten each stud. Since these go to water, make sure to use some RTV or thread sealant to prevent leaks. Note: the longest stud goes in the lower passenger side hole, as shown.
Next we thinly coated two of the supplied gaskets with RTV and slid them over the studs.
3. Next we thinly coated two of the supplied gaskets with RTV and slid them over the studs.
We fitted the alternator bracket to the driver side of the block followed by the A/C compressor bracket on the passenger side
the a/c compressor bracket on the passenger side
4-5. We fitted the alternator bracket to the driver side of the block followed by the A/C compressor bracket on the passenger side.
Then we coated the final two gaskets in RTV and slipped them onto the studs and up against the face of both brackets
6. Then we coated the final two gaskets in RTV and slipped them onto the studs and up against the face of both brackets.
Before installing the water pump, we went ahead and attached the power steering pump bracket using the supplied hardware with thread-locker.
7. Before installing the water pump, we went ahead and attached the power steering pump bracket using the supplied hardware with thread-locker.
We proceeded to install the water pump. Small tolerance variations in your block or the studs may make this a tight fit. Just work it over the studs gently, making sure not to damage the threads.
8. We proceeded to install the water pump. Small tolerance variations in your block or the studs may make this a tight fit. Just work it over the studs gently, making sure not to damage the threads.
Then we threaded on the standoffs (using antiseize on the threads) with the shortest of the four going on the lower passenger side again. Make sure to install the standoffs with the hex notch to the outside as there are SAE threads on the block side and metric threads on the opposite end. As per the Eddie Motorsports instructions, we left these hand tight for now.
9. Then we threaded on the standoffs (using antiseize on the threads) with the shortest of the four going on the lower passenger side again. Make sure to install the standoffs with the hex notch to the outside as there are SAE threads on the block side and metric threads on the opposite end. As per the Eddie Motorsports instructions, we left these hand tight for now.
It was finally time to install that fancy main bracket that ties everything together. Like the standoffs, only hand tighten the M8x25mm screws.
10. It was finally time to install that fancy main bracket that ties everything together. Like the standoffs, only hand tighten the M8x25mm screws.
Time for a little PSA here: We noticed that Eddie Motorsports provided one button-head screw while the rest were socket heads but didn’t learn until the end of the installation why (they hadn’t updated their instructions at the time). Make sure to install this button head on the lower passenger side because it is needed to clear the tensioner pulley.
11. Time for a little PSA here: We noticed that Eddie Motorsports provided one button-head screw while the rest were socket heads but didn’t learn until the end of the installation why (they hadn’t updated their instructions at the time). Make sure to install this button head on the lower passenger side because it is needed to clear the tensioner pulley.
Next, we moved onto preparing the power steering pump for installation. We screwed in the pressure fitting followed by the hard line.
Since these both have O-ring seals, we made sure to get them nice and snug, but did not overtighten.
12-13. Next, we moved onto preparing the power steering pump for installation. We screwed in the pressure fitting followed by the hard line. Since these both have O-ring seals, we made sure to get them nice and snug, but did not overtighten.
With the fitting and hardline installed, we bolted the power steering pump to the bracket using the supplied hardware.
14. With the fitting and hardline installed, we bolted the power steering pump to the bracket using the supplied hardware.
Then we installed the Powermaster alternator, which slid nicely into place between the main and alternator brackets.
15. Then we installed the Powermaster alternator, which slid nicely into place between the main and alternator brackets.
The final accessory to hang was the A/C compressor, which has two M8x25mm capscrews for the main bracket and then a ½-inch shoulder bolt securing it to the compressor bracket.

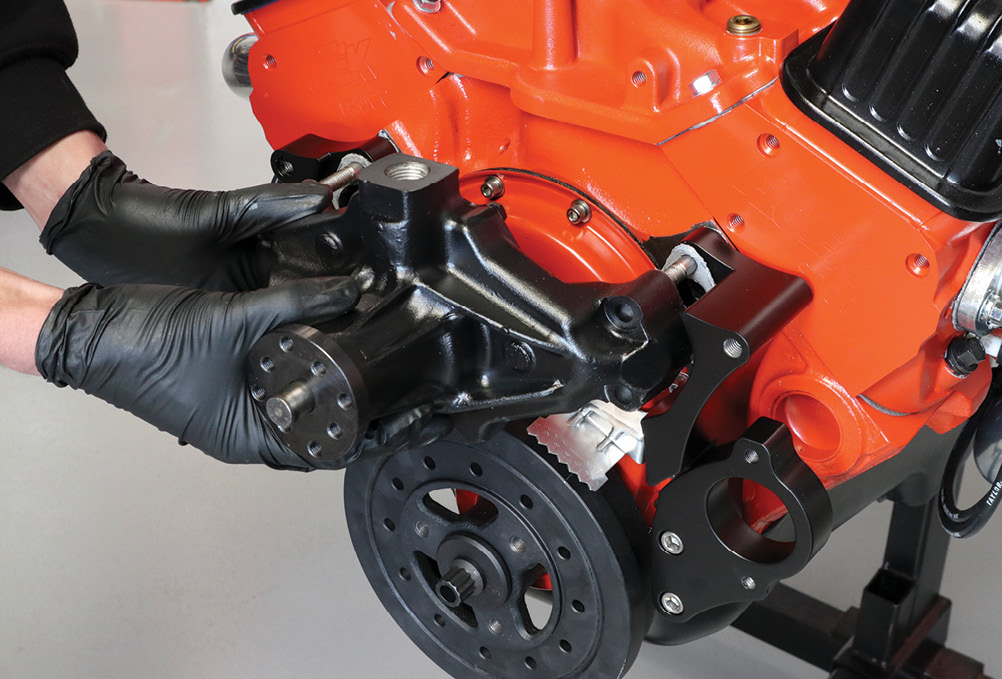
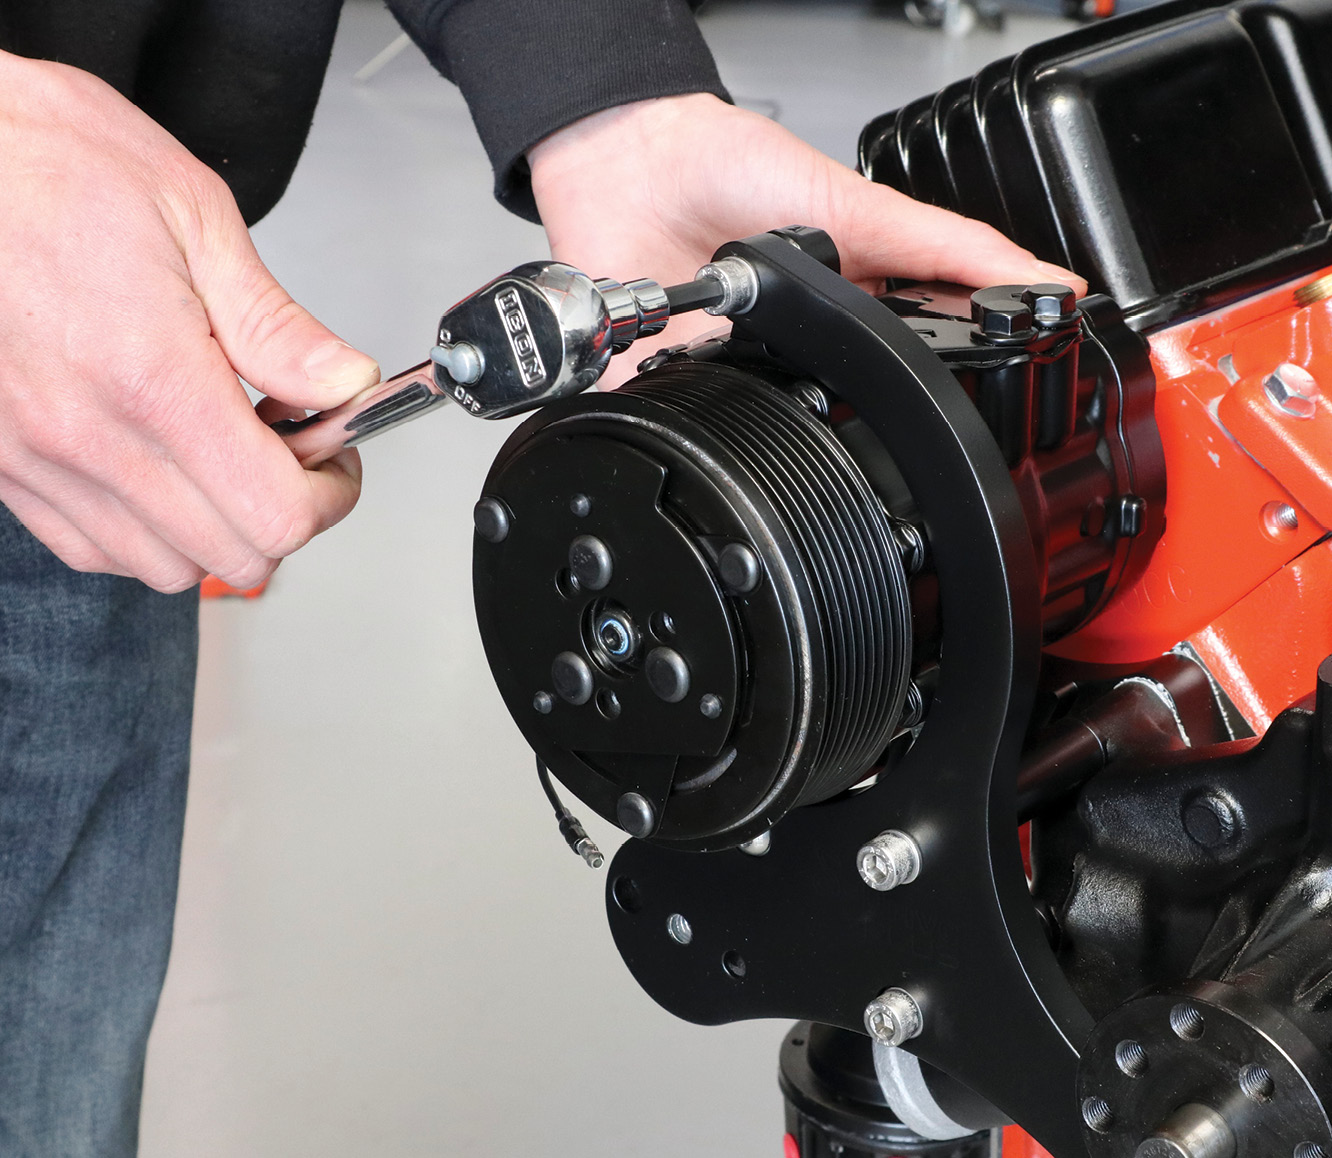
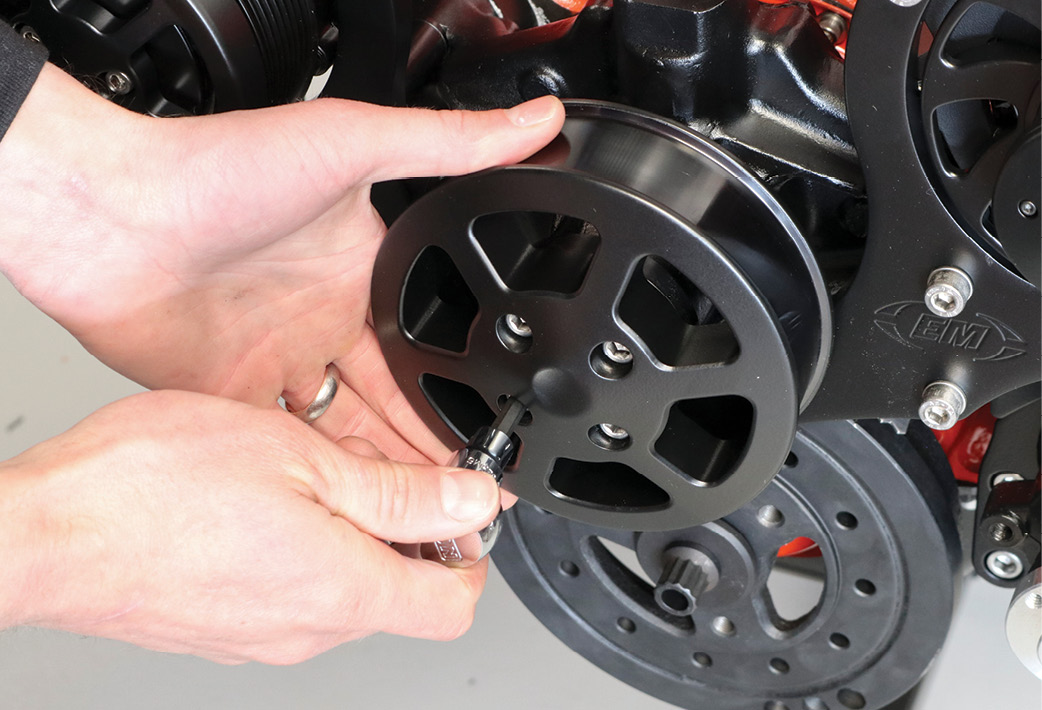
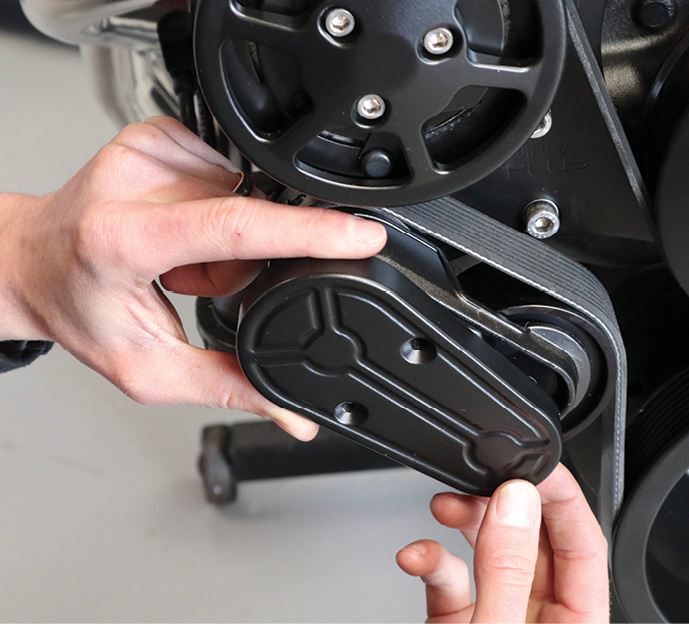
16. The final accessory to hang was the A/C compressor, which has two M8x25mm capscrews for the main bracket and then a ½-inch shoulder bolt securing it to the compressor bracket.

Once all the accessories were installed, we went back and fully tightened the four standoffs. Then we tightened all the M8x25mm screws on the main bracket.
17. Once all the accessories were installed, we went back and fully tightened the four standoffs. Then we tightened all the M8x25mm screws on the main bracket.
Now, onto the finishing touches. Using thread-locker, we installed the A/C compressor cover.
18. Now, onto the finishing touches. Using thread-locker, we installed the A/C compressor cover.
Make sure not to install the A/C compressor manifold until you are fully ready to install your A/C lines and charge the system.

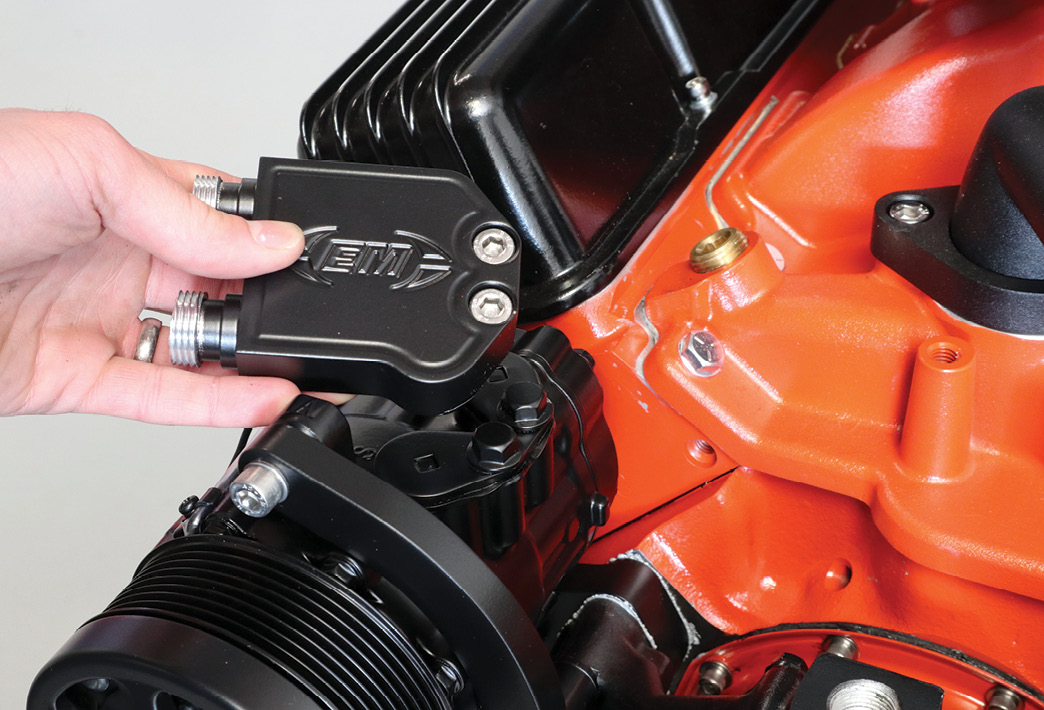
19. Make sure not to install the A/C compressor manifold until you are fully ready to install your A/C lines and charge the system.

Then we proceeded to install the alternator pulley and power steering pump pulley using thread-locker on all the hardware.
20-21. Then we proceeded to install the alternator pulley and power steering pump pulley using thread-locker on all the hardware.
Next we bolted on the crank pulley, which is supplied with beveled washers that help center it. Thread-locker is used on these bolts as well.
22. Next we bolted on the crank pulley, which is supplied with beveled washers that help center it. Thread-locker is used on these bolts as well.
All that is left now is the tensioner and eight-rib serpentine belt. The tensioner installs easily with one ³/8-inch hex-head bolt and thread-locker. Wait to install the tensioner cover until the belt has been fitted.
23. All that is left now is the tensioner and eight-rib serpentine belt. The tensioner installs easily with one ⅜-inch hex-head bolt and thread-locker. Wait to install the tensioner cover until the belt has been fitted.
To install the belt, use a 1/2-inch drive breaker bar to hold pressure on the tensioner and feed the belt around the accessories, as shown.
24. To install the belt, use a ½-inch drive breaker bar to hold pressure on the tensioner and feed the belt around the accessories, as shown.
Then you can go ahead and install the tensioner cover using the two supplied flathead screws.
25. Then you can go ahead and install the tensioner cover using the two supplied flathead screws.
And just like that we’ve got a sleek, highly functional accessory drive system for the front of our 383 small-block. All that’s left, once we drop the engine in the car, is to hook up the one-wire alternator, connect the power steering hoses, and install the supplied hose barb for the water pump.
26. And just like that we’ve got a sleek, highly functional accessory drive system for the front of our 383 small-block. All that’s left, once we drop the engine in the car, is to hook up the one-wire alternator, connect the power steering hoses, and install the supplied hose barb for the water pump.
In the Garage Media Tech Center - Duralast/Frontier
SOURCE
Eddie Motorsports
(888)813-1293
eddiemotorsports.com