ACP department heading TECH
InTheGarageMedia.com
A classic white sports car undergoing restoration sits in a garage with interior carpeting and trim pieces laid out in the foreground.
Top to Bottom
Updating a Second-Gen Camaro With a Fresh Headliner and Carpet
BY Chuck VranasImages BY THE AUTHOR
O

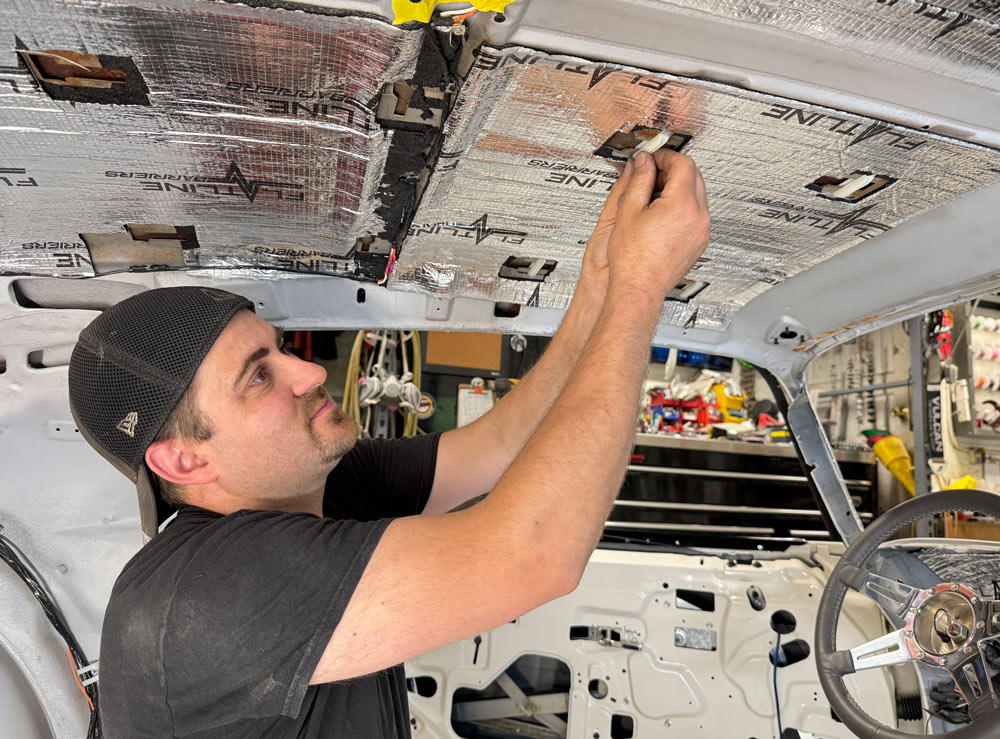
ne of the best moments in reaching the end of a new build is when the business office finally starts to take shape. It’s a time when you can delve into the endless stream of options available from the aftermarket to help you decide on just the right parts, colors, textures, and materials to use when you’re ready to freshen up your interior and add a bit of a punch. Simple things like the headliner and carpet should never be overlooked as they frame the vibe of the interior, offering a solid base to work with.

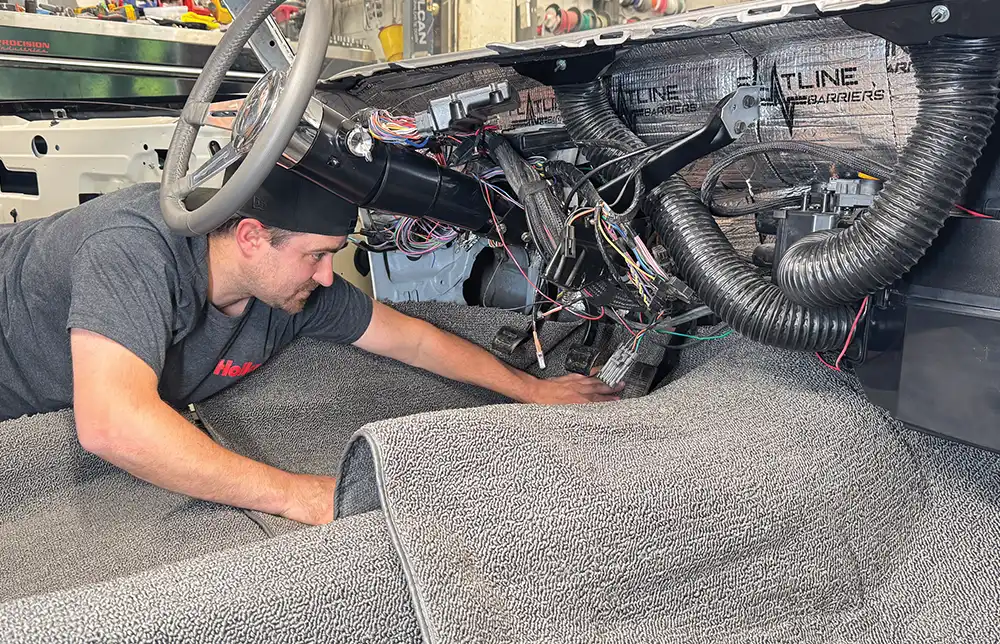
Many readers of All Chevy Performance have seen the evolution of this 1971 Camaro laid out across our pages, being the subject of numerous tech articles over the past few years. Its evolution from a bare shell has introduced us to all aspects of the build, including suspension and brakes, LS driveline, cooling, exhaust, sheetmetal, wiring, insulation, and more. With a hopped-up 5.3 LS underhood nailed to a T56 six-speed transmission, it’s easy to see that it’ll be a beast once it hits the streets. This time we’re stepping deep into the interior to look at updating it with a fresh headliner and carpet set.

We recently stopped by Procision Industries in Taunton, Massachusetts, where shop owner Pat O’Brien was ready to move forward by designing the interior and taking on this very subject. With the body restored to its original factory Code 11 Antique White complemented by a black vinyl roof, it opened the door to many different color combinations. After making the decision on the carpet and headliner, he contacted Classic Industries to check into their extensive interior restoration offerings. For the headliner, a PUI reproduction Premier perforated vinyl material in black featuring their exclusive pre-sewn headliner body along with enough extra material to recover sunvisors, if needed, was selected. To complete the installation, he chose their reproduction headliner bows along with 20-piece headliner clip set, matching sunvisors with mounting brackets, interior headliner molding kit, dome lamp kit, headliner installation tool, and HH-66 Vinyl Cement. It’s imperative when taking on a headliner installation that you take your time in following all the steps highlighted.

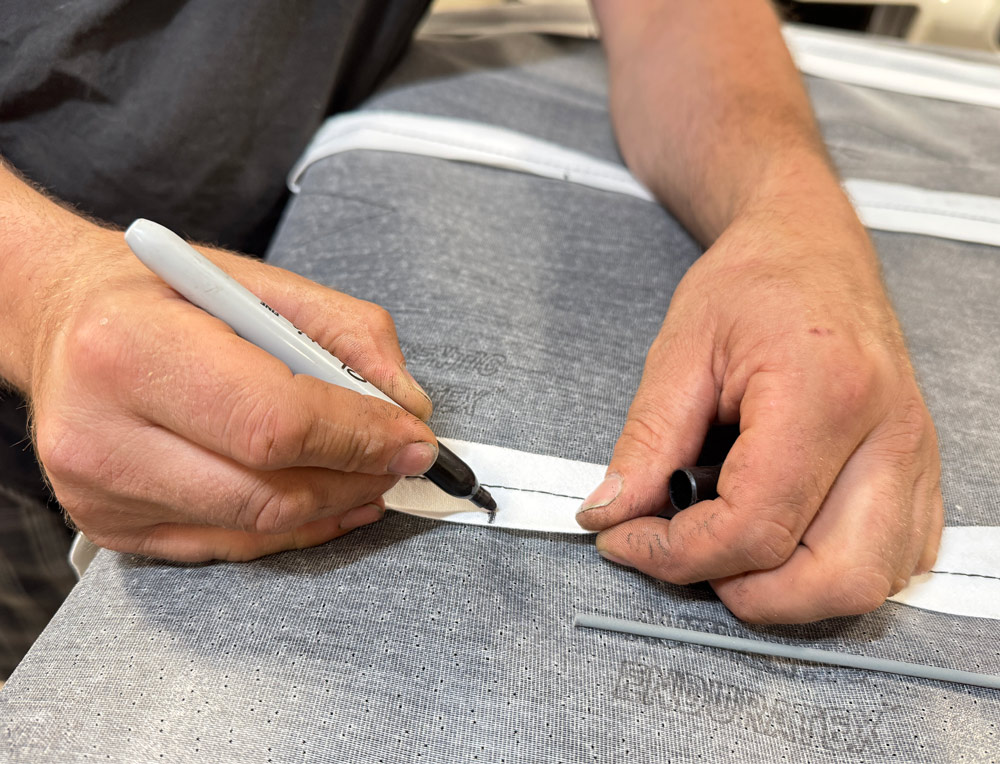
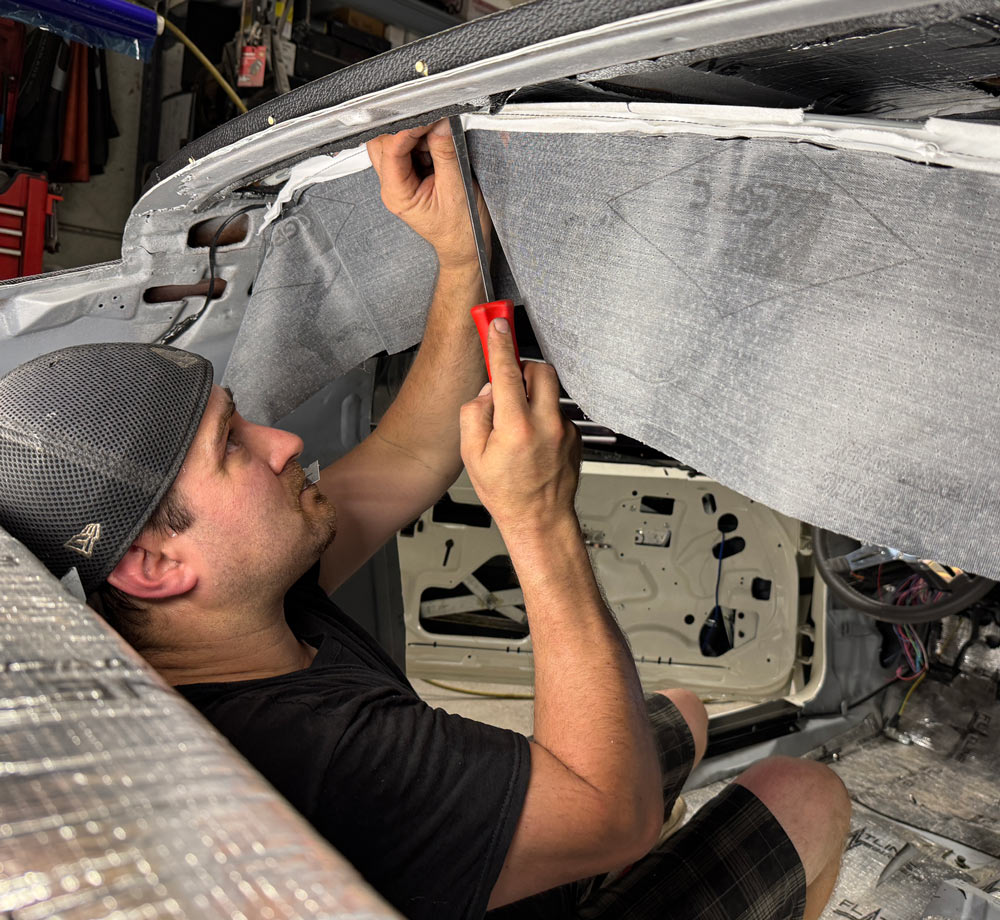
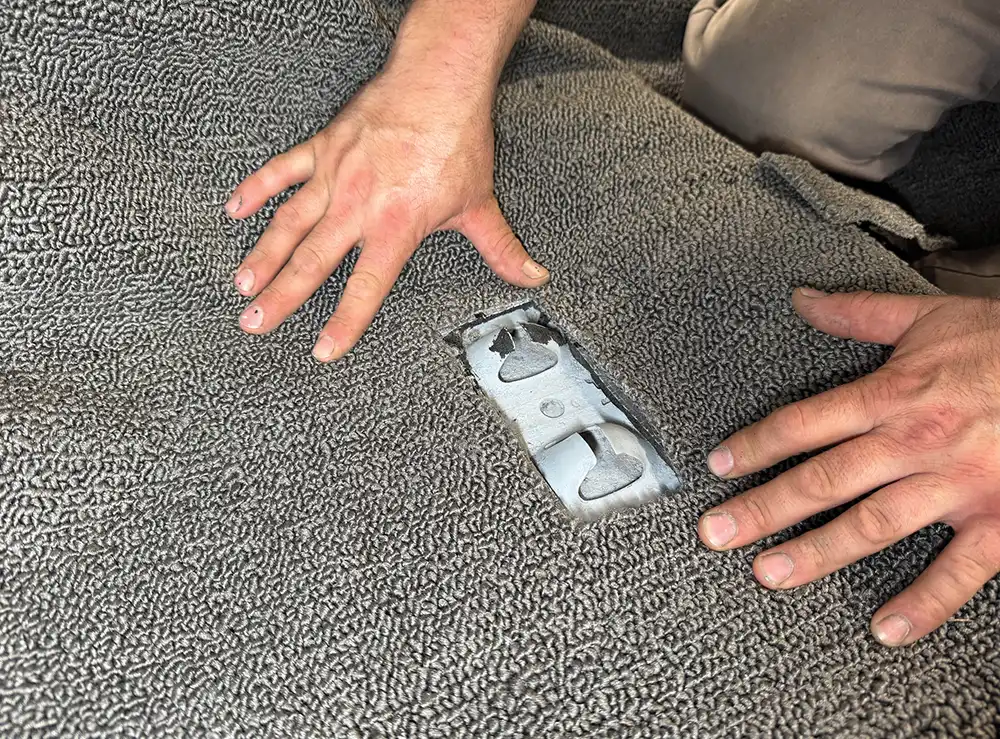
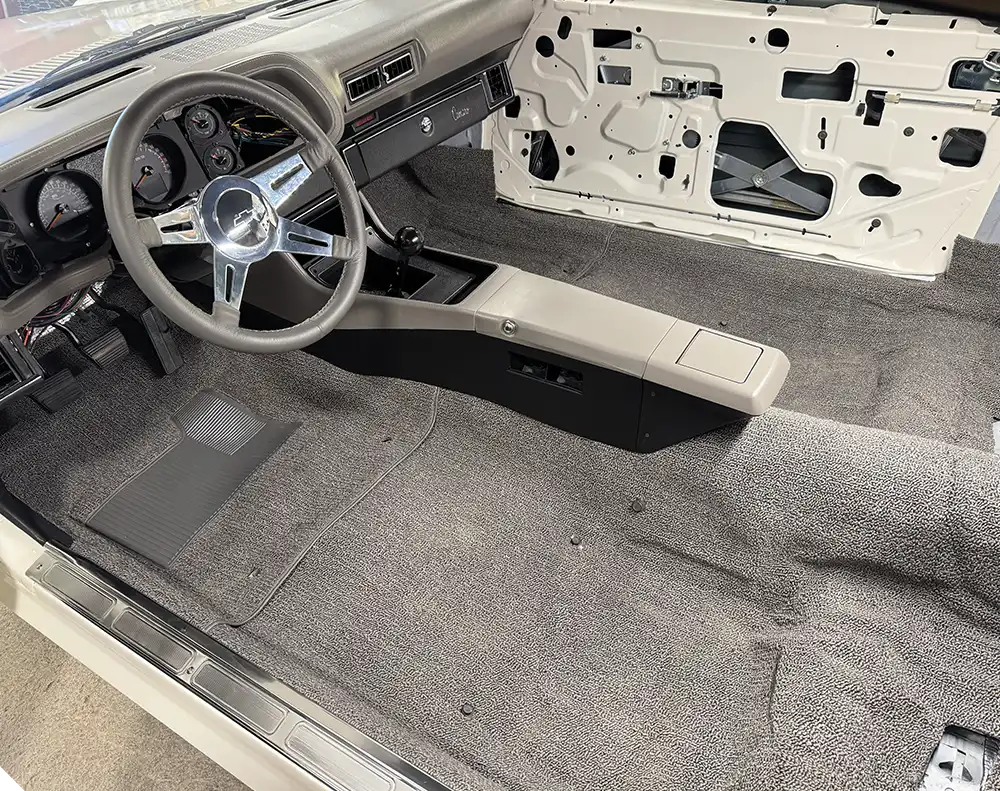
Wanting to give the interior a lift, away from your standard black carpeting, an OER, two-piece, pre-molded carpet set in gunmetal gray was chosen, along with a pair of stamped steel sill plate wiring harness carpet guards, stamped aluminum doorsill plates, reproduction rear seat trunk partition divider with jute padding, and rear seat shelf package tray.

As with the headliner, it’s important to take your time through these steps, especially when fitting the carpet sections. This will include cutting access holes for the center console mounts, rear seatbelt mounting holes, rear seat mounting brackets, and floor shift. If a particular area of the carpet needs additional finessing, a heat gun can be carefully used to help shape it back to the needed contour.

The completed installation is flawless, getting us closer to home plate with plenty of adrenalin moving as we venture into seating next time. Let’s follow along as we get a start on the interior!

A person secures sound-deadening material to the interior roof of a restored car before the new headliner is installed.
1. To prepare the inner roof panel for the new factory replacement headliner, Pat O’Brien of Procision Industries got started by installing a 20-piece headliner clip set from Classic Industries (PN K591). Be sure the clips have ample movement once installed, fore and aft, to allow for adjustment once the headliner bows are clipped in place.
A person measures the fabric panels for a car headliner using a yellow tape measure, aligning the measurement against a support rod.
2. The Premier Perforated Vinyl headliner from PUI, sourced from Classic Industries (PN F8321501), was laid out on a flat padded surface to relax any wrinkles to the material from shipping. O’Brien then measured to locate the center of each headliner bow pocket from the outer edges of each inboard and set a mark using a Sharpie.
A close-up of hands marking a reference line with a black permanent marker on the white stitching of the headliner fabric.
3. With the center of each headliner bow marked, match to the outside center of each bow pocket and mark 1-inch outward of the bow width on each end.
Hands use shears to trim excess fabric material near a stitched seam, cutting away a marked section.
4. Trim the excess from the end of each bow pocket. Note that the headliner is wider toward the rear of the material.
A person threads a thin metal support or "bow" rod into the stitched pocket of the new gray headliner material.
5. Follow by sliding each of the reproduction headliner bows from Classic Industries (PN GM351) into each of the bow pockets.
A close-up shows a person using a professional spray gun to apply adhesive to the headliner fabric laid out on a table.
6. To prepare for installation, the outer perimeter of the inner headliner material was given a spray coating of HH-66 Vinyl Cement. It was also sprayed on the inner front and rear headliner retainer strips as well as the sail panel areas.
A person uses their fingers to carefully press the edge of the new headliner into the retaining strip at the top of the windshield opening.
7. Starting at the front, begin the installation of the headliner by carefully snapping the headliner bow into each individual bow clip, moving from center outward on each.
A person uses a screwdriver to tuck the edge of the new headliner fabric into the retaining channel above the car's side window.
8. For ease of installation, O’Brien trimmed the bow pocket material from each row while proceeding using a standard screwdriver to help snap each bow into the clips.
Headliner material, already installed with bow rods, is temporarily pulled back to show the sound deadening material on the car's roof.
9. Here you can see the base of the headliner installation completed now that the bows have all been snapped into place.
A close-up shows hands using a screwdriver to tighten screws into the metal retaining channel for the headliner along the roof.
10. O’Brien then set the front headliner retaining strip (PN C95250) in place. Note there is a coating of previously applied HH-66 Vinyl Cement on the inner surface both front and rear.
A person uses a screwdriver to push and secure the front edge of the headliner into the retaining strip at the roofline.
11. Out back, follow by installing the rear reproduction stamped steel headliner retaining strip.
A person is securing a final piece of black vinyl trim or weatherstripping against the freshly installed headliner.
12. The excess headliner material was carefully trimmed on both the driver and passenger side.
A person uses heavy-duty clamps to secure the vinyl covering onto the top metal trim piece, preparing to install it.
13. To complete the job, a headliner installation tucking tool (PN A7672) was used both front and rear to gracefully stretch and tuck the headliner material into the retainer strips while moving from left to right while tucking. Note, that a coating of HH-66 Vinyl Cement was previously sprayed on the inner headliner surface on each end.
The new black headliner is successfully installed on the car's interior roof, featuring a single, centered dome light.
14. The freshly installed headliner looks awesome, accented by a new reproduction dome lamp set (PN R358).
A close-up of a person screwing a black trim piece into the car's body panel, which will later cover the interior structure.
15. To prepare for the carpet, a new set of reproduction stamped steel body sill plate wiring harness carpet guards from Classic Industries (PN K892990) were set in place on both the driver and passenger sides.
The new gray loop carpet is laid loosely over the sound-deadening material on the floor of the partially restored car interior.
16. To prepare for carpeting, the cabin was vacuumed clean followed by a wipe down with a damp cloth to remove any remaining dust. An OER two-piece molded carpet set in Gunmetal Gray from Classic Industries (PN K219035) was unboxed to relax to its form. Here is the rear section set in place.
A razor blade is used to carefully cut a small slit in the new gray loop carpet material to make an opening.
17. With the rear carpet section settled in place it was time to address fitment, starting with locating areas that needed to have access holes cut. Starting with cutting access for the center console mounts using a razor, O’Brien followed with locating the seatbelt mounting bolts, which were loosely installed prior to the carpet being laid in place.
A metal floor bracket is pushed through the new gray loop carpet to mark and create the necessary opening.
18. The console mounting bracket was then brought through the carpet opening.
Hands pull the gray loop carpet back slightly to reveal an existing metal floor bracket for a seat or seatbelt attachment.
19. Next, the rear seat mounting brackets (2) were located and trimmed using a razor blade.
A close-up shows a person trimming the excess material from the new gray carpet using a sharp razor blade.
20. The carpet set is extra wide at the sill plate area allowing it to be custom trimmed to suit the application.
A person installs a large, brown sound-deadening felt panel against the interior rear quarter panel of the car.
21. The REM Automotive reproduction rear seat trunk partition divider from Classic Industries (PN K15700) was then set in place.
A person lowers the newly upholstered rear package tray panel into the space behind the rear seats, below the back window.
22. O’Brien followed by sliding the OEM-style die-cut reproduction rear seat shelf package tray (PN F3821001) into place.
A person presses the new gray carpet into position around the complex wiring and pedals beneath the car dashboard.
23. The front carpet section was then set in place and adjusted for proper fitment.
The new gray carpet is trimmed to fit precisely around the car's exposed manual gear shifter assembly on the transmission tunnel.
24. To allow access for the shifter, the boot and handle were first removed to determine the size hole needed. A razor was used to cut the opening, allowing for perfect placement of the carpet.
A person uses a yellow heat gun to warm the new gray carpet, making it more flexible for shaping and proper fitting.
25. With any area requiring a little finessing to achieve the perfect form, a heat gun was used along with any needed relief cuts.
A close-up shows hands using a screwdriver to secure the long, polished metal door sill plate over the carpet edge.
26. The icing. O’Brien installed new OER stamped aluminum doorsill plates (PNs 9819034 and 9819033) from Classic Industries.
The car interior, now mostly complete, shows new gray carpet, a center console, steering wheel, and dashboard installed.
27. The completed carpet and headliner installation was completed with basic hand tools and looks amazing. Stay tuned for our next installment when the final interior hits the business office.
SOURCES