ACP department heading TECH
InTheGarageMedia.com
 Detroit Speed’s mini-tub kit (PN 040401DS)
Camaro Mini-Tubs
When a Little is Just Enough!
By Eric Geisert 
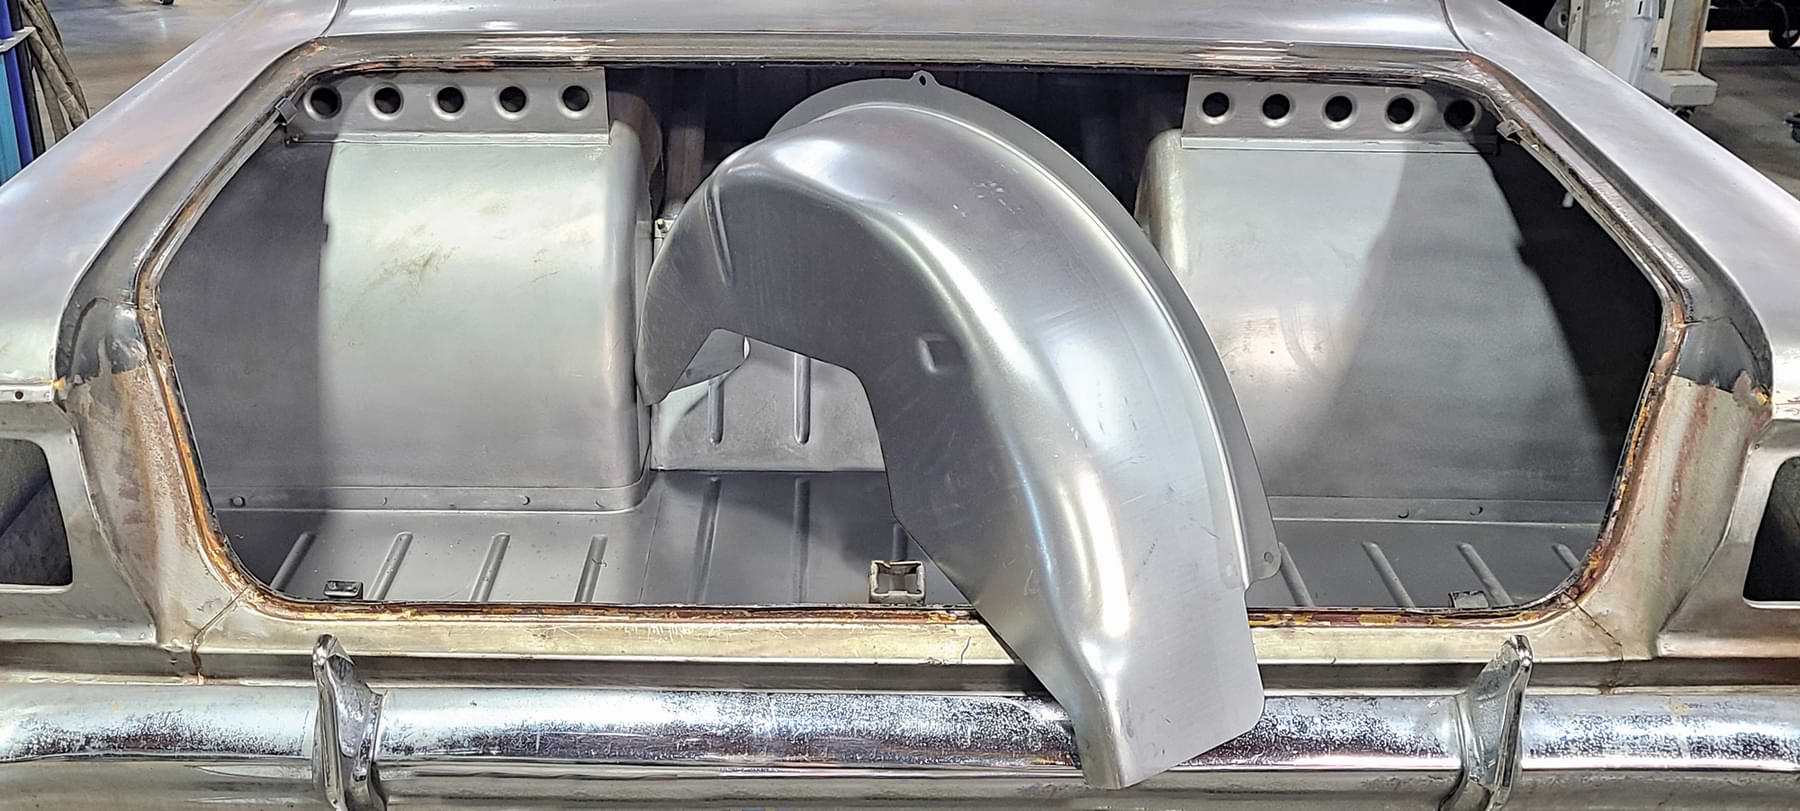
Photography by The Author
W

e’ve all seen the cars at the local cruise spots making a statement with the blowers sticking through the hoods and rear tires as wide as they are tall stuffed between the quarter-panels. But, if you think that look is overkill, there is another way to get performance from your ride without going overboard.

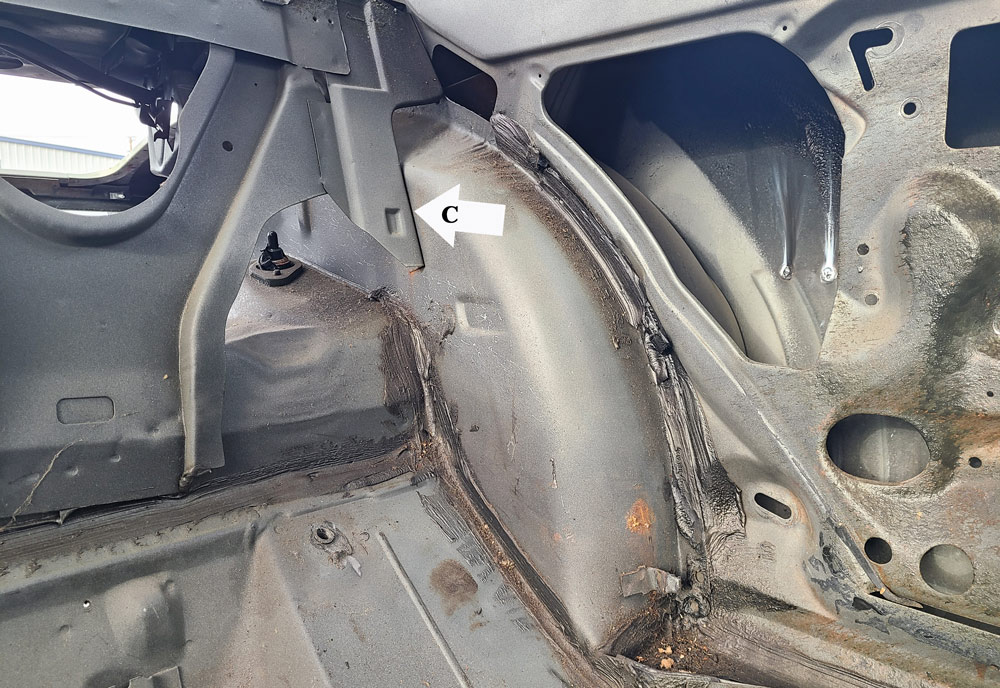
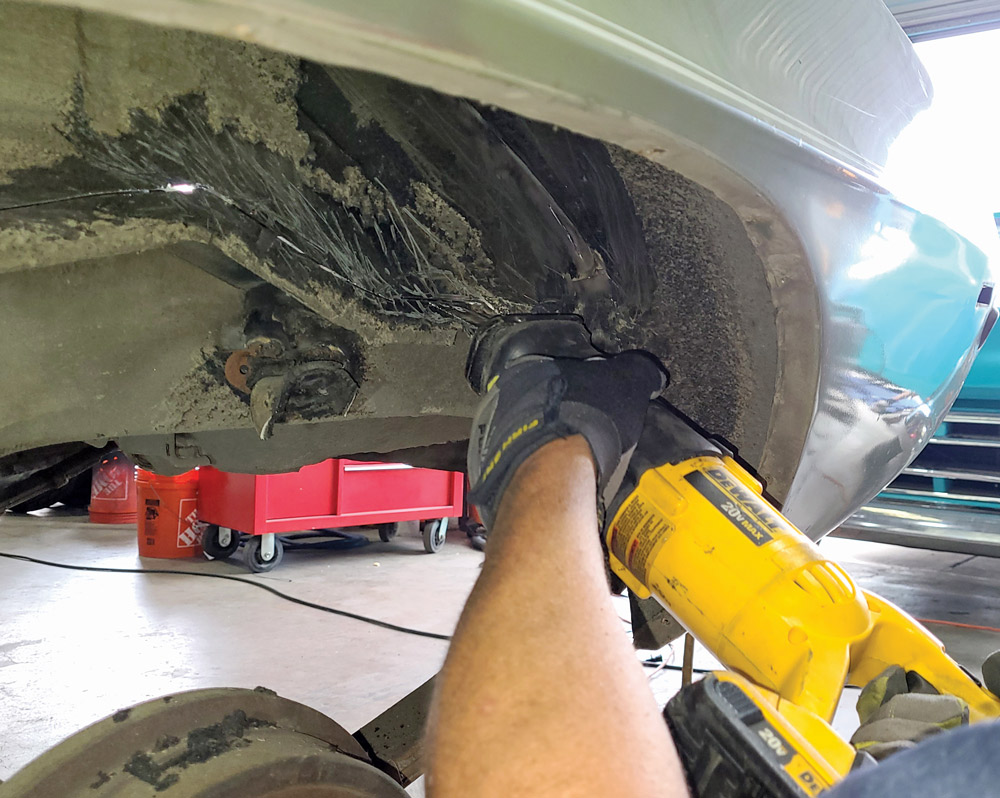
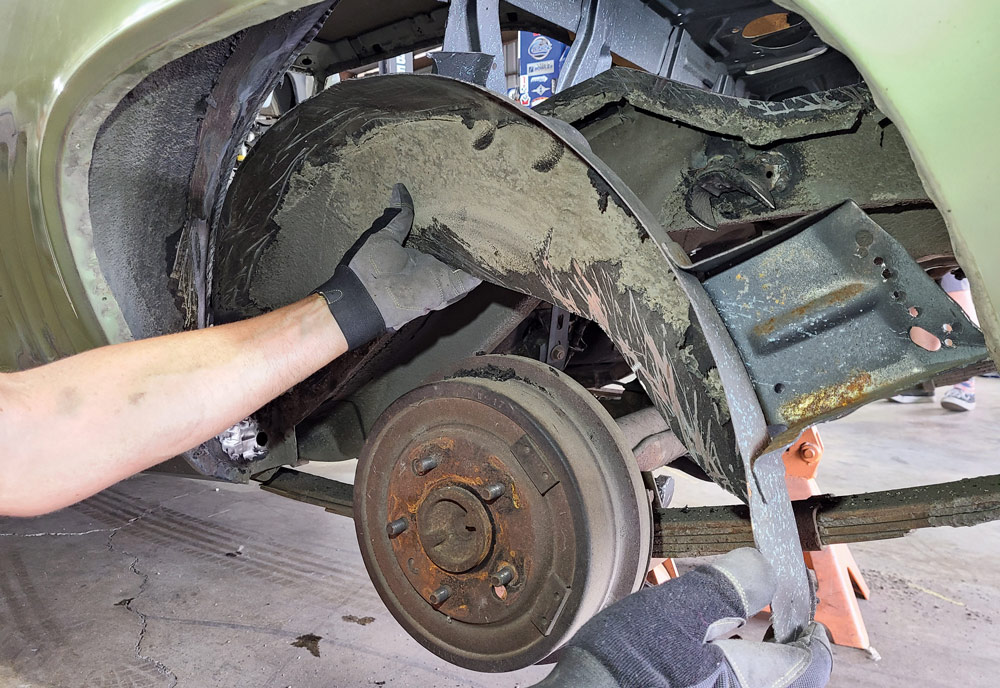
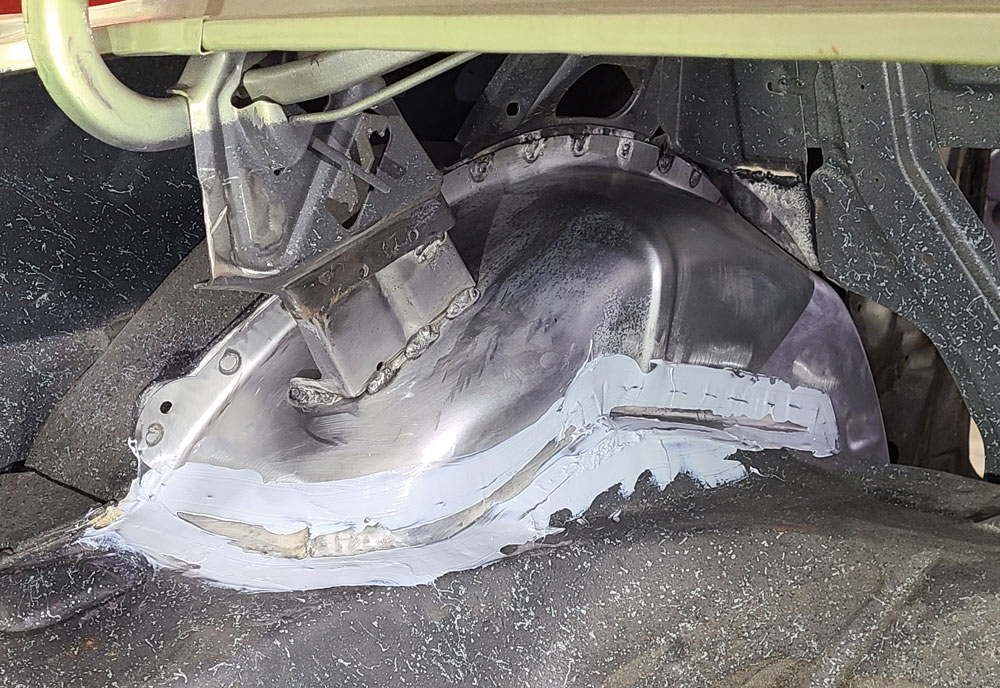
If you need up to a 12-inch tire out back but your ’69 Camaro still has its factory wheelwells for those extra-skinny ’60s-era tires, you’re in luck because installing a pair of mini-tubs will solve your problem. Detroit Speed manufactures several styles of mini-tubs for those owners who want to retain a near-stock appearance but add a little more tire out back.

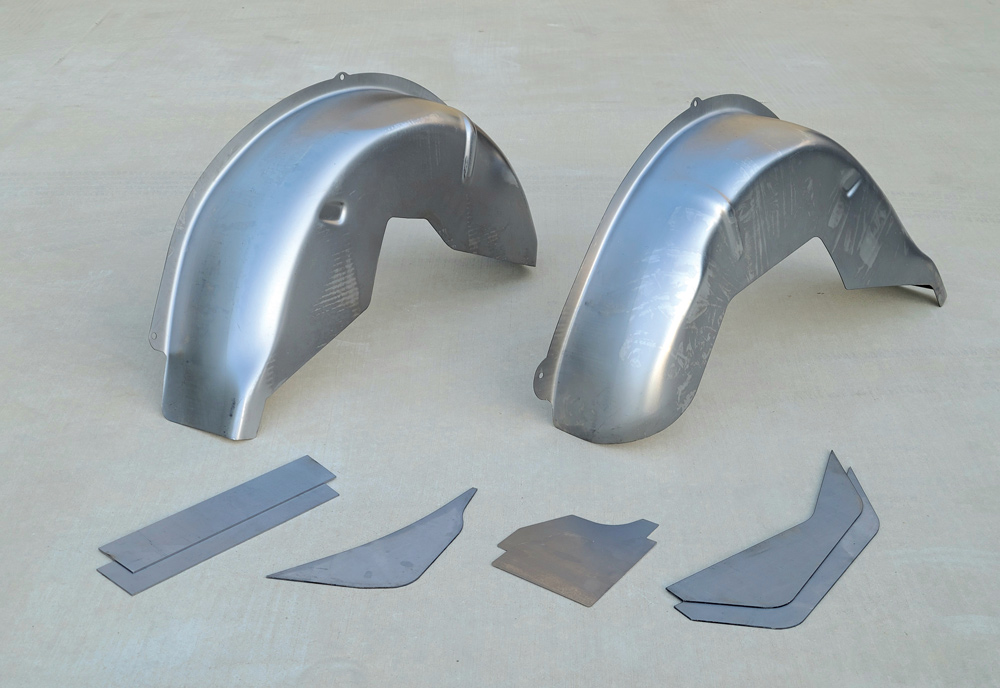
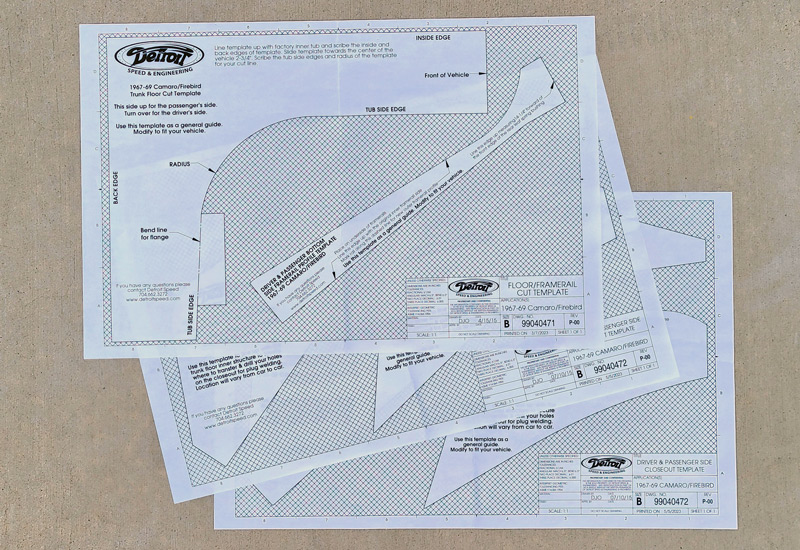
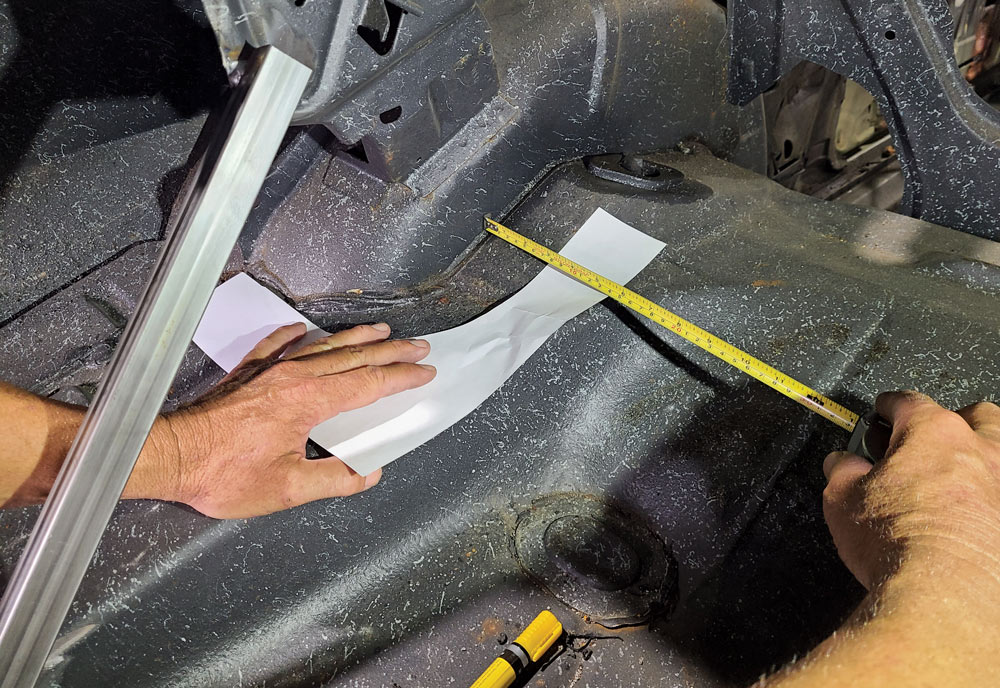
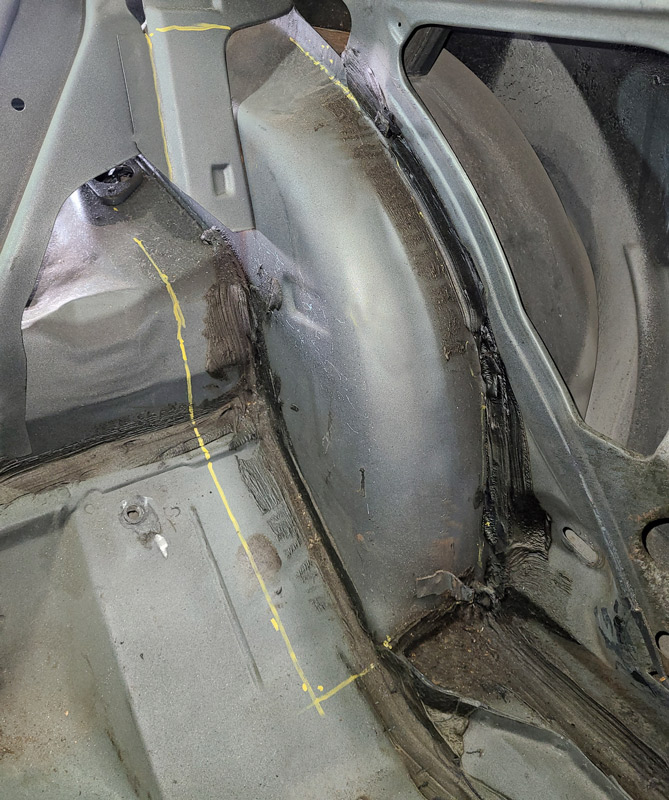
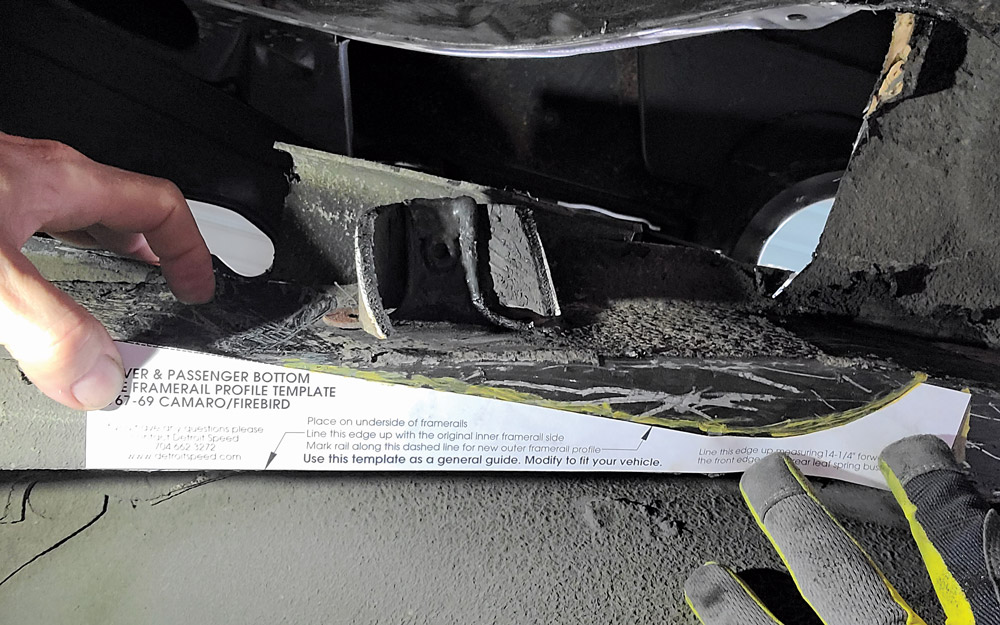
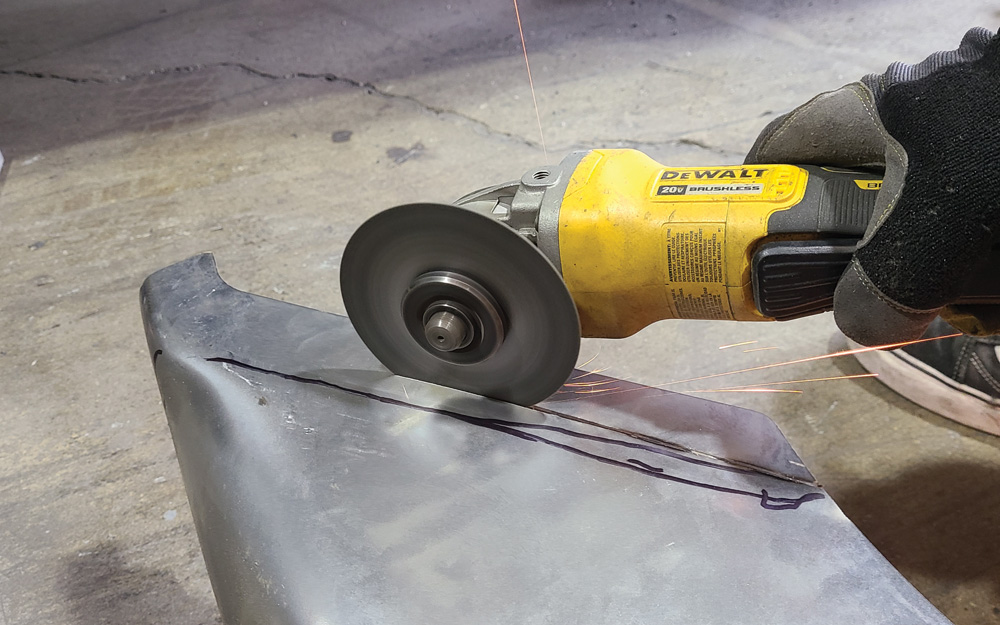
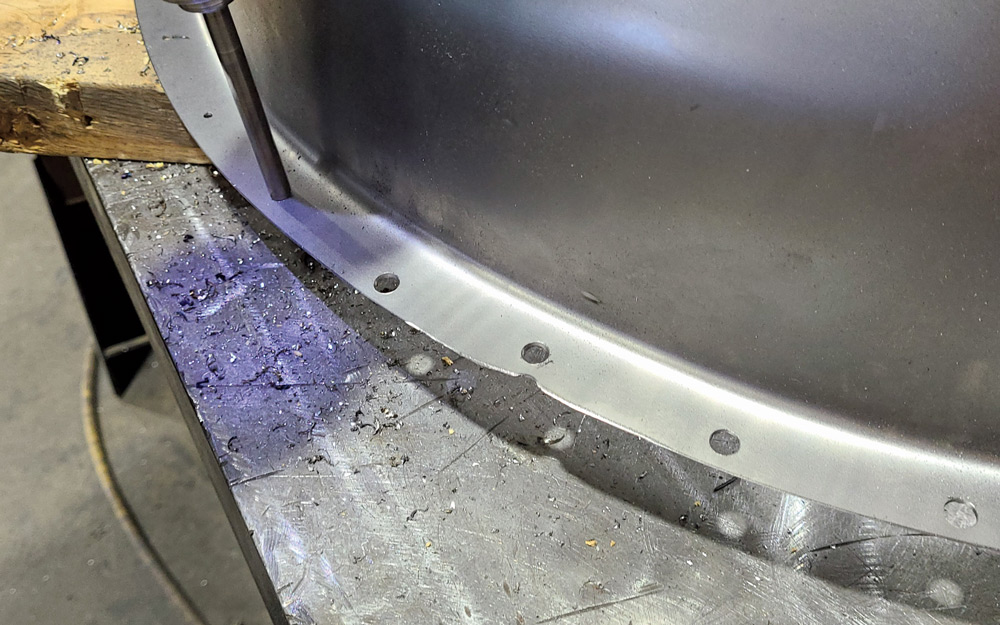
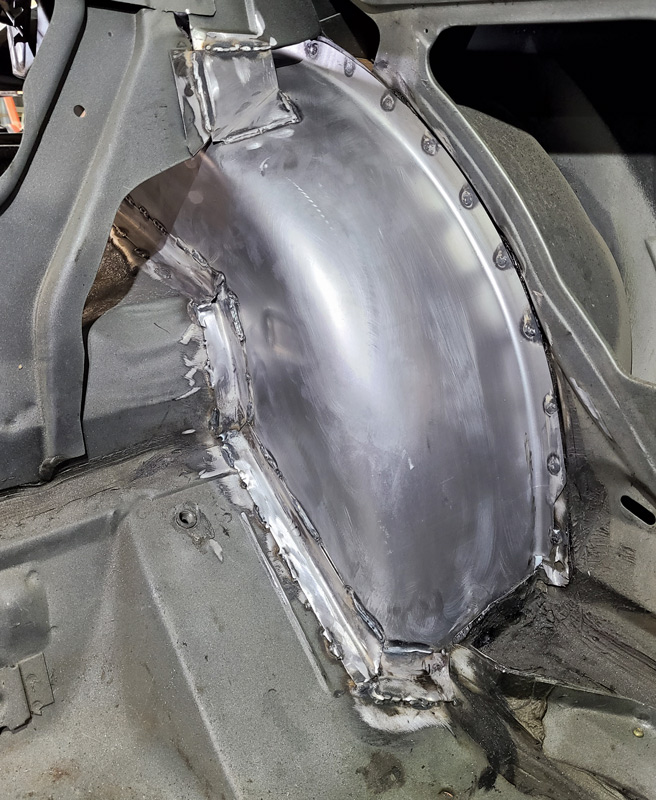
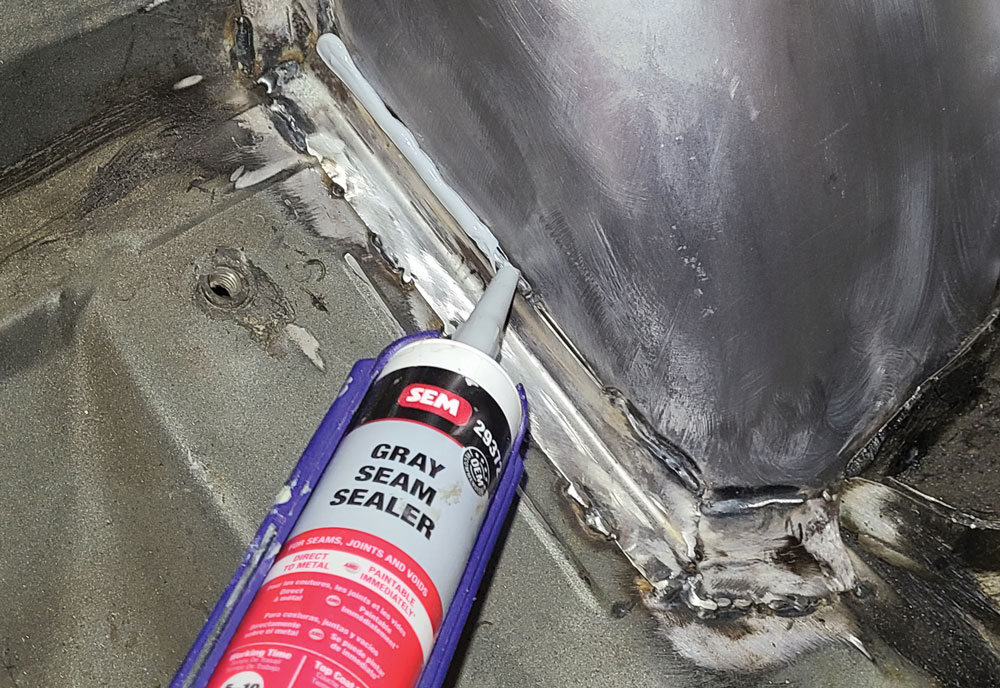
Made in the USA using 18-gauge steel, the kit Detroit Speed offers includes two stamped tubs that are 2.75 inches wider than stock, look like the factory wheeltubs, come with a set of steel fill plates, a set of paper templates to help lay out the cut lines, and a 23-page(!) instruction booklet to explain how to do the work (they also have an installation video on their website).

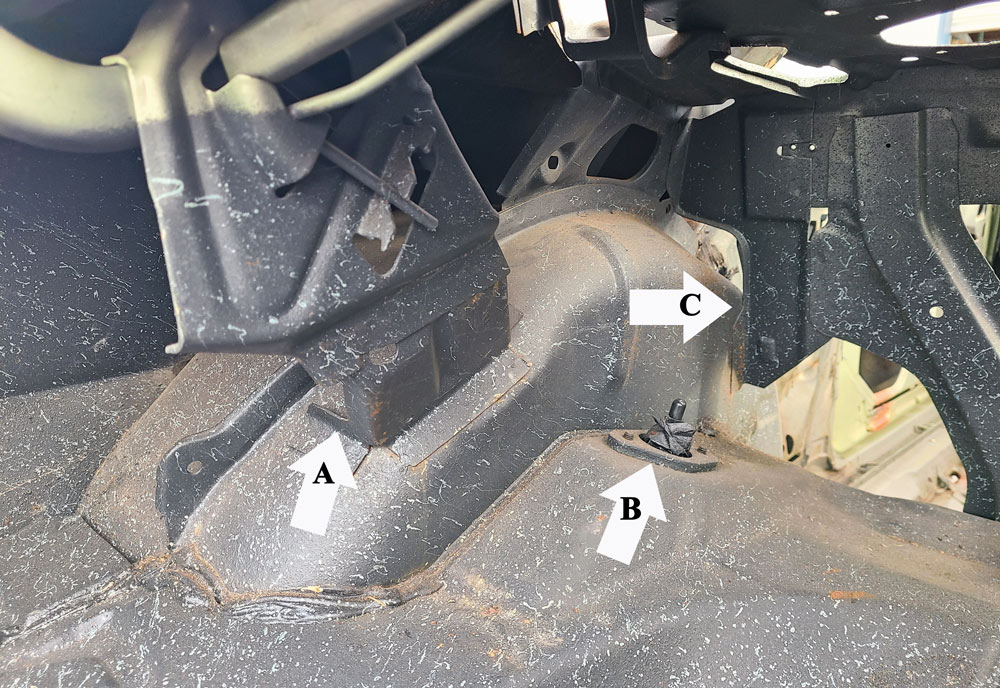
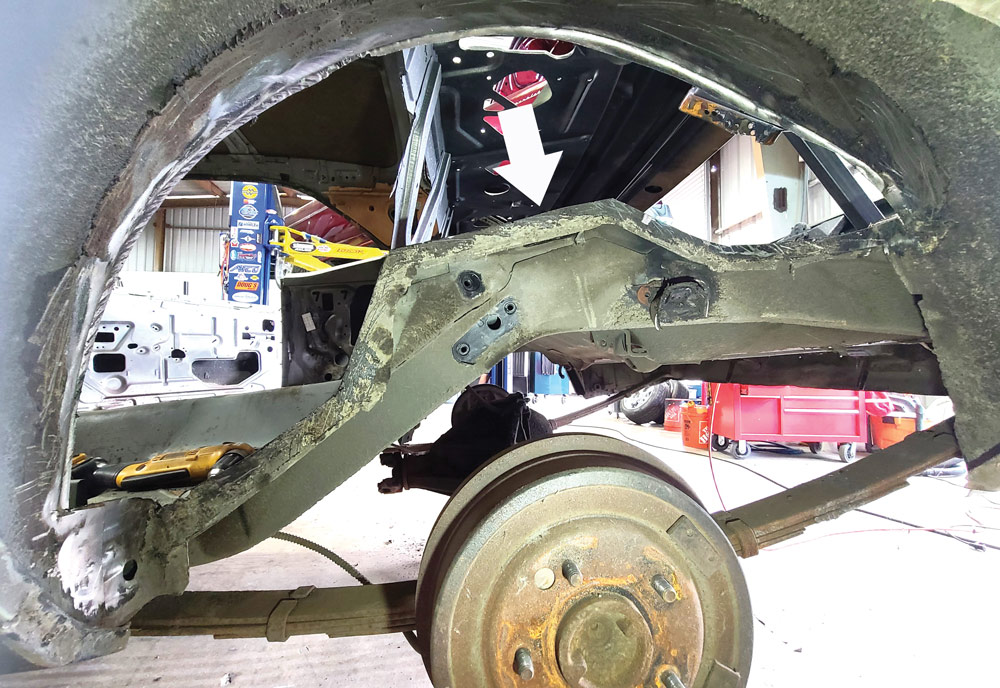
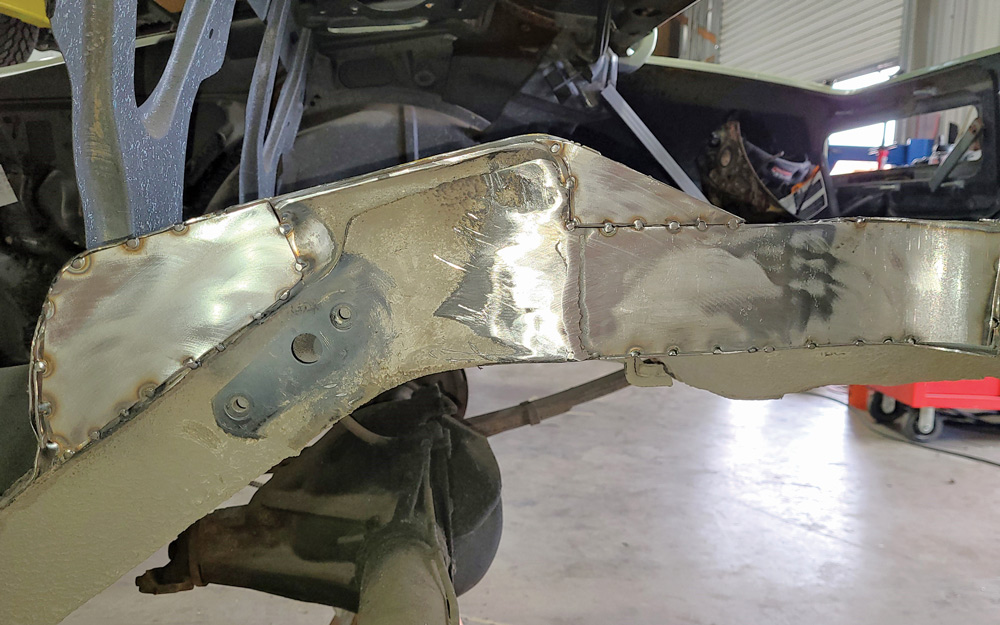
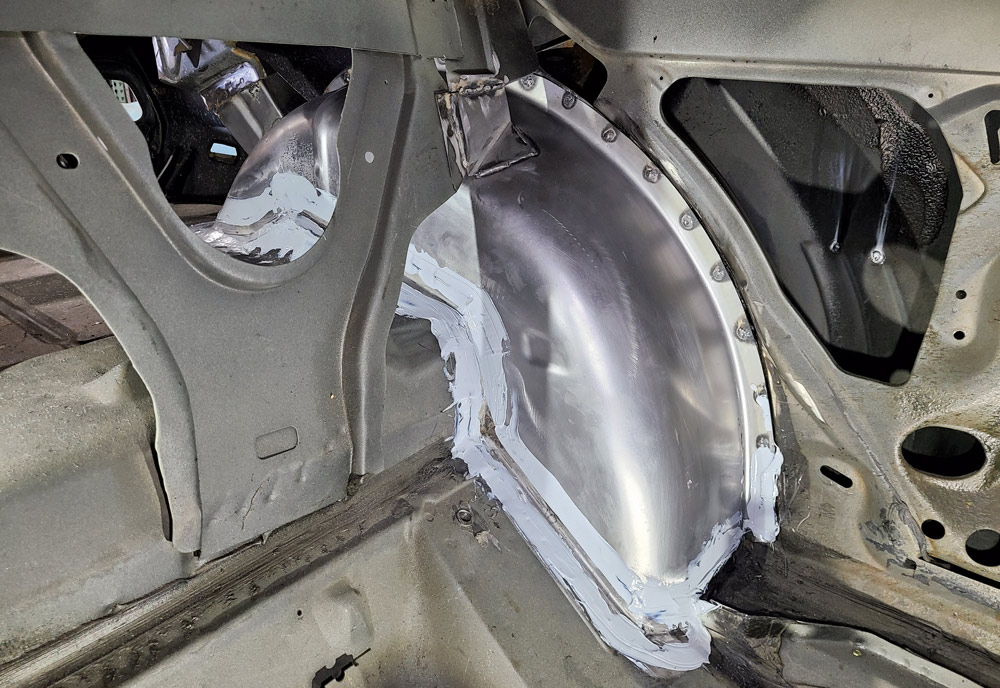
This installation of Detroit Speed’s tubs (PN 040401DS) is expressly made for ’67-69 Camaros and Firebirds (there are extra instructions included for convertibles and certain text that’s unique to the ’67 models), and this particular subject car is a well-preserved ’69 that has been with one family for decades before becoming the subject of a Roadster Shop frame-swap and build that will happen over the course of three days during the 2024 Grand National Roadster Show in Pomona, California.

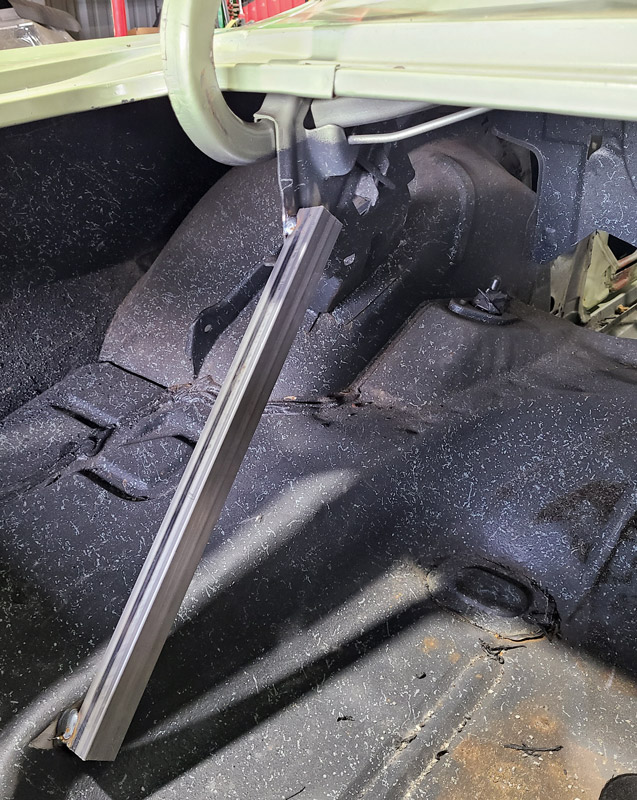
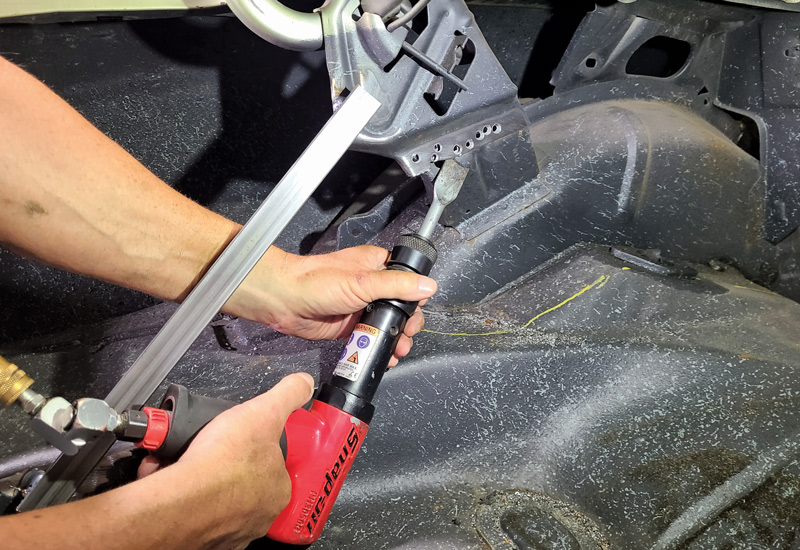
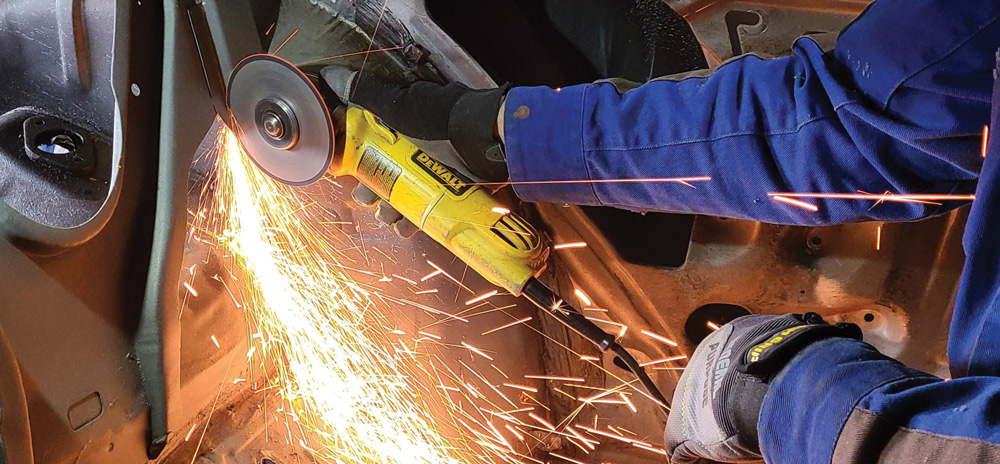
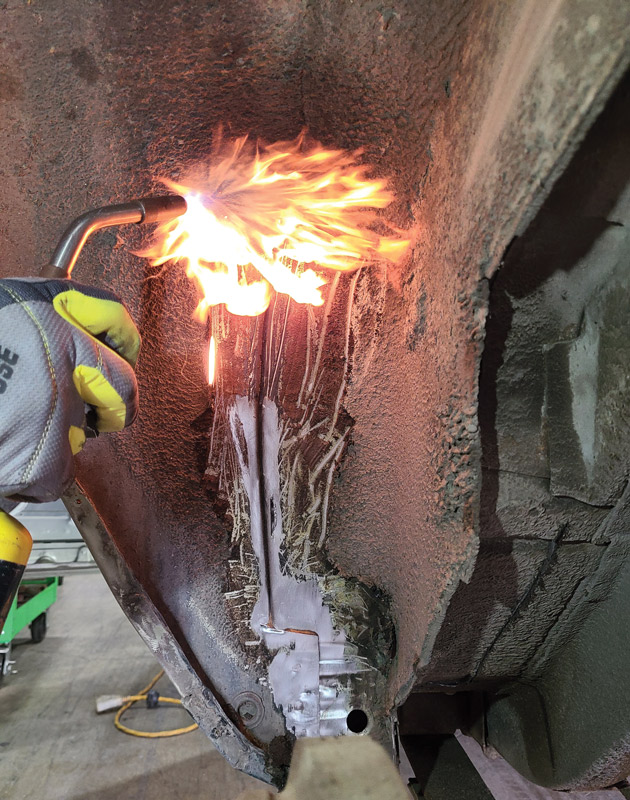
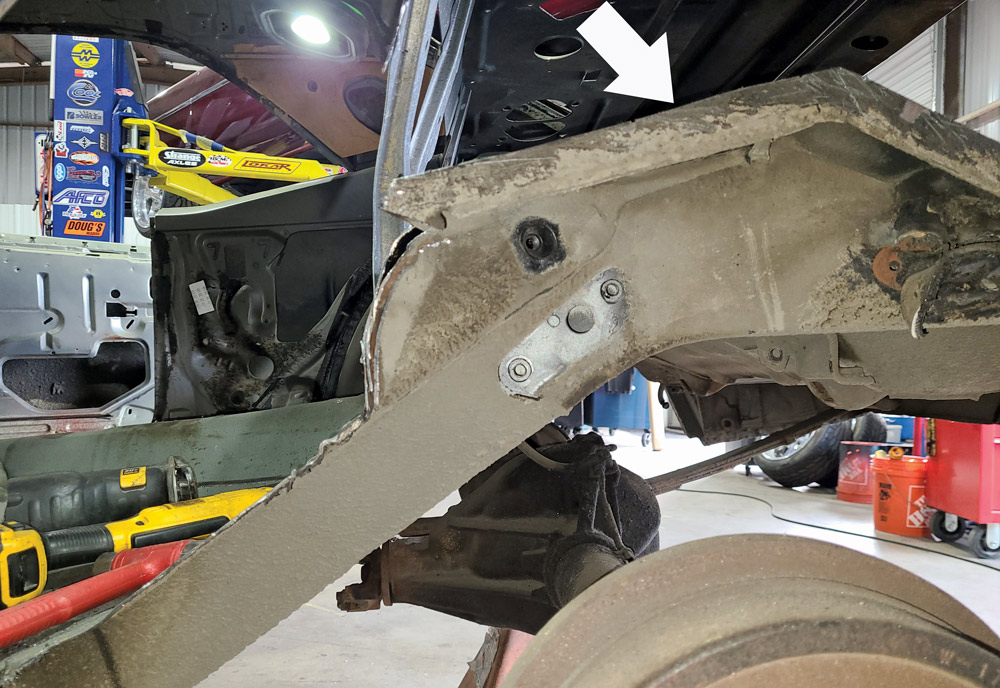
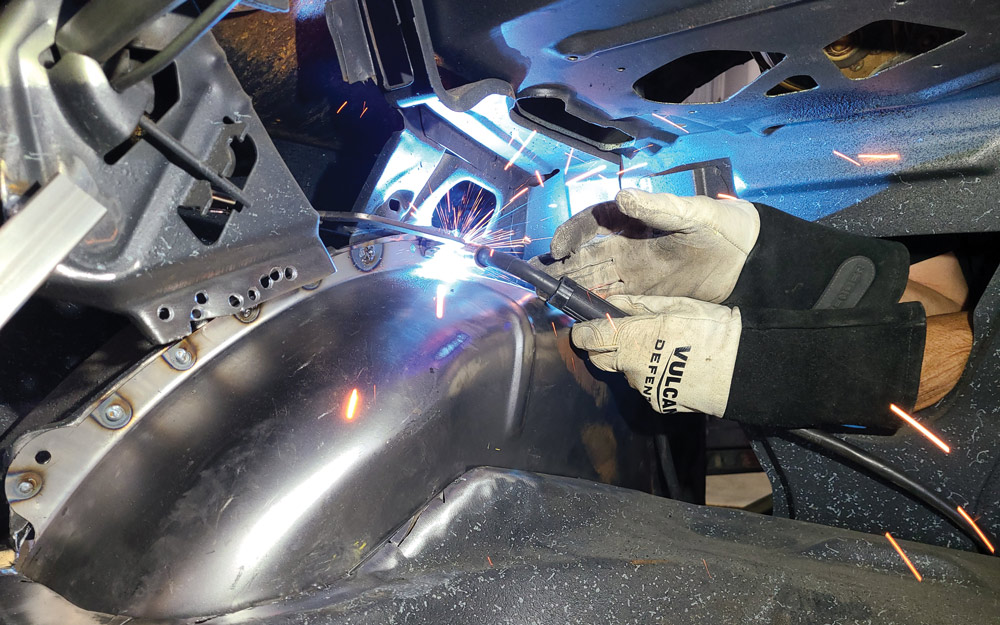
Performing that work will be a team from Orange County Hot Rods (Corona, California), which are the same folks who pre-prepped the body with these tubs to make the three-day swap schedule a little bit easier. Because the new tubs are wider than stock, you will also need to narrow the rear seat base and seatback, which is not covered in this story (this vehicle will get custom seating instead) but it is discussed in Detroit Speed’s instruction booklet.

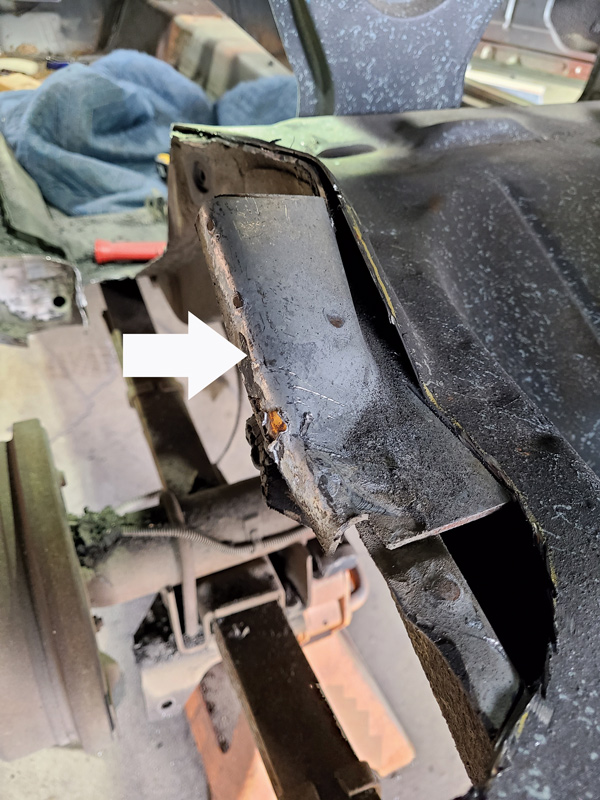
Since the body will sit on a new Roadster Shop chassis with integrated upper shock mounts, relocating the original stock mounts is not shown here, but it’s in the Detroit Speed booklet. It always seems every builder does the same job a little different from the next shop, so follow along to see how Orange County Hot Rods completed this installation.

Detroit Speed’s mini-tub kit (PN 040401DS) includes two factory-looking, stamped steel tubs and all the extra plates needed to fill areas that will be cut away.
1. Detroit Speed’s mini-tub kit (PN 040401DS) includes two factory-looking, stamped steel tubs and all the extra plates needed to fill areas that will be cut away.
Also included are the paper templates that, when cut out and laid inside the vehicle’s trunk area, will indicate where all the necessary cuts will need to be made.
2. Also included are the paper templates that, when cut out and laid inside the vehicle’s trunk area, will indicate where all the necessary cuts will need to be made.
The trunk side and the rear seat area of the factory wheeltubs show some of the items that will need to be removed or modified, including the trunk decklid hinge brace (A) and the decklid’s torsion springs (careful when removing as they’re under tension). The rear shocks (B) should be removed, and the rear seat brace (C) that runs between the two rear wheeltubs will also have to be cut/modified.
3-4. The trunk side and the rear seat area of the factory wheeltubs show some of the items that will need to be removed or modified, including the trunk decklid hinge brace (A) and the decklid’s torsion springs (careful when removing as they’re under tension). The rear shocks (B) should be removed, and the rear seat brace (C) that runs between the two rear wheeltubs will also have to be cut/modified.
The very first thing to do is tack-weld the decklid trunk hinge brace to the vehicle’s floor so its location will not move while everything else around it will.
5. The very first thing to do is tack-weld the decklid trunk hinge brace to the vehicle’s floor so its location will not move while everything else around it will.
One of the templates gets laid out to show just how wide the new tubs will be, and then marked and cut.
6. One of the templates gets laid out to show just how wide the new tubs will be, and then marked and cut.
 Cut lines on the floor section show the same 2.75 inches that will need to be removed on the seat-side of the tubs.
7. Cut lines on the floor section show the same 2.75 inches that will need to be removed on the seat-side of the tubs.
Orange County Hot Rods’ (OCHR) Aaron Hamusek starts the mods by drilling out the trunk brace’s factory spot welds with a ³/8-inch spot weld bit and then using a pneumatic chisel to separate the pieces.
8. Orange County Hot Rods’ (OCHR) Aaron Hamusek starts the mods by drilling out the trunk brace’s factory spot welds with a 3/8-inch spot weld bit and then using a pneumatic chisel to separate the pieces.
A cut-off wheel is used on much of the seat-side section to further the needed cuts (but not totally cut apart yet).
9. A cut-off wheel is used on much of the seat-side section to further the needed cuts (but not totally cut apart yet).
 Inside the wheelwell a BernzOmatic MPA/PRO propane torch is used to burn/cook the factory undercoating, which then becomes brittle and easily removed with a putty knife or wire wheel.
10. Inside the wheelwell a BernzOmatic MAP/PRO propane torch is used to burn/cook the factory undercoating, which then becomes brittle and easily removed with a putty knife or wire wheel.
Hamusek then runs a reciprocating saw about an inch above where the tub meets the trunk floor so a large portion of the factory tub can be removed.
11. Hamusek then runs a reciprocating saw about an inch above where the tub meets the trunk floor so a large portion of the factory tub can be removed.
Most of the factory wheelwell (with a portion of the old trunk brace still attached) can now be pulled free.
12. Most of the factory wheelwell (with a portion of the old trunk brace still attached) can now be pulled free.
What’s left is the small section (arrow) of where the old tub had been spot-welded to the trunk floor that OCHR will remove entirely.
13. What’s left is the small section (arrow) of where the old tub had been spot-welded to the trunk floor that OCHR will remove entirely.
The factory’s outer wheelwell’s lip flange (arrow) should not be cut/removed, but the remnants of the original tub’s tack welds need to be drilled out and chiseled away from it to provide a flat surface to weld on the new tub.
14. The factory’s outer wheelwell’s lip flange (arrow) should not be cut/removed, but the remnants of the original tub’s tack welds need to be drilled out and chiseled away from it to provide a flat surface to weld on the new tub.
 After removing the seat-side section of the floor, this view shows the area around the upper shock mount (arrow) that still needs to be removed.
15. After removing the seat-side section of the floor, this view shows the area around the upper shock mount (arrow) that still needs to be removed.
The view from the top of the same area shows what else still needs to be removed.
16. The view from the top of the same area shows what else still needs to be removed.
Viewed from underneath looking up, another supplied template gets laid out over the lower edge of the framerail that indicates exactly where the cut lines need to be marked.
17. Viewed from underneath looking up, another supplied template gets laid out over the lower edge of the framerail that indicates exactly where the cut lines need to be marked.
The yellow line is where the cut needs to be made along the lower section of the vehicle’s C-shaped framerail to match the shape of the corner of the new tub.
18. The yellow line is where the cut needs to be made along the lower section of the vehicle’s C-shaped framerail to match the shape of the corner of the new tub.
With the curved section removed, it will make the frame look like a scoop had been taken out of it.
19. With the curved section removed, it will make the frame look like a scoop had been taken out of it.
From above you can see how much of the framerail has been removed for the new tub to fit.<br />
20. From above you can see how much of the framerail has been removed for the new tub to fit.
This newly exposed framerail reinforcement section (arrow) above the trunk’s torsion spring mount holes will also be removed.
21. This newly exposed framerail reinforcement section (arrow) above the trunk’s torsion spring mount holes will also be removed.
With all the necessary sections removed, reassembly can now begin.
22. With all the necessary sections removed, reassembly can now begin.
Two of the provided plates can be tacked in place with the rear piece first needing to be shaped a bit to provide the needed curve. This rear piece is also a different shape from the one needed for the passenger side.
23. Two of the provided plates can be tacked in place with the rear piece first needing to be shaped a bit to provide the needed curve. This rear piece is also a different shape from the one needed for the passenger side.
After multiple test-fitments of the new tub, OCHR determined they could trim away some of the tub’s edge to provide a better fit.
24. After multiple test-fitments of the new tub, OCHR determined they could trim away some of the tub’s edge to provide a better fit.
A final test-fit is made before the tub gets fully tack-welded in place (just as the factory did it). Note the complete lower edge of the tub will not be welded to the frame to ensure no chance of creating a possible water pocket that might lead to a spot where rust could form.
25. A final test-fit is made before the tub gets fully tack-welded in place (just as the factory did it). Note the complete lower edge of the tub will not be welded to the frame to ensure no chance of creating a possible water pocket that might lead to a spot where rust could form.
Hamusek drills out the tub’s mounting surface where the new Rosette welds will be made.
26. Hamusek drills out the tub’s mounting surface where the new Rosette welds will be made.
The new tub’s lip is Rosette-welded to the original factory lip flange, and it’s not easily accessible.
27. The new tub’s lip is Rosette-welded to the original factory lip flange, and it’s not easily accessible.
With a new seat brace section added above and a custom-fabricated, 90-degree flange between the floor and the tub, the assembly is now looking more like a factory wheelwell.
28. With a new seat brace section added above and a custom-fabricated, 90-degree flange between the floor and the tub, the assembly is now looking more like a factory wheelwell.
SEM 29372 seam sealer is applied to both the inside floor-to-tub area as well as the long seam inside the fenderwell between the new and old sections.
29. SEM 29372 seam sealer is applied to both the inside floor-to-tub area as well as the long seam inside the fenderwell between the new and old sections.
Once the seam sealer is spread out evenly (and everything painted or undercoated) the new mini-tubs will have a factory appearance.
30-31. Once the seam sealer is spread out evenly (and everything painted or undercoated) the new mini-tubs will have a factory appearance.
SOURCES
Detroit Speed
(704) 662-3272
detroitspeed.com
Orange County Hot Rods
(714) 514-3887
orangecountyhotrods.com