

ACP department heading TECH
InTheGarageMedia.com
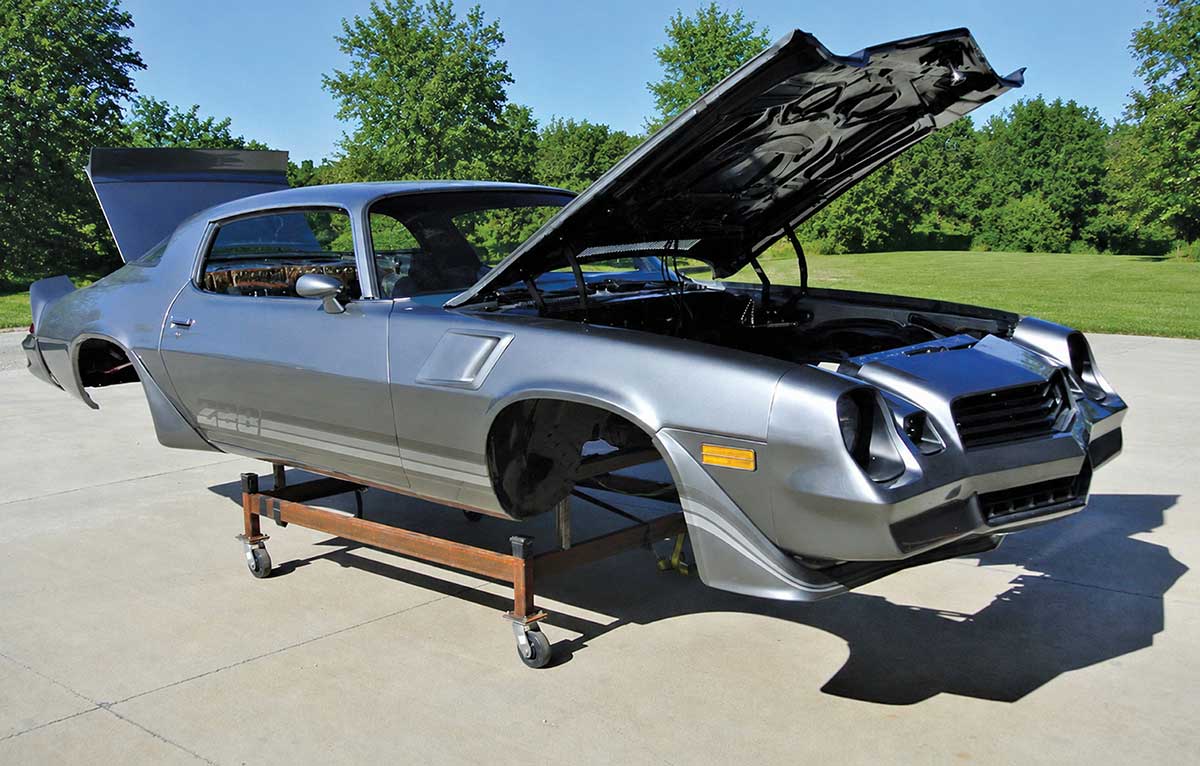
1981 Z28 Camaro body on a wheeled shop cart.
1. This project started with a very sound and straight 1981 Z28 Camaro. Since the body required very few modifications, most of the effort was concentrated on the chassis, drivetrain, and the beautifully sculpted engine compartment.
Sheet Metal Symphony
Custom Fabricating The Engine Bay On A 1981 Camaro
BY RON COVELL
T

he treatment of the engine compartment offers a perfect opportunity to showcase both craftsmanship and design, all in service of highlighting the engine—the beating heart of any serious project vehicle.

BBT Fabrications is well known for its superb metalworking skills, and this 1981 Z28 Camaro provided the perfect canvas for the crew to create a custom-fabricated engine bay. Starting with an exceptionally clean and solid car that required very little bodywork or repair, they fitted a Roadster Shop SPEC Series chassis and installed a 376ci LSA engine with a Harrop supercharger.

Retaining the factory underhood sheet metal simply wasn’t an option for a build of this caliber. The BBT team began by reworking and smoothing the firewall, then turned its attention to creating a series of elegantly sculpted panels to enclose the inner fender areas and cover the radiator support.

At first glance, the finished design appears deceptively simple, but as with so many high-end fabrication projects, the real artistry lies in the details. In the following photos, we’ll take a close look beneath the surface to reveal the craftsmanship and problem-solving that went into every panel and contour.

The inner fender panels were fabricated first, beginning with an upper section that followed the inner flanges of the fenders while gracefully spanning the distance between the firewall and radiator support. These panels had to be carefully notched to clear the Eddie Motorsports hood hinges. Once the upper section was shaped and fitted, a second panel was formed to fit directly below it. After extensive tweaking and refinement, the two sections were welded together and metal finished into a seamless unit.

The lower panel was then fabricated to extend downward to the framerail. This section required additional notches to clear the front suspension components, and once properly fitted, it was joined to the upper panels to create a rigid, unified structure. Every edge was flanged to add strength, maintain flatness, and provide secure mounting points, while also allowing most of the fasteners to remain hidden from view.

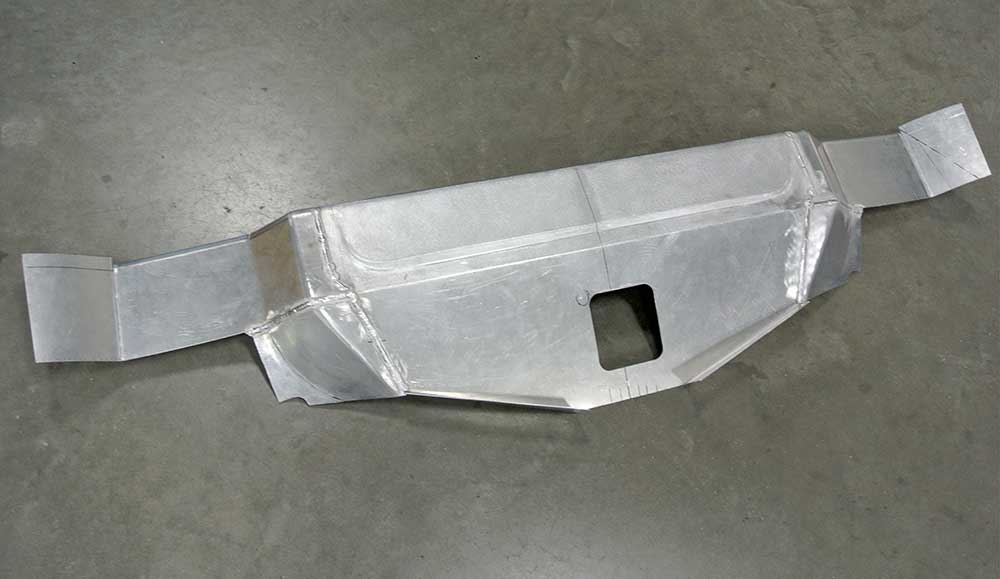
Arguably the most complex component to fabricate was the radiator cover, which required numerous transitions in both angle and contour. Piece by piece, the crew shaped and refined the assembly until it blended perfectly with the surrounding panels, creating a smooth and cohesive appearance throughout the engine compartment.

The accompanying photos clearly document each stage of the fabrication process, and we hope this exceptional design and craftsmanship provides inspiration for your own projects.
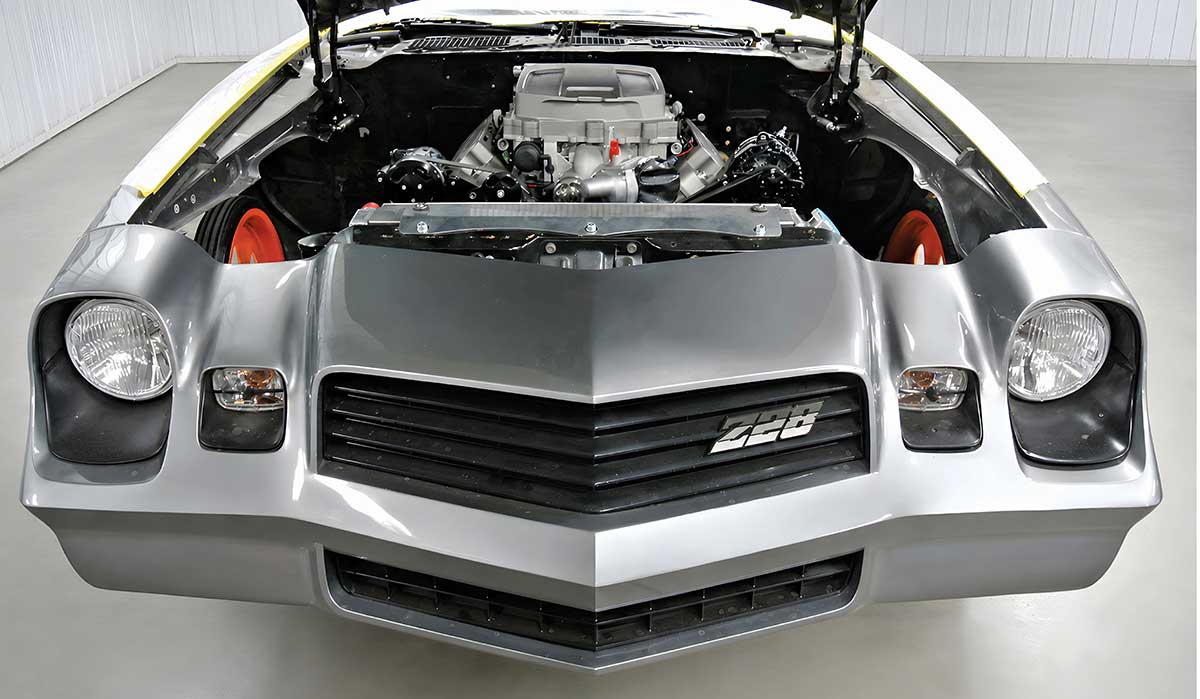
Front view of silver Camaro with custom engine bay.
2. After fitting a Roadster Shop SPEC Series chassis and a modern GM powerplant, the engine compartment was prepped for the extensive fabrication work to come.
Original factory firewall with multiple holes and contours.
3. The original firewall, with its myriad of holes and convoluted contours, had to go.
Center section of the firewall cut away for replacement.
4. The entire center section was cut away and replaced with a flat sheet metal panel. A brace of square tubing was used to keep the panel perfectly flat during installation.
Black filler panel fitted for bellhousing clearance.
5. A filler panel is being fitted to provide clearance for the bellhousing.
Flat sheet metal panel secured with magnets for welding.
6. After careful fitting, the panel is temporarily secured with magnets in preparation for tack welding.
Finished and smoothed new firewall after welding.
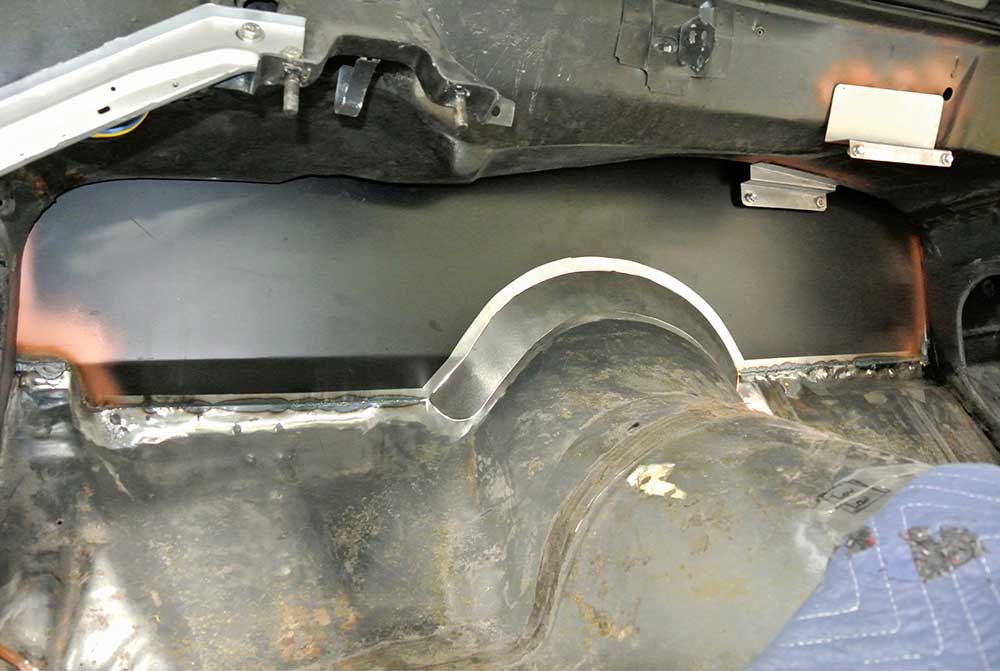
7. After welding and metal finishing, the new firewall looks dramatically cleaner and smoother.
Inner fender panels fitted to the fender edges.
8. The inner fender panels were fabricated from multiple sections. Here, the upper panels are being fitted where they meet the inner edges of the fenders, with relief notches to clear the hood hinges.
Shaping a metal panel to continue the fender contour.
9. The next section is being carefully shaped to continue the contour of the first panel.
Two metal sections welded and finished into one unit.
10. After extensive shaping and fitting, the first two sections were welded together and metal finished into a seamless assembly.
Pair of custom-shaped inner fender panels on the floor.
11. Another section is shaped and test-fitted here. The lower edge will fit tightly against the framerail, while the notches provide clearance for the front suspension components.
Panels held against the firewall with Clecos for trimming.
12. The panels are being fitted tightly against the firewall, held in place with Clecos for the final trimming before welding.
View of custom engine bay panels with precise fitment.
13. At this stage, every panel fit like a glove, with virtually no gaps anywhere.
Driver-side panel notched to clear brake master cylinder.
14. The driver-side panel was notched to clear the brake booster and master cylinder assembly.
Custom machined cover concealing the brake components.
15. A graceful machined cover was fabricated to conceal the brake components.
Flanged edges on a metal panel on a workbench.
16. All panel edges were flanged to provide rigidity, maintain flatness, and create sturdy mounting surfaces.
Fabrication of the custom radiator and core-support cover.
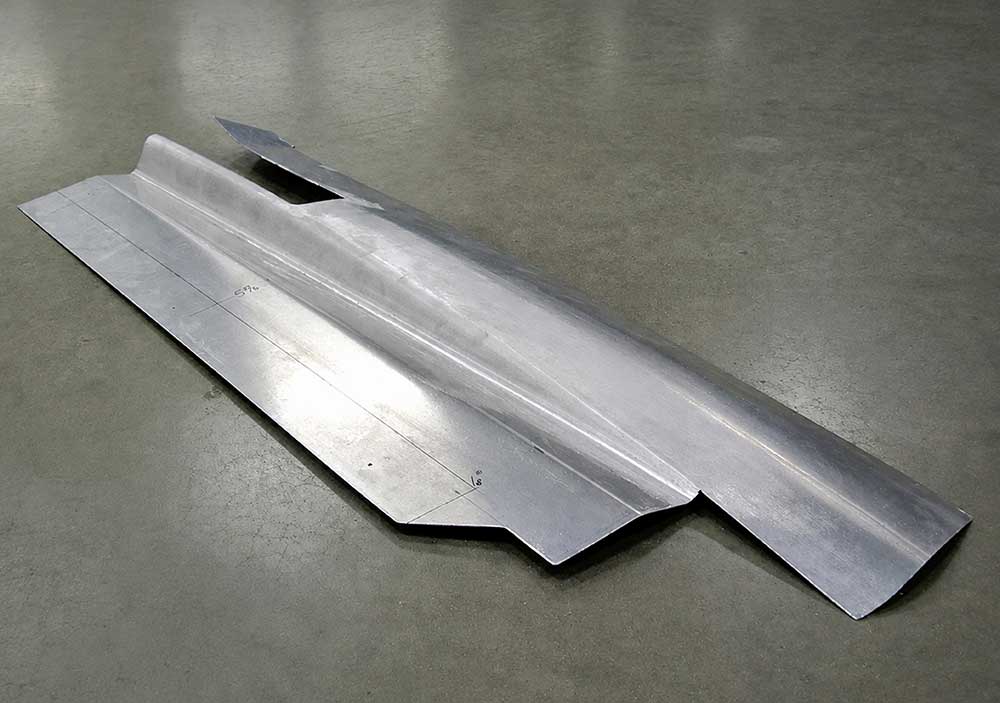
17. Fabrication begins on the custom radiator and core-support cover panel.
Stepped detail on top of the radiator cover panel.
18. A subtle stepped detail was formed into the top of the radiator cover to add strength and visual interest.
Radiator cover assembly with additional sections on floor.
19. Additional sections were added to the cover, extending outward to meet the inner fender panels.
Smoothing the joints on the custom radiator cover assembly.
20. Every joint was carefully massaged and metal finished for a smooth, uninterrupted appearance.
Radiator cover assembly on stands showing flowing contours.
21. More sections were added to the rear of the panel to maintain continuous flowing contours throughout the assembly.
Aligning the radiator cover with the inner fender panels.
22. Fine-tuning was required to make the radiator cover align perfectly with the shape of the inner fender panels.
Clean and smooth appearance of panels with concealed fasteners.
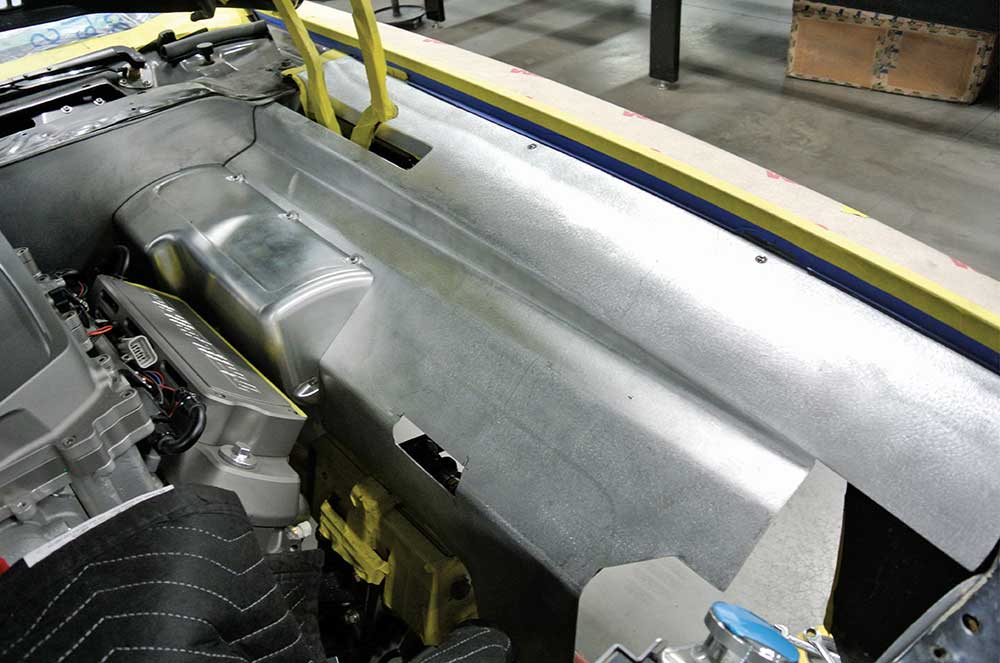
23. Great care was taken to conceal most of the fasteners, creating an exceptionally clean and smooth appearance.
View of the impeccable fitment from the back side.
24. From the back side, the impeccable fit and craftsmanship of the panels becomes even more apparent.
Recessed opening fabricated to house the radiator cap.
25. A recessed opening was fabricated to house the radiator cap.
Custom machined radiator cap installed in the recessed opening.
26. The custom-machined radiator cap fits in the recess perfectly.
Completed and self-supporting rigid underhood panel structure.
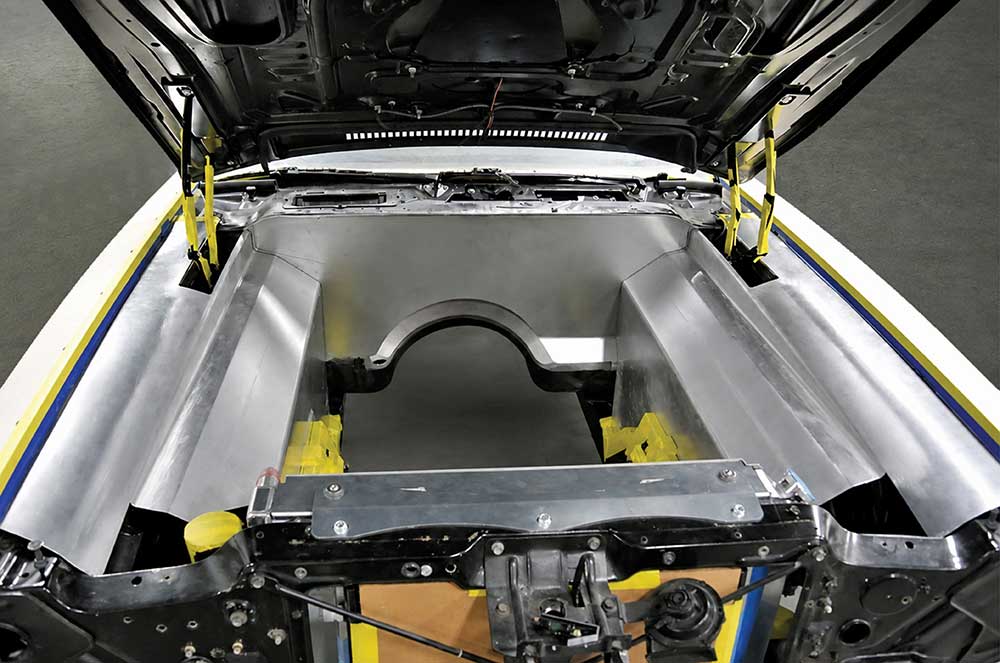
27. The completed underhood panels form a rigid structure that is fully self-supporting even when removed from the car.
Rear view of the completed and precisely fitted structure.
28. From the rear, you can see just how precisely all the panels fit together.
Climate control hoses passing through a flanged opening.
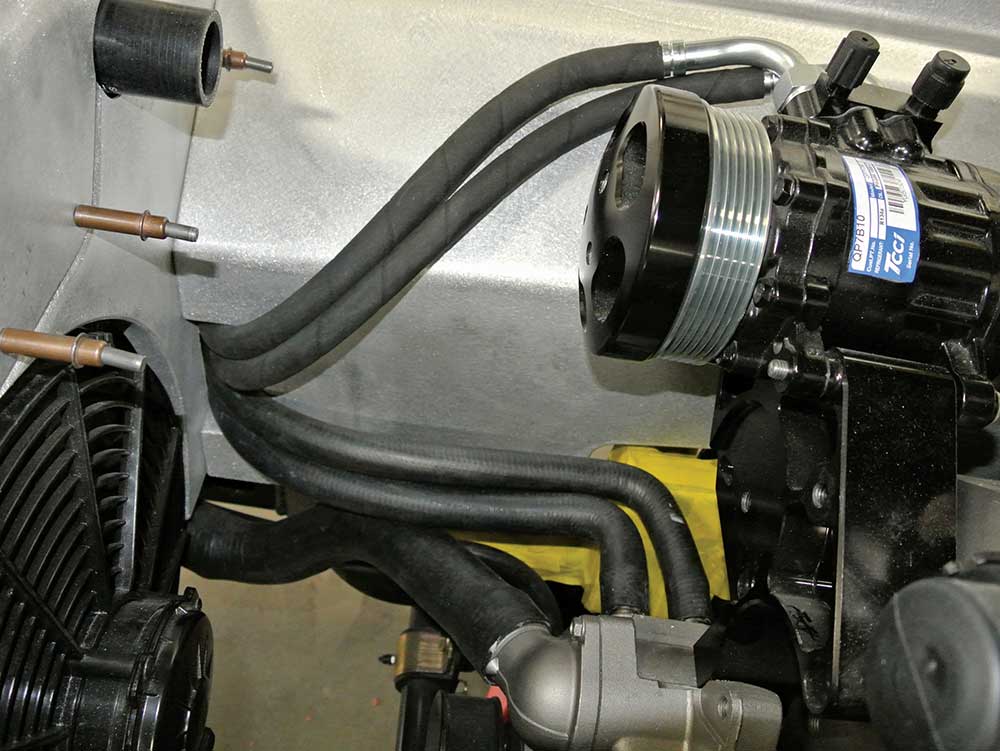
29. A flanged opening was incorporated to allow the climate-control hoses to pass neatly through the panels.
Pair of cooling fans mounted with tight clearances.
30. Both cooling fans are mounted here, highlighting the tight clearances and exceptionally clean installation.
Induction system inlet tube carefully fitted into the panel.
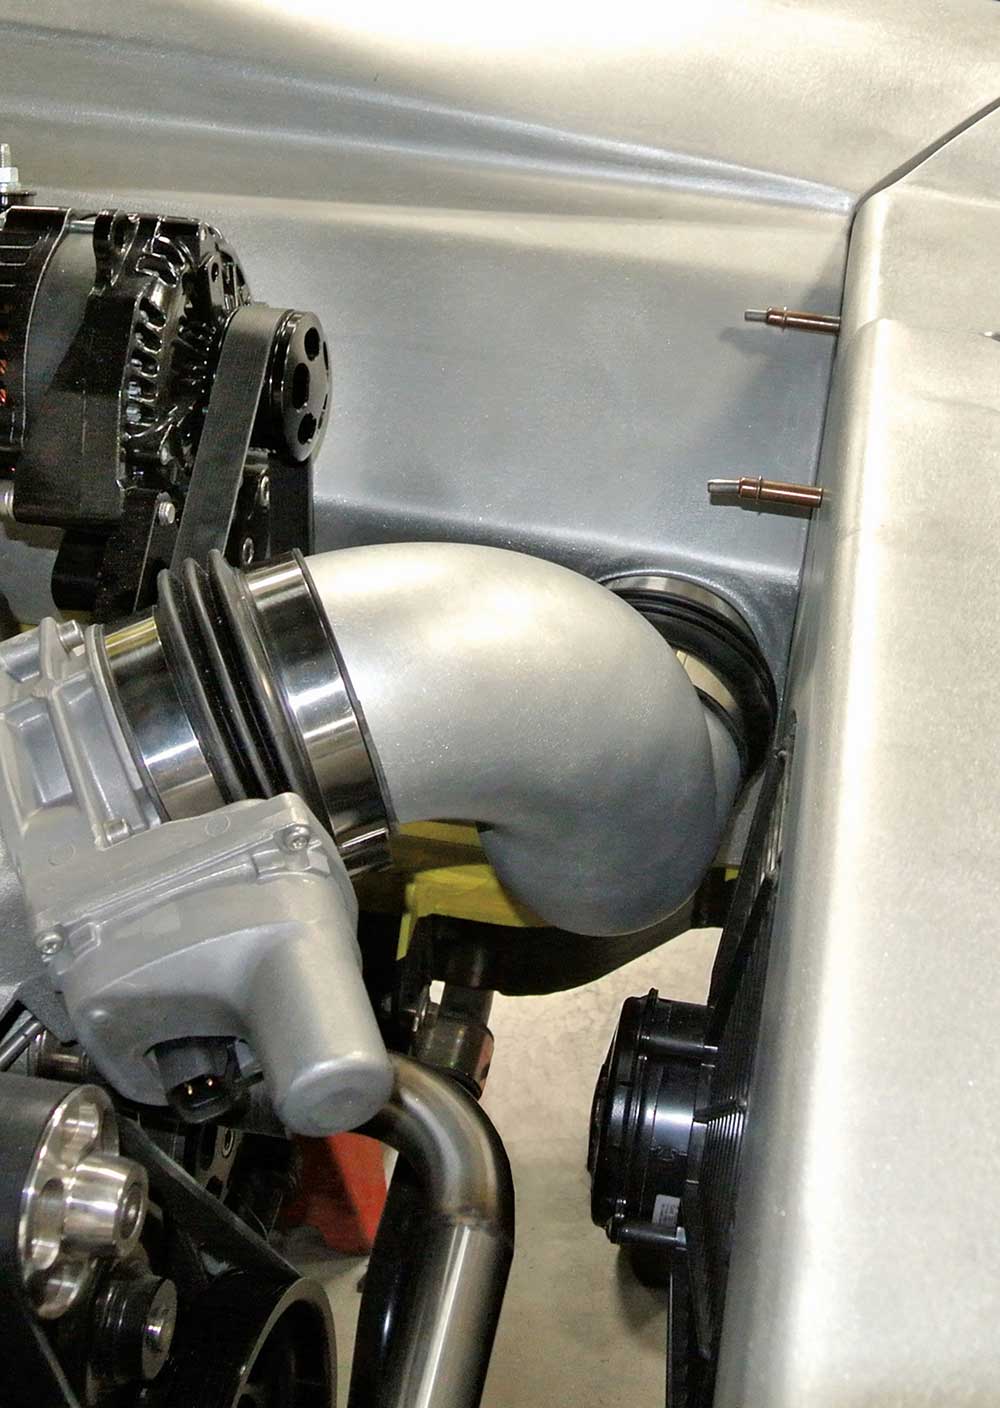
31. The inlet tube for the induction system required especially careful fitting.
Inlet tube fitting perfectly within the surrounding metal panels.
32. Despite the extremely tight clearances, the inlet tube fits perfectly within the surrounding panels.
Filler section added around the hood latch area.
33. A filler section was added around the hood latch area to complete the panel transitions.
Final assembled engine bay highlighting the smooth metalwork.
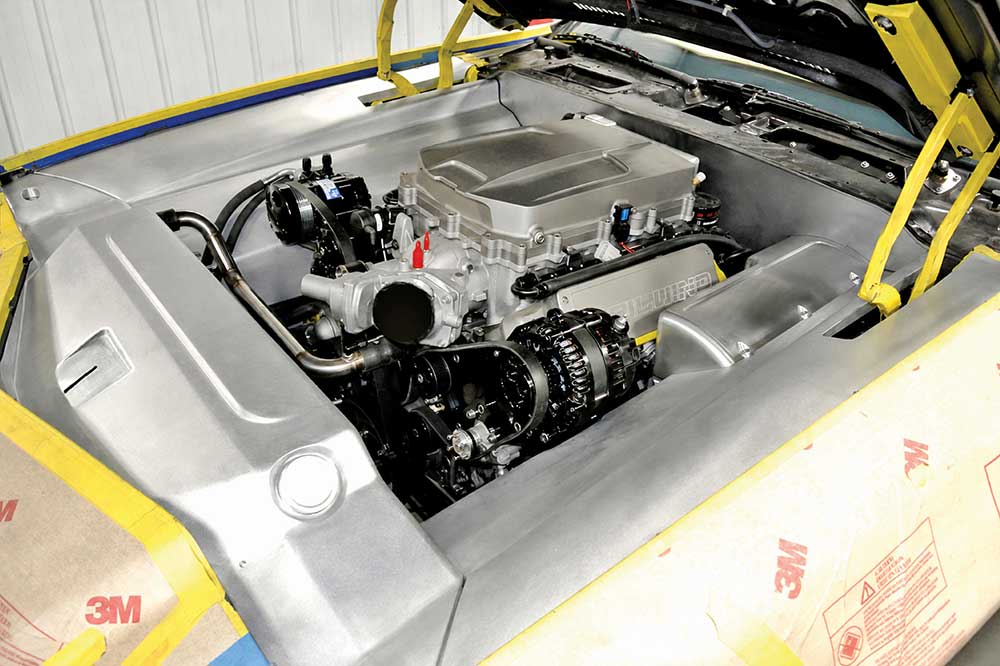
34. With all the pieces assembled, the focus naturally centers on the engine, showcased by the smooth, flowing metalwork surrounding it on every side.
In The Garage Media
BBT Fabrications

Eddie Motorsports logo

(909) 581-7398
eddiemotorsports.com
Roadster Shop logo

(847) 949-7637

roadstershop.com

Wilwood Disc Brakes

(805) 388-1188
wilwood.com