ACP department heading TECH
InTheGarageMedia.com
Digital rendering of a sleek black classic muscle car with gold wheels and yellow Cibie rally lights.
Making Room typography
1. This beautiful rendering by Chris Gray sets the tone of the build and clearly shows how the wheelwell flares need to be enlarged to accommodate the aggressive wheels and tires.
Flaring 1968 Camaro Fenders and Quarter-Panels
By Ron Covell
T

his is our second article on the 1968 Camaro being built at Roadster Shop.

Perhaps more than any other component on a car, the wheels and tires can really set the character of a build, especially for performance-oriented cars. It is not uncommon that the ideal wheel and tire combination will not fit inside the factory wheelwells. When serious modifications take place, careful attention is required to keep everything looking balanced and in proportion.

Mike O’Brien, the lead engineer at Roadster Shop, used scans of the body and chassis to experiment with various tire diameters and widths in order to achieve the desired look. They landed on 18×11 315/30R18 fronts and 18×12 335/30R18 rears, with BFG Rival S tires. The wheels were designed in-house by Chris Gray, and machined by Greening Auto Company in Cullman, Alabama.

The goal was to have very subtle wheel flares that resemble the shapes on the original car. To accomplish this, they bowed the rear quarters out roughly 3/4 inch to help minimize the size of the flare. They also experimented with different track widths on the front suspension to allow for an outer wheel lip that was proportionate to the rear. They wanted the car to sit relatively level, so when they integrated the IRS centersection, they tweaked the framerail profiles to adjust the ride height. Care was taken to balance all these factors to keep everything proportionate.

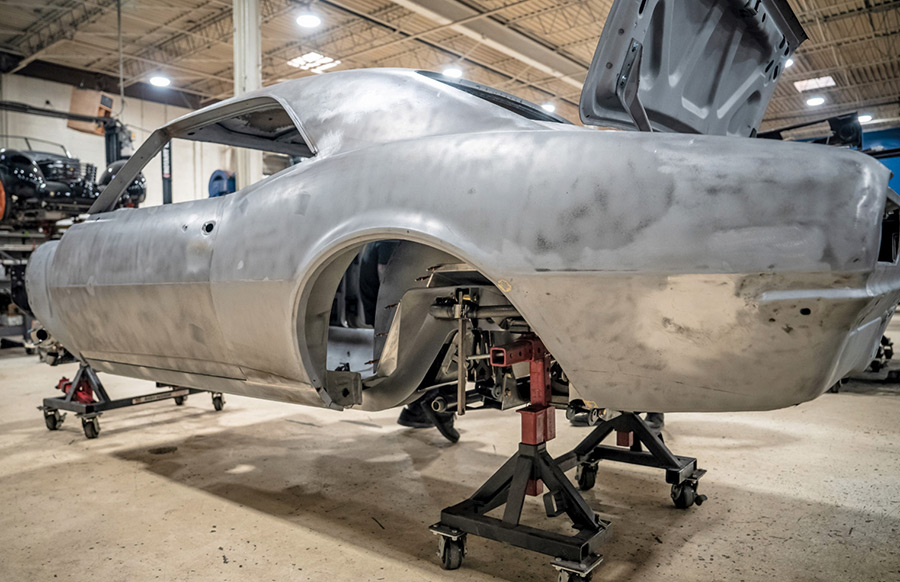
Cody Young did most of the metal fabrication on this project. Starting at the rear of the car, new quarter-panels were fitted, and the lips of the wheelwells were carefully cut away. The plan called for reusing them as the outer edge of the new flares.

The quarter-panels get pretty flexible with the original wheelwell lip cut away. They were fitted tightly against the body on the top, front, and rear edges but were pulled outward at the top of the wheelwell, effectively bulging the width of the quarter-panel about 3/4 inch. A band of metal about 4 inches tall was cut from the middle of the panels, centered on the horizontal bodyline. This cut allowed the upper and lower portions of the new quarter-panel to be flexed into position, preserving the continuity of the shape as the body was bulged out around the wheel.

Next, new panels were fitted to fill the horizontal cuts. These panels were bent in a brake at an angle that matched the horizontal bodyline, then were aligned and tack-welded to the quarters. Finally, the quarter-panels were fastened to the car with Clecos, holding them in position but allowing them to be removed when access was needed to the back side.

The lips from the reproduction wheelwells were re-contoured and held temporarily into place to check the fit against the tires. A lot of this work is done “by eye,” developing shapes that flow nicely into the original bodywork and have a look that is reminiscent of the original wheelwell flares.

With the wheelwell lips fastened temporarily in place, patterns were made for the new flares, which bridge the gap between the lips and the quarter-panels. New metal was cut from these patterns, carefully shaped, then fitted to the quarter-panel.

Once all the pieces were properly contoured, they were trimmed to provide a butted joint and tack welded together. After tacking, the joints were worked with a hammer and dolly to fine-tune the fit, then finish welded.

It was helpful to remove the new quarter-panels from the body at this point to provide unimpeded access to the back side as the panels were smoothed and metalfinished. Then the quarters were reinstalled on the body and checked for fit.

A piece of sheetmetal was folded into an angle and tack-welded into place to establish a consistent gap in the ’jamb area just behind the door. After the fitting and adjusting was perfected, all the welds on the quarter-panels were completed, and all of the joints were metal-finished.

With the front fenders assembled and metal-finished, the overall visual impact truly comes to life. It’s a perfect match for the car, and a testament to the outstanding craftsmanship of the team at Roadster Shop.

Digital blueprint of a car's frame, illustrating the mechanical layout including the engine block, axles, and floor pan.
2. The entire car was scanned and CAD was used to find the best wheel and tire combination that could fit the car. The chassis was also scanned, and lots of tweaks were made with the suspension height and width to get the best possible fit of the wheels and tires.
Automotive design rendering: top-down perspective of a classic coupe, highlighting the vehicle's body lines and internal components.
3. This is a high-angle view of the car with the new wheels and tires but with the original wheel flares.
High-angle digital rendering of a light blue classic muscle car with custom fender flares, showcasing body modifications.
4. Here’s a high-angle view with the modified flares.
Rear view of a light blue classic muscle car with custom wide tires and an exposed exhaust system, rendered digitally.
5. This is a rear three-quarter view with the original wheel flares.
Rear view of a light blue classic muscle car with custom wide fender flares and visible exhaust, rendered digitally.
6. This view shows the modified flares. The goal is to accommodate the massive wheels and tires while allowing full suspension movement but to keep the flavor of the original flares.
Automotive fabrication work in progress: a worker cutting metal from a car's wheel arch, indicating preparation for new, larger wheels.
7. The inner wheelwells need to be removed to get the new wheels in place.
Classic car body stripped to bare metal, mounted on stands in a workshop, ready for extensive custom modifications and paintwork.
8. The body has been stripped to bare metal, providing a “blank canvas” for the extensive modifications to come.
Bare metal classic car body on jack stands, showing wheelwell openings precisely trimmed to fit new large tires for a custom ride height.
9. Here the wheelwell openings have been trimmed just enough to squeeze in the tires at normal ride height.
Close-up of a car restoration project, with fresh metal quarter panels being aligned, which will be bulged out to create a wider fender.
10. Reproduction quarter-panels are being fitted here. These will be bulged out as the work progresses.
Custom car body in bare metal, showing new metal pieces being fitted to create bulged fender flares and an enlarged wheel opening.
11. New pieces of metal are being fitted here, with a slight peak formed along the centerline, as part of the bulging process. The wheel opening in the quarter-panel has been enlarged considerably.
Custom car body showing a reshaped wheelwell lip temporarily held in place with clecos for fitment check during metal fabrication.
12. The lip for the wheelwell opening has been reshaped and is held temporarily in place to check the look and fit.
Automotive metal fabrication: A classic car's rear quarter panel showing the shaped widebody fender flare attached with temporary fasteners.
13. The outer portion of the wheelwell flare has been formed here and is held with Clecos as the fit is finalized.
Close-up of a classic car body showing new fender flares held by clecos, with bodylines being checked for continuity before welding.
14. All of the bodylines are checked for continuity before the new flares are welded into place.
Automotive metalworker welding a car's fender flare, carefully hammering the joint to prevent distortion during the fabrication process.
15. The overlapped joint is trimmed to create a butt joint then carefully welded. The weld is hammered periodically to correct any distortion.
Close-up of a car's custom quarter-panel with fresh welds from a new fender flare, removed from the vehicle for final welding and smoothing.
16. The quarter-panel is removed from the car to complete the welding and smoothing.
Side view of a vintage coupe undergoing modification, showing a newly installed, metal-finished rear quarter panel with an expanded wheel arch.
17. With the welded joints metal-finished, the quarter-panel is test-fitted back on the car.
Automotive technician fitting a custom-formed sheetmetal angle into a car's door jamb to ensure true door gaps during restoration.
18. A custom-formed sheetmetal angle is being fitted into place, which will true-up the door gaps.
Automotive metalworker in a skull-flame welding helmet butt-welding a newly formed edge to a car's doorjamb, creating bright sparks.
19. The newly formed edge is butt-welded to the doorjamb.
Automotive metalworker grinding the top joint of a newly welded quarter panel on a classic car, achieving a smooth metal finish.
20. The top joint of the new-quarter panel is welded and metal-finished.
Close-up of a custom car build, highlighting the smooth, prepared surface of the quarter panel and wheel arch, ready for paint.
21. The final smoothing on the quarter-panel is completed.
Automotive technician test-fitting a modified inner wheel arch lip against a front wheel on a bare metal classic car, for custom clearance.
22. The front wheel arches are modified in a similar manner. Here the inner lip is being test-fitted against the wheel.
Custom car front fender showing a shaped and tack-welded filler panel around the wheel arch, with clecos holding the position.
23. Once the lip has been positioned, the filler panels are shaped and tack welded into place.
Automotive metalworker making small adjustments to sheetmetal pieces on a car's fender, meticulously fitting them for custom fabrication.
24. Many small adjustments are required as the sheetmetal pieces are meticulously fitted together.
Bare metal classic car with newly fitted front fender flares and custom wheels, nearing completion of body modifications in a workshop.
25. The fitting of the front flare is nearly finalized.
"Close-up of a skilled technician meticulously welding a widebody fender flare onto a bare metal vintage car body.
26. The new flare is carefully butt-welded into place.
Bare metal car fender with completed welds around a custom widebody flare, ready for metal finishing in an automotive shop.
27. After the welding is completed, the fender is ready to be metal-finished.
A vintage coupe showcasing its newly completed, seamlessly integrated widebody fenders and performance wheels with an exposed engine.
28. With the final smoothing completed, you can appreciate how perfectly the new flares complement the wheels.
SOURCES