

ACP department heading TECH
InTheGarageMedia.com
Technician Mark Denlinger working on the LS3 engine.
Dressed For Success!
Turning A Pedestrian-Looking LS Into A Vintage-Styled Small-Block
BY SCOTTY LACHENAUER IMAGES BY THE AUTHOR
T

here’s no doubt that Chevy’s LS engines are an excellent powerplant for any classic ride that you want to be able to hop in and drive without worrying about what’s going down under the hood. These modern mills can deliver care-free performance right out of the box, giving you the utmost confidence to drive your car, and lean on it hard, anywhere at any given time. Though we try and try again, we sometimes just don’t have that same conviction with some older, OEM engines … especially ones that haven’t been maintained properly or given enough attention over the years.

Though LS engines can be more dependable, to some, they lack that aura and classic vibe offered from the engines of the ’60s and ’70s. There’s nothing more aesthetically appealing than a fresh period-correct engine sittin’ pretty in its corresponding engine bay.

Fortunately, there are aftermarket companies that have developed parts and add-on kits that can be easily retrofitted to your LS engine to make it more appealing to the eye, especially to those classic car lovers out there.

At MAD Customs in Boyertown, Pennsylvania, proprietor Mark Denlinger and his Chevy-loving cohorts have transformed enough of these crate engines to turn the process into an art form. Using off-the-shelf aftermarket parts, clever detailing, and a few custom touches, they turn modern Chevy powerplants into vintage-looking mills that look right at home in a classic engine bay.

Follow along to see how the guys tackle this feisty LS3 and turn it into a mill that would work in any classic ride, knowing that its modern capabilities will take a load off the brain when doing some long-distance runs, cold weather exploring, or even some hot laps on the track.

Unwrapped fresh GM crate LS3 engine.
1. Here’s our starting point. A fresh GM crate LS3 unwrapped and ready for a new life as a modern-built, vintage-appearing powerplant, born with all the upsides of today’s advanced engine-building capabilities.
Technician removing stock LS3 oil pan.
2. MAD Custom’s technician Mark Alexander removes the stock oil pan to replace it with a Holley pan for better ground clearance. You can see here the LS has been stripped, prepped, and taped off for paint. All machined parts are blasted with aluminum oxide so the paint has something to grab onto.
Spraying the engine block with Chevy Orange paint.
3. Painting the engine is a tedious task. Once epoxy primed, MAD Customs owner Mark Denlinger sprays the block in single-stage Chevy Orange urethane to match the classic vibe of the engine build. It’s important to not use more paint than necessary because of the heat generated by the engine.
Finished engine block painted Chevy Orange.
4. Here we see the finished engine, ready for its next step in the process. Note that the original valve covers were kept on during painting. They will be discarded later in the build process.
Hand-lettering the Chevrolet script on valve covers.
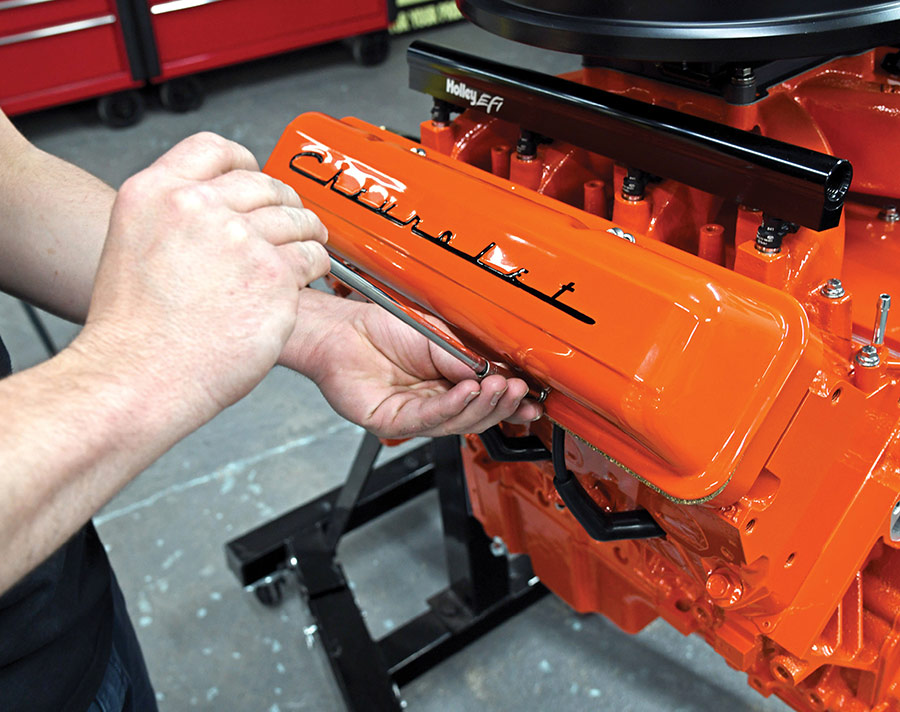
5. Once finished in-house, the new valve covers are sprayed in the same Chevy Orange paint, then hand-lettered in gloss black by MAD Customs technician Brandon Wuchter.
Overview of various engine accessory parts.
Intake manifold and induction system components layout.
6-7. Here’s our layout of parts for the build. As you can see, items such as the Holley water pump housing, valley cover, and the Holley intake are all sprayed in matching Chevy orange. Some parts get the appropriate black shade and finish.
Installing the Billet Specialties retro-styled valley cover.
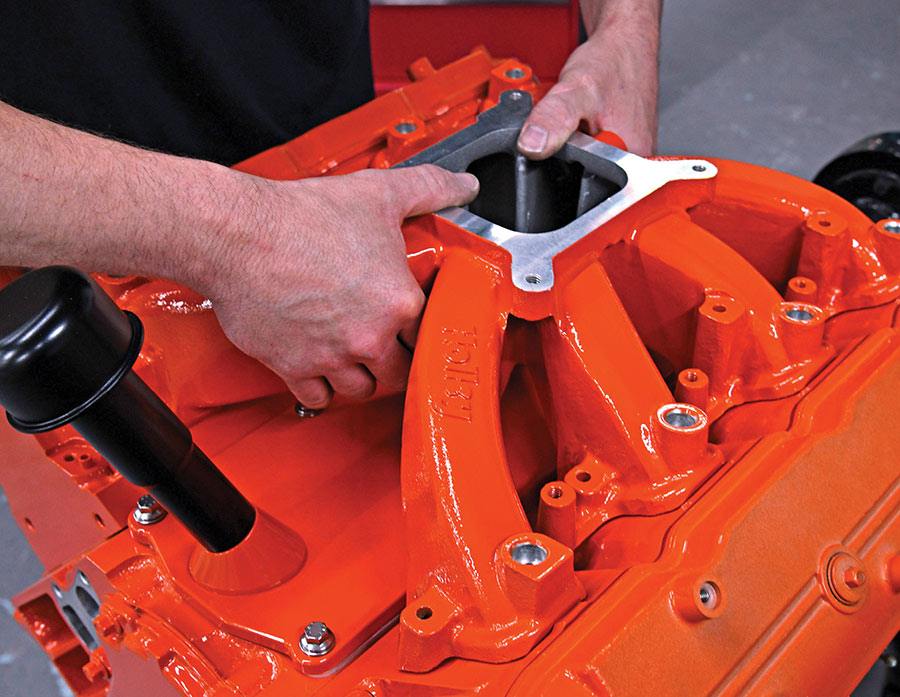
8. Next, the Billet Specialties retro-styled valley cover with oil fill tube that was previously painted is added to the block. This will prevent dirt and debris from getting into critical areas of the engine.
Adding O-ring seals to the Holley EFI intake.
9. O-ring seals are added to the prepped Holley singleplane EFI intake in preparation of installation.
Placing the Holley single-plane EFI intake on the engine.
10. Technician Alexander installs the modern Holley intake on the LS, assuring its correct fit. This is the base for the LS engine’s fuel induction setup.
Using a torque wrench on the intake manifold bolts.
11. The intake is torqued down to the correct specs to ensure proper installment.
Fitting GM fuel injectors into the intake manifold.
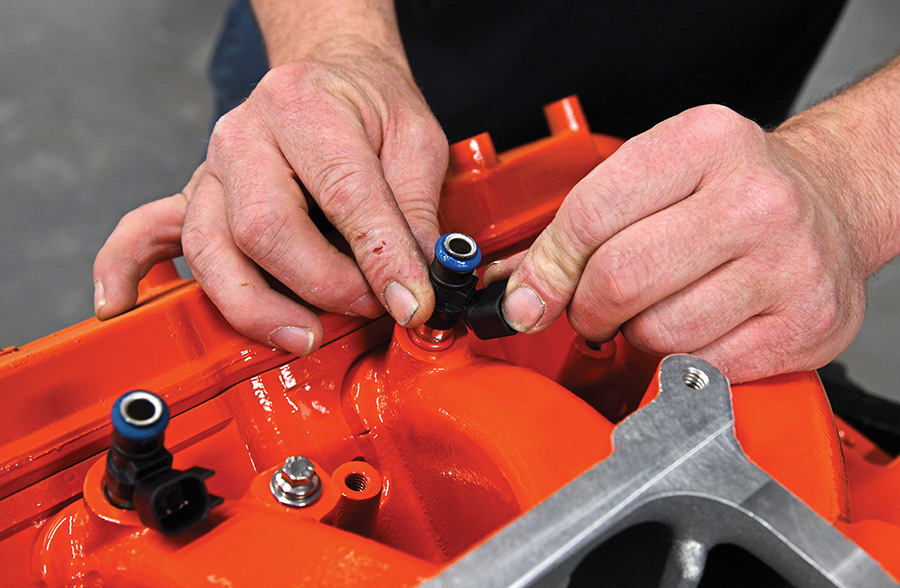
12. After the intake is installed, GM injectors are fitted to the intake. Each injector is rated at 42 lb/hr—more than sufficient for this LS3 setup.
Installing black Holley fuel rails on the engine.
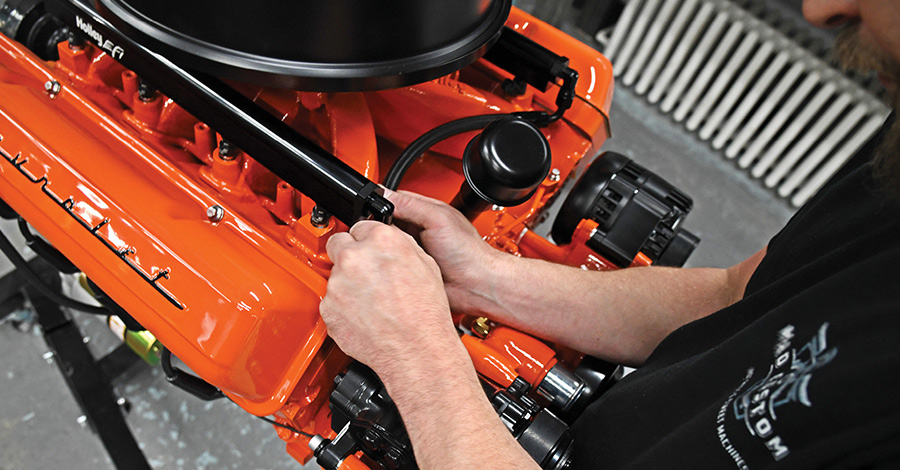
13. The Holley supplied fuel rails are up next and set up on the injectors. MAD Customs keeps the color scheme here all orange and black for that vintage look.
Mounting the 1,000-cfm Holley throttle body.
14. To feed this modern engine a 1,000-cfm Holley throttle body is added up top.
Placing a Goodmark C10 reproduction air cleaner.
15. To give it that total vintage vibe, MAD Customs decided on a Goodmark C10 reproduction four-barrel air cleaner to top the throttle body. This is an all-around great choice when trying to evoke that ’60s vibe.
View of the engine with factory valve covers removed.
16. The factory valve covers are now removed in preparation of better things to come. Being a brand-new mill, this thing is spotless inside, and the mounting sills are cleaned and readied for the next step.
Fastening the Billet Specialties valve cover adapter plate.
17. Here the Billet Specialties valve cover adapter is fastened into place. This will accept the retro-styled valve cover and hide the coils out of sight and out of mind.
Adding new ACDelco ignition coils to the adapter plate.
18. The new ACDelco ignition coils are added to the adapter plate and tied together with Holley-supplied coil harnesses.
Fitting the AMD reproduction valve covers.
19. These AMD reproduction valve covers look right at home now that they’ve been painted and the small Chevrolet script has been hand lettered. Hiding the coils underneath is a big improvement to the engine’s overall appearance.
Pressing the harmonic balancer onto the crankshaft.
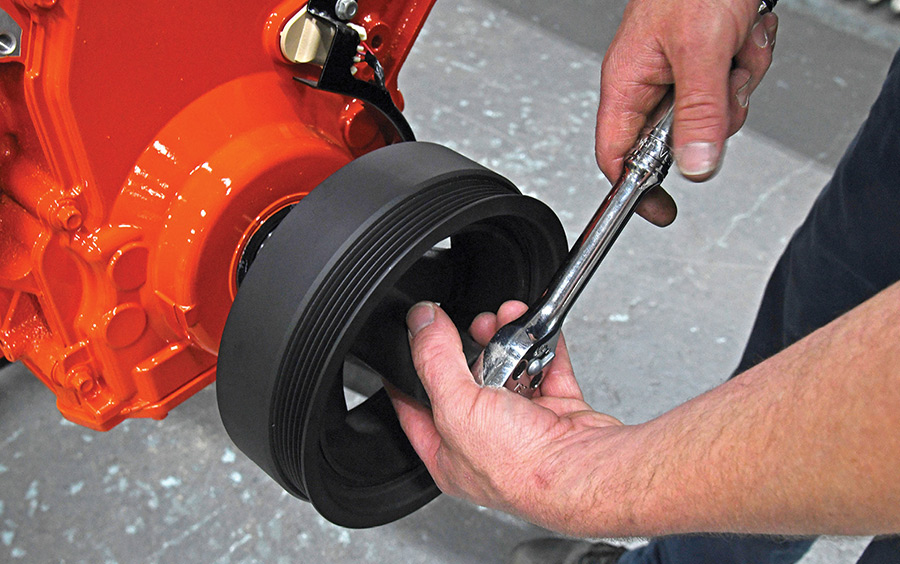
20. The supplied harmonic balancer assembly is installed next. This is the basis for the front accessories. Mounting the piece involves using a specialized installation tool that presses the balancer onto the crank without damaging the threads.
Installing the Holley Mid-Mount Accessory Drive system.
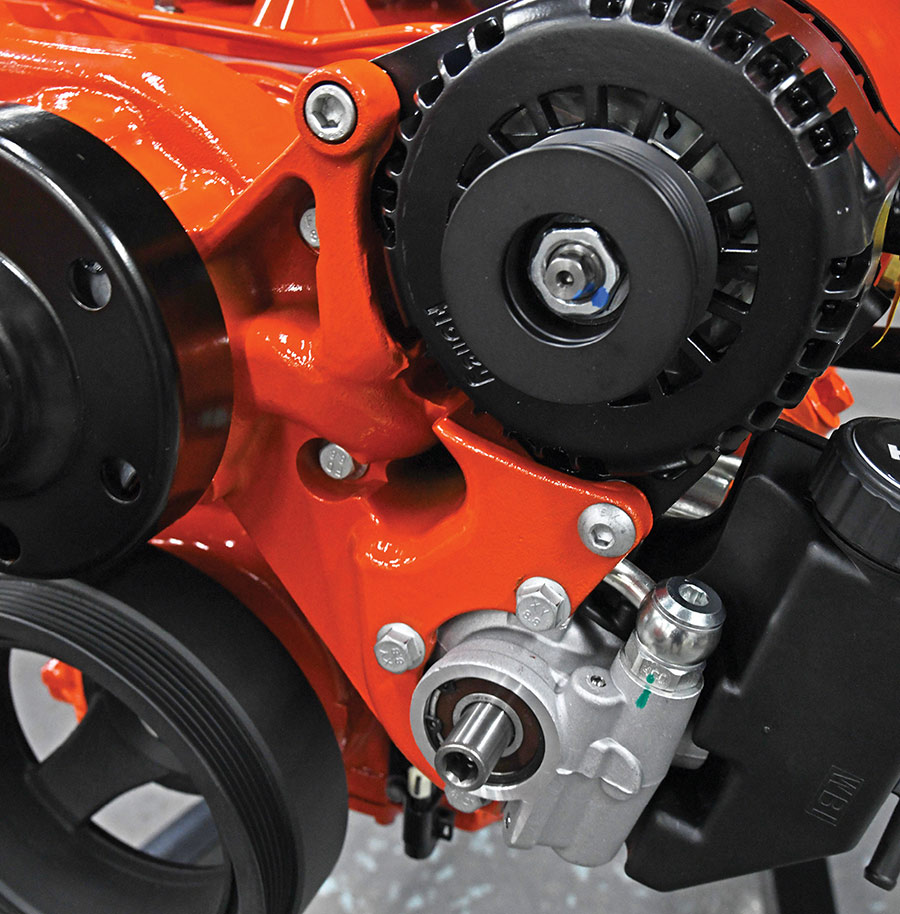
21. Up front, a Holley Mid-Mount Accessory Drive system is installed on the LS. The water pump housing is an integral part of the engine build as it’s designed to serve as a mounting point for several of the important parts of the engine makeover. It features a bracket-less design, which cleans up the overall look of the engine and makes installation of key parts a snap.
Adding the water pump assembly to the housing.
22. Next up is the water pump assembly that is included in the kit. With this design, the water pump is easily serviceable. Here, Alexander adds the assembly to the water pump housing. Antiseize or Loctite is added to all stainless steel bolts.
Mounting the Holley alternator to the engine.
23. The Holley alternator is added next directly to the water pump housing, keeping with the color combination. It’s an LT1-based, 150-amp premium unit, and, like many of the accessories, was included in the Holley kit.
Installing the Type II baffled power steering unit.
24. The included Type II baffled power steering unit is installed, and like before, it attaches directly to the housing. Here we see our accessory setup coming together.
Mounting the Holley-supplied Sanden SD7 A/C compressor.
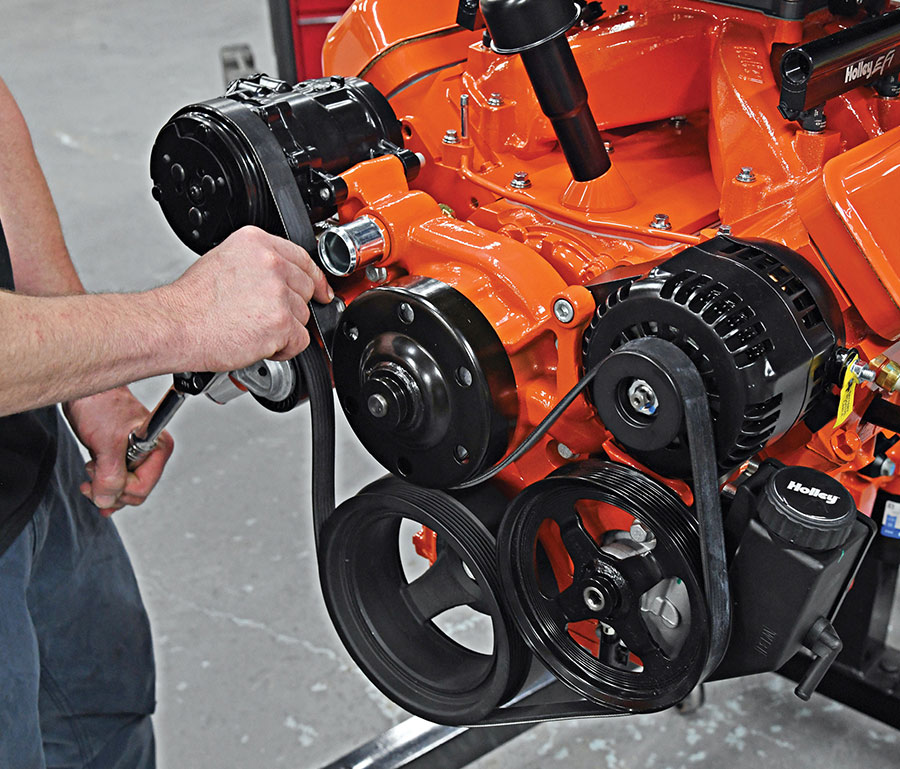
25. Last piece of the puzzle is the Holley-supplied Sanden SD7 compact A/C compressor, which handle the cool side of the HVAC system for our LS build.
Installing the Lokar flexible engine oil dipstick.
26. This Lokar flexible engine oil dipstick is the perfect modern add-on to our build. The design gives you several options on where to locate your dipstick according to your build.
Adjusting the serpentine belt tensioner.
27. The serpentine belt is next on the list and is included with the Holley accessory drive kit. Alexander adjusts the tensioner to get the belt to fit properly.
Fabricating a custom fuel crossover hose.
28. MAD Customs went ahead and fabricated their own custom fuel crossover hose to connect the rails and ensure proper fuel supply between banks.
Installing stainless steel heater hose fittings.
29. Installing the stainless steel heater hose fittings into the water pump housing.
Completed vintage-styled LS engine on a stand.
30. This LS is a great powerplant for almost any ride, but it really shines in a period-correct Chevy.
In The Garage Media
ARP logo

(800) 826-3045
arp-bolts.com

Auto Metal Direct logo

(888) 255-3895
autometaldirect.com
Billet Specialties logo

(800) 245-5382
billetspecialties.com
Lokar Performance Products logo

(877) 469-7440
lokar.com
MAD Customs

(610) 790-3390