 Images by THE AUTHOR
t’s certainly not a rare occurrence for one upgrade to necessitate a whole slew of other unexpected tasks to pop up. When it came to our buddy Bruce Valley’s 1957 Chevy Handyman Wagon project it seemed to exemplify this. What began as a project with a short list of modifications soon turned into a near body-off restomod job. The simple task of swapping out the previous 350ci engine with a new LS3 meant that if we wanted the end result to reflect what we thought it deserved, the entire engine compartment needed restoration. When it came to the few suspension upgrades, the story continued. New parts shouldn’t be haphazardly thrown onto filthy framerails amidst miscolored inner fenders. No, the frame got a thorough cleaning and a couple fresh coats of chassis black while the inner fenders and all underlying sheetmetal got a new layer of undercoating. The end results speak volumes, so the extra bit of effort goes a long way in producing a product one can be proud of, but it takes more time and a little more money to get those results.
The interior of the car wasn’t originally going to receive too much attention, but with the addition of the LS engine, we decided that it would probably be a good idea to upgrade the gauge package so a keener eye could be kept on the operations of the 400-plus horse powerplant.
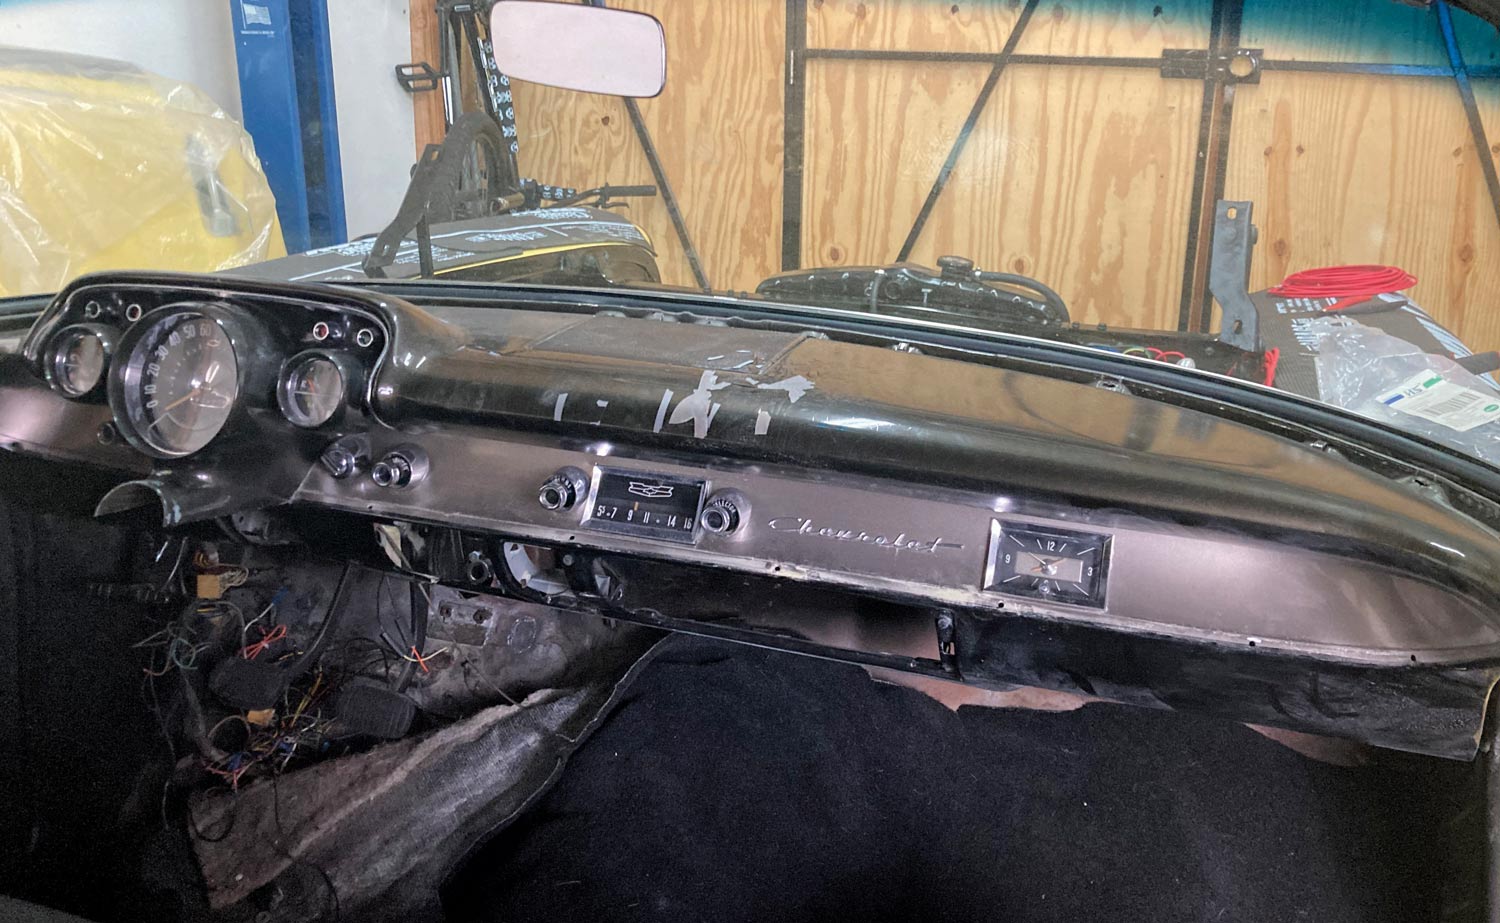
Like the other tasks previously mentioned, pulling out the original gauge cluster and replacing it with new just wasn’t going to do it. Plans also involved a full A/C installation, courtesy of Vintage Air, which meant that, at some point in the not-so-distant future, the dash was going to be all but stripped of its components, leaving us with no excuse regarding the refinishing of said dash. As it turns out, the dash was in pretty serious need for rehab as the paint that had been applied at some point in its past was starting to peel, pop, and craze. Scraping what could be easily removed resulted in a section about 4×10 inches round, but the rest would need a more-aggressive approach.
A few different methods could be used to exercise the finish on the dash, but the existence of the windshield, and the resistance to remove it, meant that whatever method we utilized would be hampered by access to the front section of the dash, namely the area around the gauge pod. The interior was also very much still in place, though we had pulled the carpet back to the front seat at least, but that meant we needed to keep dust down to a minimum if we wanted to avoid any lengthy, unnecessary cleanup. It was decided then to try some over-the-counter paint stripper from the local hardware store and a bit of patience. My luck with the stuff didn’t have a great record, so I was slightly reluctant. Previous experience found me with a bigger mess than when I started and a section of sheetmetal that wasn’t much barer. But, we played the optimist and this time around, we weren’t disappointed.
The key to successful stripping as it turns out, is patience. Each layer is slowly removed until the entire bare sheetmetal section is exposed to great fanfare. Applying stripper in single, one-way passes and walking away to let it do its job for 10 to 15 minutes proved to be the best method. Not rushing it and finding something else to do in the meantime was key. When it came to scraping or sanding the area clean, a lackadaisical approach proved to be more successful than attacking the surface with vigor; what didn’t sand or scrape right off received another coat of stripper and was left to soak. Wash, rinse, repeat. By the time we’d put down a half dozen or so applications of stripper, the dash was spotless, having received a final attack with a red Scotch-Brite pad.
The process yielded a result that was very impressive, and the entire dash was ready for a couple coats of self-etching primer.
Speaking of primer, originally, we expected to tackle the dash the traditional way, with an HVLP gun and a quart of self-etching, direct-to-metal primer, followed by a compatible high-build primer and a topcoat of satin black. But the road to hell is paved with good intentions and our plans were soon turned on their head for a number of reasons. For starters, I wasn’t sure that I could get my standard HVLP gun in between the windshield and front section of the dash, especially that aforementioned area around the gauge pod. My detail gun might do the trick, but I only have one size needle for it, and it isn’t big enough to spray the high-build primer. A trip to the local body supply shop was made in hopes of some answers and it turned out they had them. We had some satin black topcoat leftover from the engine compartment resto job, but the system components needed to do the dash, start to finish (DTM primer/sealer and high-build primer), only came in gallon sizes. We barely used a ½ gallon on the entire engine compartment so that seemed like a waste of materials and money, so another option was needed. I inquired about the SEM Trim Black that I’ve used successfully on other jobs, and it just so happened that not only did they carry all the components to allow us to stay within the SEM “system,” they offered it in spray cans, which would give us even better access to those hard-to-reach areas.
With cans a-rattlin’ in the back seat, we headed back to the shop, redetermined to get that dash whipped into shape. After a good cleaning and wipe down, the first couple coats of the SEM Self-Etching Primer were applied without issue. A quick scuffing with a red Scotch-Brite pad was followed by a couple coats of SEM High-Build Primer. This laid down nicely and gave us some material to work with when it came to getting the dash nice and flat. A few imperfections were found (and were to be expected), but nothing a light coat of body filler or spot putty couldn’t handle. After the few repairs were made, another coat of high-build was applied, followed by more blocking and sanding until things looked good enough for a handful of topcoats applied via Trim Black. The results turned out much better than I expected using what was basically rattle cans, but the body supply salesman assured me the stuff was as good as what could be sprayed through a gun. After seeing the resulting finish on the dash, I’ve no excuse to not believe him!
When all was said and done, reassembly of the dash happened pretty quickly, and while we won’t cover the details this month, keep your eyes peeled to future issues of ACP for those stories!


 SOURCES