ACP department heading TECH
InTheGarageMedia.com
BY “Rotten” Rodney Bauman Photography by The Author
Refining
The Ride
Suspension Upgrades for Them Ol’ Tri-Fives
Refining
The Ride
Suspension Upgrades for Them Ol’ Tri-Fives
BY “Rotten” Rodney Bauman Photography by The Author
R

elaying information about the engine to the driver was never really of huge importance to Chevrolet or the other OEMs. They figured a temp gauge was worthy of being in most instrument clusters and maybe a couple warning lights, just in case.

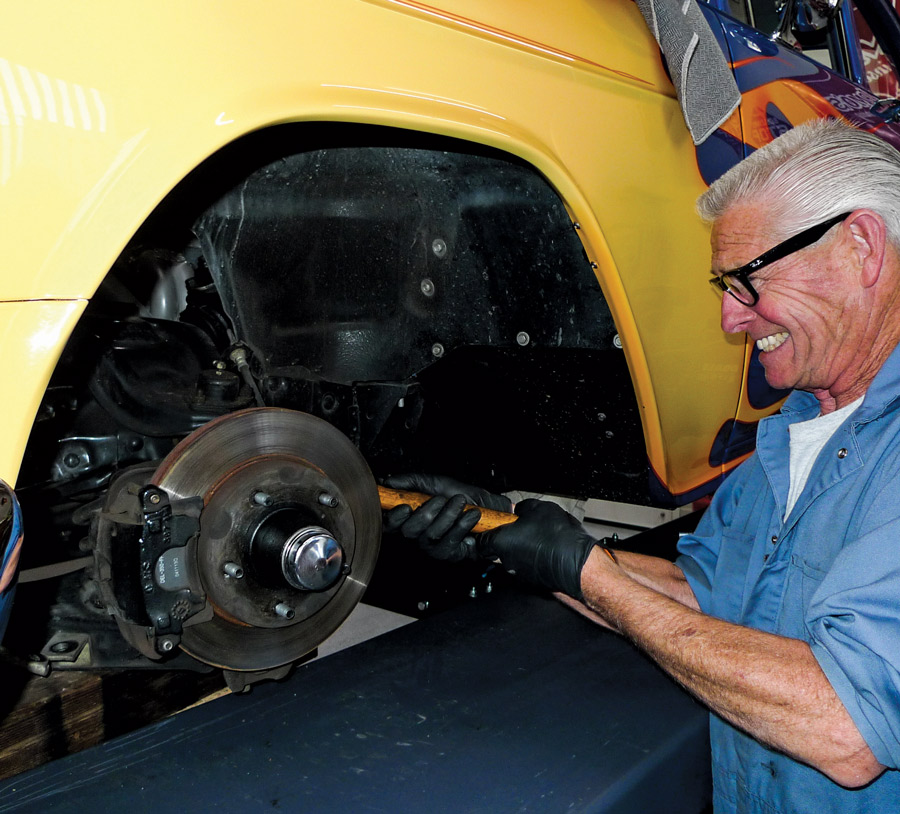
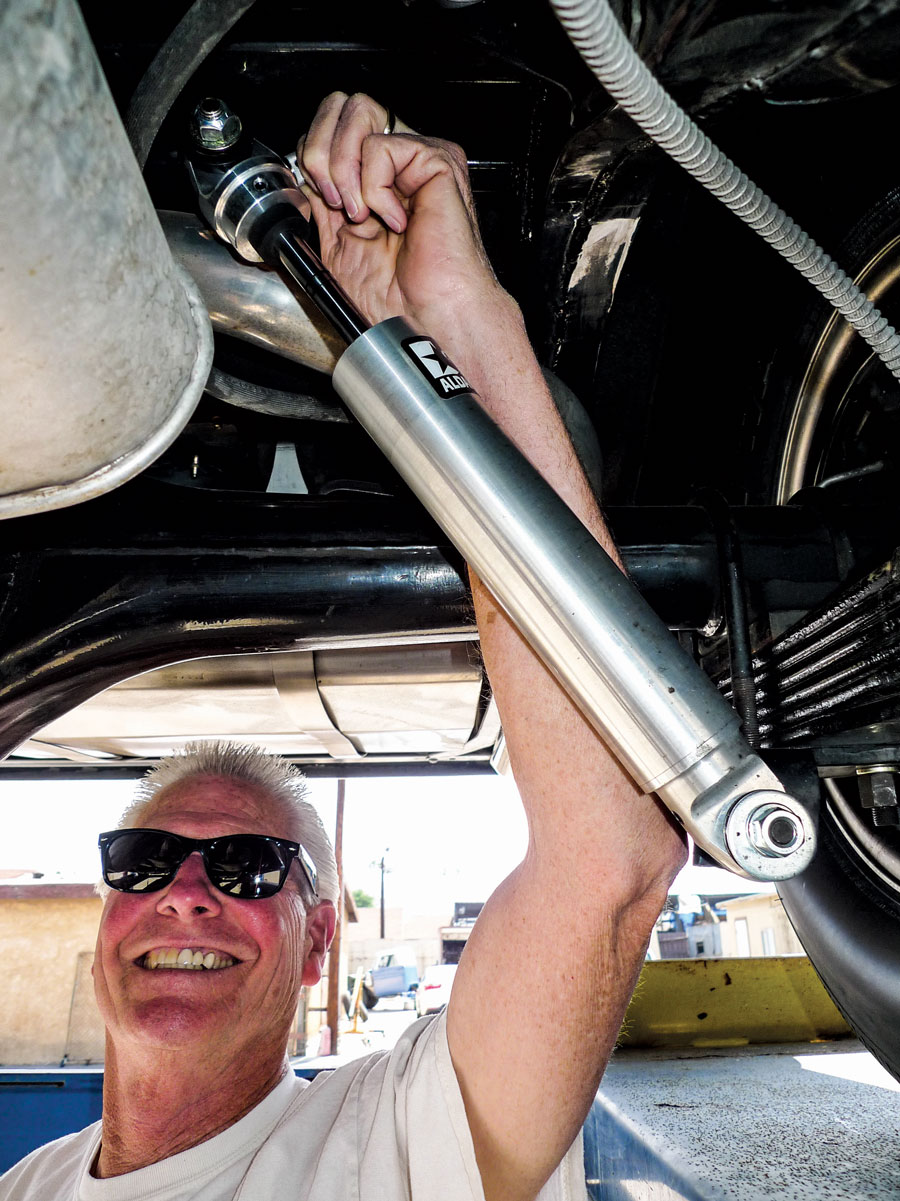
Why is “Guardrail” Willie Martin smiling? Well, it likely has a lot to do with his high school ride’s suspension upgrade. Martin has owned this same ’55 Chevy 150 pretty much straight-through since 1970. In fact, in slightly earlier years it served as the loaner car for Martin’s family business: the original Ed Martin Garage.

As a third-generation auto mechanic, Martin has enjoyed a long, successful run in the trade. That was back in Riverside, California. But back to his flammable ’55—following a crash, and an off-frame rebuild, it’s been together, on the road in its current configuration now for 22 years. During that time, it’s also been driven—a lot.

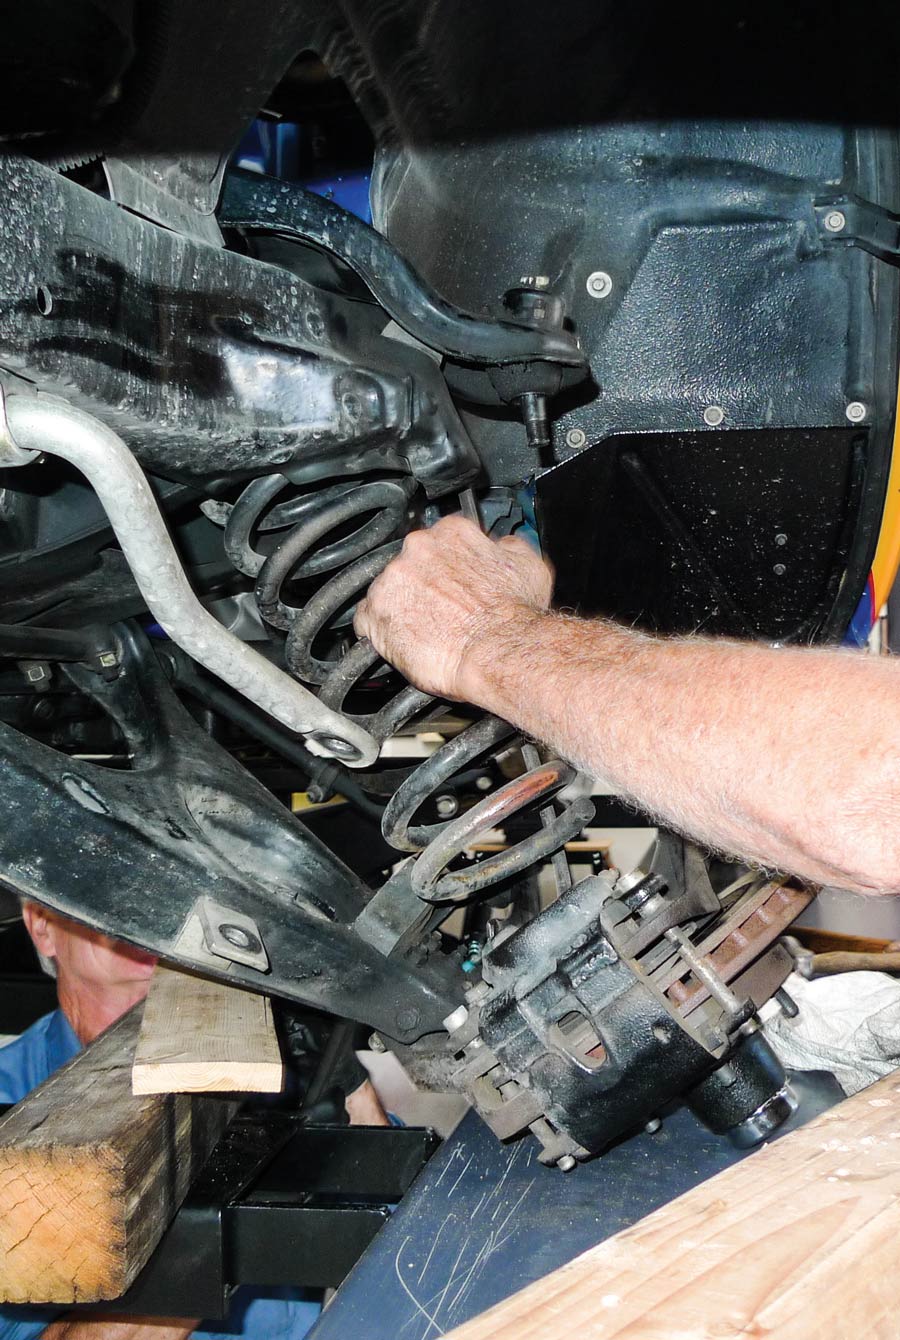
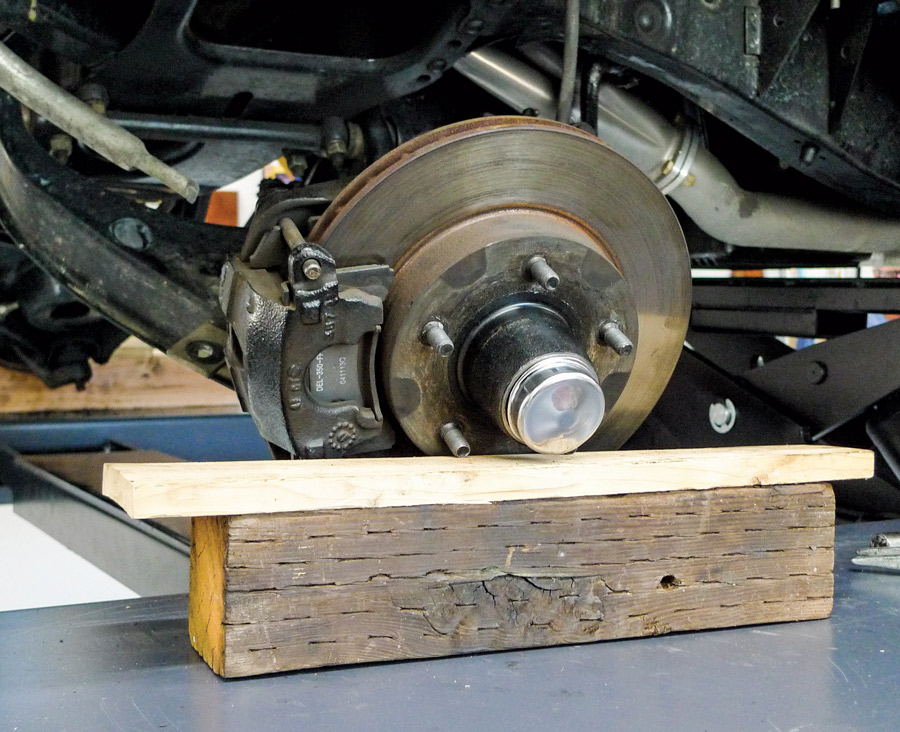
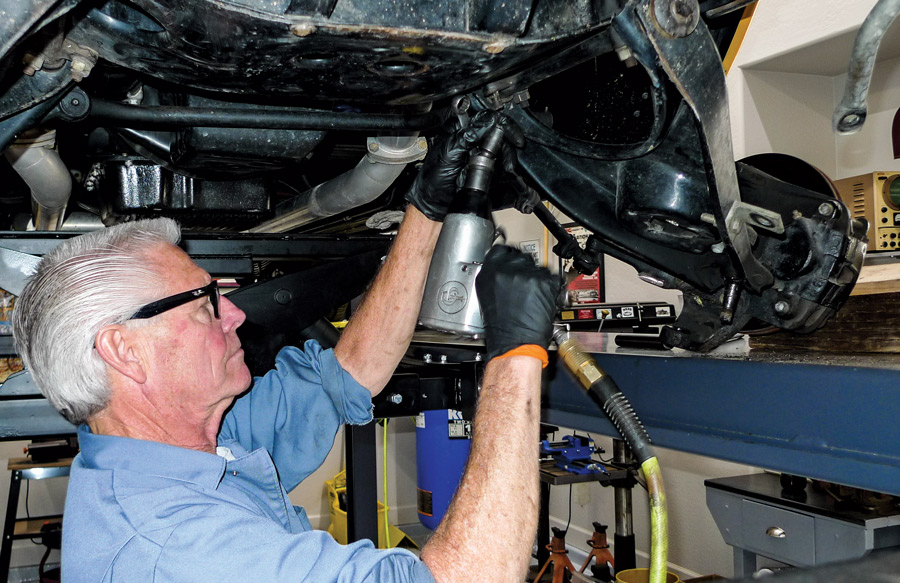
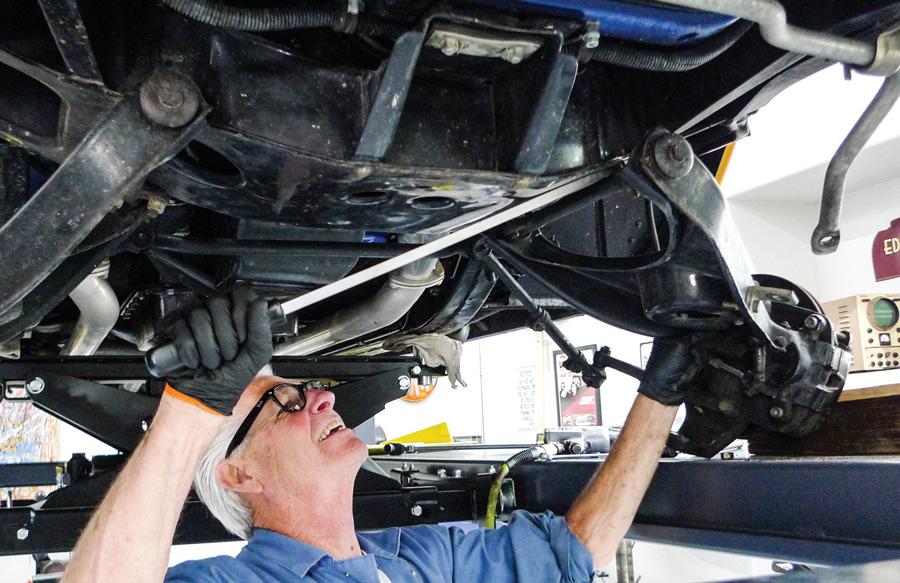
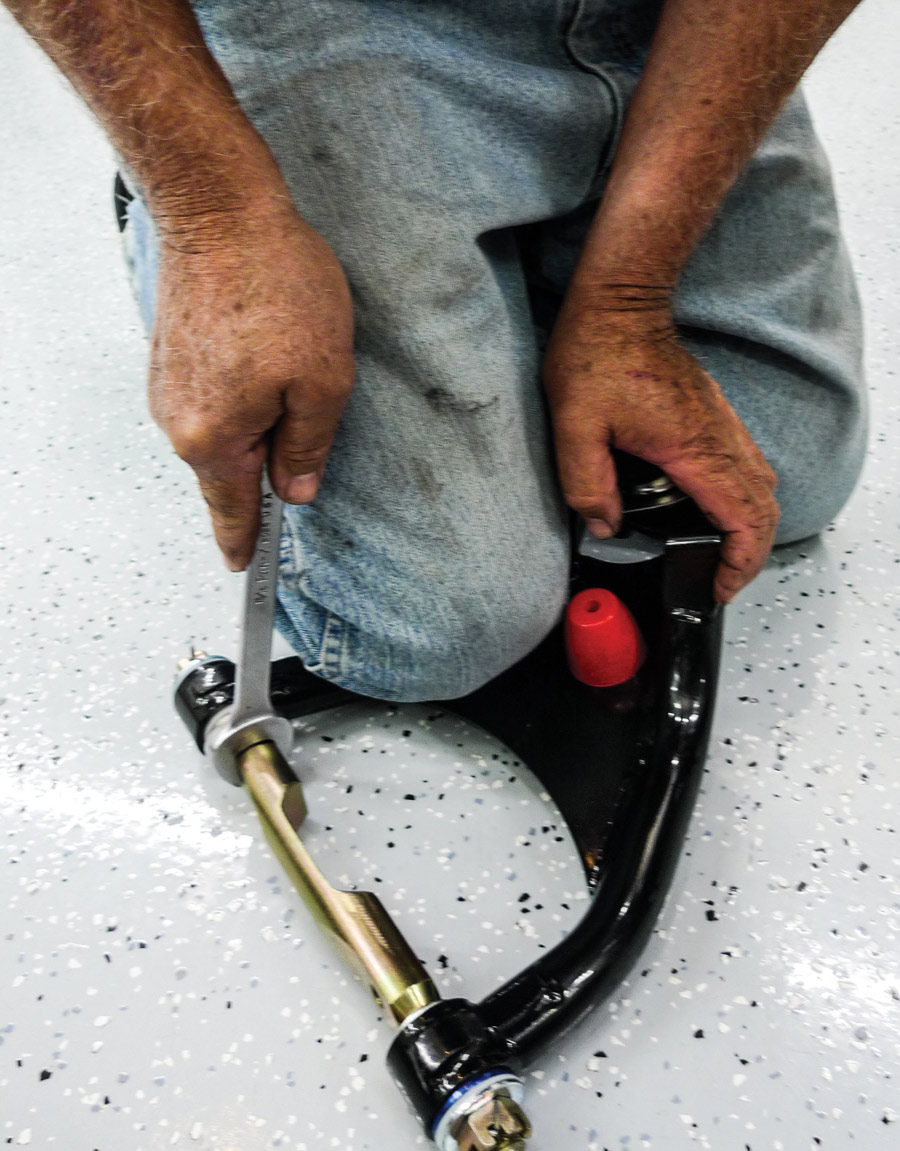
Just recently Martin took notice that the ol’ Chevy’s OEM stock-type control arm bushings were exhibiting signs of wear. Back when the car was last built, we didn’t have the options that we have today. Tubular control arms, for example, weren’t considered. Neither were coilover shock absorbers.

At the very least, it’s time to freshen up our frontend suspension. A worthwhile suspension upgrade might be a bit or two more rewarding than just replacing worn bushings. We might as well gain adjustability for whatever kind of ride and cornering we might desire, right?

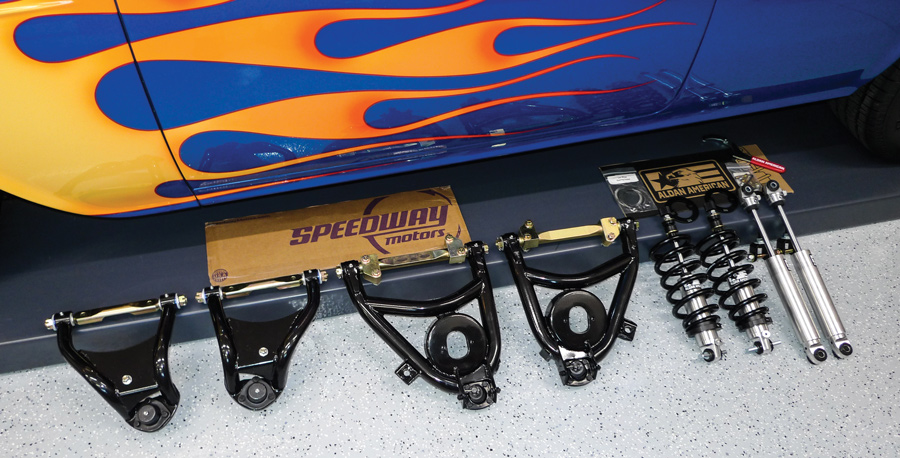
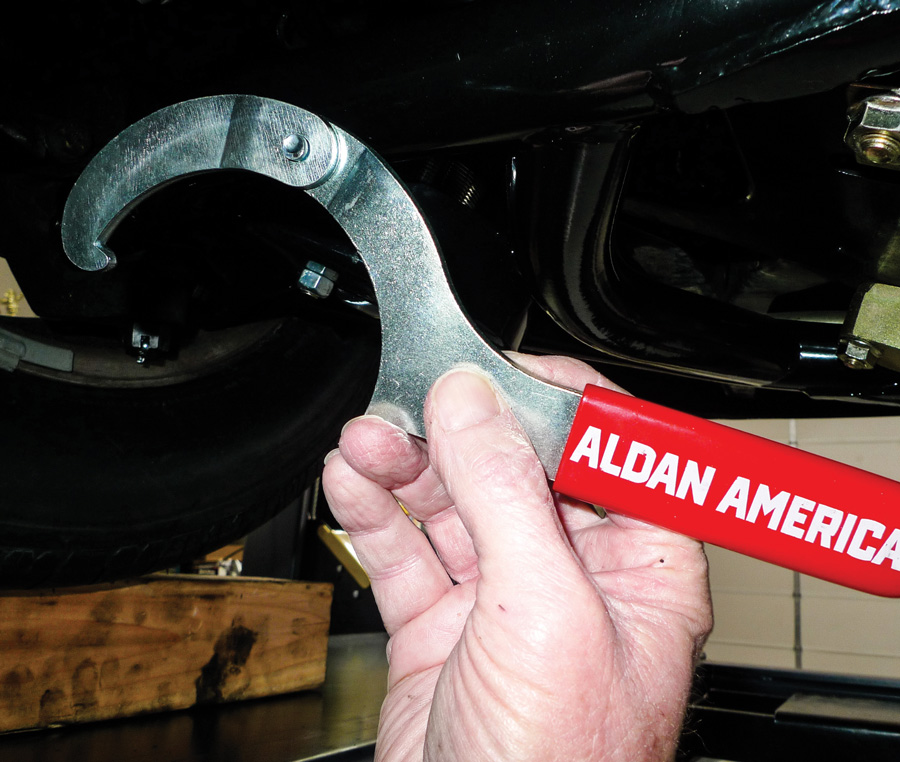
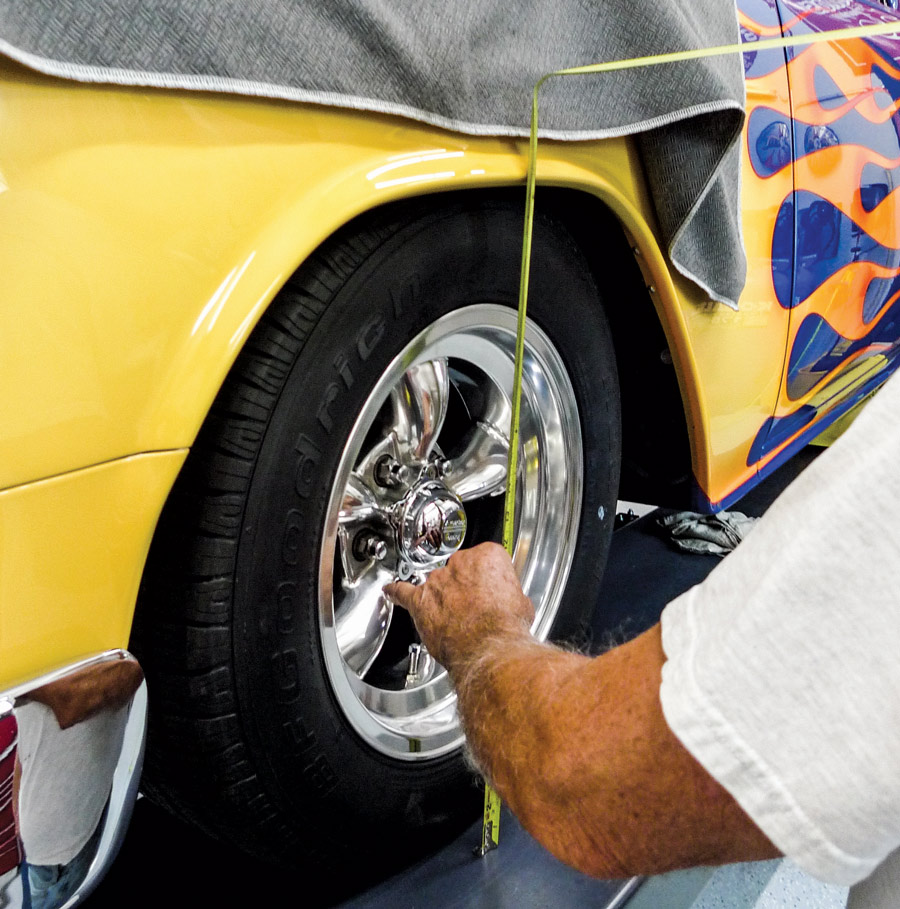
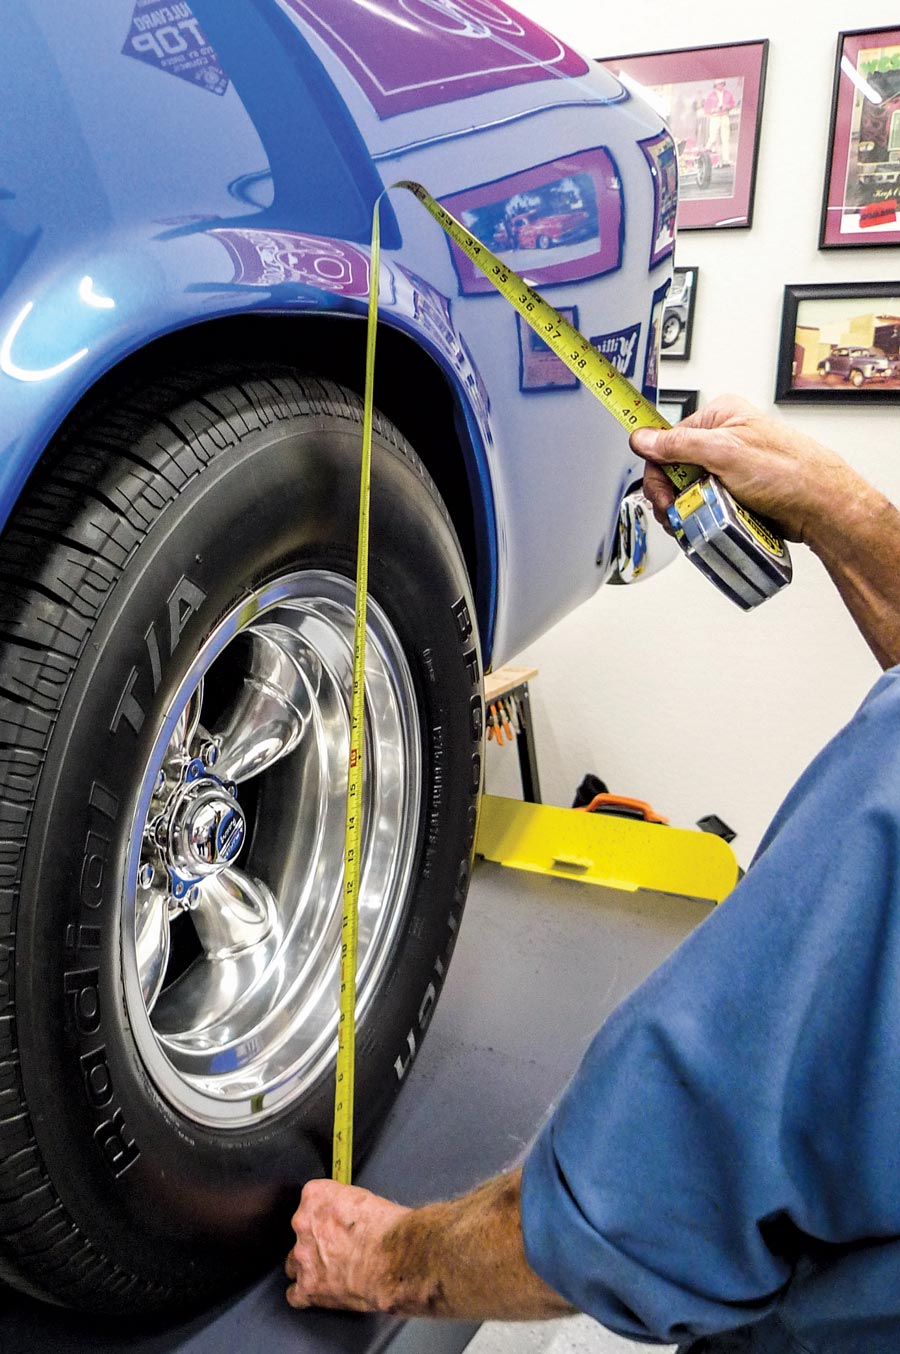
With a little help from Aldan American and Speedway Motors we’ll refine the ride and perhaps enhance the stance somewhat to boot. Apart from one leaky shock, the components we’ll retire might be useful to a restorer, but first things first. We’ve got ourselves a job to do.

Bringin’ Down the Rear
Just short of wheel alignment, and perhaps on-the-fly testdrive adjustments, the frontend job is pretty much done. Now let’s turn our attention to this car’s other end.

Only a few days ago, Martin placed an online order (somewhere) for a brand-new pair of leaf springs. Once installed, they’d raised the end of the car a total of 3 unwanted inches. The new springs were promptly excused and the good, used originals reassumed their positions. Back in 1975, Martin had installed Teflon strips between their leaves—and really, that’s all still fine today.

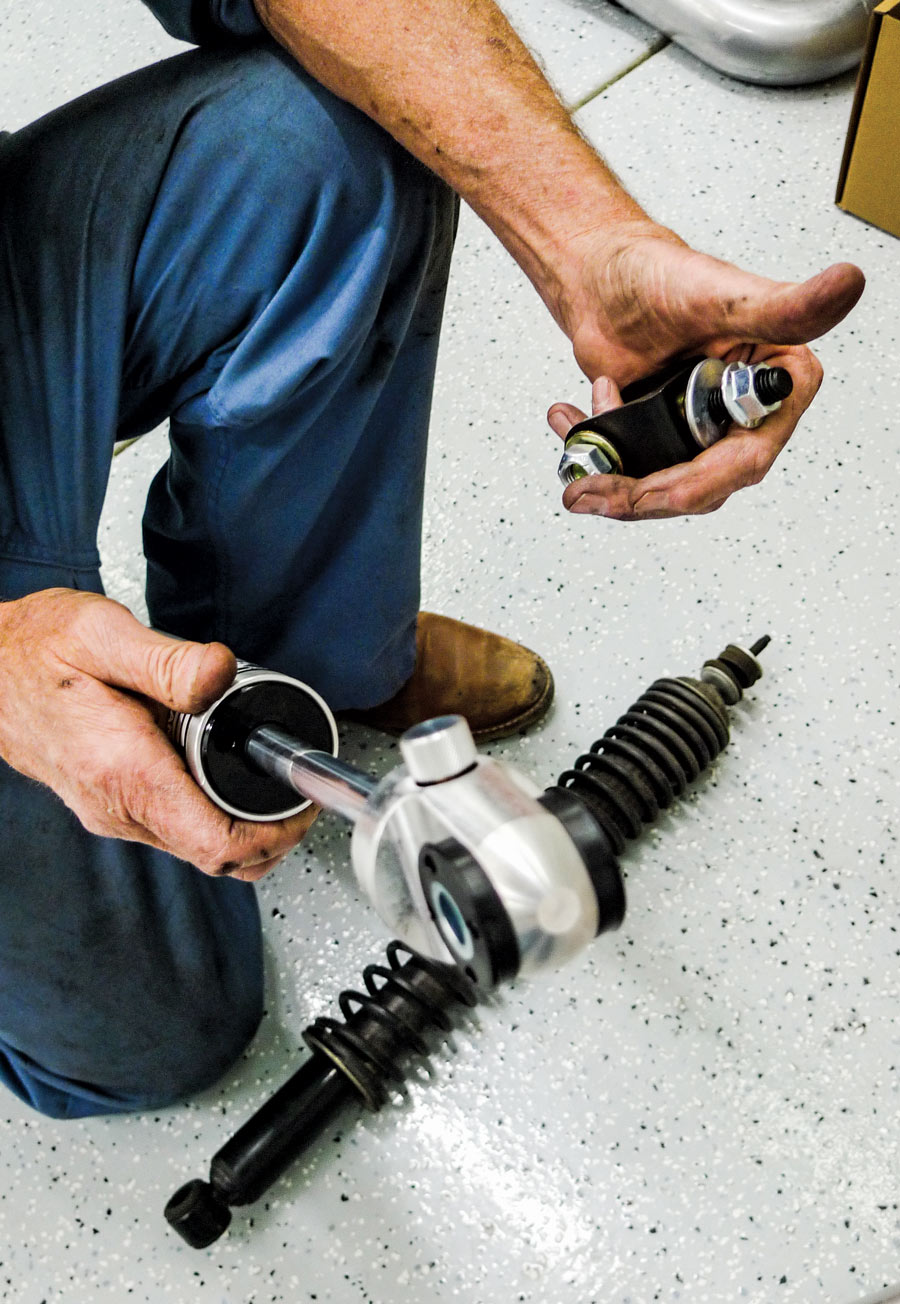
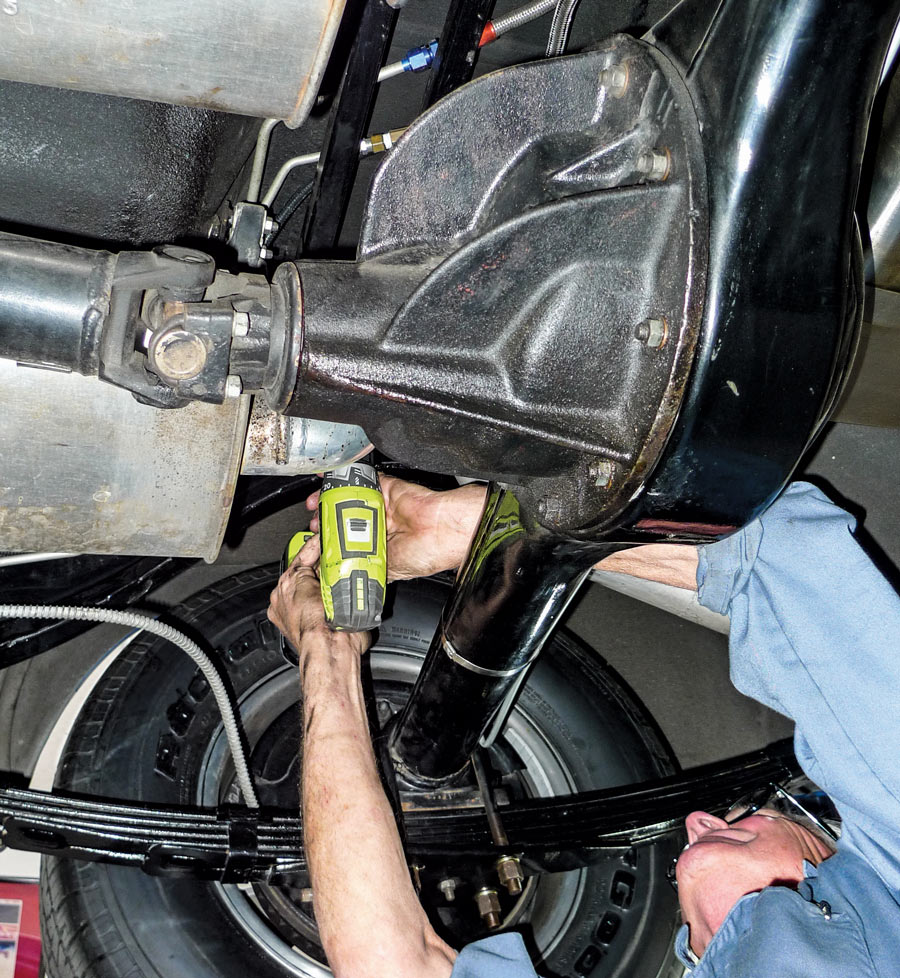
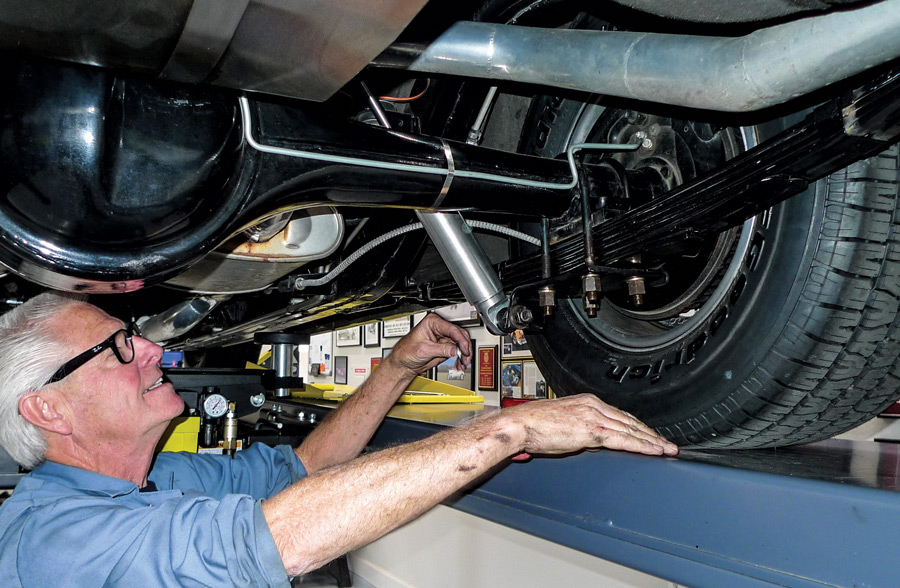
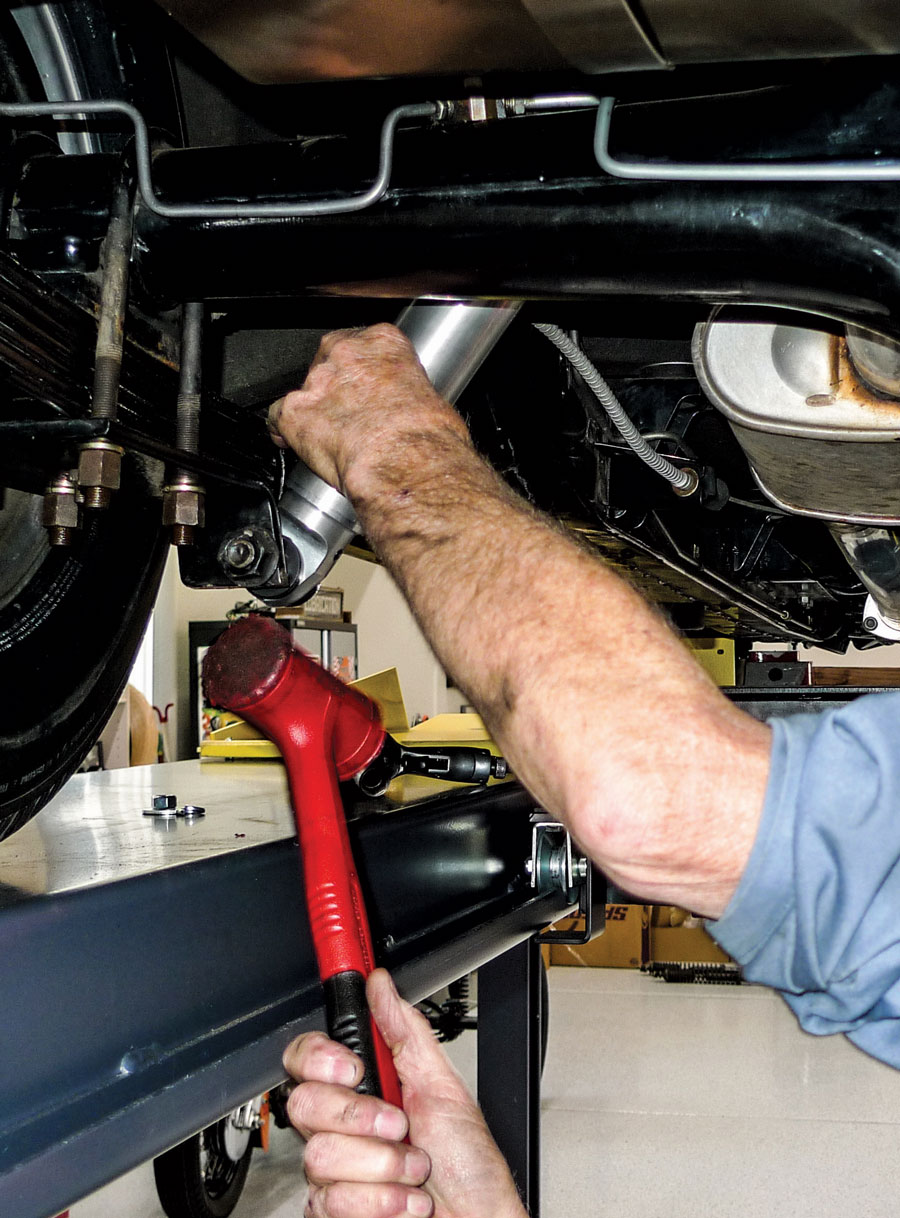
So, the rearend upgrade should go fairly easily. On that note let’s install Aldan American “TruLine” series single-adjustable shocks (PN 100111).

Testdrivin’
Of course, results may vary, but in Martin’s new home-based shop we’ve invested only 81/2 hours. At this stage our work here is pretty much finished, and frontend wheel alignment chores have also been tended to.

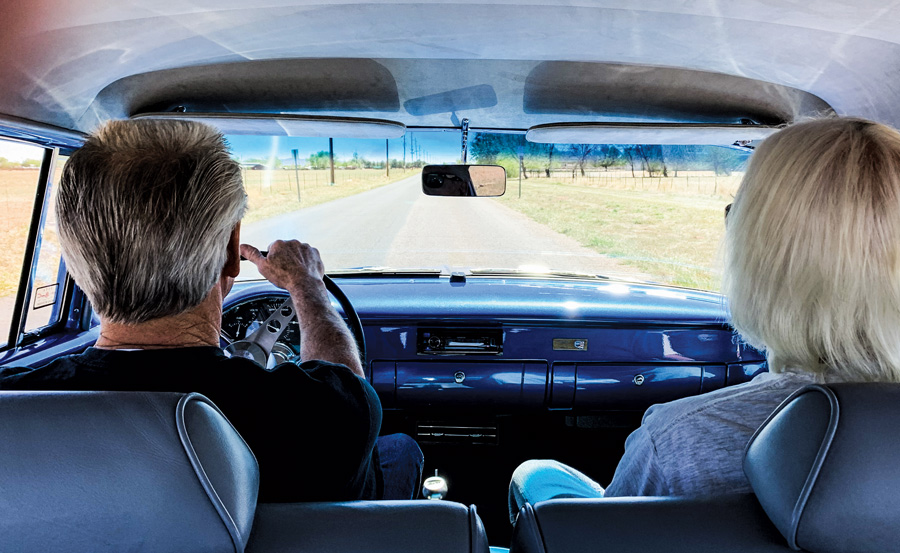
Last, but not least, all new Zerk fittings have been greased—and greased again. Now it’s time to take a drive. According to our newfangled phones, Chino Valley, Arizona, to Riverside, California, is roughly 347 miles. As a new suspension shakedown run, this should be good.

For starters, we’ll be steppin’ up to Speedway Motors’ tubular control arms (PN PB 91095557). With serviceable ball joints and pivot points, those arms come powdercoated black and ready to install. The kit’s lower arms are made to accept a sway bar and stock-type coil springs—for those who’d care to retain them.

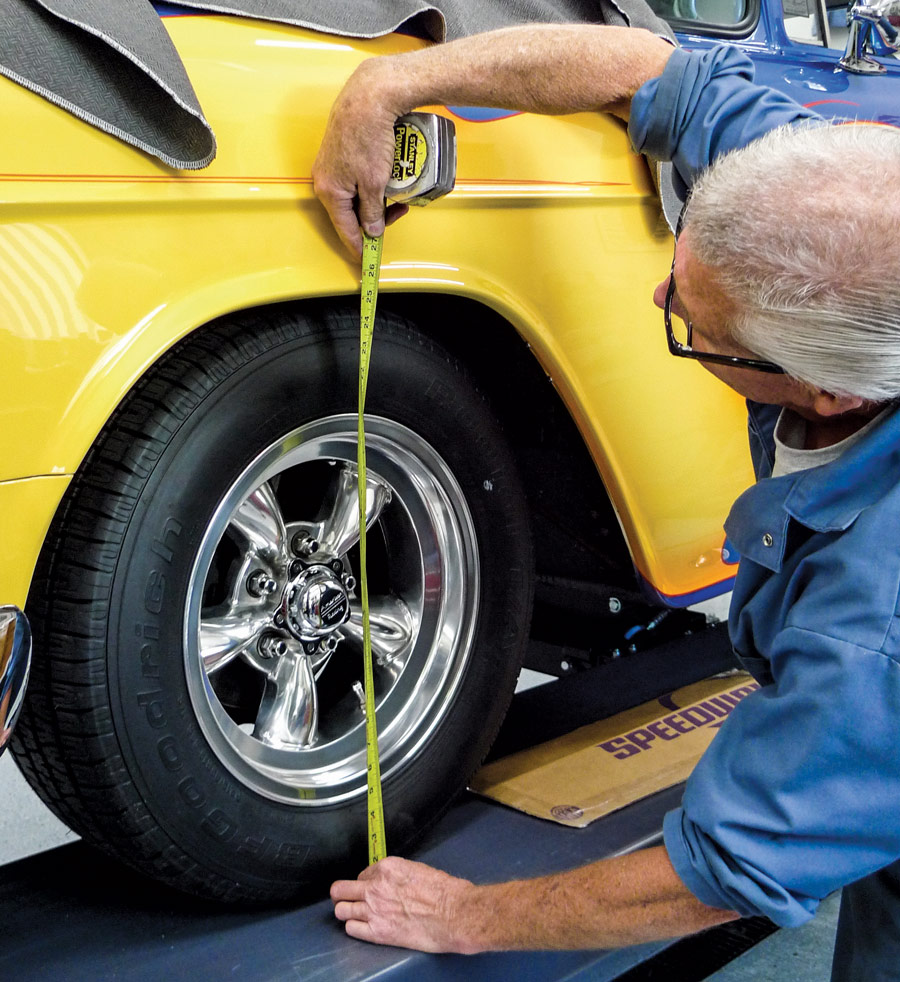
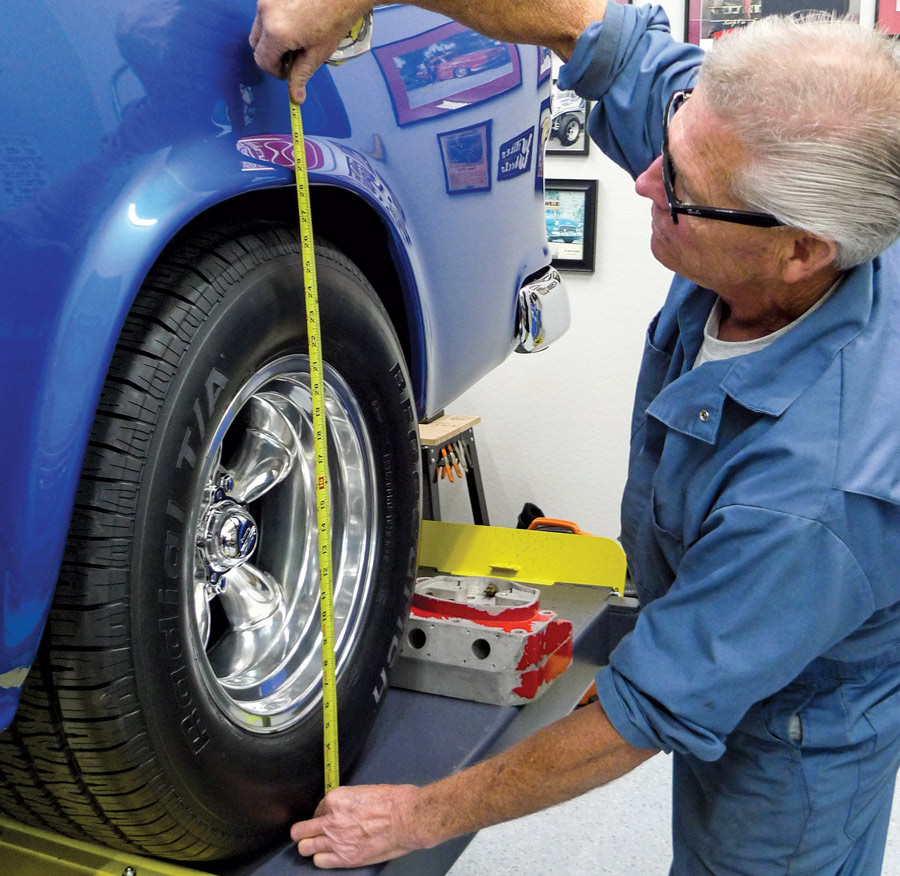
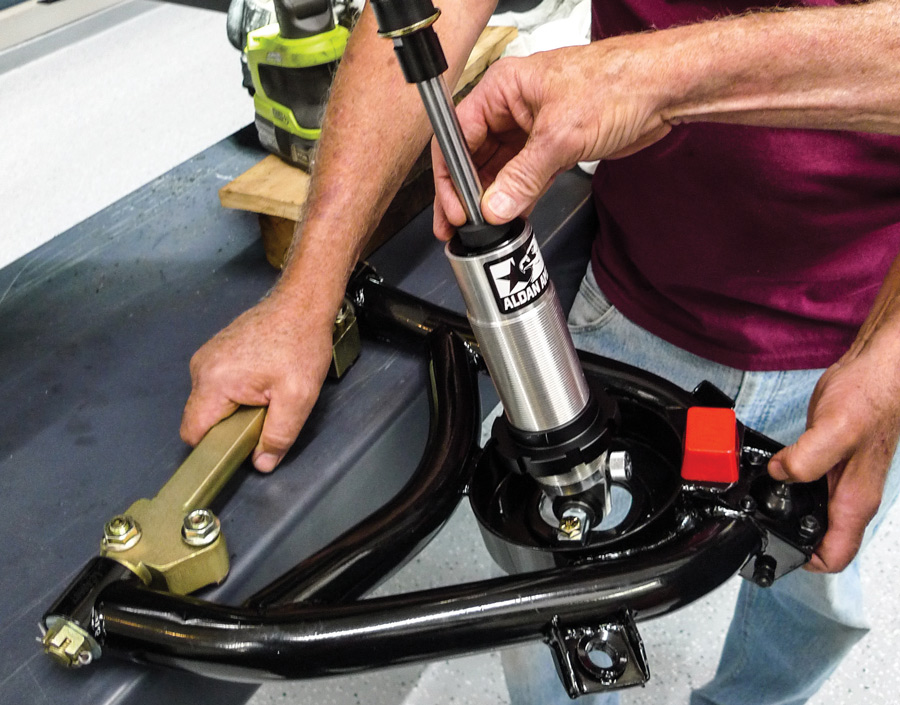
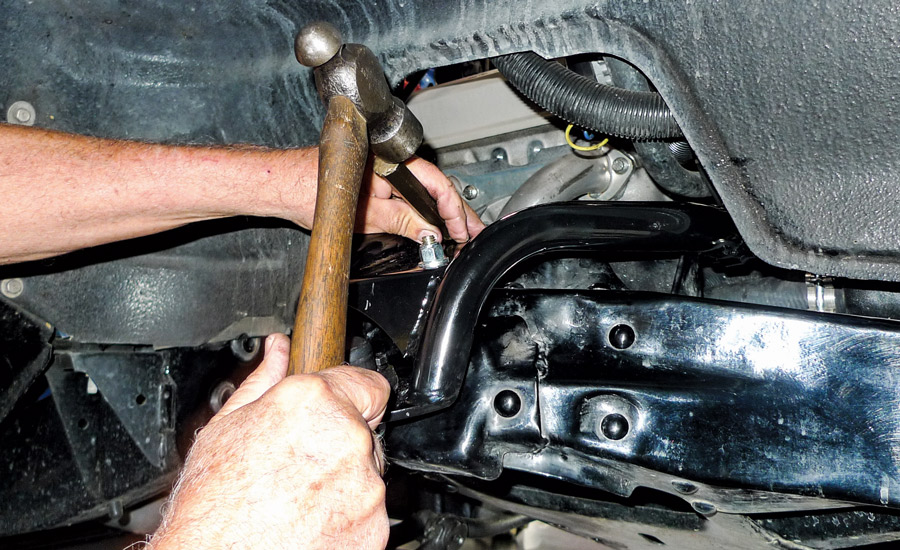
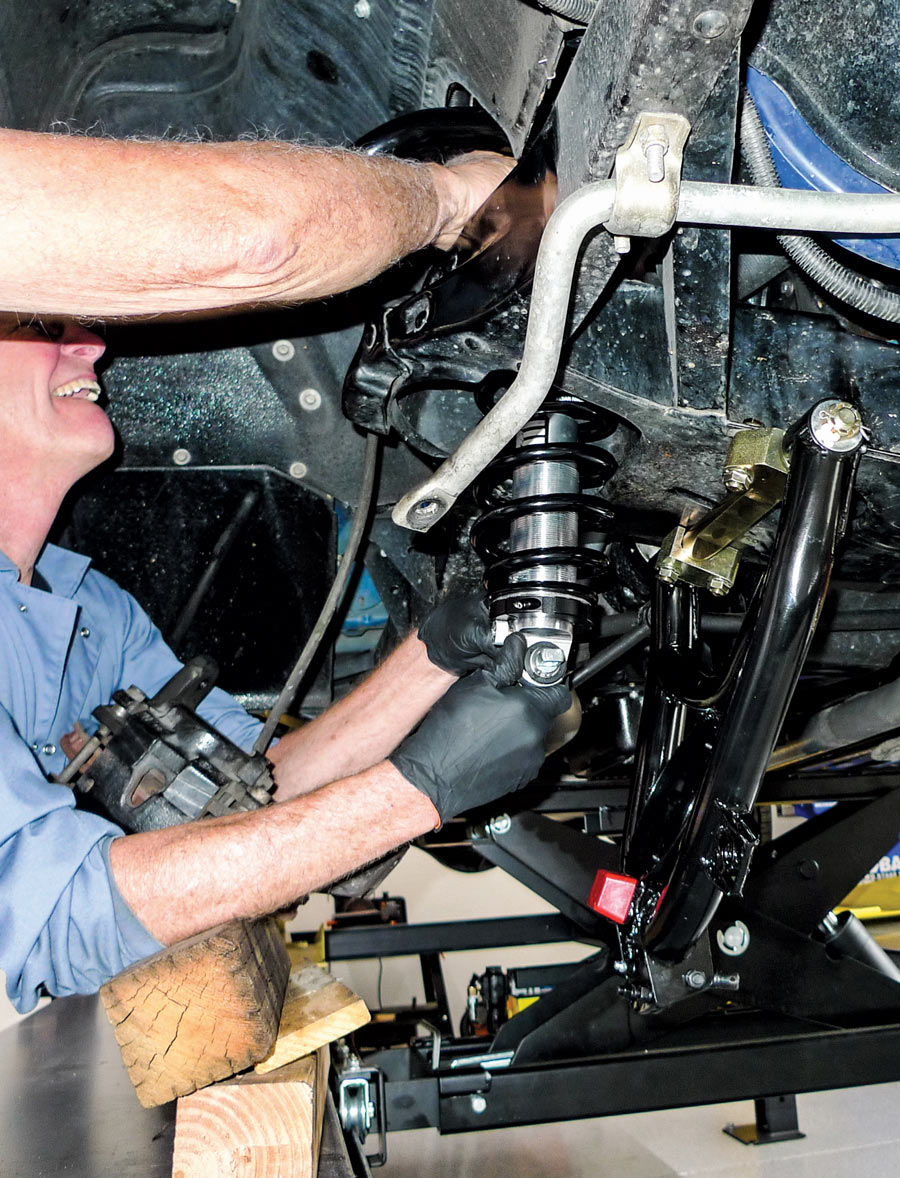
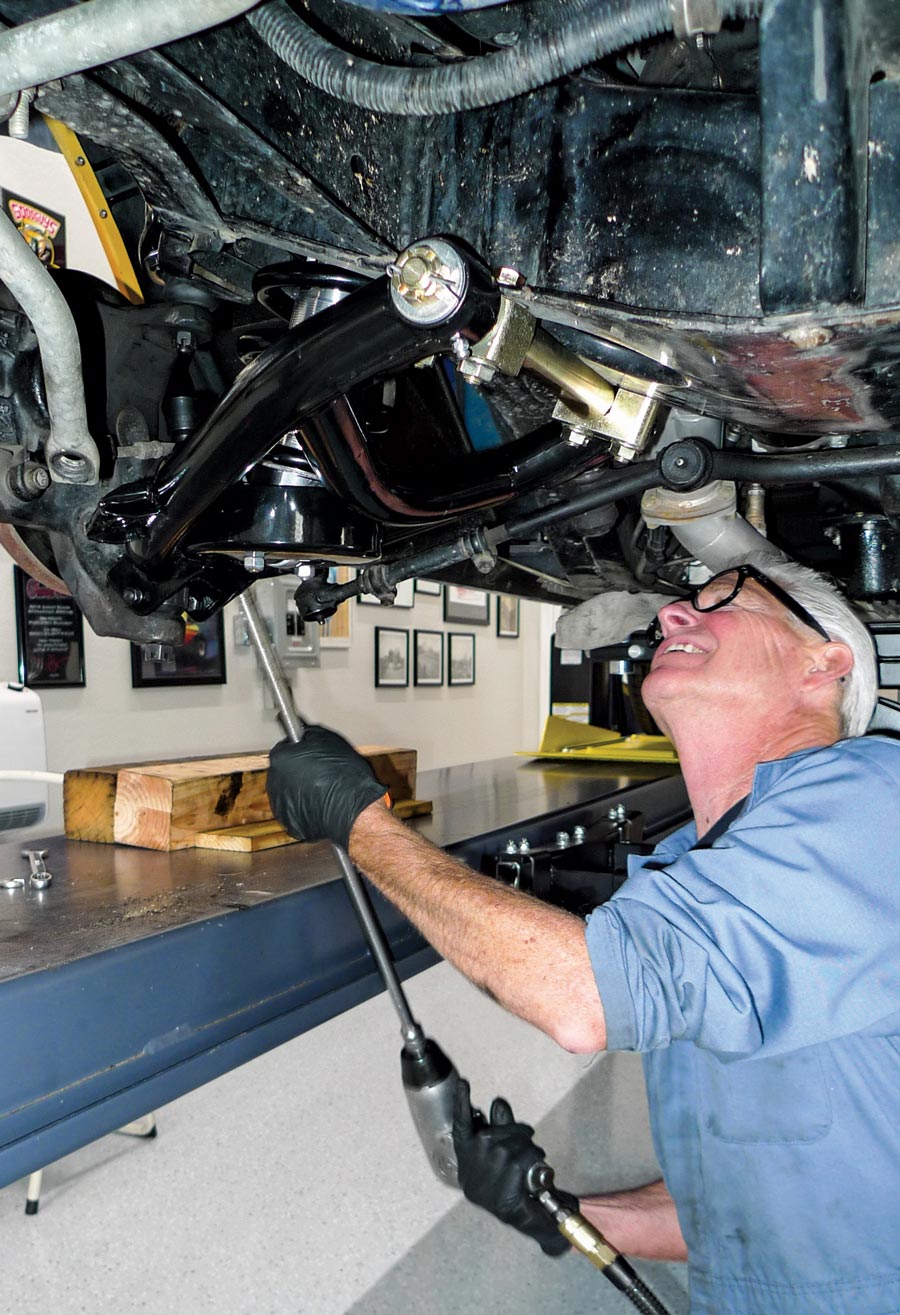
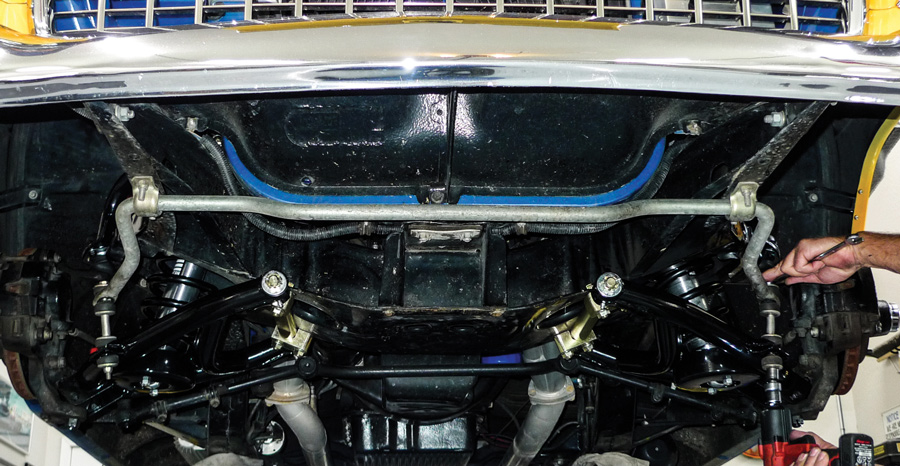
By design the Speedway Motors tubular arms (with included polyurethane spring pads) will lower the frontend of a Tri-Five Chevy by an additional inch. For our own particular purposes, we’ll be ditchin’ the stock-type coil springs. Quite conveniently, the Speedway Motors kit allows us that option as well.

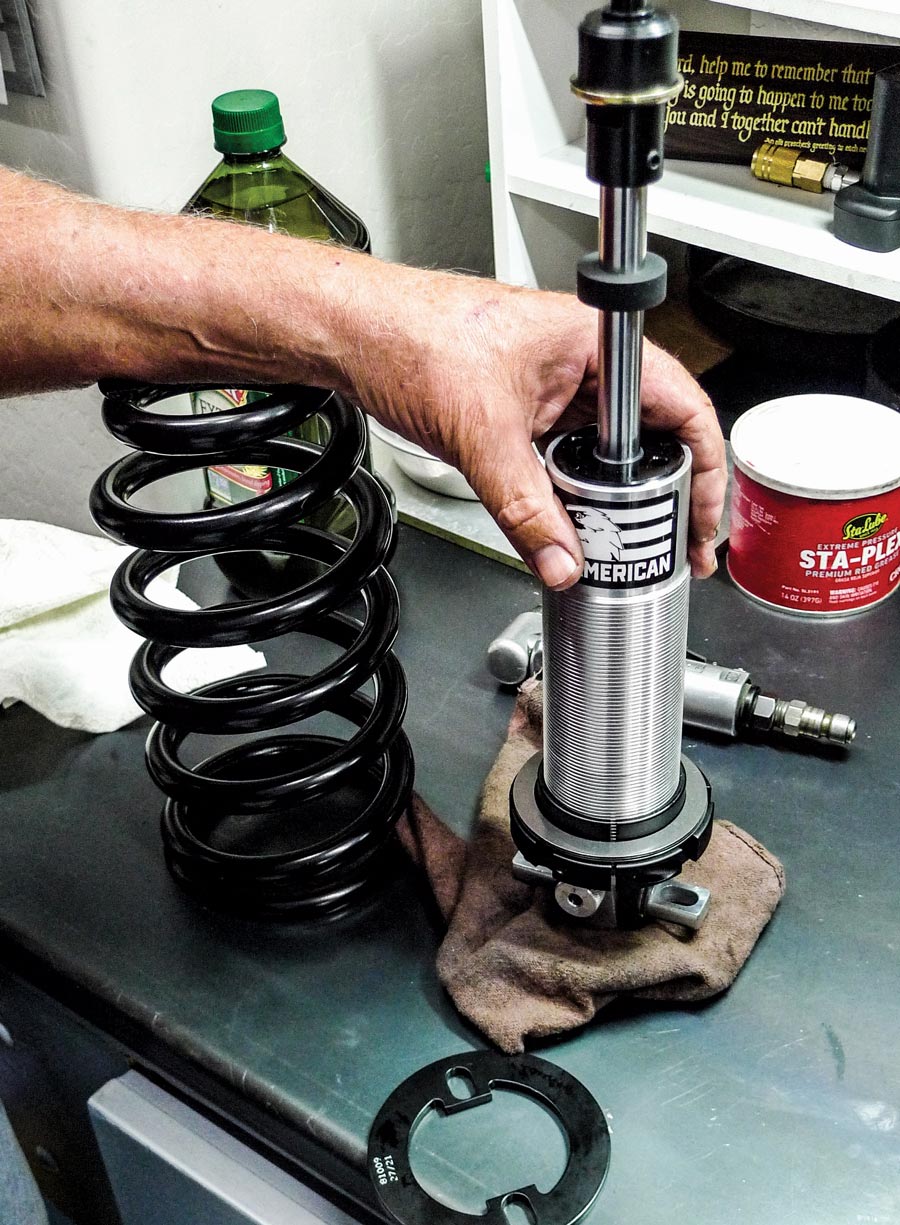
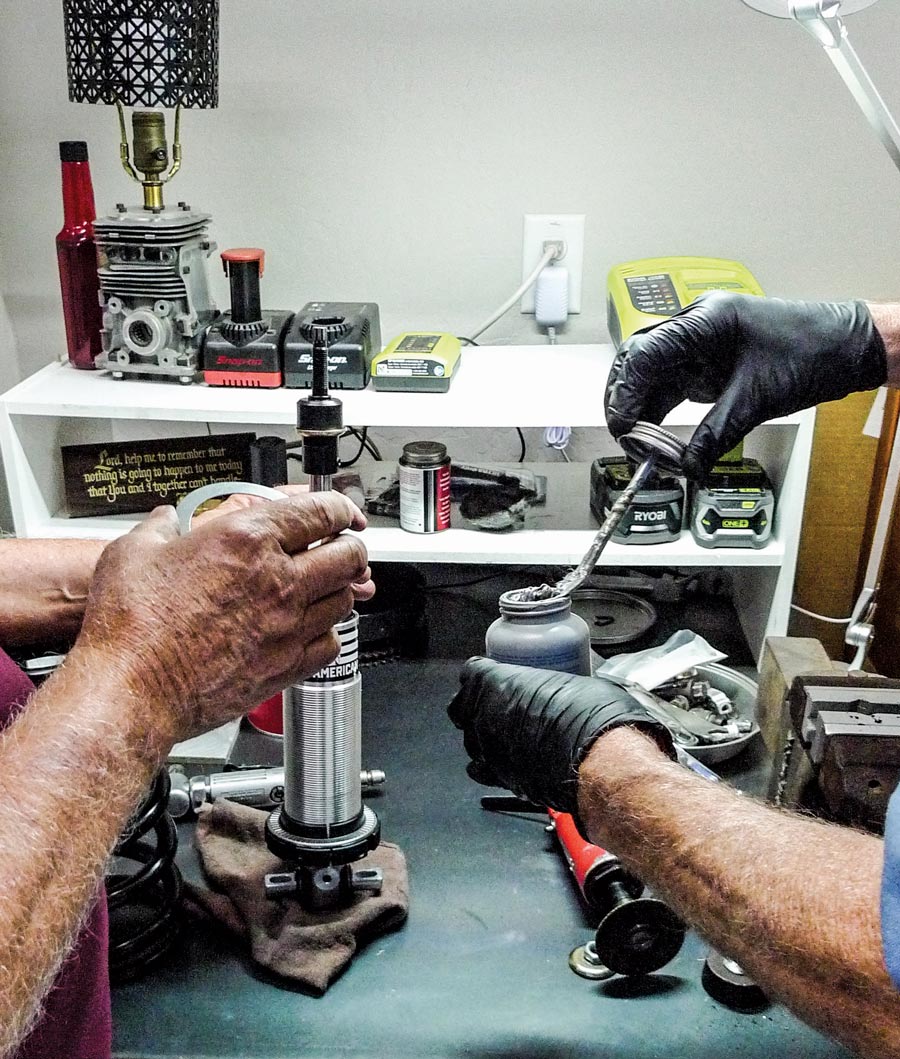
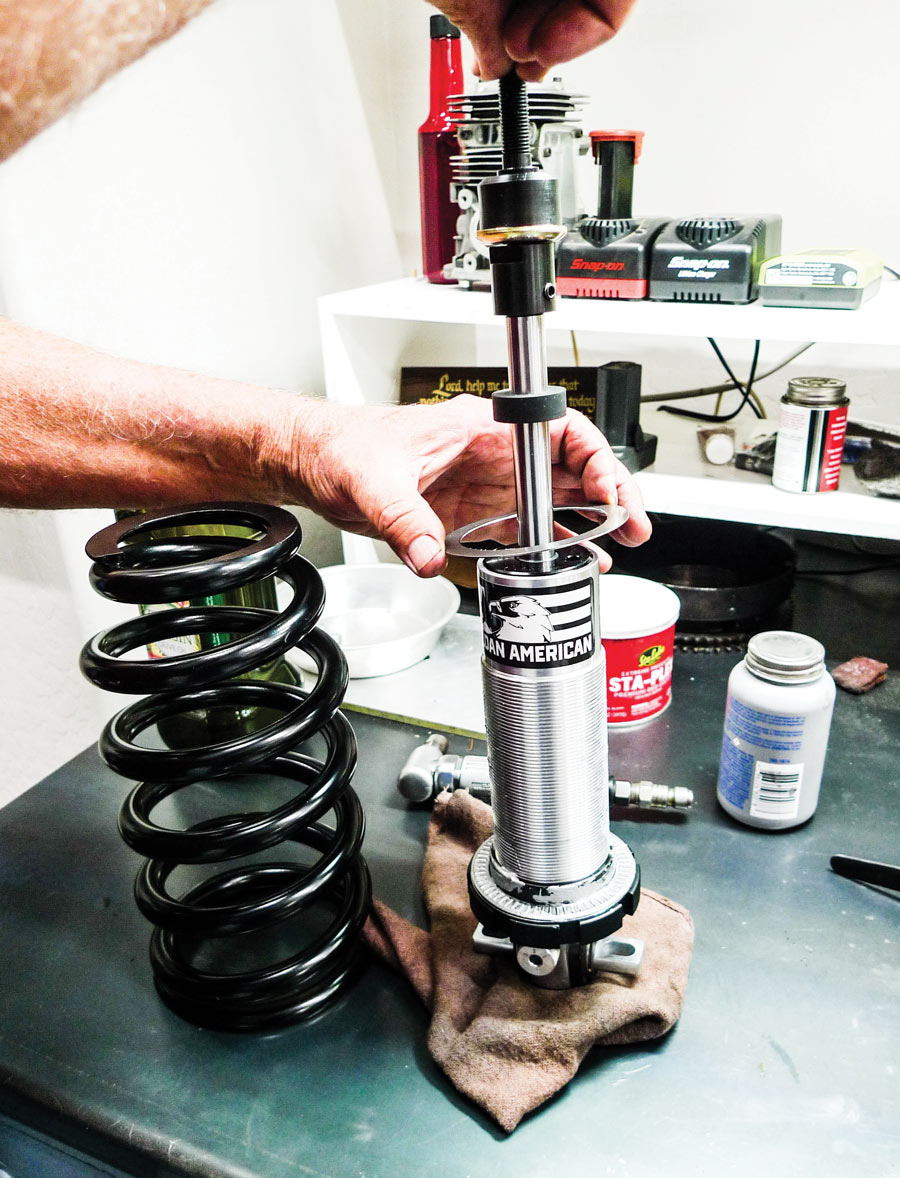
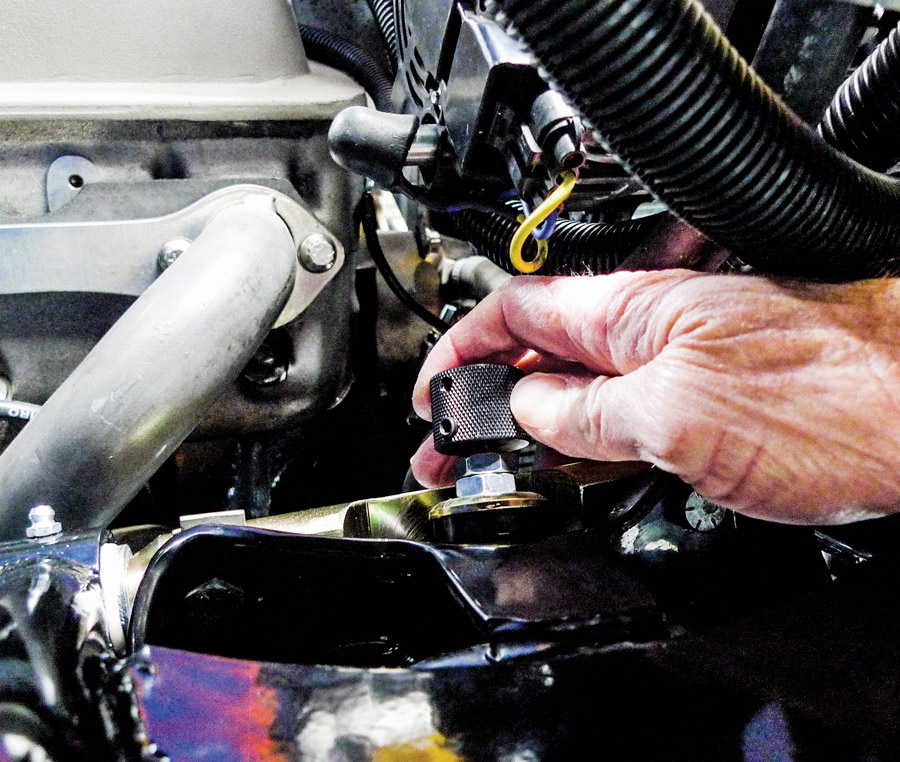
This time around, for a whole new world of adjustability, we’ll be installing Aldan American “RCX” double-adjustable coilovers (PN 300227). Out back Martin’s ride will remain leaf sprung, but we’ll be replacing tired overloaded shocks with Aldan American “TruLine” series single-adjustable shocks (PN 100111). Like our chosen control arms, our Aldan American upgrades come in kit form—and we’ll talk more about all of this later as we go.

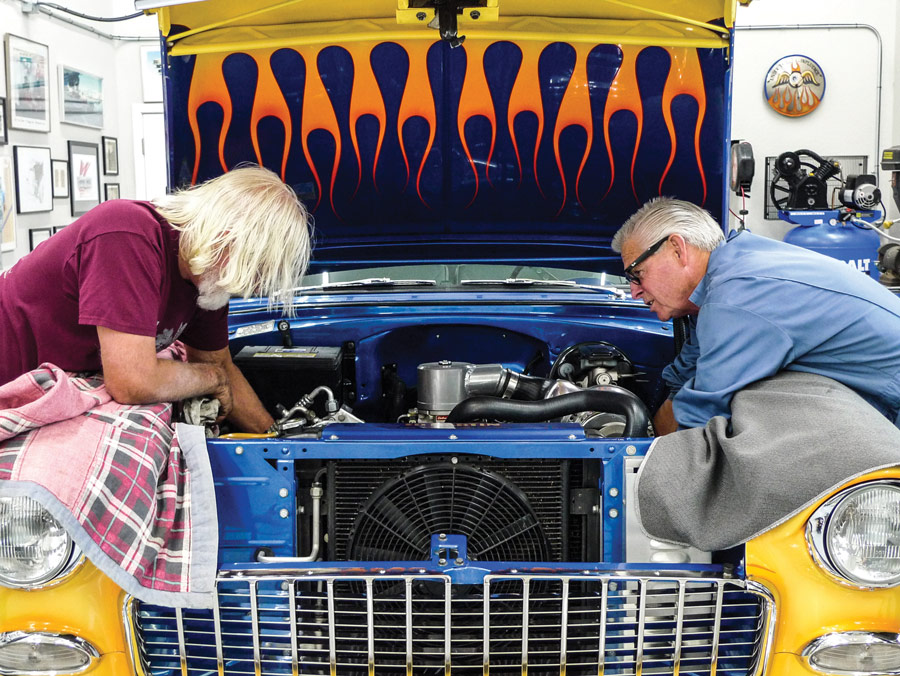
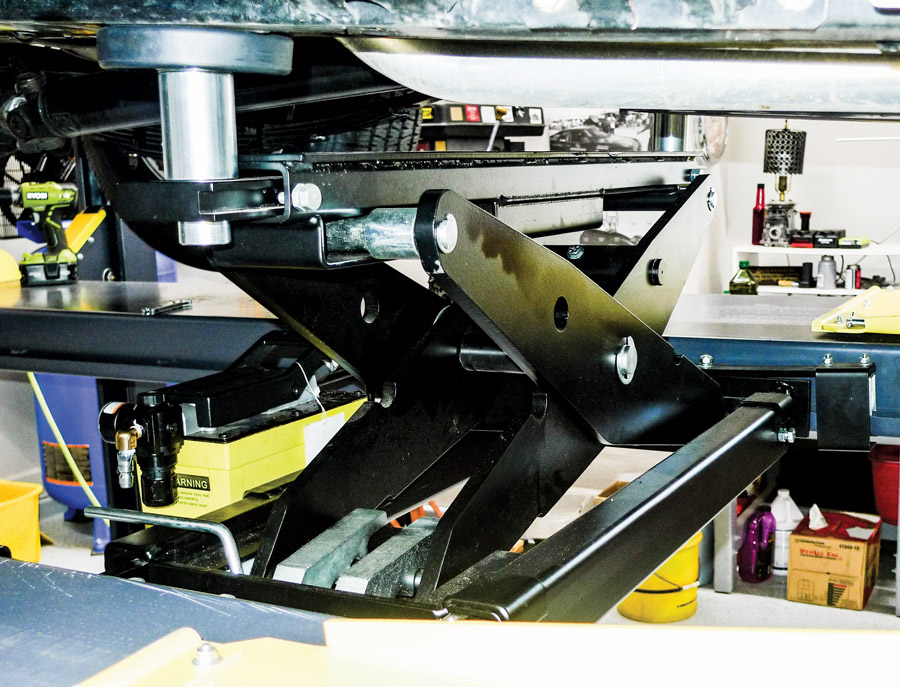
Doing the bulk of the work here will be car owner “Guardrail” Willie Martin, and his longtime coworker/friend, Mike “Spinner” Ferguson. Yes indeed, we all have distinctive monikers.

As we begin, we’re not expecting the job at hand to take any longer than the weekend we’ve set aside. In fact, Martin has already scheduled a Monday morning appointment with the local wheel alignment shop.

Afterward we’ll conduct a thorough testdrive—from Chino Valley, Arizona, to Riverside, California. Winding mountain roads and the windy Whitewater stretch of Interstate 10 should add up to a satisfactorily sufficient shakedown run. As, or if necessary, we’ll make adjustments on the proverbial fly.

Speedway Motors tubular control arms and the Aldan American coilovers and rear shocks for the ol’ flammable ’55
1. (Left to right) Here’s the Speedway Motors tubular control arms and the Aldan American coilovers and rear shocks for the ol’ flammable ’55. The spanner wrench, thrust bearings, and support plates are optional and not included in the kit.
Ferguson and Martin working on the car
2. This car’s supercharger, headers, and lower radiator hose will be our obstacles. For Ferguson (left) and Martin, it’s all quite familiar.
Measuring the front wheel
3. Expecting to end up somewhat lower, we’ll be keeping track as we go. To begin, the centers of our front wheel openings are up to 25 inches.
Measuring the rear wheel
4. Out back the centers of our wheel openings are up to 28 inches. At this end, we wouldn’t mind coming down an inch or so.
Martin’s four-post lift comes equipped with a roller jack
5. A job like this might best be done on a two-post lift. Martin’s four-post lift comes equipped with a roller jack, which will be enormously helpful along the way.
For disassembly, we could use a pickle fork, or a pickle fork attachment to an air chisel
6. For disassembly, we could use a pickle fork, or a pickle fork attachment to an air chisel. Martin, however, possesses the prowess to properly place—a hammer smack!
With ball joints now disjointed and tired shocks out of the way, Ferguson manually extracts the ol’ stock-type coil springs.
7. With ball joints now disjointed and tired shocks out of the way, Ferguson manually extracts the ol’ stock-type coil springs.
lumber used to protect brake hoses
8. It’s always good to have random chunks of lumber on hand and within reach. Here a little bit of that goes a long way to protect brake hoses.
ready to pull the original lower arms for good
pulling the original lower arms for good
9-10. At this point we’re ready to pull the original lower arms for good. With pneumatic persuasion this should go fairly quickly.
Martin’s ultrasonic parts cleaner
11. With disassembly chores all tended to, we’ll let the reusable fasteners ride around in Martin’s ultrasonic parts cleaner and maybe take a lunch break while this goes on.
shiny-new front suspension components
12. Now, before we commence with the installation of our shiny-new front suspension components, let’s just take a moment to become acquainted with them and review Aldan’s installation instructions.
Existing shock mount holes must be enlarged to  3/8 inch
13. To accept Aldan’s lower T-bar hardware (PN 71006), Speedway’s lower arms require one minor modification: Existing shock mount holes must be enlarged to 3/8 inch.
With a 13/16 open-end wrench their shafts are easily clocked as necessary
14. With that, the lower arms are ready to install. The upper arms are close. With a 13/16 open-end wrench their shafts are easily clocked as necessary.
For reassembly, original serrated bolts require repositioning. Here, a brass drift and a few gentle hammer taps do the trick just fine.
15. For reassembly, original serrated bolts require repositioning. Here, a brass drift and a few gentle hammer taps do the trick just fine.
Not yet completely attached to the spindle, our left-side arms are loosely in position. As a pre-alignment starting point, we’ll slip the same shims into the same places.
16. Not yet completely attached to the spindle, our left-side arms are loosely in position. As a pre-alignment starting point, we’ll slip the same shims into the same places.
the last clear view we’ll have of Aldan’s coilover support plates (PN AlD39) uninstalled
17. Down low in this photo is the last clear view we’ll have of Aldan’s coilover support plates (PN AlD39) uninstalled. These are optional but they’ll further strengthen the lower arms’ spring pockets.
As recommended by Aldan, a thin, even coating of antiseize compound is applied to spring seat adjusting threads.
18. As recommended by Aldan, a thin, even coating of antiseize compound is applied to spring seat adjusting threads.
we’re now installing the optional thrust bearings
19. Between spring retainers (PN ALD-50) and the lower ends of conical coil springs, we’re now installing the optional thrust bearings (PN ALD-26). For reference, big-block springs are PN 10USA55 and small-block are PN 10USA450.
At times like these, it’s good to have three hands. Martin doesn’t really, but Ferguson lends an extra, which helps to loosely locate the new spring in its upper pocket.
20. At times like these, it’s good to have three hands. Martin doesn’t really, but Ferguson lends an extra, which helps to loosely locate the new spring in its upper pocket.
For certain Aldan components, torque specifications are included in our installation instructions. Apart from that, Martin’s instinct is good enough for us.
21. For certain Aldan components, torque specifications are included in our installation instructions. Apart from that, Martin’s instinct is good enough for us.
Down to the short strokes, at least for the front end, the preexisting sway bar attaches to the new Speedway tubular lower arms just the same.
22. Down to the short strokes, at least for the front end, the preexisting sway bar attaches to the new Speedway tubular lower arms just the same.
With the front end reassembled it’s time to make adjustments. For rebound, we’ll begin with a midpoint setting. For this, deeper details are included in our instructions.
23. With the front end reassembled it’s time to make adjustments. For rebound, we’ll begin with a midpoint setting. For this, deeper details are included in our instructions.
optional spanner wrench
24. Using this optional spanner wrench (PN ALD-1) we’ll continue with pre-load and ride-height adjustments. It’s dark down here, but “RCX” compression adjustment knobs are located just below.
time to replace the overload shocks
25. Out with the old, in with the new. It’s time to replace the overload shocks. They’ve done their jobs, but they never were much to look at. The new shocks, however, are pretty.
For stock Tri-Five Chevys, upper shock mounts are part of the trunk floor. Martin’s car has a custom-fabricated crossmember. Either way, holes must be enlarged to ½ inch.
26. For stock Tri-Five Chevys, upper shock mounts are part of the trunk floor. Martin’s car has a custom-fabricated crossmember. Either way, holes must be enlarged to ½ inch.
Our new Aldan shocks feature adjustable rebound. Here, the adjustment knob is just out of view, but right within reach as we’ll demonstrate soon.
27. Our new Aldan shocks feature adjustable rebound. Here, the adjustment knob is just out of view, but right within reach as we’ll demonstrate soon.
With upper holes properly enlarged, the right-side shock slipped right into place. Here the left side will as well—with the dull thud of a non-marking mallet.
28. With upper holes properly enlarged, the right-side shock slipped right into place. Here the left side will as well—with the dull thud of a non-marking mallet.
With our installation now complete, it’s time for a ride-height recheck. Without yet rolling down the road, our frontend is just an inch lower. This, to us, looks good.
29. With our installation now complete, it’s time for a ride-height recheck. Without yet rolling down the road, our frontend is just an inch lower. This, to us, looks good.
Out back, we’re still a little higher than we’d like. Off the car, the original springs were stored without their familiar load. By allowing a little drive time, settling will likely occur.
30. Out back, we’re still a little higher than we’d like. Off the car, the original springs were stored without their familiar load. By allowing a little drive time, settling will likely occur.
2 people enjoying a ride in the car
31. With nothing more than suggested mid-point (starting point) adjustments, the ’55 is riding and cornering much nicer than ever before.
At our final destination we’ll adjust rearend rebound a click or two
32. What a difference a drive makes. For rearend ride height, this is what we’ve had in mind. At our final destination we’ll adjust rearend rebound a click or two.
“Guardrail” Willie Martin smiling
33. Why is “Guardrail” Willie Martin smiling? Well, it likely has a lot to do with our newfound adjustability, for whatever kind of ride and cornering we might desire.
Aldan American
(310) 834-7478
aldanamerican.com
Speedway Motors
(855) 313-9173
speedwaymotors.com/allchevyperformance