TECH
TECH

 Photography by The Author
n LS swap into a Chevelle is not breaking news. In fact, it’s a nearly commonplace occurrence. Most media stories reveal just the main points and never the little details and information that make the swap a success. There are plenty of nuances to these swaps and after struggling through our fair share of these, we thought we’d share the little nuggets as well. For example, if you don’t choose the right oil pan, ground clearance will suffer, the pan will hit the crossmember or the steering linkage at full lock.
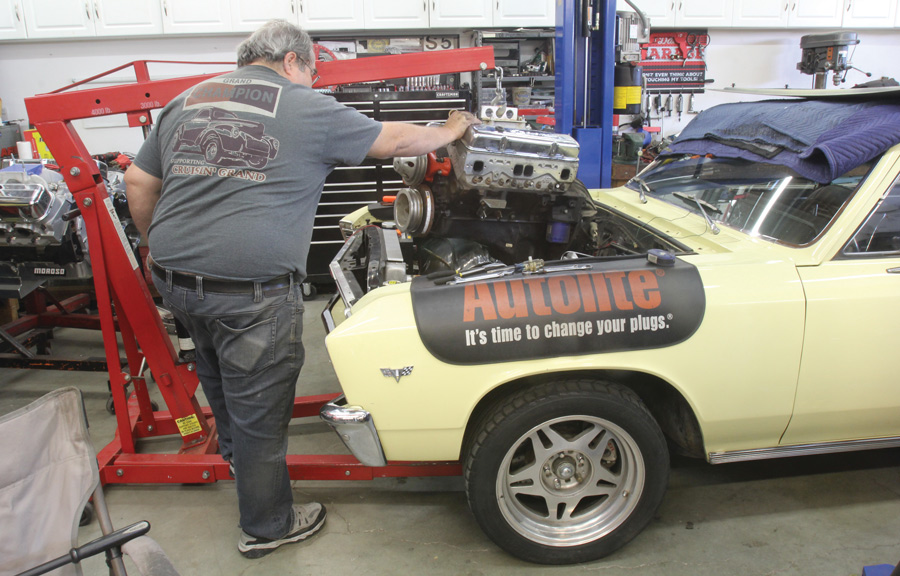
Our test mule is a somewhat out-of-the ordinary 1967 Custom 300 sedan that Eric Rosendahl purchased with a small-block 383 and a TREMEC five-speed. While he loved the car with its Hotchkis suspension, 17-inch wheels, four-wheel discs, and great paint, he envisioned a modern driveline with a much more tractable 5.7L LS and a 4L60E controlled with a factory ECU. The swap demanded quite a bit of time to execute correctly as the project ran into typical old car issues that added to the build time.
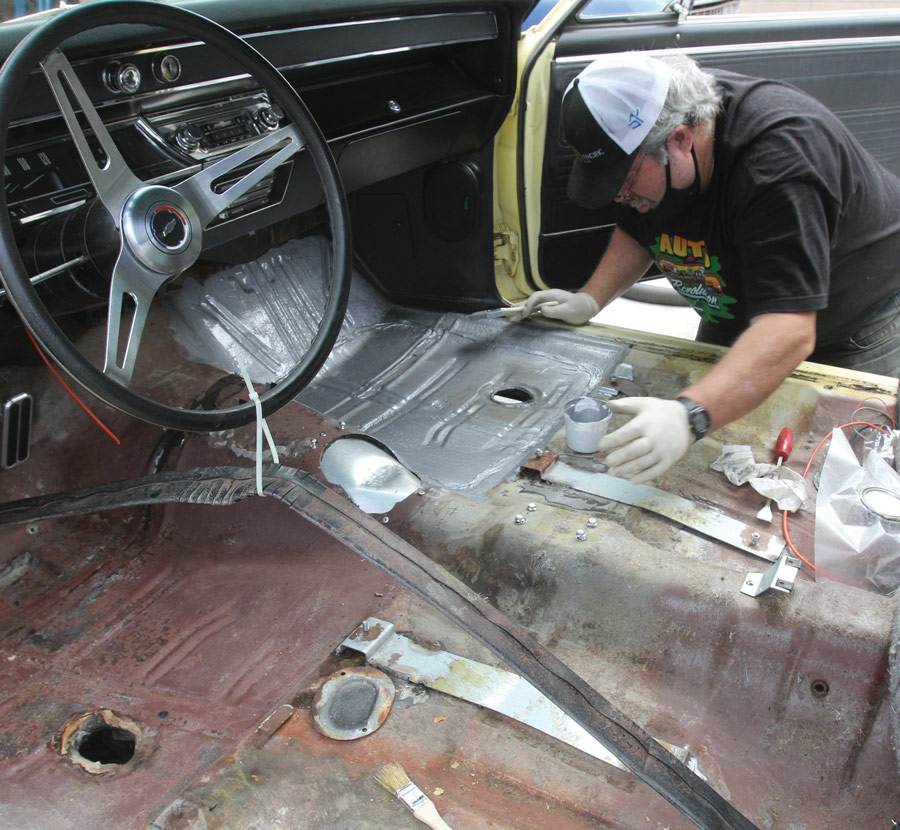
While the LS swap was the primary focus, the first effort involved modifying the interior. It needed some rust repair on the passenger side floorpan with a MIG welder followed by Rosendahl treating the work with POR-15 anti-rust paint. The five-speed manual left a large shifter hole in the floor that required an aluminum cover, which we completed with pop rivets and body sealer.
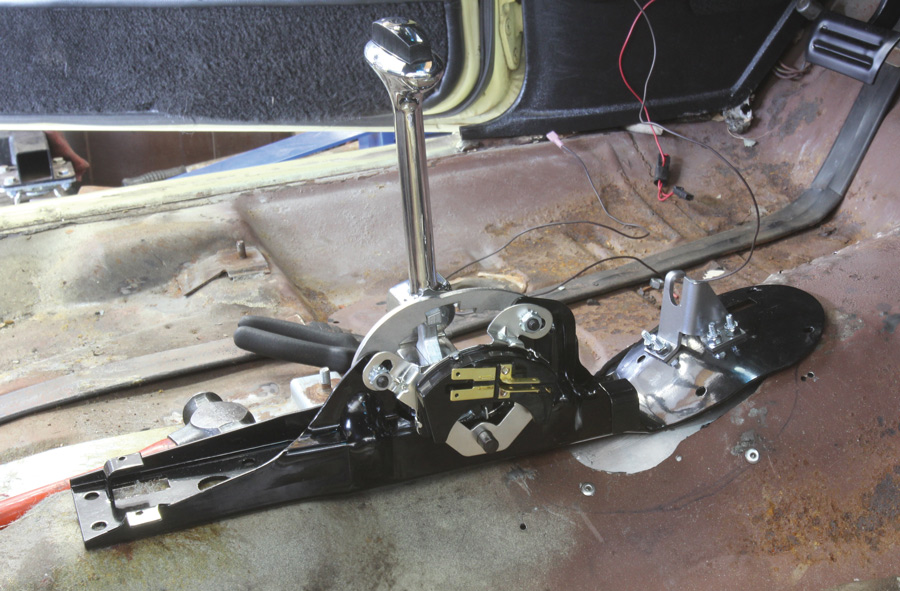
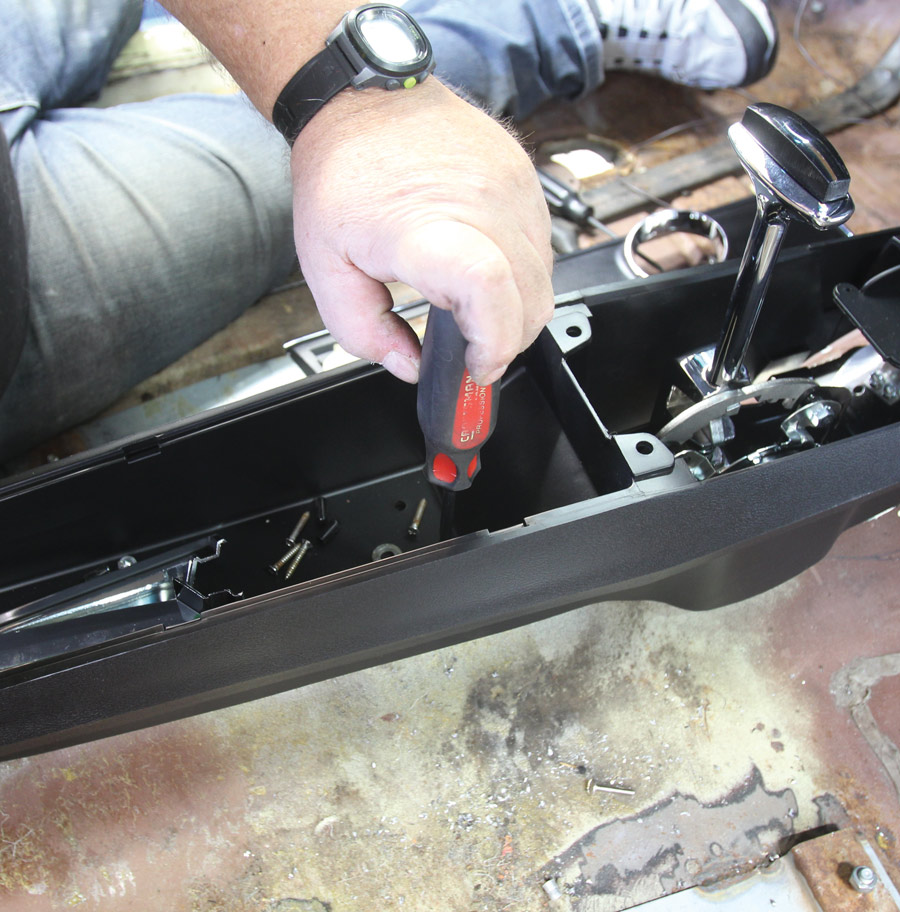
The plan also called for a Chevelle shifter converted to four-speed auto control and a factory console. Shiftworks supplied the stock-appearing shifter with all the proper gear depressions and we took the time to mount the shifter in the stock location using the original factory detent locations in the floor. Instead of just using bolts and nuts or cheesy sheetmetal screws we took the extra time to mount ¼-inch thread inserts to allow easy removal. Rosendahl then carefully staged the location of the console mounts to make sure the shifter would not make contact with the console while the shifter was either in First gear or Park. The console brackets were also attached with threaded inserts.
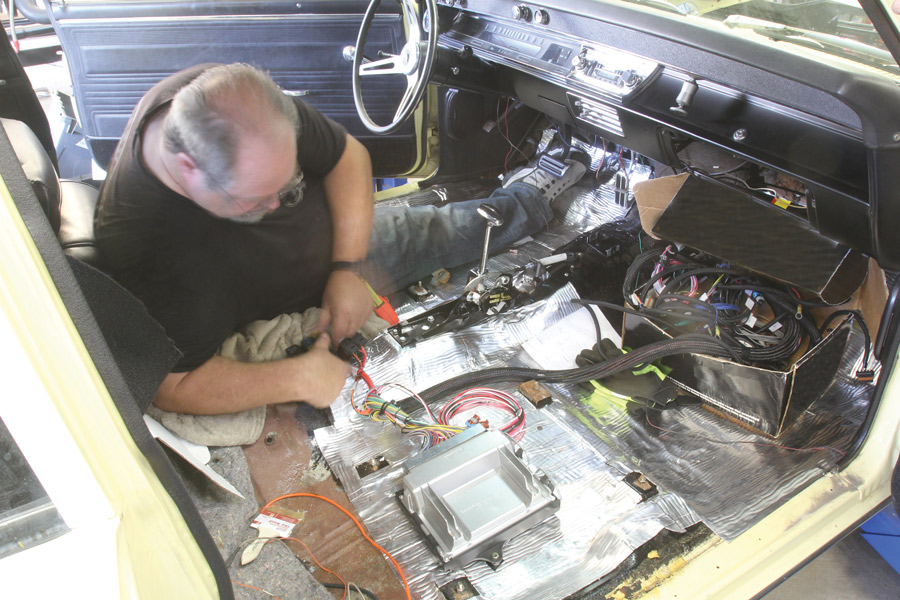
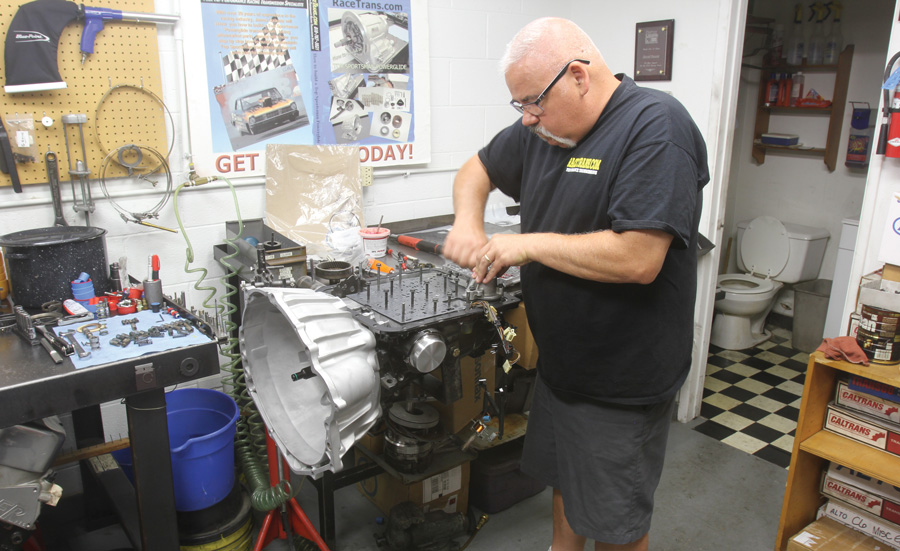
At this time, Rosendahl also worked out where to hide the large factory ECU. He determined that by raising the passenger bucket seat about ¼ inch, anyone sitting in the seat would not feel the ECU. Rosendahl chose Performance System Integration (PSI) for the ECU. The company offers a service where you can order a complete system that will be configured for the correct gear ratio and tire size along with a basic tune to get the engine running. A more accurate final tune has to be accomplished once the car is running.
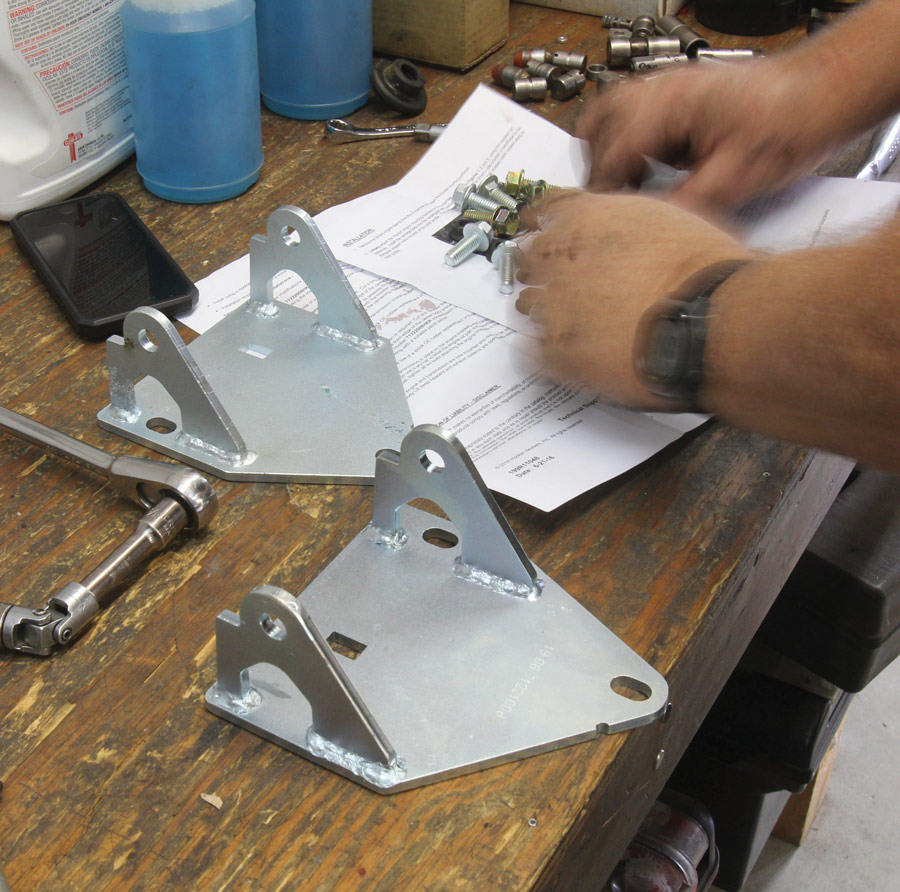
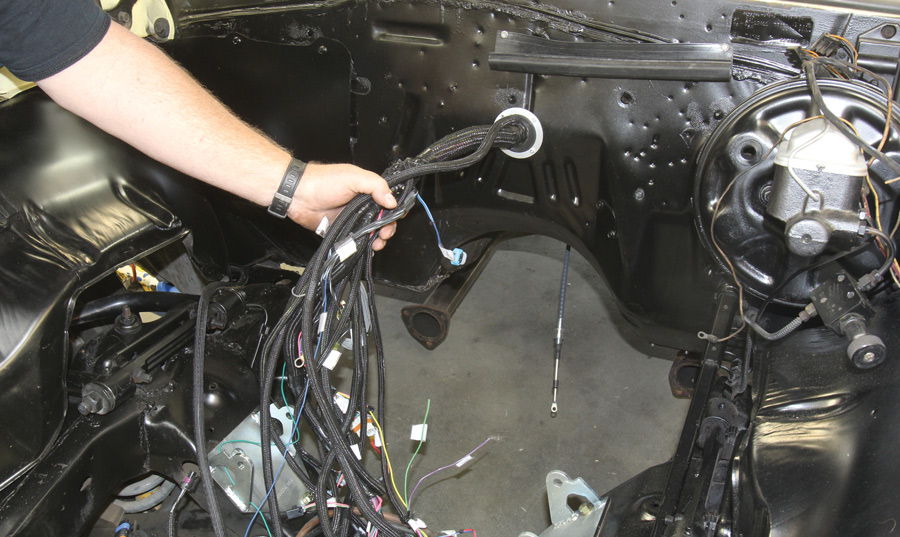
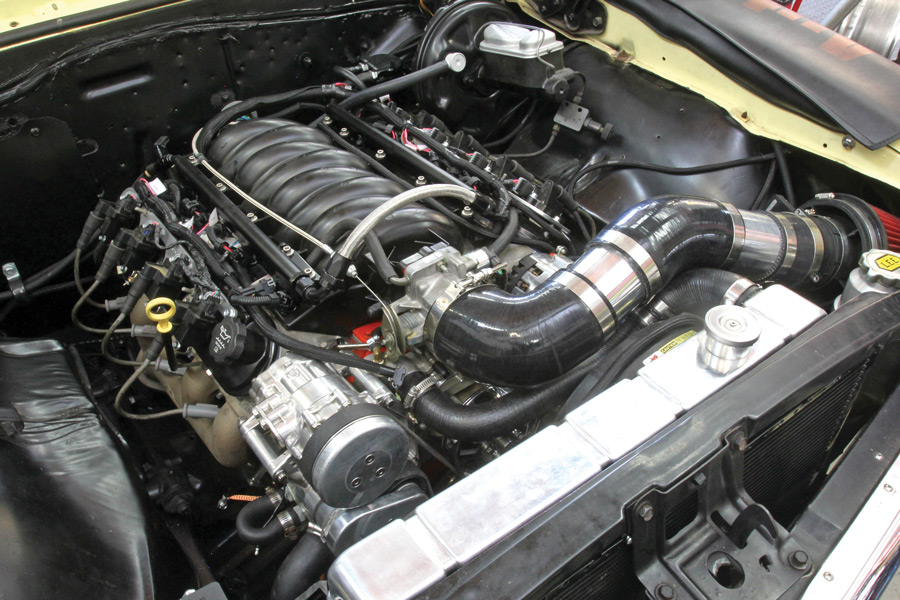
The stock EFI harness that he had procured earlier was somewhat large in diameter but it easily fit underneath the reproduction console and then ran directly through the firewall with a Sealz-It grommet at roughly the intake manifold height in the engine compartment. Moving into the engine compartment, the next step was a complete cleaning and repaint followed by new Hooker Blackheart clamshell-style motor mounts. These mounts place the engine slightly lower in the chassis and offer a slight forward bias. These use polyurethane-style mounts similar to late-’90s LS inserts. This also demanded an oil pan with a shallow front portion to be able to clear the Chevelle engine crossmember.
Holley actually has several LS cast-aluminum oil pans but the best one for this application is the 302-2 with its shallow front portion. The Holley pan may be considered pricey, but it comes with an integrated oil filter, so an external oil filter is not needed. There are other pans available at a lower initial price, but they require either a separate oil filter or a separate billet aluminum oil filter mount that increases the cost. There is also a muscle car factory oil pan that will clear the crossmember but its depth will protrude below the crossmember. The problem is a cast pan is far more susceptible to breaking instead of just bending like a stamped steel pan. With a lower ride height, it’s not worth the risk. The Holley pan fits nicely right at crossmember depth.
Rosendahl also chose an LS-style 4L60E trans to use behind the engine and we had our friend Jimmy Galante at RaceTrans assemble an LS 4L60E. A small-block Chevy version 4L60E will work but requires adapters that aren’t necessary with the LS version. With a full 360-degree bellhousing don’t install the starter motor until the converter bolts are attached, as this has to be done through the starter motor pocket.
Since this Chevelle is intended as a daily driver in San Diego, Rosendahl opted for a set of Hooker cast-iron LS manifolds as opposed to headers mainly for reduced maintenance. He also chose a set of second-gen Camaro lead-down pipes that a muffler shop will complete once the engine is installed and operational.
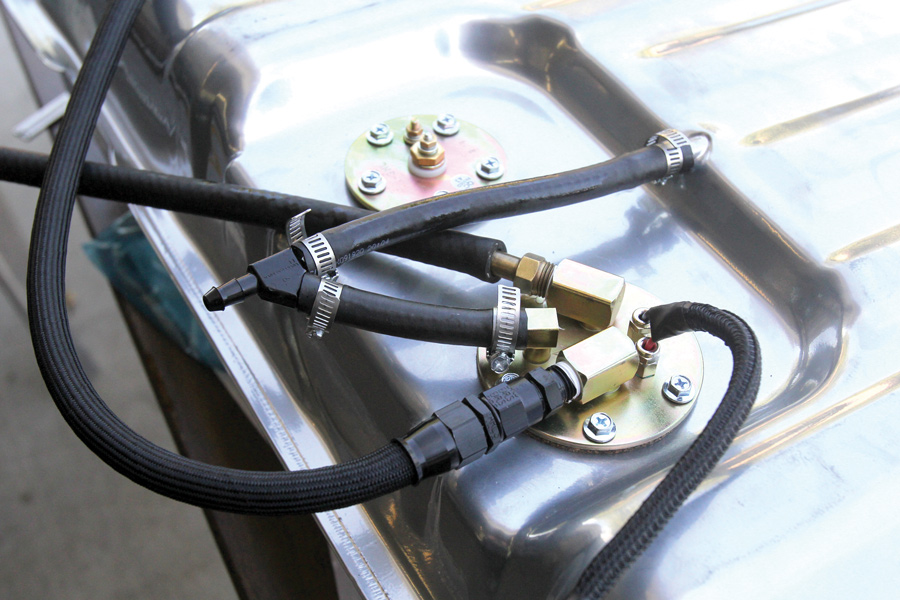
One key to any EFI LS swap is to invest in a quality fuel delivery system. We’ve seen plenty of externally mounted fuel pump attempts and these never perform well due to fuel slosh in the tank. EFI engines demand that the pump inlet be submerged in fuel at all times so Rosendahl opted for Holley’s Sniper fuel tank assembly that includes the tank, pump, mounting assembly, and fuel level indicator. The Sniper system internally mounts the pump and includes a baffle to prevent fuel starvation at low fuel levels. The 255-liter-per-hour (lph) pump is capable of delivering enough fuel to feed over 550 normally aspirated horsepower at 58 psi, leaving plenty of horsepower headroom should Rosendahl decide to bump this engine up in the future.
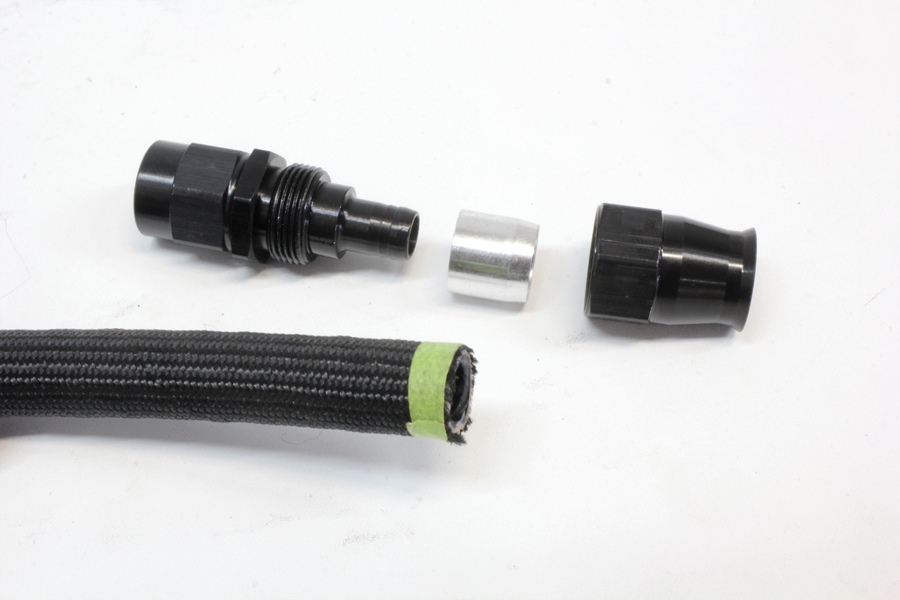
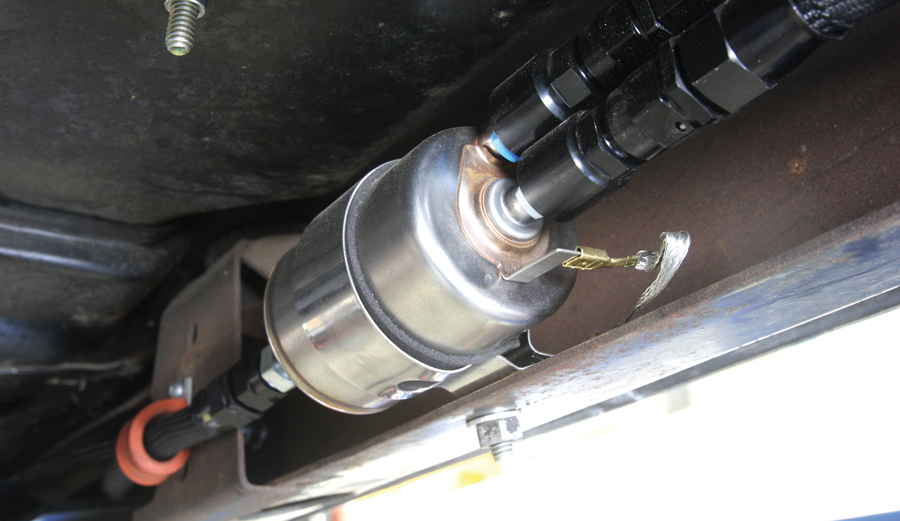
Rosendahl designed the fuel delivery system around Earl’s Ultra-Pro PTFE fuel line for the high pressure side and using the original Chevelle hard fuel line as the return. For a regulator, he chose a Wix version of the 1999 and later Corvette filter regulator located on the framerail near the front of the car. To plumb this combination required some specialty quick-disconnect (QD) fittings that adapt the filter-regulator to -6 AN hose.
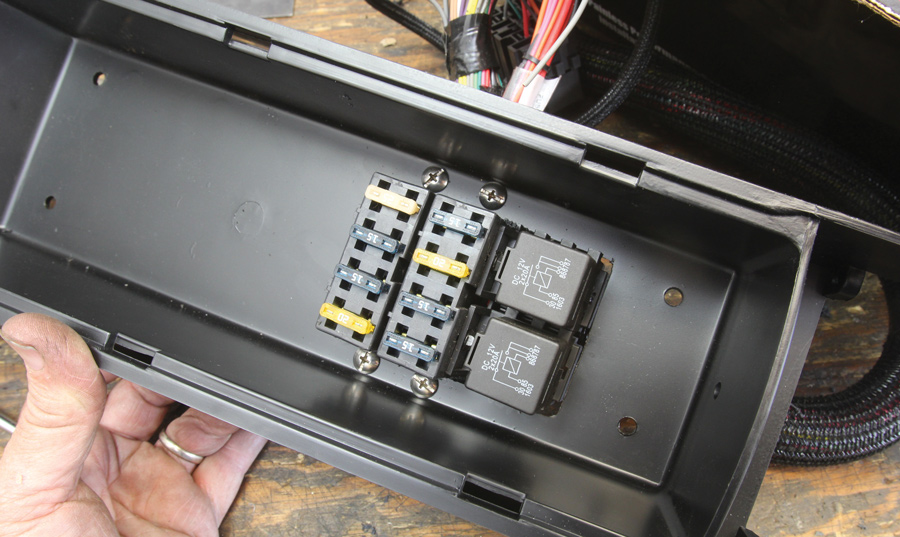
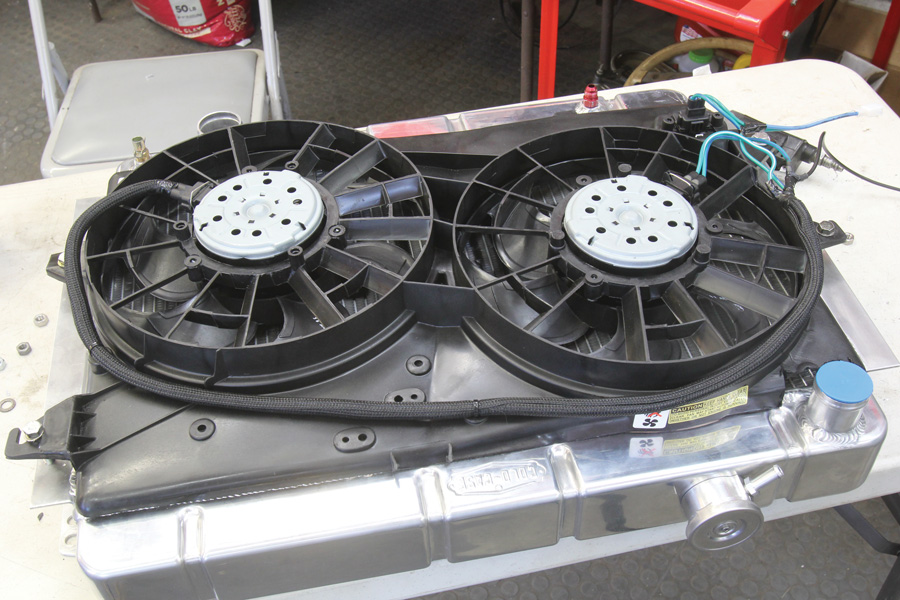
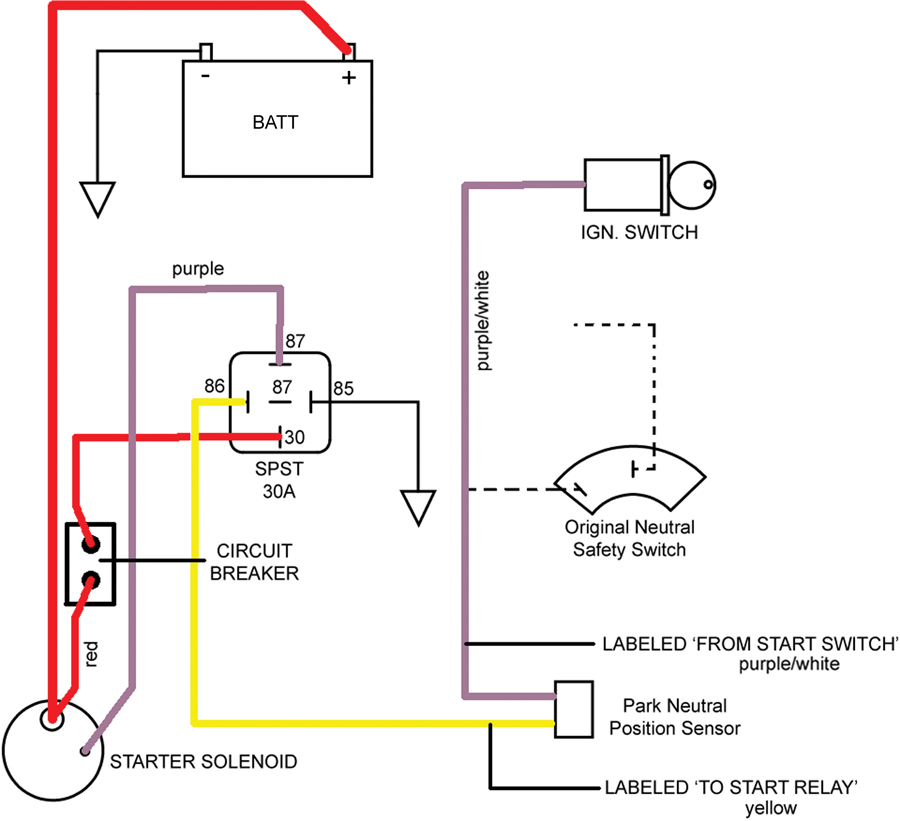
Before we installed the engine, Rosendahl also mounted a relay box with a total of six relays in which we used two for the headlights to make them brighter along with two more for the twin electric fans. This left two unused relays, one which he used to send more current to the starter solenoid from the relay instead of conducting nearly 35 amps of current for a few milliseconds through the ignition switch, which can eventually create damage to the switch. The relay removes the load from the ignition switch.
The original wiring harness in the car was in pretty rough shape, so among the tasks we will push once the engine is in the car and running will be to upgrade the 50-plus-year-old wiring with a complete American Autowire harness. We decided to wait until the car ran first before doing this portion of the work so as not to add another potential problem along the way and not know if a wiring mistake was to blame. As it turned out, we did have a problem starting the engine that we’ll discuss in Part II and had we added the new vehicle electrical harness, it would have made the diagnosis that much more difficult.
For Part II, we’ll have the new LS engine in place and run through all the other little adventures that needed addressing. Unlike many magazine projects that always seem to fit together seamlessly from start to finish, discussing the problems we faced during this swap will help others avoid these issues. At least that’s what we tell ourselves every time something goes wrong! Hang with us for Part II coming in the next issue.