ACP department heading TECH
InTheGarageMedia.com
Contemporary cluster
A Modern Driveline Demands a Digital Dash
BY RYAN MANSONImages by THE AUTHOR
I

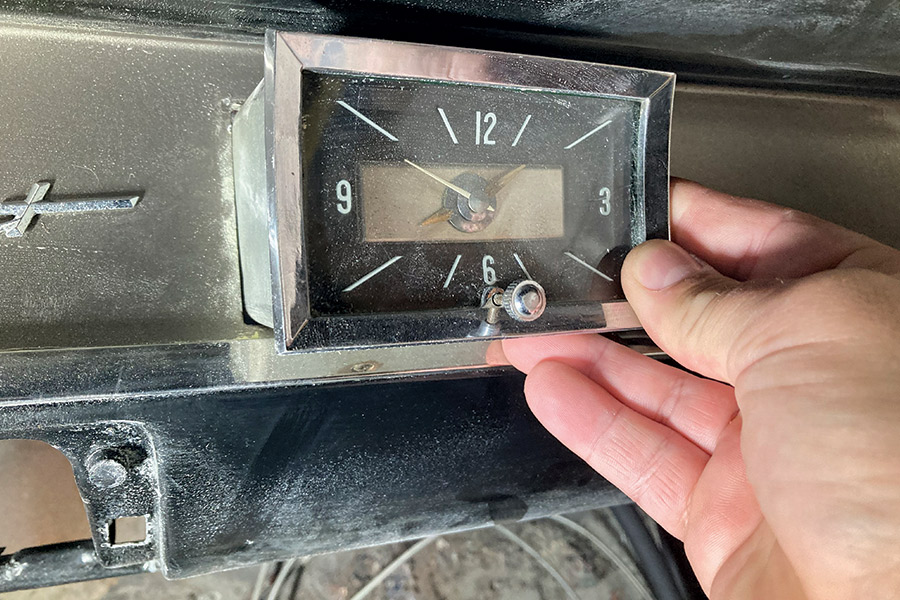
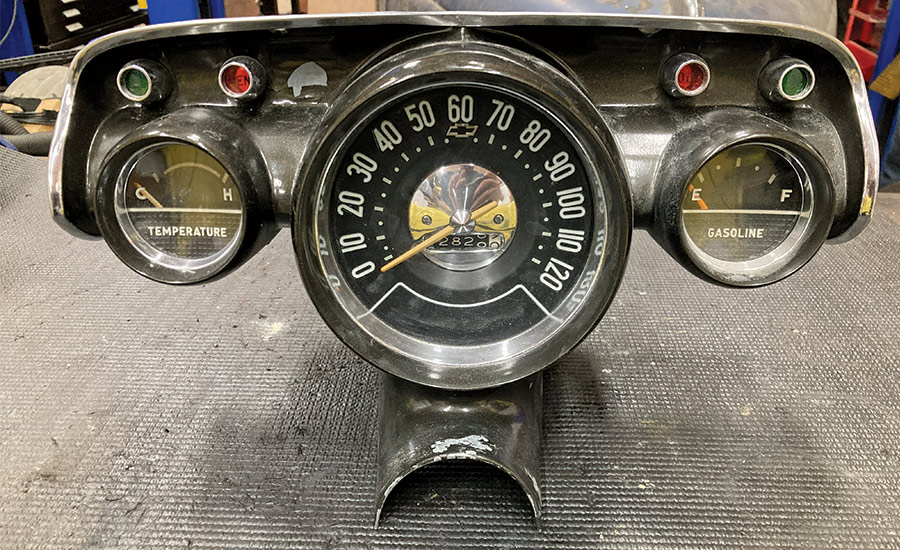
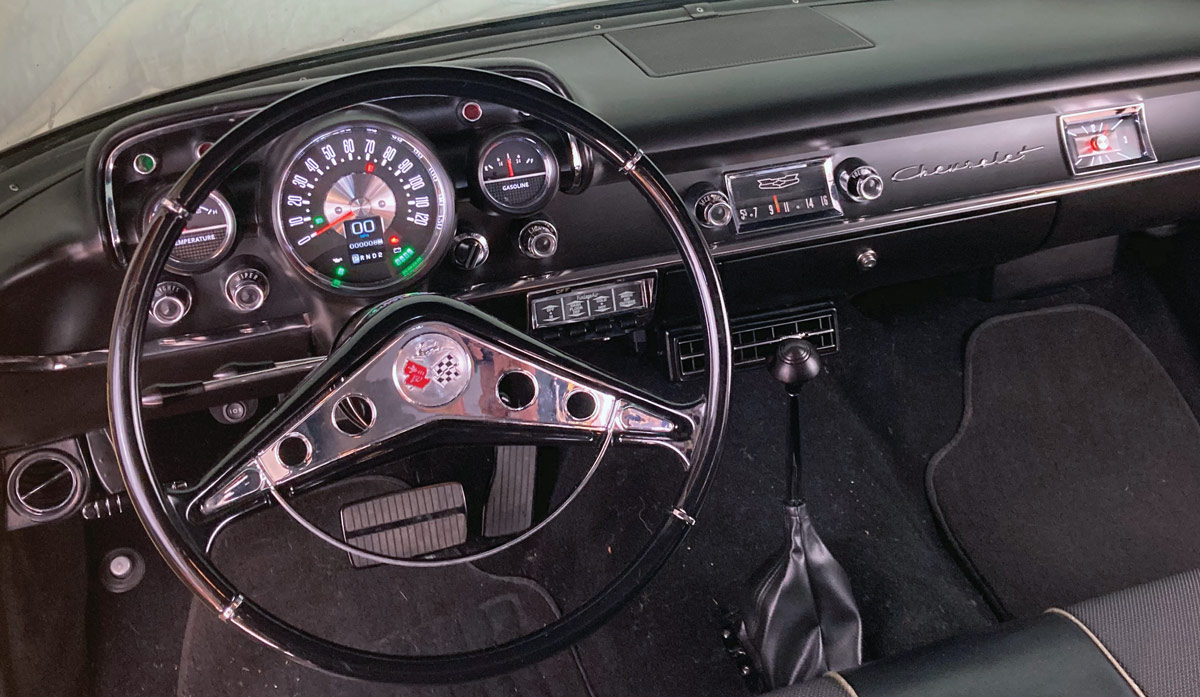
f you’re building a classic Chevy with a lean toward any type of contemporary features, be them based on performance or comfort, chances are one of the things on the upgrade list are the gauges. Most cars from the 1950s and 1960s lacked a full array of gauges, limiting information to speed, engine temp, and fuel level. Low oil pressure or volts was usually displayed via a simple dummy light that may or may not have worked. And engine temp was usually displayed in such a manner that one had to know where the “normal” setting on the gauge was to even know when an overheating scenario was actually taking place, given simply a “Hot” and “Cold” setting at either side of a sweeping needle. It’s no wonder adding a couple extra gauges under the dash rail and a cup-mounted tach on the steering column became so popular.

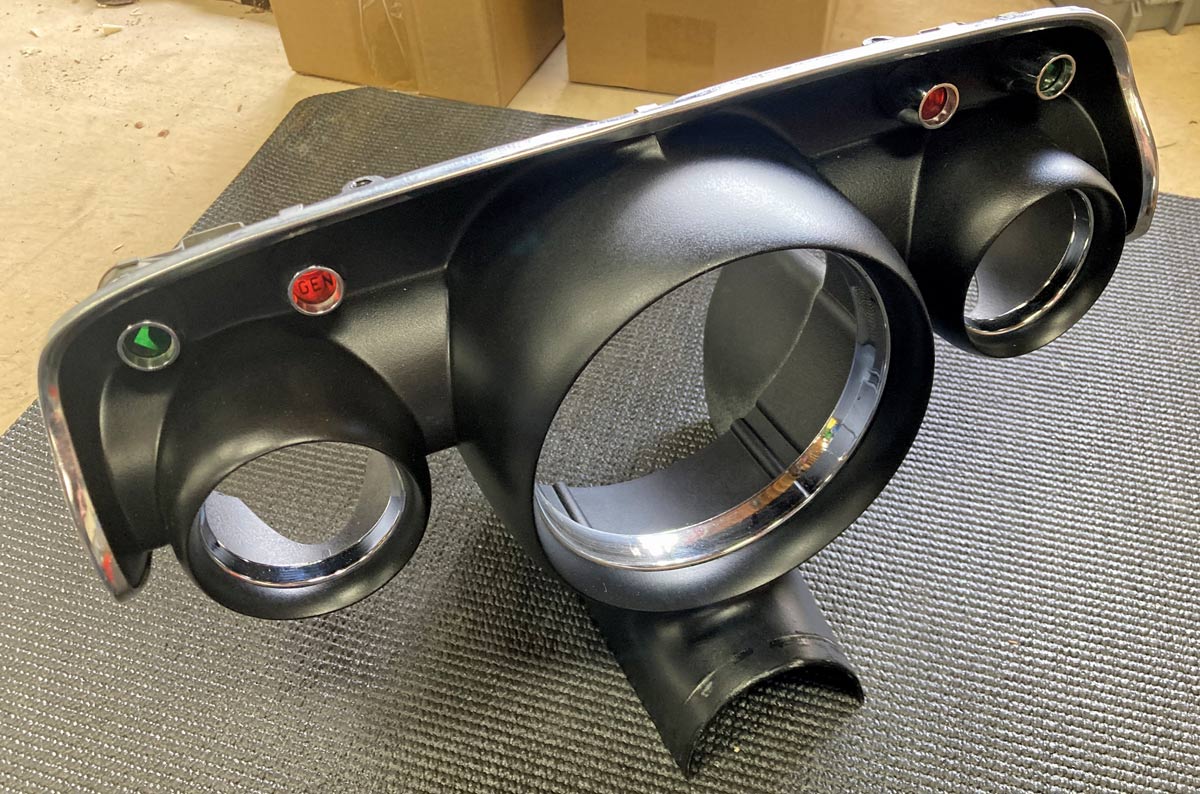
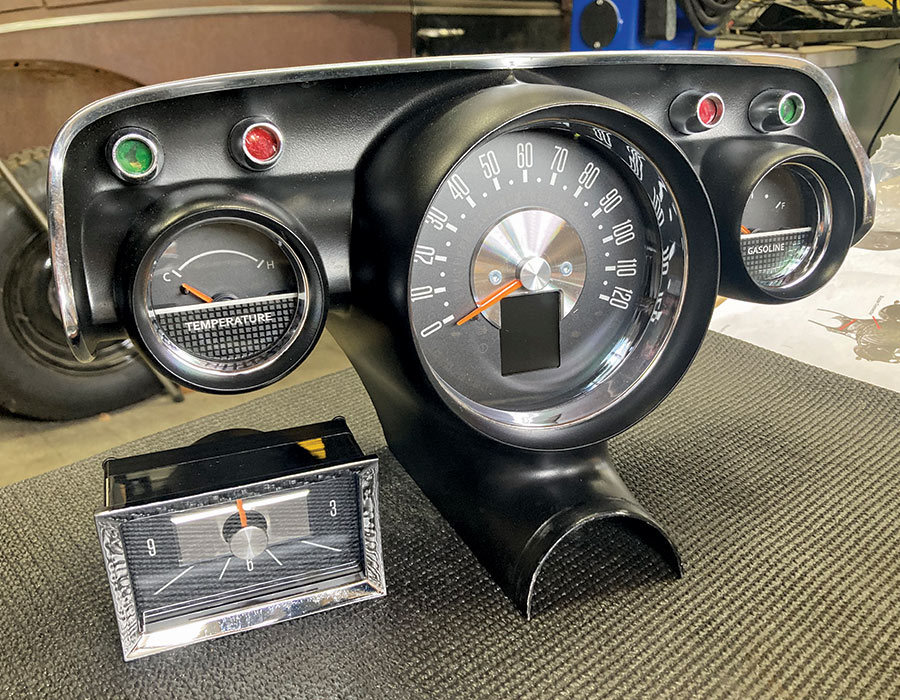
But with time, technology has caught up to the needs of hot rodders in the form of more accurate gauge clusters that abound with additional information to boot. And that describes nearly all of Dakota Digital’s gauge offerings, but never more so than their RTX line of Retrotech Analog/Digital Instrument Systems. With a nod to the original factory cluster’s aesthetic, Dakota Digital has snuck in a myriad of additional information, all programmable by the end user. Their effort to incorporate OEM design elements as the layout is concerned results in an unobtrusive gauge design that, when powered down, is easily mistaken for stock. But once the ignition switch is hit, the LED-backlit cluster comes alive, providing an array of additional information.

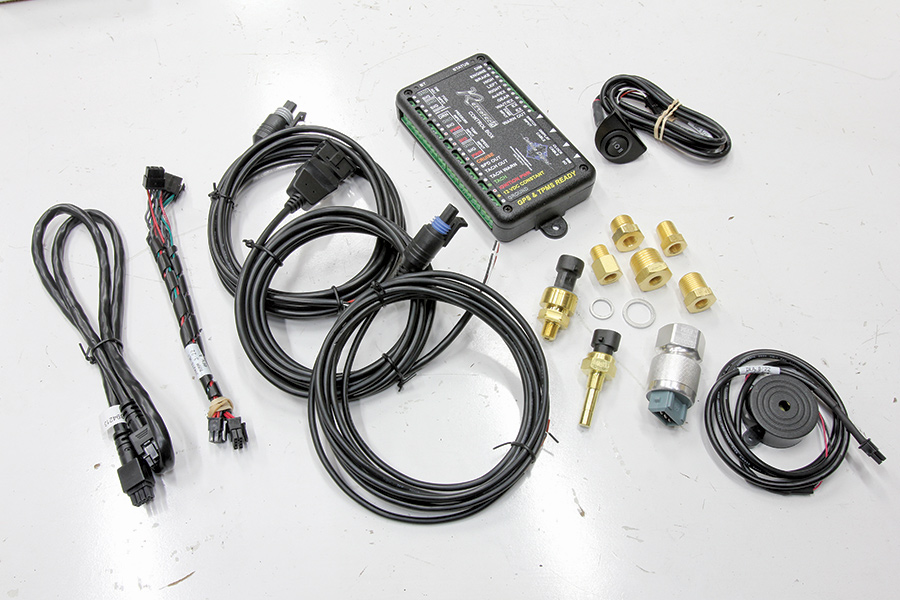
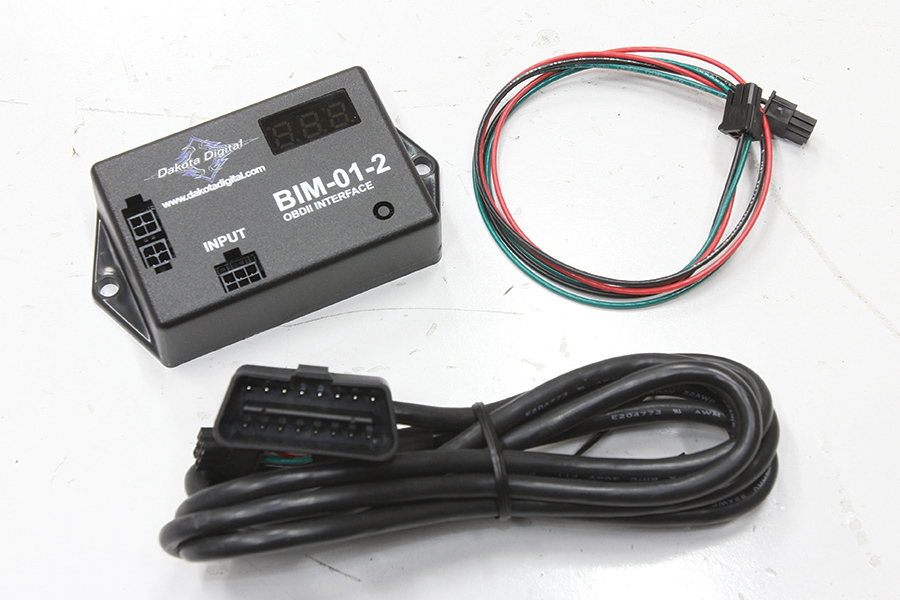
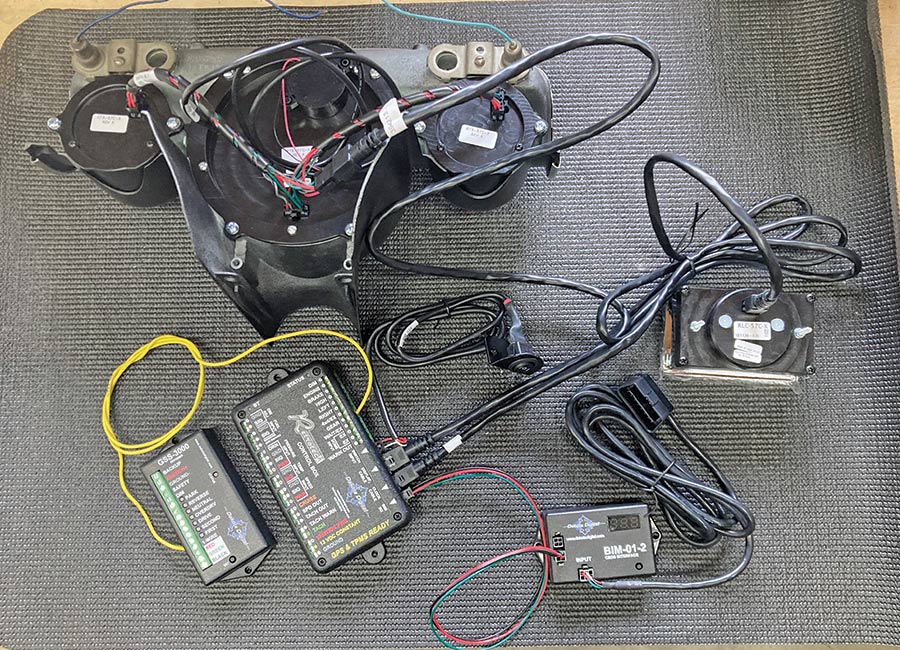
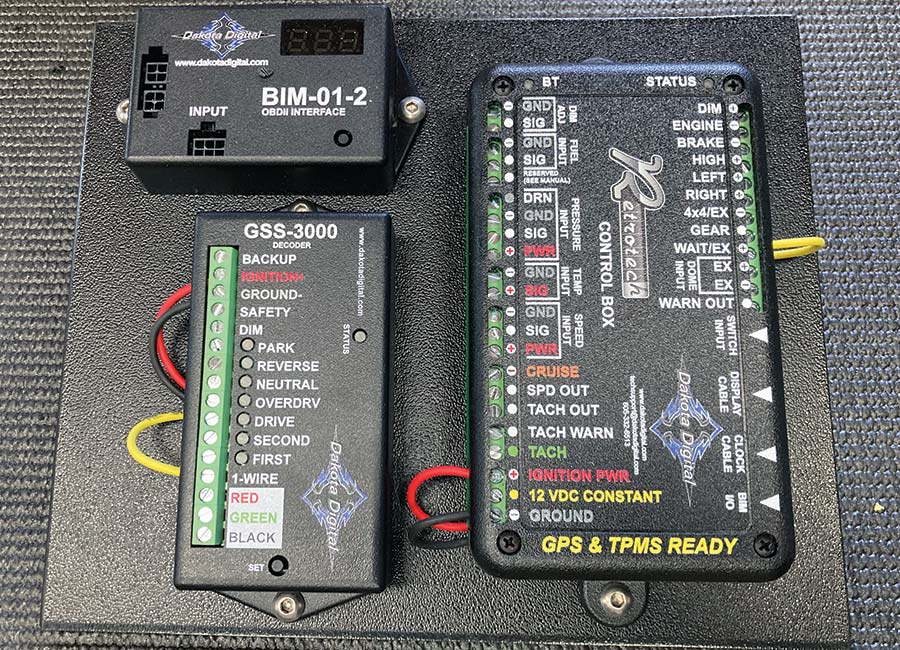
With the LS swap transformation in full tilt boogie mode on our buddy Bruce Valley’s 1957 Chevy Handyman Wagon here at the Clampdown Competition headquarters, we knew we were going to want more information as it pertained to the powerplant than the OE gauges were going to provide. With the recent dash overhaul that we just covered a few issues back, we weren’t about to install a bunch of tired gauges. Turns out, Dakota Digital’s RTX Instrument Cluster would fit the bill perfectly for what we were looking for. With plenty of information displayed, a close eye on the goings-on underhood would be possible, and with the addition of a Bus Interface Module for vehicles equipped with an OBD-II (BIM-01-2), the new RTX gauge cluster could be connected directly to the LS engine’s ECU to receive nearly all of its information. That negates the extra effort of running additional sensors for things like oil pressure, engine coolant temp, speed, and tach signal; these all now come directly from the engine’s ECU via the OBD-II port.

The RTX Instrument Cluster is also fully customizable with a number of backlight and needle color options. With a night-dimming mode, that backlight setting can be programmed to be nice and bright during the day, resulting in easy viewing even on the sunniest of days, yet toned down when the headlights are on, making nighttime driving enjoyable.

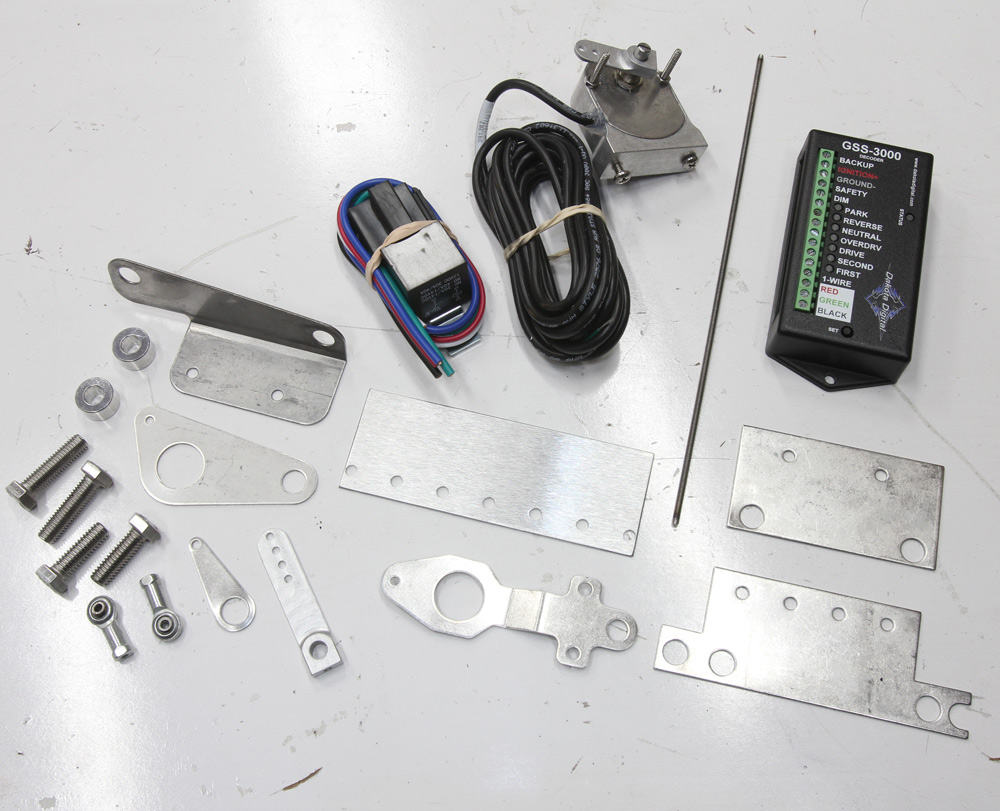
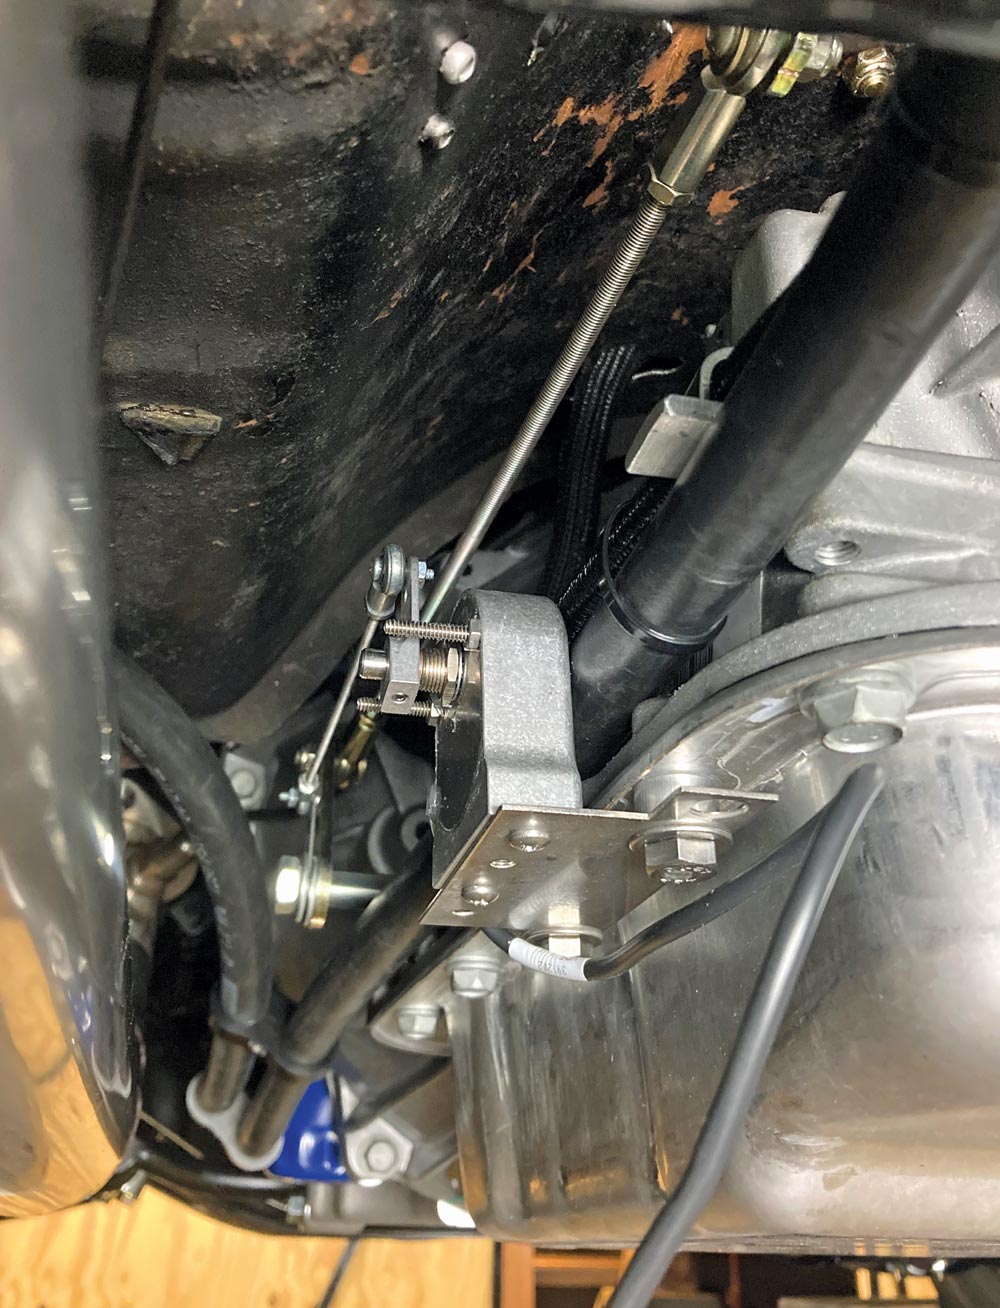
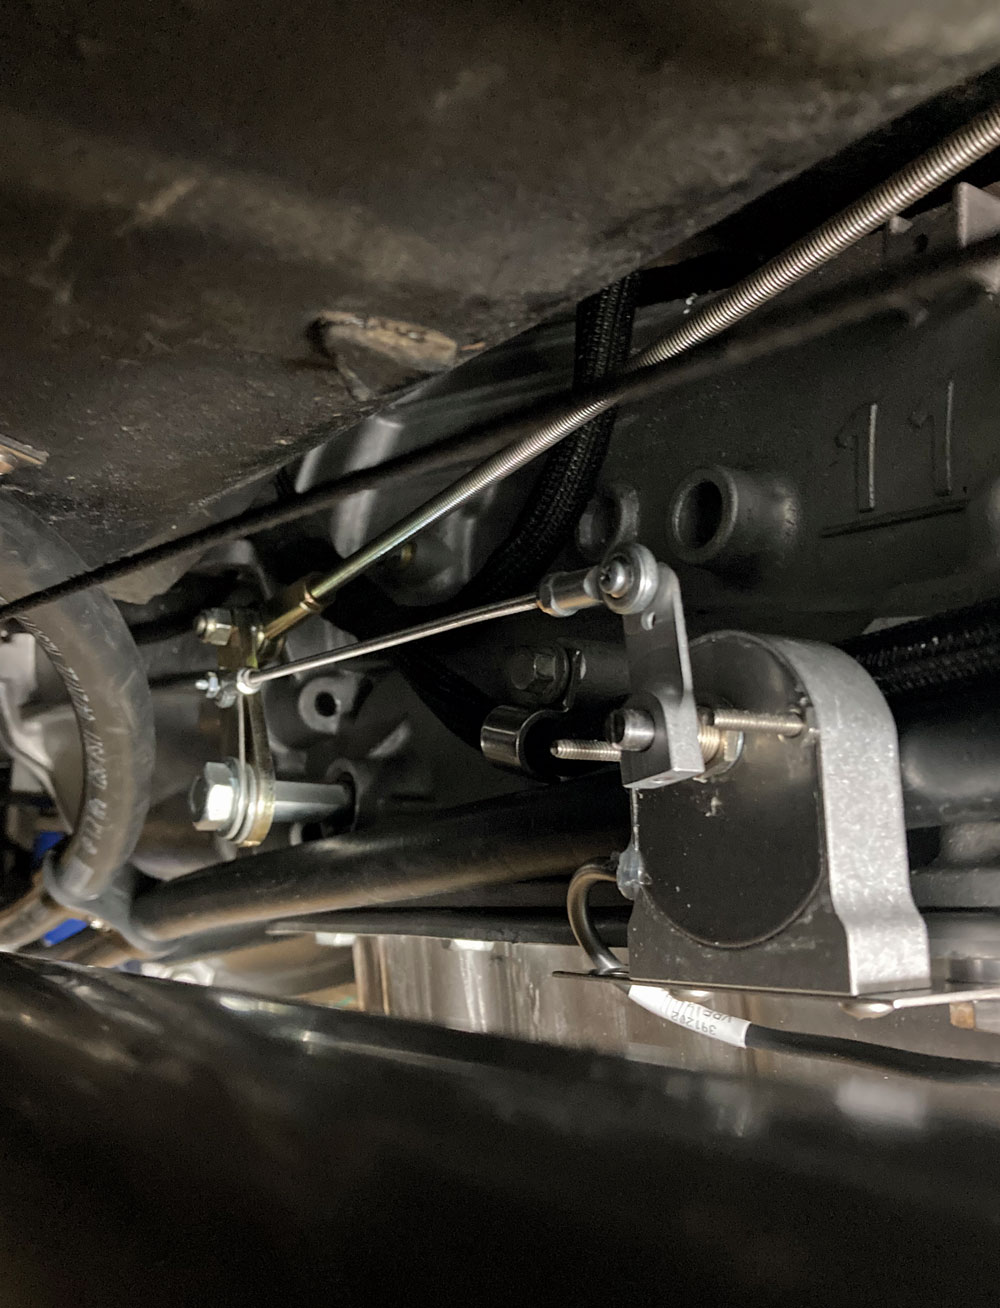
Dakota Digital’s RTX system allows a number of add-on options, from compass to outside temp to GPS speed, but one we opted for was their Universal Gear Shift Sender (GSS-3000) that will display the selected gear on the TFT Message Center. Since the 1957’s dash also housed a clock, we opted to add that to the mix as well, which connects to the main RTX cluster so that whatever theme we program the gauges to the clock will mimic. So, if the main cluster is set to a theme of “Fire and Ice,” the clock will match, changing the backlighting and pointer colors to suit.

Adding a bunch of gauges to further the stream of information coming across the dash isn’t hard to do, but doing so in a matter that fits seamlessly into the aesthetic of a vintage vehicle can be and is something that Dakota Digital has figured out in spades. The inclusion of a ton of extra information in a package that fits within the stock footprint is an amazing feat and one that looks great to boot!

Removed instrument cluster from a 1957 Chevy, showing the backside wiring and connectors
1. Our new Dakota Digital RTX gauges (PN RTX-57C-X) will install into the 1957’s cluster from the rear, so, suffice it to say, the cluster needs to be removed from the dash. While it’s out, the entire dash will be gutted for a thorough overall.
Close-up of a vintage 1957 Chevy dashboard clock during disassembly
2. To match our new cluster, we opted to add a new Dakota Digital clock (PN RLC-57C-X), so the old one is removed.
Reassembled and cleaned 1957 Chevy gauge cluster, ready for installation
3. The layout and design of the RTX gauge cluster is very similar to the originals until the ignition power is applied and the trio of LED bars reveal oil pressure, voltage, and tach readings. In addition, the large TFT message center can be programmed for a number of additional readouts, making the RTX a super versatile, modern gauge cluster in a classic package.
Wiring components and sensors for the 1957 Chevy, including adapters and connectors
4. A control box receives all the inputs from the various sending units and sends them off to the main gauge cluster. The RTX system comes with electrical oil pressure and water temp sending units and cables, electrical pulse generator for the speedo, buzzer, and a switch for making menu selections on the TFT screen.
Dakota Digital BIM OBDII interface module for a 1957 Chevy gauge setup
5. Dakota Digital offers a bunch of different BIM expansion modules, allowing for up to 16 additional gauge readouts. Additional BIM modules allow the RTX system to read, receive, and display engine information, such as tach, speedo, coolant temp, and so on from a variety of EFI systems. We opted for their BIM-01-2 OBD-II Interface that will allow us to tap into the OBD-II port on our LS system, providing speedo, tach, engine temperature, oil pressure, and check engine indication with a single connection.
Refinished 1957 Chevy dashboard housing, freshly painted and ready for gauges
6. With the cluster removed, we took the opportunity to blast off the old paint and apply a couple fresh coats of SEM Trim Black before installing the original chrome bezels and indicator lenses.
Back view of the 1957 Chevy instrument cluster housing, with mounting brackets visible
7. The new RTX gauges install from the back side of the cluster and use the same method as stock to attach, making installation a matter of simply swapping out gauge for gauge.
Fully restored and assembled 1957 Chevy gauge cluster with temperature, speedometer, and fuel gauges
8. Here’s the original cluster before disassembly. Comparing it …
Final assembly of the 1957 Chevy dashboard with a restored clock and gauges installed
9. … to the new RTX assembly, the similarities are easily undeniable.
Backside view of a 1957 Chevy instrument cluster connected to a digital control module during restoration
10. The three individual gauges are connected via a pigtail that connects them together as well as to the control box. The buzzer connects to the central, main gauge.
Complete setup of 1957 Chevy dashboard wiring, modules, and gauges laid out for installation
11. Here, the additional BIM for the OBD-II connection, clock, and another add-on we haven’t discussed yet: the GSS-3000 gear shift position system is shown as connected.
Close-up of the Dakota Digital control box and OBDII interface ready for integration into a 1957 Chevy
12. A convenient location needs to be found inside the passenger compartment for all the components and we found the kick panel a welcoming location. But first, the three control boxes are mounted to an ABS panel and some bench wiring is done.
Fully restored 1957 Chevy interior with modernized digital gauges and classic design elements
13. With the gauge cluster installed and powered up, those LED bars and TFT info center have revealed itself.
Wiring harness, control module, and mounting brackets prepared for the 1957 Chevy's dashboard installation
14. Dakota Digital’s GSS-3000 uses a sensor that attaches to the gear-shift lever on the transmission and relates its position to the decoder (control box). This info is then processed and sent to the RTX gauge cluster control box, which in turn processes it and sends it to the RTX’s TFT screen where gear position is displayed. Dakota Digital provides a variety of brackets and hardware to suit a myriad of transmission options.
Installation of the shift linkage and control components on the 1957 Chevy's transmission
Close-up of the custom shift linkage setup under the 1957 Chevy, showing detailed mechanical work
15-16. For our application (4L60-E) we found that mounting the sensor to the two rearmost pan bolts was the easiest and most convenient location. A piece of linkage was then fabricated to connect the shift arm on the trans to the sensor.
SOURCES