ACP department heading TECH
InTheGarageMedia.com
Customized turquoise classic El Camino pickup with the hood missing to expose a modified V8 engine
1. It’s not quite finished yet, but Ross Berlanga’s immediate goal was to get his El Camino running and back on the road with brakes to match the healthy new fuel-injected engine.
Some Things Are More Important Than Others
El Camino Disc Brake Upgrade
By Ron Ceridono Images by Jason Scudellari
W

hen Ross Berlanga brought this 1971 Chevrolet El Camino home in 1992 it was by all accounts in sad shape. The engine was junk, the body was rough, and the interior was destroyed, but Ross saw the potential of this diamond in the rough. Over the years the front suspension was updated with tubular upper and lower control arms, airbags were added all around, and Ross and his uncle, Mark Berlanga, straightened the body and covered it in 1992 GM Turquoise Metallic. A fresh fuel-injected small-block was installed, followed by the next major performance enhancements: the addition of Wilwood dropped spindles and disc brakes on all four corners.

For the brake update, the El Camino was delivered to Jason Scudellari at HB Hot Rod in Huntington Beach, California. Scudellari began the transformation by installing a pair of Wilwood’s AFX Pro Spindles (PN 831-15890). These high-strength steel spindles use the original bolt-on steering arms and are specifically designed for use with Wilwood’s disc brake kits. These spindles provide a 2-inch drop-in ride height for a more aggressive stance without affecting steering geometry. In addition, they are taller than the factory spindles, which raises the roll center and decreases camber change through the suspension’s range of movement. That’s suspension speak for saying these spindles improve handling dramatically.

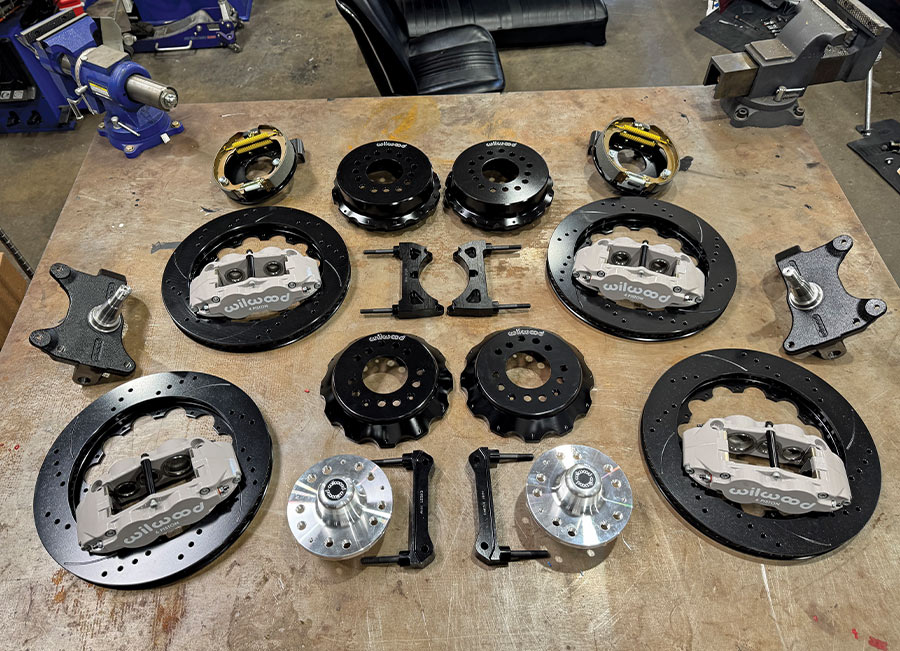
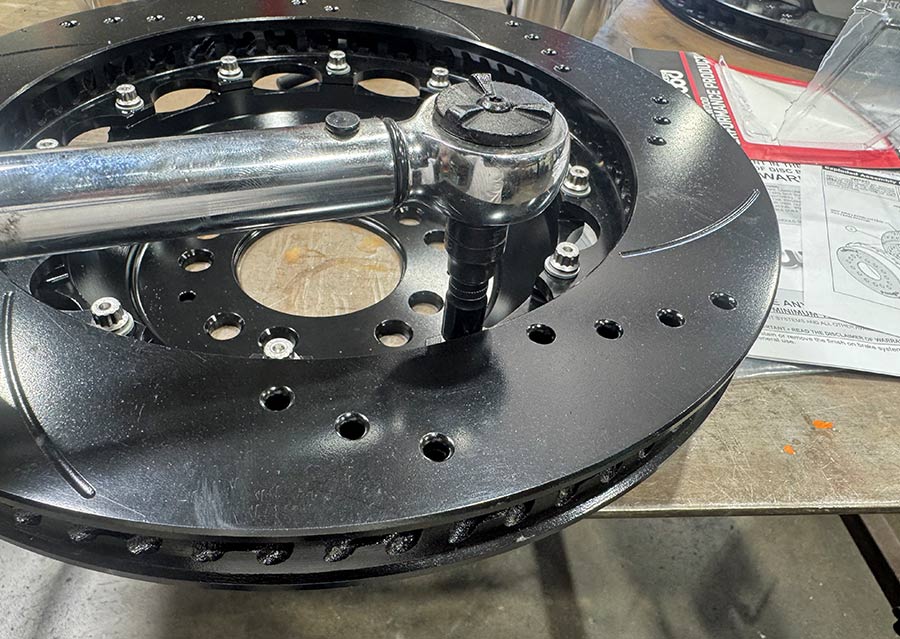
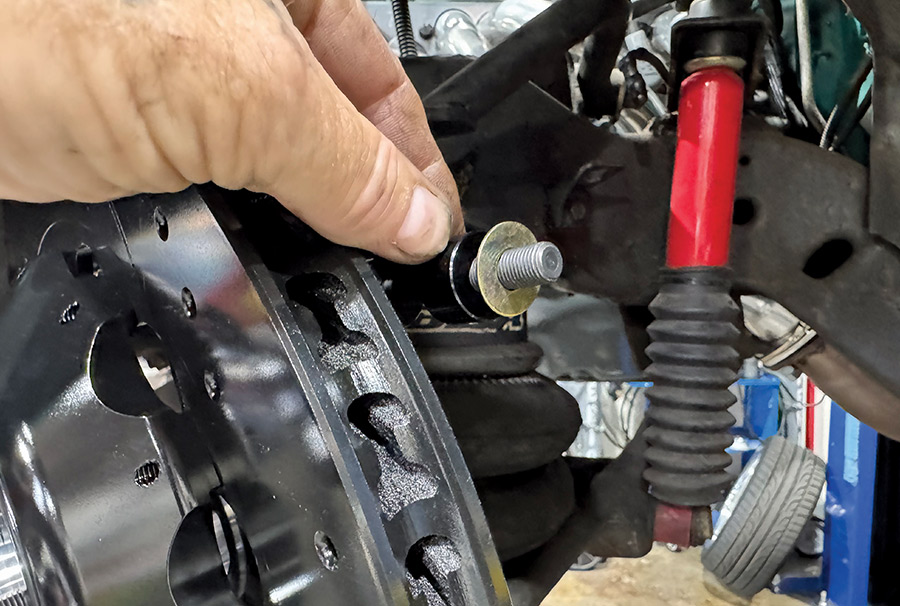
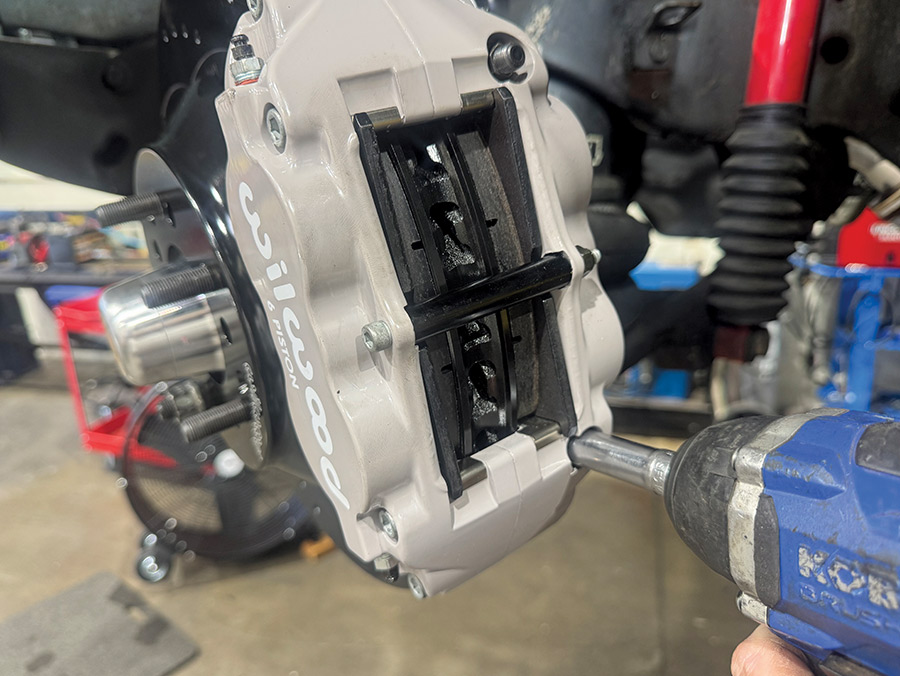
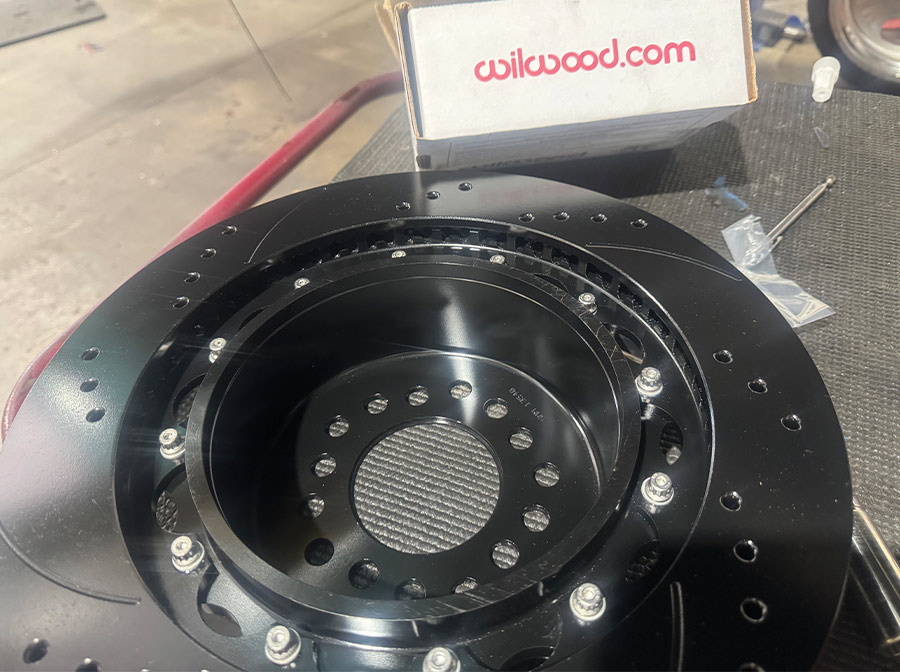
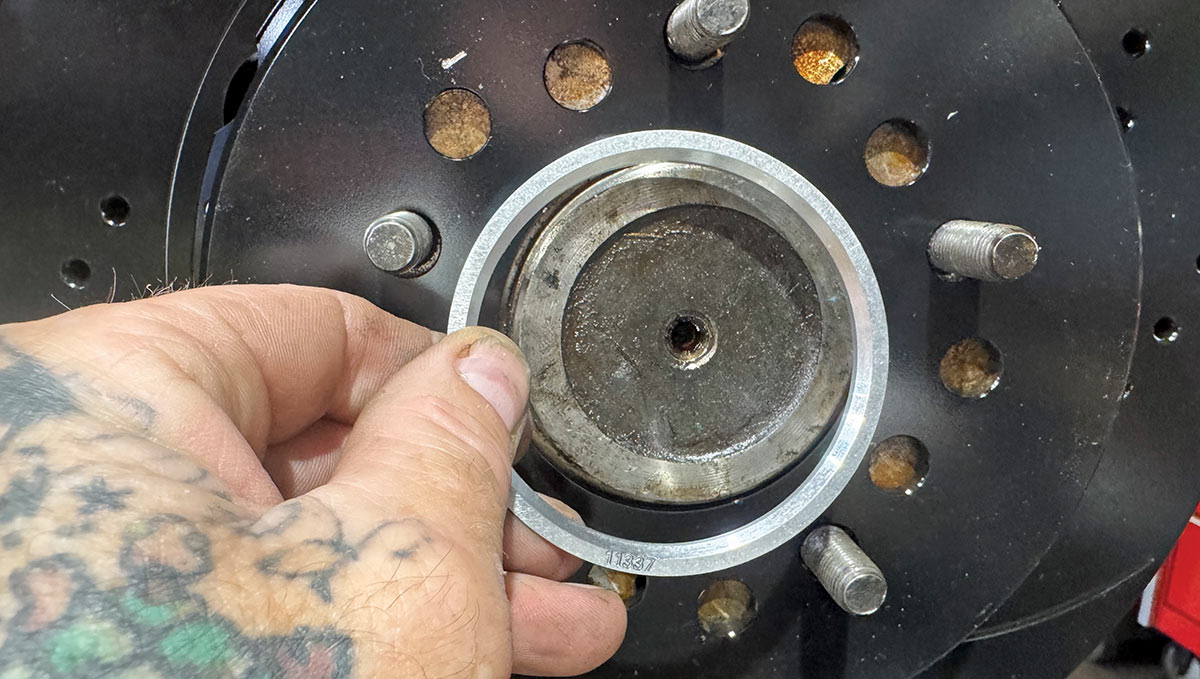
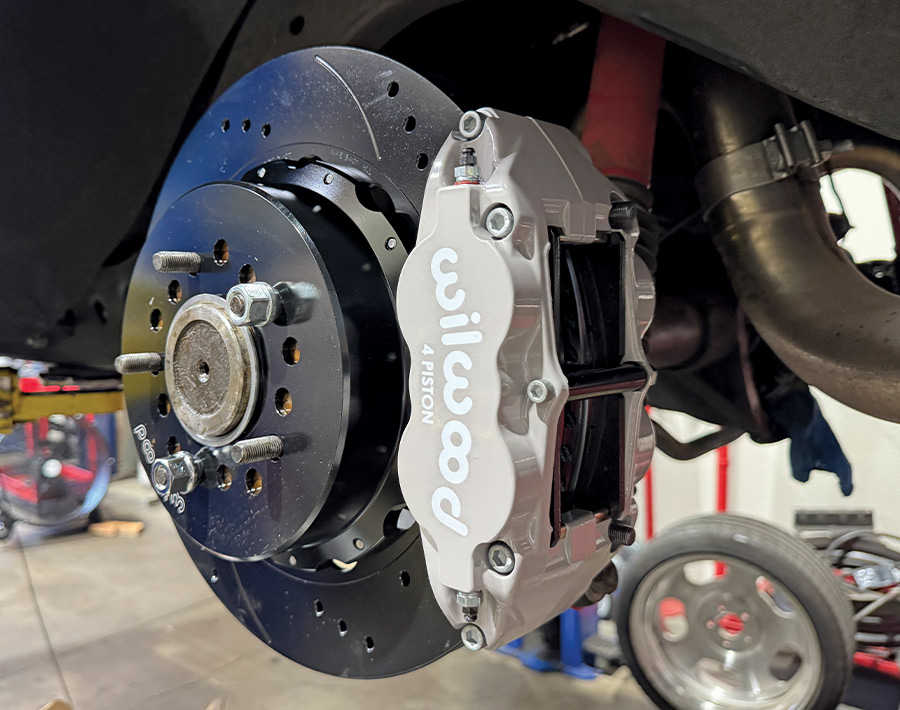
With the spindles swapped, Scudellari installed Wilwood’s Big Brake Kit (PN 140-15911-D) for use with the AFX Pro Spindles. This kit includes aluminum hubs, FNSL6R billet forged six-piston calipers, and 14-inch rotors. Like most Wilwood extreme performance calipers, these have a differential piston bore design, meaning one end of the caliper has larger pistons than the other. In this case, the stainless steel pistons in bore 1 on each side are 1.62 inches, bores 2 and 3 measure 1.12 inches. These calipers must be mounted so that the smaller piston end is closest to the rotor entrance and the larger piston end toward the rotor exit. As Wilwood explains it, “The larger piston end provides slightly greater clamping force to compensate for pad taper, which can occur under extended severe-use applications.” Wilwood cautions that an improperly mounted caliper (reverse rotation) will cause increased pad taper and reduce overall braking efficiency.

To update the rear brakes, Ross chose Wilwood’s kit (PN140-12964-D), the perfect solution for applications that require a parking brake. Along with the FNSL4R calipers with four 1.12-inch pistons and high-performance BP-10 pads. The kit also includes two-piece rotors (13 or 14 inch are available) that have integral drums for the internal parking brake assembly.

The heart of any hydraulic brake system is the master cylinder. For this application, Scudellari installed one of Wilwood’s compact 1.12-inch bore tandem master cylinders (PN 261-14964). Available in bore sizes from 7/8 through 1 1/8 inches, these master cylinders measure a mere 6.55 inches from end to end and are offered in two finishes: ball burnished or black E-coat. Also available from Wilwood is a combination proportioning valve with a mounting bracket and precision-bent stainless steel fluid lines all specifically designed to work with Wilwood tandem master cylinders.

With the body- and paintwork done, suspension updates made, a new engine installed, and Wilwood brakes on all four corners, the El Camino’s “to do” list was getting shorter. As Ross told us, “I still have more to do to my Elco, such as get the new AMD SS hood painted and installed, plus install a complete new TMI interior.” Ross is the director of marketing for TMI, a leading manufacturer of aftermarket seats and interior products, but circumstances would dictate those things would have to be postponed as Ross learned his father, David, was going into hospice care. David, who was a professional baseball scout, wanted to go to a ball game with his sons and take a ride in the El Camino so those final details could wait; some things are more important than others.

Five men smile and pose while using an engine hoist to work on the engine of a teal classic car in an outdoor driveway
2. This is the crew that helped install the El Camino’s fresh small-block from L&R Race Engines. From left to right: Ross Berlanga, Jorge Lopez, Gus Stewart, Ponch Silva, and Tom Schoch.
A complete set of new Wilwood high-performance big brake kit components, including gray 6-piston calipers, black slotted and drilled rotors, hubs, spindles, and mounting hardware, neatly arranged on a workbench
3. Jason Scudellari of HB Hot Rod took charge of installing these complete Wilwood forged Superlite brakes kits on both ends of the El Camino.
Close-up of a new black Wilwood spindle installed on a vehicle's front suspension, with a red shock absorber visible in the background
4. Also part of the chassis update was the installation of Wilwood’s 2-inch dropped spindles. They can be used with original or aftermarket control arms.
A mechanic uses a blue cordless impact wrench to secure a black Wilwood brake caliper bracket and spindle to a vehicle suspension, with an air bag and red shock visible
5. Here Scudellari installed the Wilwood radial caliper mounting bracket. With this unique mounting system the caliper can be located precisely in relationship to the rotor.
A red tool seats a black seal into a polished aluminum Wilwood wheel hub packed with red bearing grease
6. Wilwood’s forged billet hat mount hubs are CNC-machined for precise fit on each spindle application. Hubs come with bearings, races, and seals and three ¼-20 holes for hat retention bolts (PN 239-7032).
Blue thread locker is applied to the threads of a black wheel stud being installed into a polished aluminum Wilwood hub
7. Rather than press-in studs, the Wilwood hubs use 12-point cap bolts that screw into the flange. They are installed using thread locking compound and torqued to 77 ft-lb.
Close-up of a greasy hand installing a red-grease-packed wheel bearing into a polished aluminum wheel hub with wheel studs
8. To eliminate wheel fitment problems, these hubs come drilled and threaded for dual bolt patterns—5-on-4.5 and 5-on-4.75 bolt circles.
Polished aluminum Wilwood wheel hub with wheel studs and a center dust cap, fully installed on a black spindle
9. Here, the lug bolts have been installed in the larger Chevy 5-on-4.75 bolt circle pattern, and the unique threaded grease caps are in place.
Mechanic using a torque wrench to secure bolts on a multi-piece, black, cross-drilled, and slotted high-performance brake rotor. Numerous 12-point bolts connect the rotor ring to its central hub
10. The rotors are secured to the hats with 1/4-20×3/4-inch 12-point bolts. They are installed with locking compound applied and torqued to 155 in-lb.
Close-up of safety wire pliers twisting lock wire through multiple silver bolts on a black mechanical hub, securing them together
11. In addition to the thread locking compound, the bolts holding the two-piece rotors together are safety wired.
A hand positions a mounting bolt and gold washer behind a black vented brake rotor
12. Wilwood provides precision spacers that go between the radial caliper mounting bracket and the spindle to center the caliper on the rotor side to side. Shims are also used on the mounting studs to locate the caliper radially on the friction surface.
A hand is holding and aligning a grey Wilwood 6-piston brake caliper over a black, cross-drilled, and slotted brake rotor
13. With the rotors installed on the hubs, the calipers are put in place on the mounting studs and the alignment is checked. Shims are then added or removed as needed.
A blue cordless impact wrench is used to tighten the mounting bolts of a grey Wilwood 6-piston brake caliper over a black high-performance rotor
14. Satisfied with the location of the caliper relative to the rotor, the calipers are secured with the supplied hardware. Note that differential piston bore calipers cannot be used interchangeably from side to side. There is a lefthand caliper and a righthand caliper.
Fully installed high-performance brake system featuring a grey Wilwood 6-piston caliper and a black, cross-drilled, and slotted rotor on a vehicle's front suspension with a red shock and air bag
15. Wilwood offers 28 different caliper colors with five different logo colors and their standard laser-engraved logo. Ross chose Chicagoland gray calipers with white logos.
A blue-gloved hand removes a long pinion shaft lock bolt from an oily vehicle differential carrier, with the large ring gear visible on the left
16. To install the new rear discs the stock drum brakes obviously have to be removed. That requires pulling the axles. Here, Scudellari removes the threaded pin that retains the spider gears’ shaft.
Close-up of a blue-gloved hand holding a metal cross-pin removed from a car's rear differential, with internal spider gears and the ring gear exposed
17. Typical of GM 10- and 12-bolt rear axles, once the retaining pin is removed the shaft slides out of the gear case (the El Camino came with a 12-bolt).
A blue-gloved hand uses a telescopic magnet to remove a metal C-clip axle retainer from inside a car's rear differential carrier, with internal gears visible
18. After removing the spider gears’ shaft, the axles can be pushed toward the center of the housing and the C-clips are removed.
A blue-gloved hand removes a rear axle shaft from a turquoise classic car's exposed drum brake assembly on a shop lift
19. Once the C-clips are removed the axles are free to slide out of the housing. This is a good time to check the axle bearings and install new grease seals.
A tattooed, blue-gloved hand lifts a brake backing plate assembly, exposing a truck's rear axle hub and airbag suspension with a red shock
20. After disconnecting the brake lines and the parking brake cables, the factory drum brakes assemblies are removed.
Close-up of a blue-gloved hand using a brass wire brush to clean a rusty metal surface on an axle housing hub end, surrounding a visible wheel bearing and seal
21. Scudellari used grease remover and a wire brush to clean the axle housing to ensure the new backing plate assemblies would seat flat against the mounting flanges.
Close-up of a new drum brake assembly with gold-toned shoes and a bright yellow return spring installed on a black backing plate, with an air bag and red shock in the background
22. The internal expanding parking brake assembly is extremely effective as it supplies substantial holding power. For this application Wilwood offers a generic-style parking brake cable kit (PN 330-9371).
Close-up of a hand holding a black disc brake conversion bracket next to an installed rear axle drum brake with yellow springs and an airbag suspension
23. As with the front brackets, the rear radial caliper mounts can be shimmed to properly center the caliper on the rotor.
A tattooed hand slides a rear axle shaft into a housing featuring a new drum parking brake assembly with yellow springs and a disc brake conversion bracket
24. With the backing plates in place, the axles are reinstalled along with the C-clips and spider gear shaft.
A black Wilwood multi-piece brake rotor with cross-drilled and slotted surfaces sits on a workbench next to its original packaging
25. The rear brake rotors are attached to the combination hat/parking brake drums the same way as the front assembly. The screws will receive locking compound and safety wire.
A tattooed hand installs a thin silver hub-centric ring, etched with the number 11337, onto the center of a black brake rotor hub
26. This is Wilwood’s removeable center register adapter. Due to variations in wheel stud final diameters, this is a more accurate method of centering the rotor to the axle than the studs alone.
A black, slotted, and cross-drilled Wilwood high-performance brake rotor installed on a vehicle hub, with wheel studs visible against a workshop background featuring suspension parts
27. The drilled-and-slotted rotors are one directional and must be mounted in a specific position relative to the rotor rotation. The slots and holes point in the direction of rotation. In this case, counterclockwise.
Close-up of a black vented brake rotor and a mounting stud with a black spacer and gold washers, used for caliper alignment on a vehicle suspension
28. Again, as with the front calipers, shims are used on the mounting studs to properly locate the calipers in relationship to the rotors.
Close-up of a newly installed Wilwood 4-piston brake caliper and a black slotted and drilled rotor on a vehicle suspension
29. Wilwood’s rear calipers use four equal-size pistons. As a result, they can be mounted on either side of the car. Note the two bleeders at the top and bottom of the caliper that makes that possible.
A hand bench bleeds a black master cylinder secured in a vise, with clear plastic tubes recirculating brake fluid from the ports back into the reservoirs
30. Prior to installation, Scudellari bench bled the master cylinder. This makes bleeding the entire system much easier.
A black Wilwood master cylinder mounted to a vacuum brake booster in the turquoise engine bay of a classic car, with brake lines connected and engine components visible in the background
31. Ross elected to retain the original GM brake booster. When using a vacuum booster, engines need to make at least 18 inches of vacuum at idle.
Two men smile in a suburban driveway; one gives a thumbs up while the other uses a walker and wears a Kansas City baseball cap. A teal classic car is parked in the background on a sunny street
32. Ross and his dad, David, are all smiles after returning from a ride in the rejuvenated El Camino.

HB Hot Rod