

ACP Tech
InTheGarageMedia.com
1965 Corvette, Roadster Shop Style
Part 4: Fitting the Bumpers
1. This rendering by Chris Gray, Roadster Shop’s in-house designer, shows where this highly detailed project is headed.
By Ron Covell Images courtesy of Roadster Shop
T

he final chapter in Roadster Shop’s 1965 Corvette build focuses on a detail that can separate a good car from an exceptional one: the bumpers. While bumpers are frequently treated as bolt-on components, this project demanded far more. To achieve the tight, integrated look expected at this level, both the front and rear bumpers were extensively reshaped to sit closer to the body and follow its contours with precision.

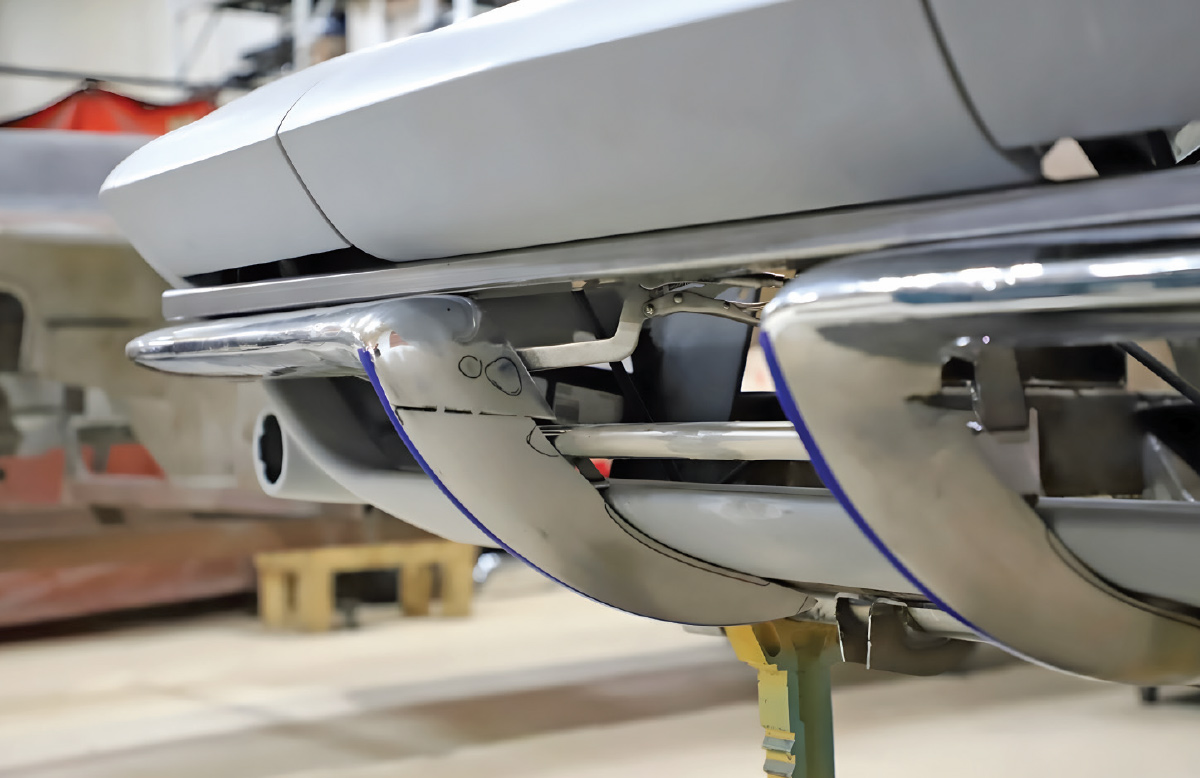
Work began on the front bumpers, focusing on the downward-pointing strakes beneath the horizontal sections. The team decided that lengthening the strakes would allow them to tie in with the body more smoothly. The strakes were carefully cut away from the main bumper to make the rework more manageable.

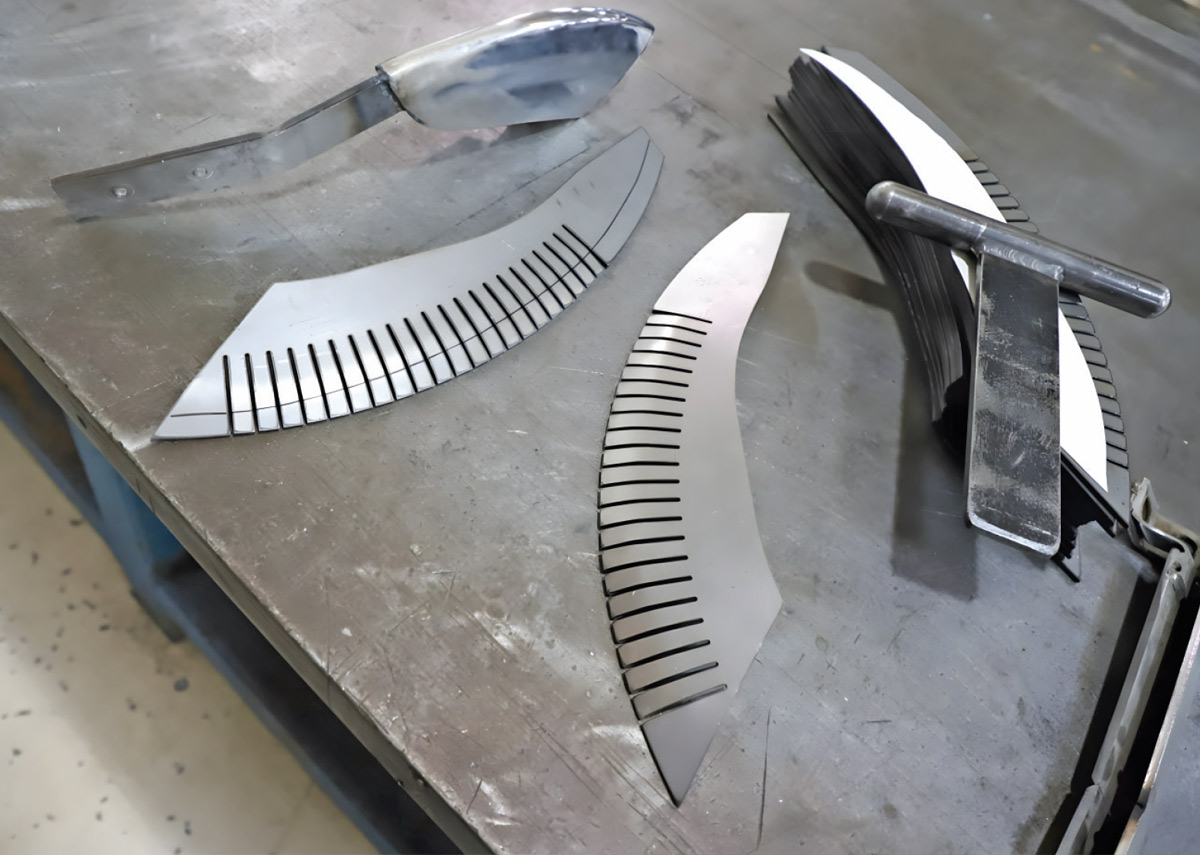
To ensure consistency, a pattern was taken from an original strake to capture the factory character. That pattern was then revised to establish the new length and refined contour. Using this updated pattern, new blanks were cut from cold-rolled steel sheet. The blanks were notched along the outer edges, allowing the metal to be shaped into the required contours without introducing unwanted distortion.

After the rough shaping was complete, each notch was carefully filled by TIG welding. This produced welds suitable for high-level metal finishing. The blanks were then methodically tweaked until the contours flowed smoothly and matched perfectly from side to side. To maintain alignment during final adjustments, the blanks were tack-welded to a heavy workbench, holding them rigidly while the seams joining each pair were finish-welded, then metal-finished to perfection.

Once complete, the strakes were re-welded to the horizontal bumper sections. Careful attention was paid to alignment, fit, and overall proportion before the assemblies were smoothed to perfection.

A small, peaked spreader bar was then fabricated to fit between the bumper segments. Pockets were added to each bumper half to positively locate the ends of the spreader bar, ensuring the precise alignment would be retained.

The rear bumpers went through a similar transformation, though they had additional challenges due to their closer interaction with the fiberglass body. Achieving a snug, glove-like fit required careful tweaking of the fiberglass panels before the final bumper adjustments could be made. Once the body contours were shaved down and refined, a metal extension was added to the bottom edge of each rear bumper to close the gap against the body. These extensions were shaped, welded, and metal-finished to become completely integrated with the design.

As with all high-end metalwork, the process involved numerous rounds of fitting, removal, and adjustment. Each change was subtle, but together they resulted in consistent gaps, clean lines, and precise alignment from every angle. With the final contours established, the bumpers were given their finishing touches in preparation for chrome plating, where flawless surfaces are essential.

The result is a set of bumpers that are consistent with the quality of the entire build. Each component looks purposeful, refined, and fully integrated with the body. It’s a fitting conclusion to a project defined by attention to detail, and a reminder that excellence is often found in the parts some builders overlook.

Front view of a C2 Corvette body in grey primer on a rolling shop stand. A plumb bob hangs from the nose to find the centerline, and a laser level is positioned to the side.
2. The bumpers on this car will need a lot of massaging to meet Roadster Shop standards. A plumb bob is used here to establish the body’s true centerline.
Close-up of a metal bumper section with green masking tape next to a can of Partall Paste No. 2 on a workshop table.
3. The original bumpers were in decent shape, but some areas of corrosion were touched up before the real work began.
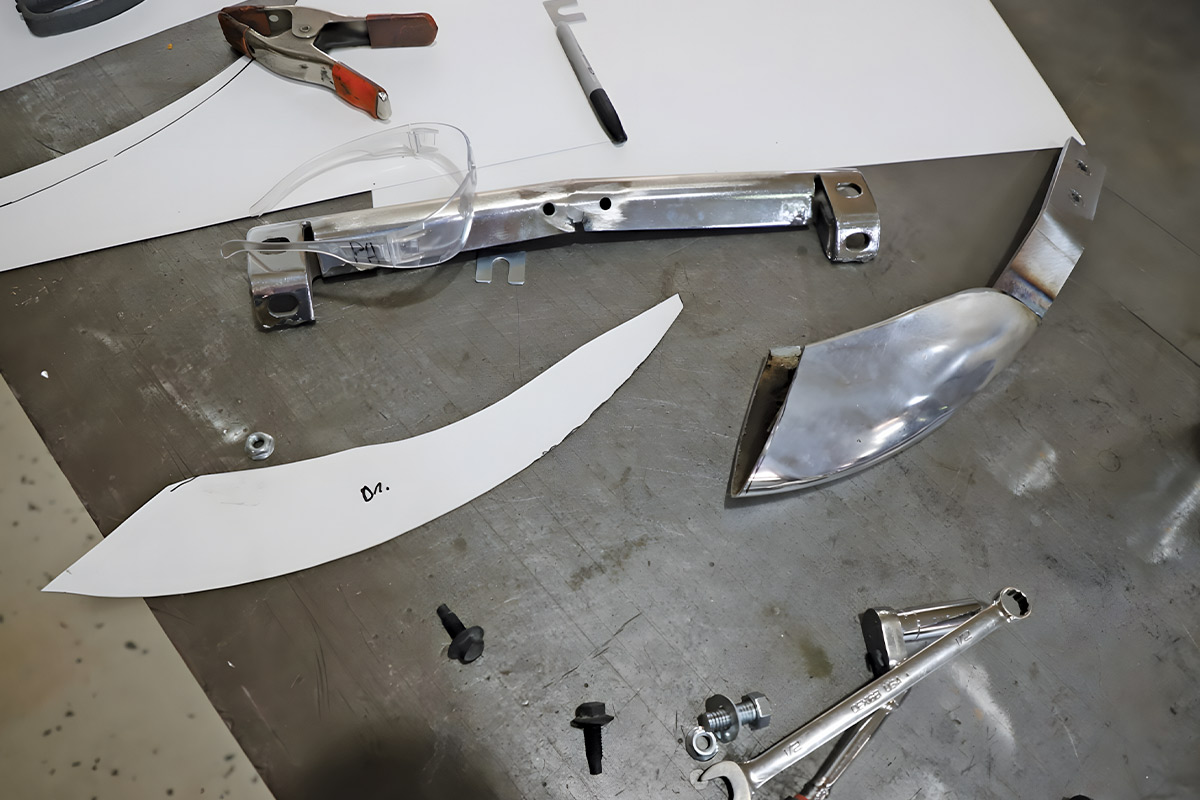
Chrome bumper sections, a white paper template for a bumper strake, and various hand tools laid out on a metal workbench.
4. The downward strakes on the front bumper will be lengthened to give them a more graceful look. A paper pattern is used to visualize the new shape.
Steel bumper strake blanks with vertical relief cuts for forming curves, shown next to a metal fabrication tool on a workshop table.
5. Steel blanks are cut from the pattern, then relief cuts are added to help form the curves.
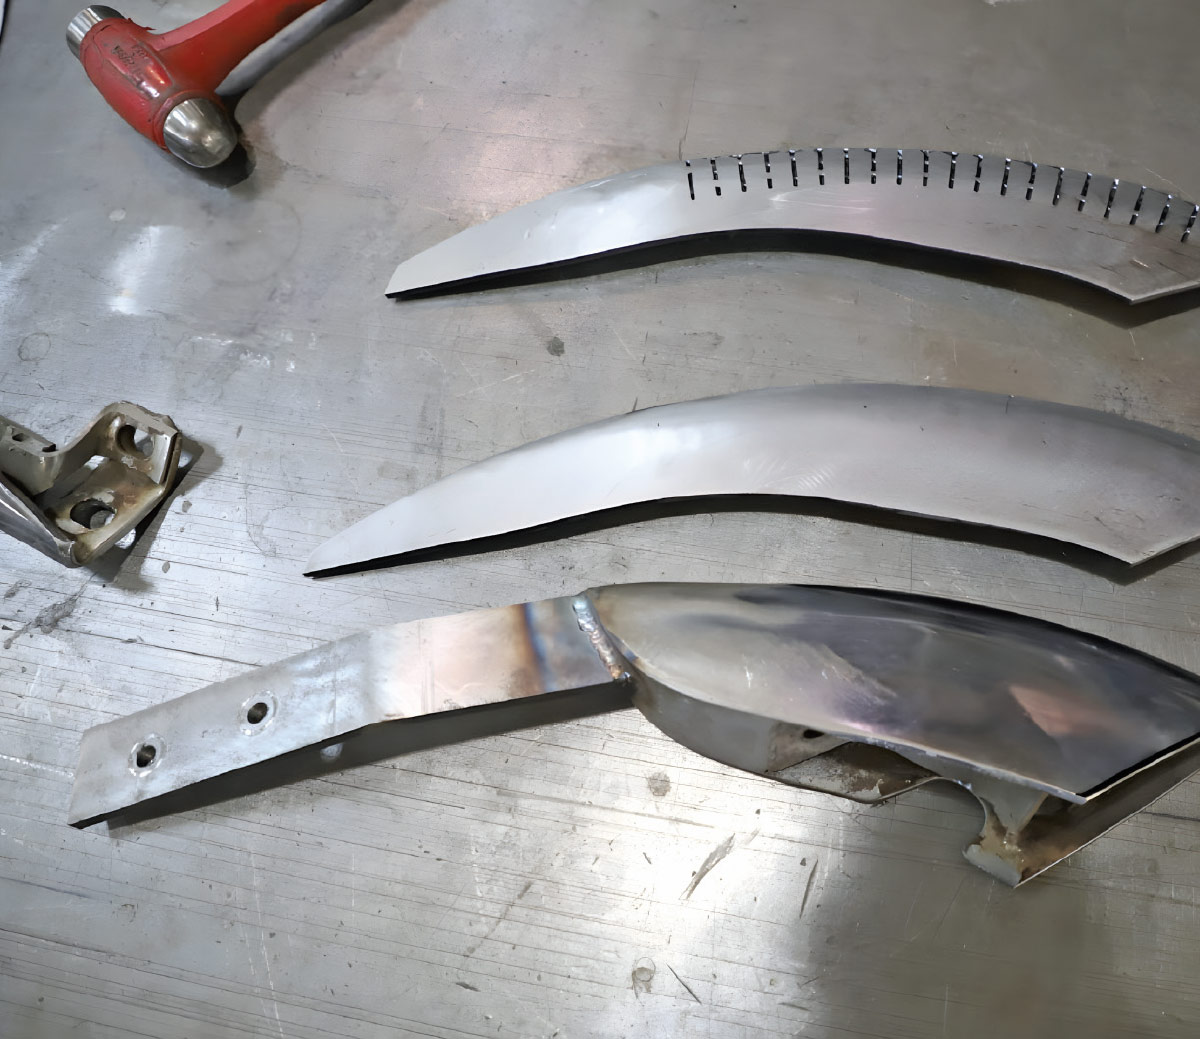
Three metal bumper strakes on a workbench next to a red hammer. The pieces show stages of fabrication: a sliced metal blank, a shaped replacement, and an original factory strake.
6. The original strake is in front, the sliced blank is in back, and the shaped and welded replacement is in the middle.
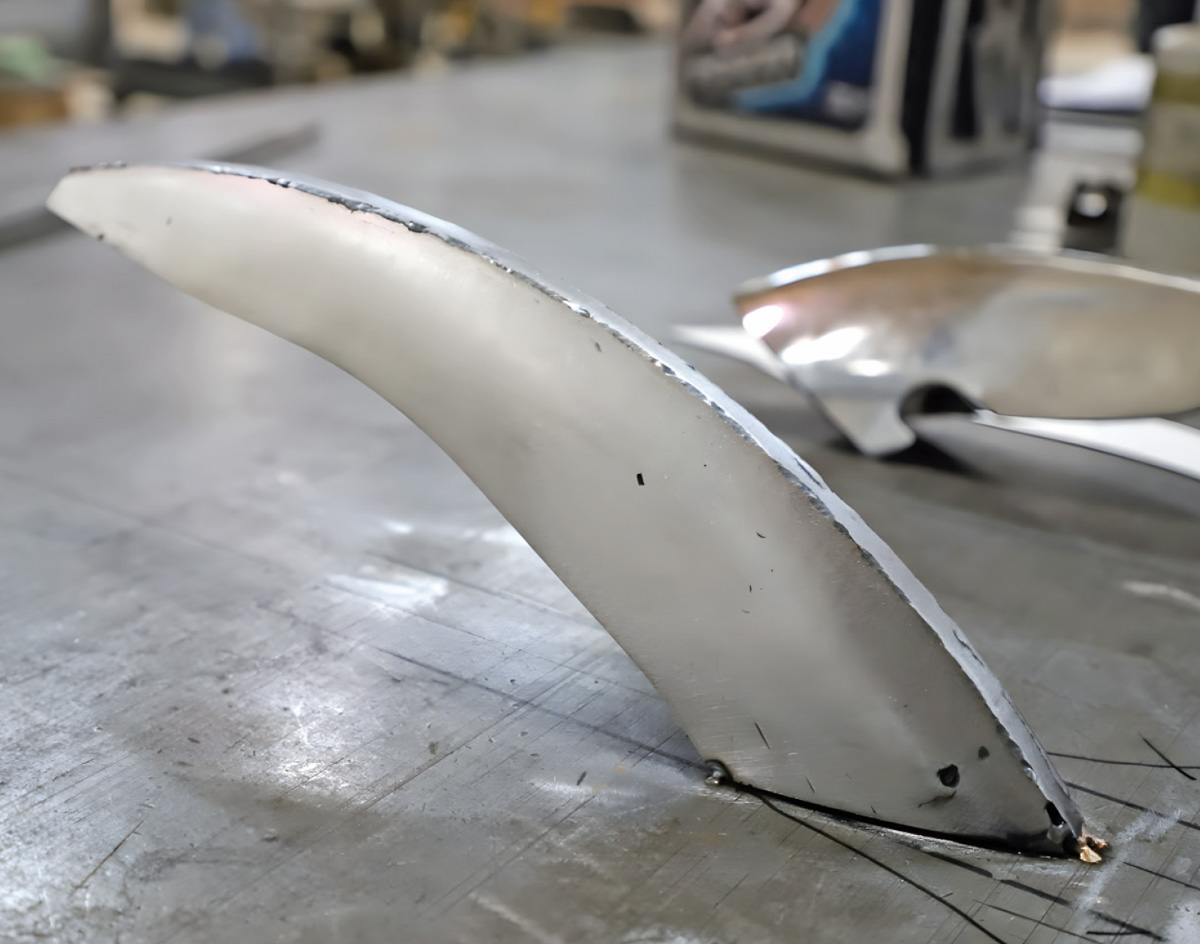
Metal bumper strake standing upright on a workbench, tack-welded at the base to hold the halves together during assembly.
7. The right and left halves of the strake are being welded together. They’re tack-welded to the workbench to keep everything solid during assembly.
Front bumper of a grey C2 Corvette during a test fit. A metal strake is held against the bumper with locking pliers, featuring blue tape and marker notations for adjustment.
8. The lengthened strakes are test-fitted and marked so the next round of adjustments can begin.
Lower front bumper assembly of a C2 Corvette with metal strakes and chrome components held in place by locking pliers during fabrication.
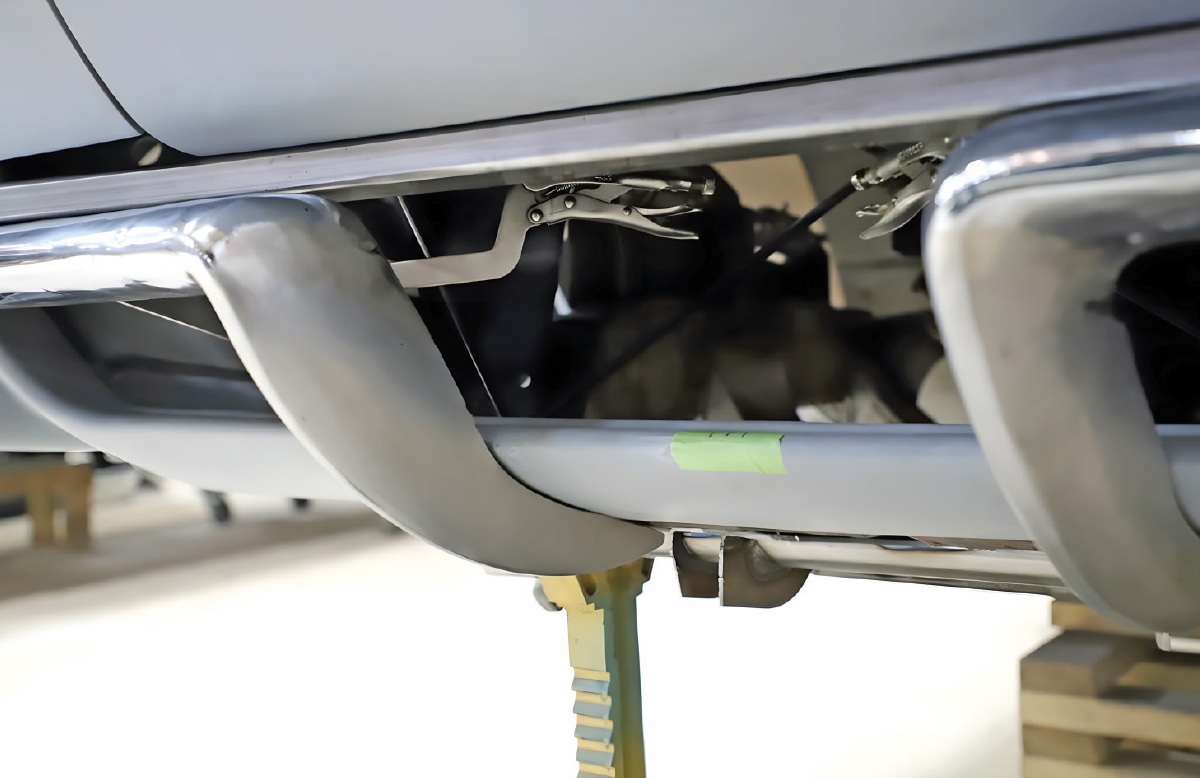
9. After a little slicing and dicing, things are starting to come together.
Front view of a grey C2 Corvette with a chrome bumper. Wooden shims are used for alignment between the bumper and the grille during the fitting process.
10. Careful measuring makes sure the bumpers line up exactly with the body.
Close-up from below of a front bumper under fabrication. A metal spreader bar is fitted between the left and right curved bumper halves, which are held with masking tape.
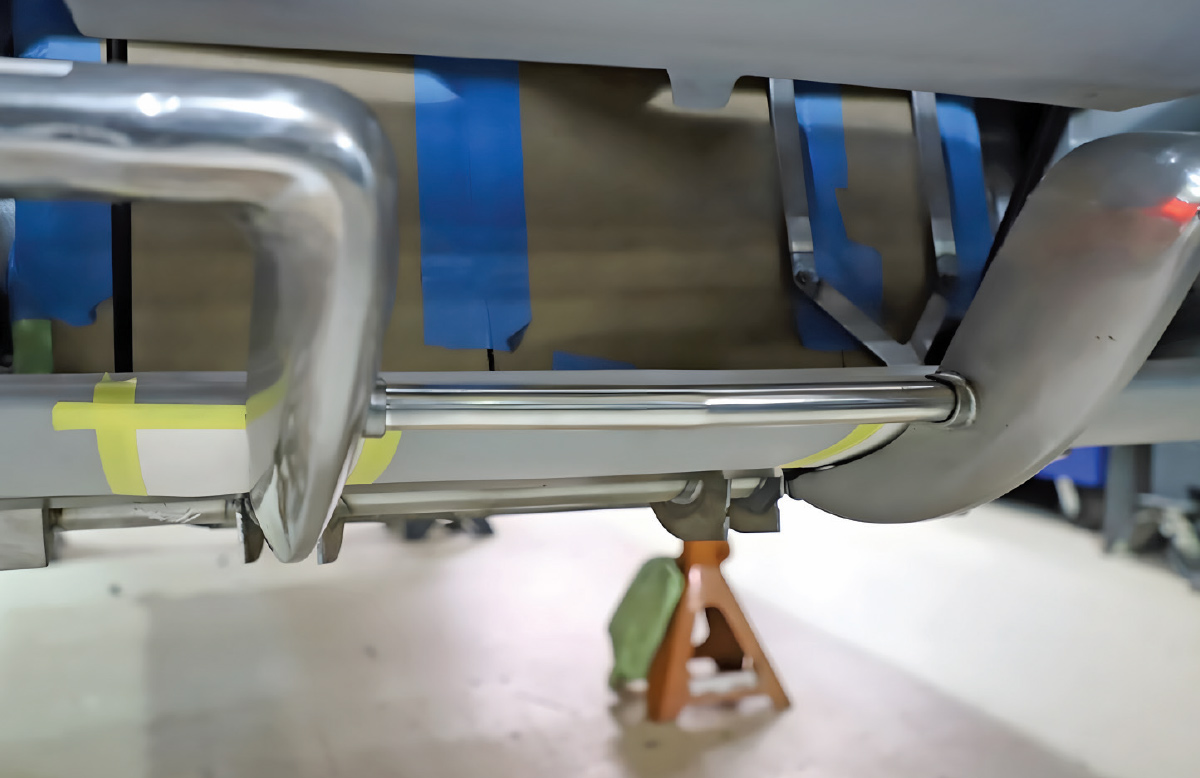
11. A peaked spreader bar is fitted between the front bumper halves.
Close-up view showing the detail of a fabricated metal pocket on the inner side of a bumper half, designed to accept the end of the spreader bar tube. Masking tape is visible.
12. Pockets are welded into each bumper half to accept the spreader bar.
Low-angle view looking up at the front of a C2 Corvette in primer grey. The reshaped chrome front bumper, complete with new vertical strakes and spreader bar, is fitted, following the body contours.
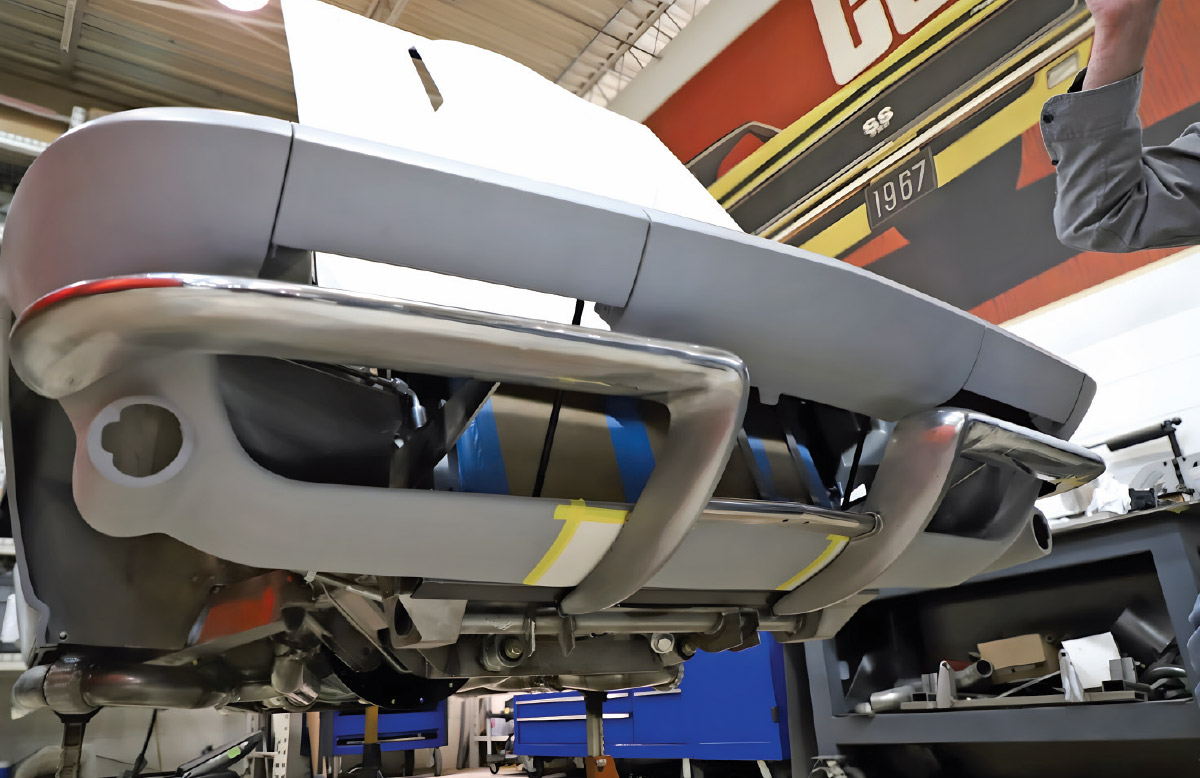
13. From down low, you can really see how the reshaped bumpers follow the body lines.
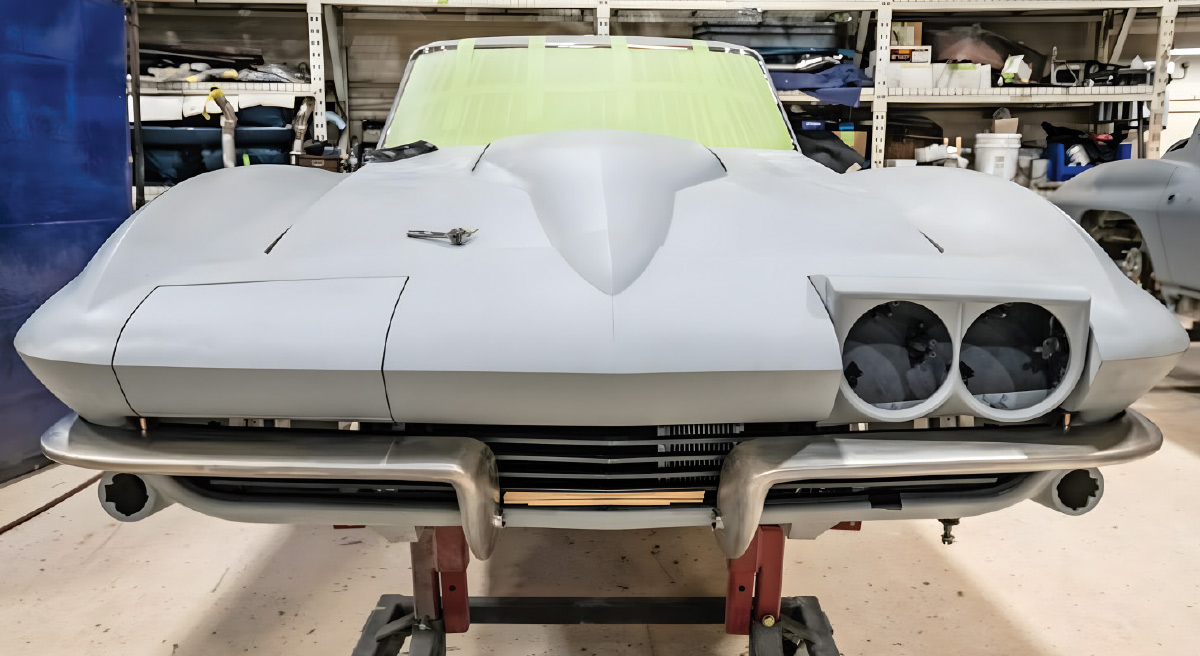
Straight-on front view of the primed C2 Corvette on a frame machine. The green masked windshield area and the new fabricated bumper are visible. One headlight door is open.
14. Viewed from straight ahead, the bumper contour matches the body perfectly.
Low-angle view of the rear of a primed C2 Corvette on jack stands, with taillight openings empty. Yellow masking tape heavily marks areas of the lower valance where work is needed, above dual exhaust tips.
15. Out back, the body needs some serious work so the bumpers can be tucked in tight. Tape marks the areas that need attention.
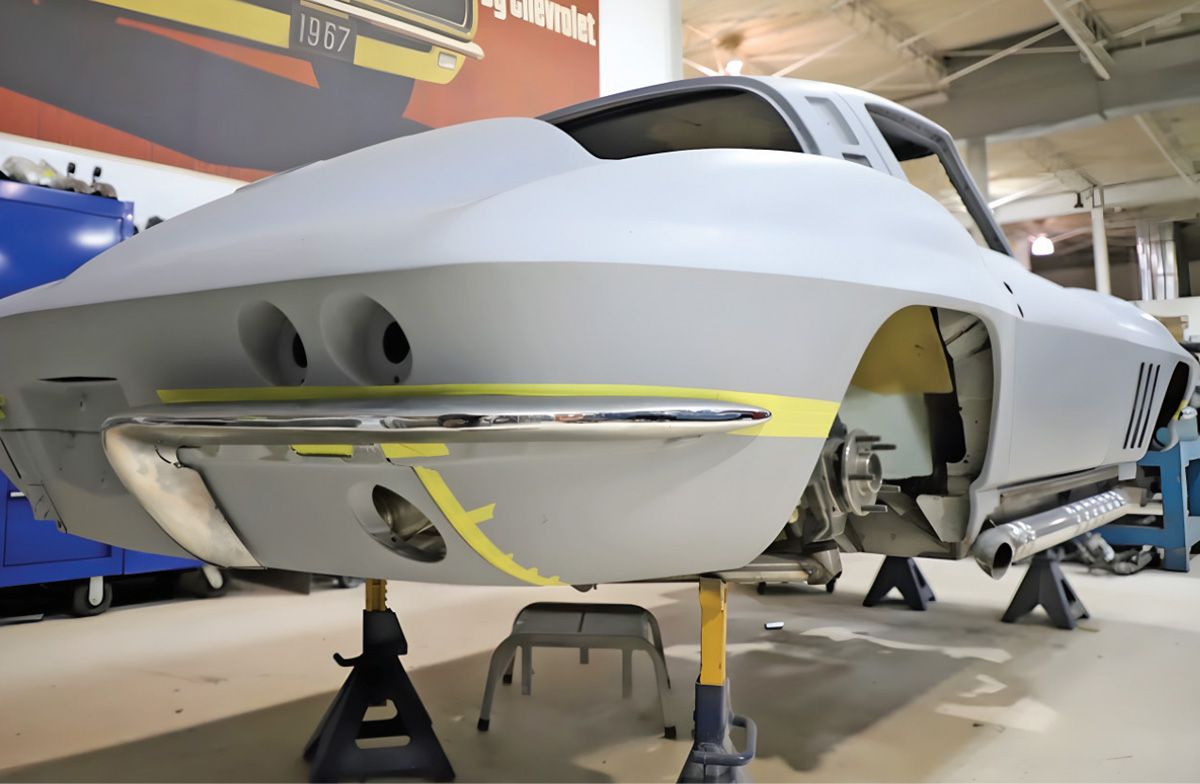
Rear passenger-side view of a primed C2 Corvette on jack stands. A chrome bumper is test-fitted to the body, with yellow masking tape marking the alignment lines.
16. The right rear bumper is test-fitted to see how everything is coming together.
Extreme close-up of a chrome bumper edge meeting a grey primed body panel. Yellow masking tape is used to mark precise fitment and adjustment points.
17. It takes a lot of small, subtle tweaks to get the fit just right.
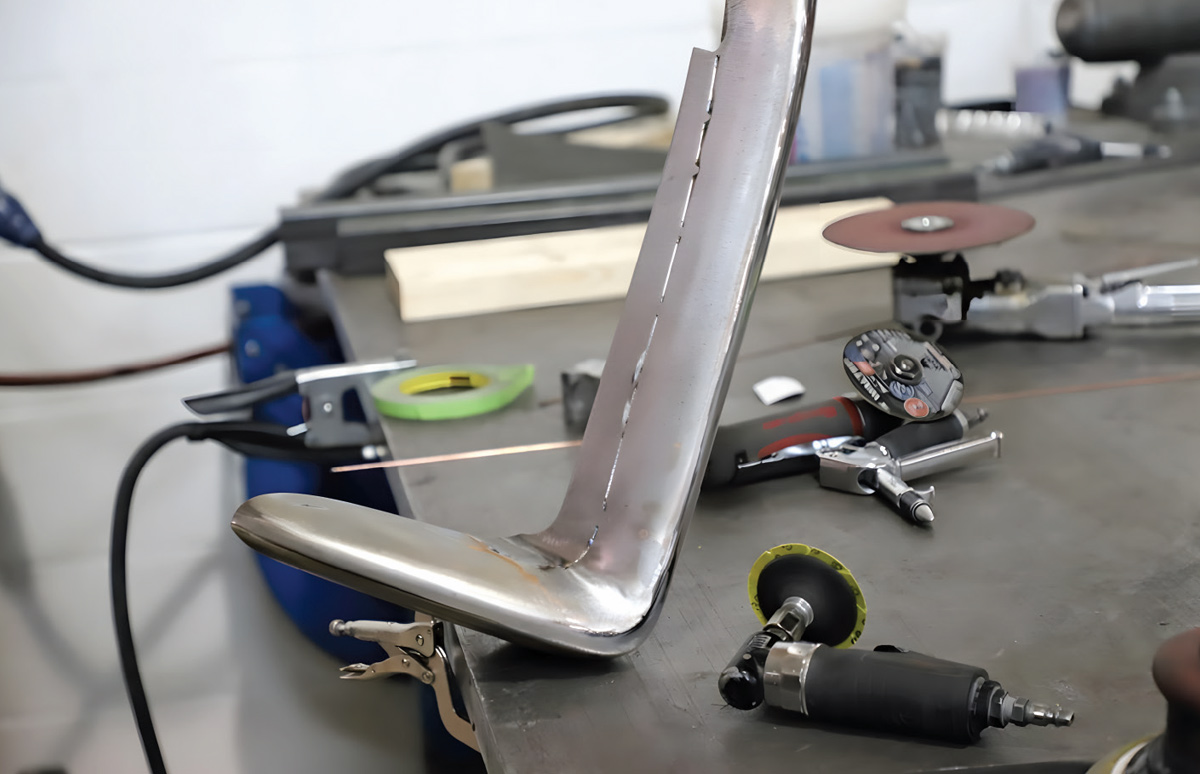
A metal bumper section stands on a workbench with a thin metal strip welded to its edge. Pneumatic grinders and shop tools surround the piece.
18. A metal strip is added to the lower lip of the bumper to help fit it tightly against the body.
A person wearing shop gloves uses a pneumatic grinder on a metal bumper section, creating sparks. Various hand tools and an air hose are visible on the workbench.
19. The welds are ground smooth. Since these parts will be chrome plated, the metalwork has to be flawless.
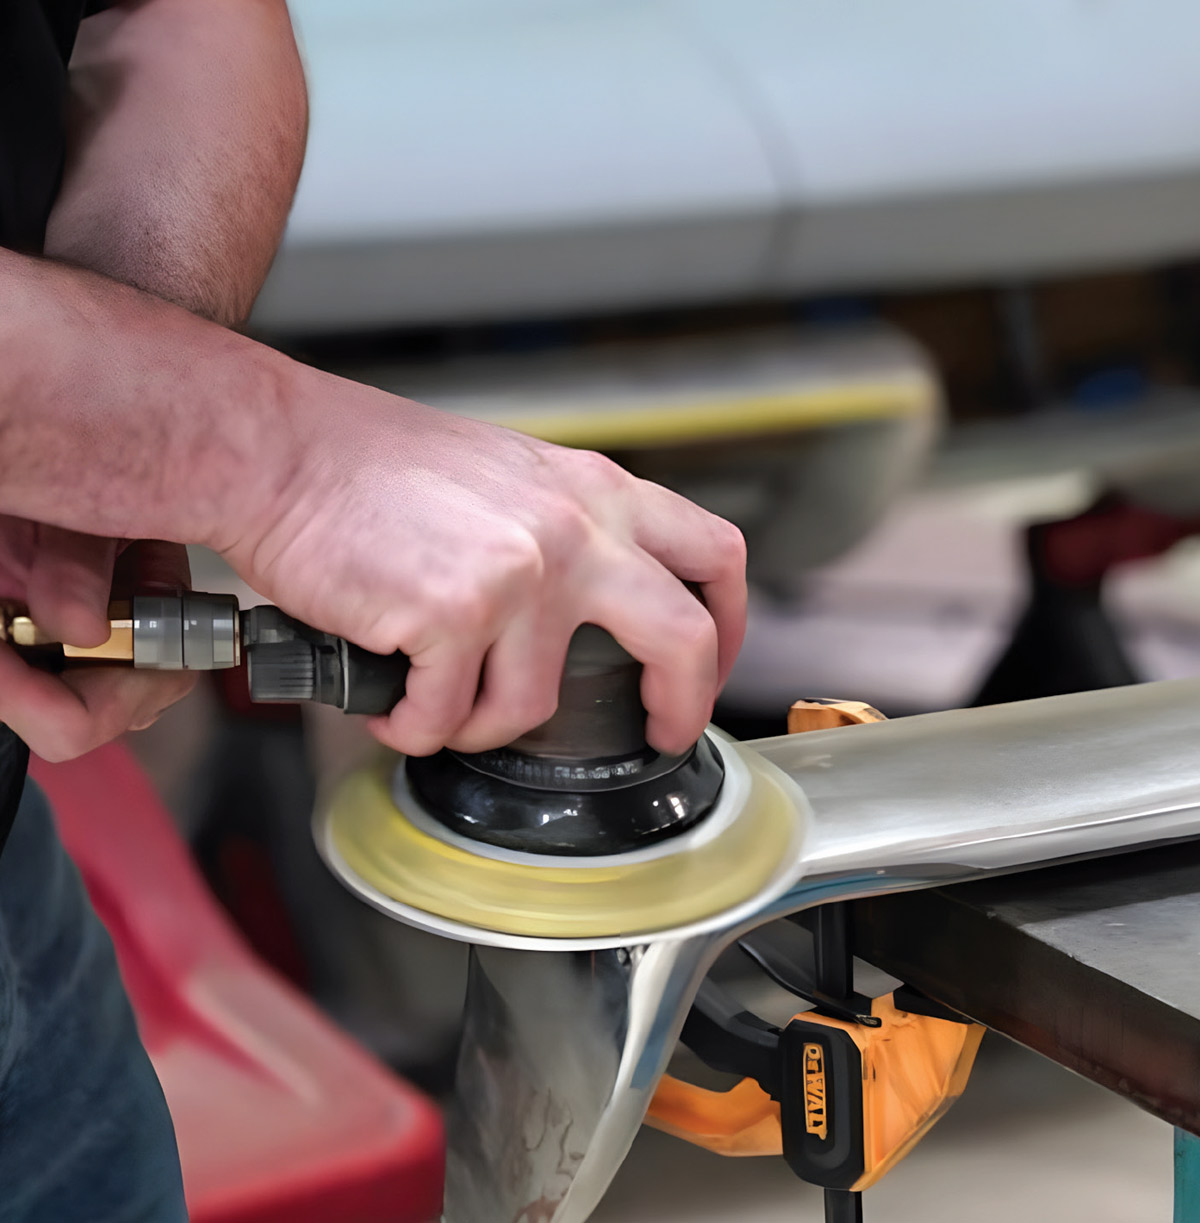
Close-up of hands operating a pneumatic orbital sander on a metal bumper part. The component is secured to a metal workbench with a yellow plastic clamp.
20. An orbital sander takes care of the final smoothing.
Fabricated metal bumper section on a shop workbench. The metal surface shows various stages of grinding and smoothing, with green masking tape applied along the top edges.
21. At this point, most of the welding and shaping work is done.
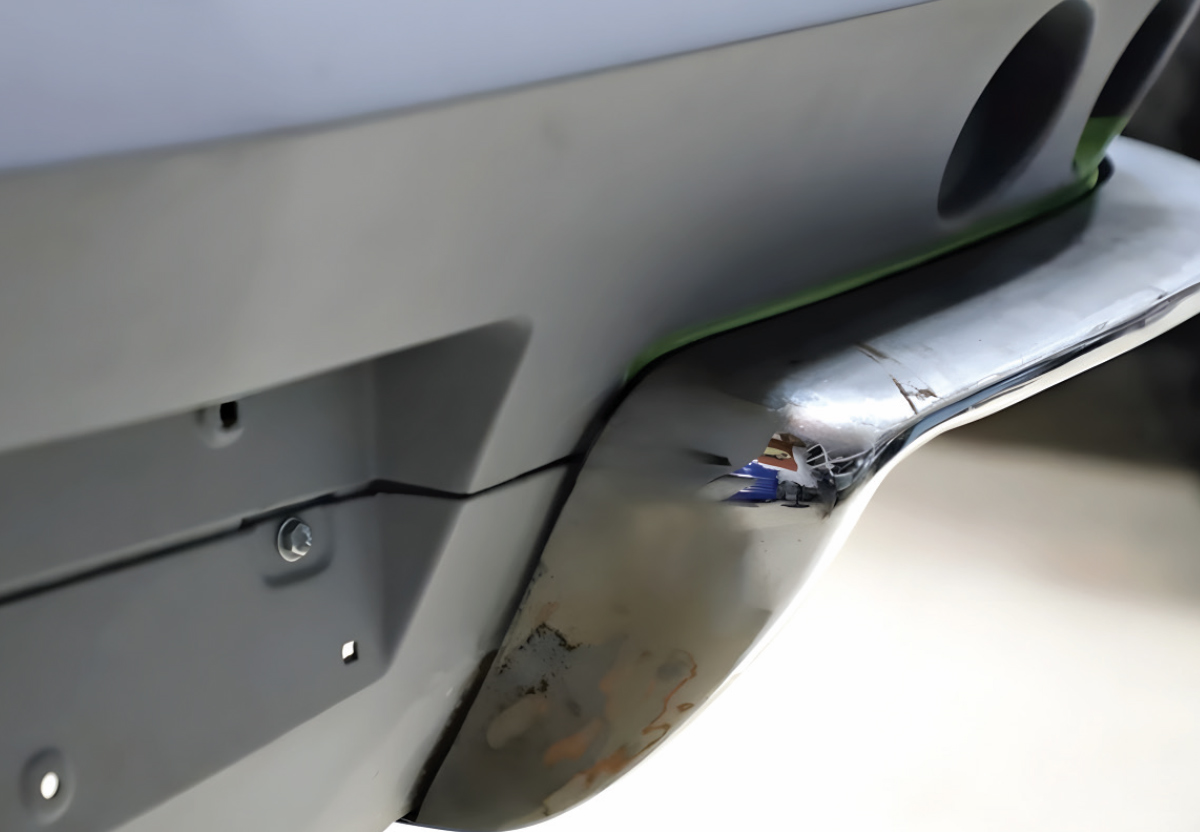
Close-up view of a metal bumper corner fitted against a grey primed body panel. The image demonstrates a tight, uniform gap between the bumper edge and the car's body line.
22. The bumpers are mounted on the car for another check. Note how tight and even the gap is along the body.
Underneath view of the rear valance and bumper on a primed Corvette. Shows metalwork modifications to the body and bumper for a flush fit, positioned above dual exhaust tips.
23. From underneath, you can see how both the bumper and the body were modified to get that snug fit.
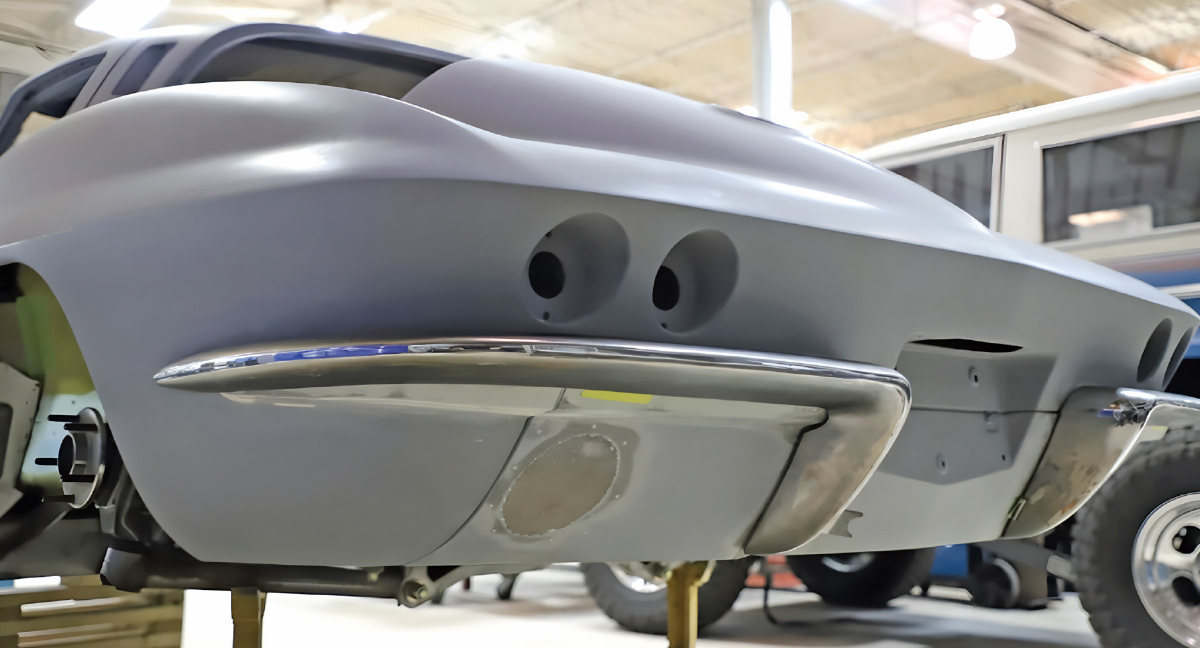
Straight-on rear view of a grey primed C2 Corvette with a fabricated metal bumper installed. The bumper follows the lower body contour beneath two empty circular taillight housings.
24. Looking straight on, the fit is right where it needs to be.
High-angle close-up of a metal bumper’s tapered end. The leading edge of the bumper sits parallel to the grey body panel with a precise, minimal gap along the entire curve.
25. This close-up shows how nicely the leading edge of the bumper flows into the body. It takes time and skill to get bumpers to fit like this, but the results are definitely worth the effort.