ACP department heading TECH

InTheGarageMedia.com

1. We mixed the new with the old. Our SP350/385 Chevrolet Performance crate engine wears the original ’63 Corvette air cleaner, ignition shielding, and reproduction exhaust manifolds from Summit
"The Case For a Crate Engine"
Why a Substitute for That ’60s Small-Block Makes Sense
By Ron Ceridono Photography by THE AUTHOR
T

here are those among us who were building and driving modified Chevrolets in the ’60s; many of us have a similar affliction as a result—a severe case of selective memory. While the sound and feel of a high-winding small-block hooked to a four-speed transmission was impressive in the good old days, the fact is many contemporary front-drive family cars will suck the headlights out of the cars we still hold near and dear to our hearts. Fond memories are often the result of “The older I get the faster I was” syndrome.

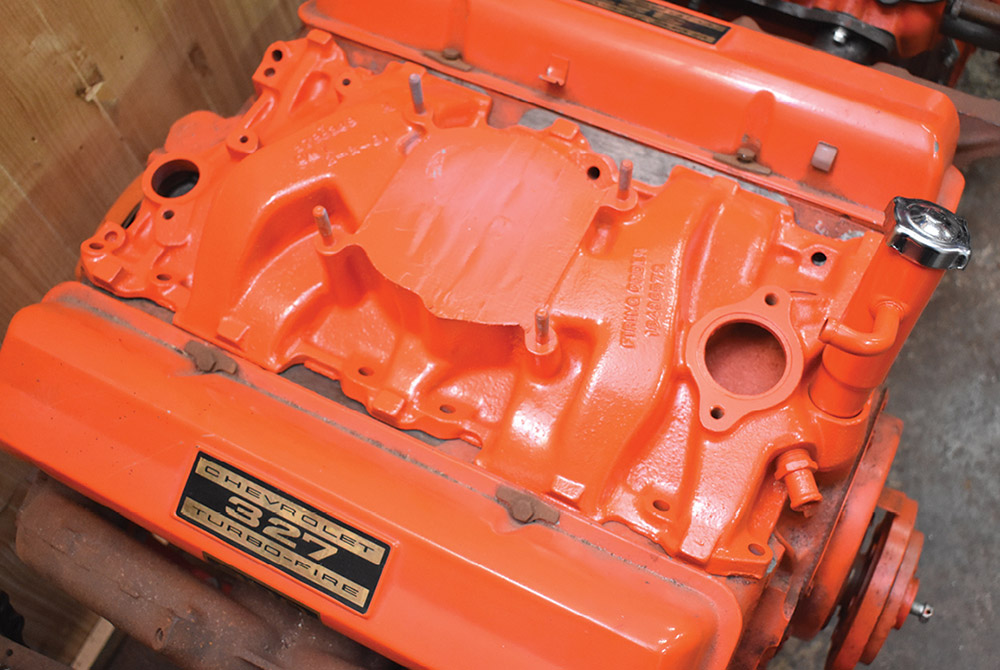
Besides the performance deficit that is a painful reality, many of the performance engines from those bygone days have other shortcomings as well; the 300hp 327 in our ’63 Corvette is a prime example. Back in the day of “high-octane” gas, the 10.5:1 compression and iron heads weren’t a problem, but with today’s fuel, engine-killing detonation can be an issue. In addition, unleaded fuel can cause valve and valve seat wear issues, so arguably the sensible idea is an engine swap.

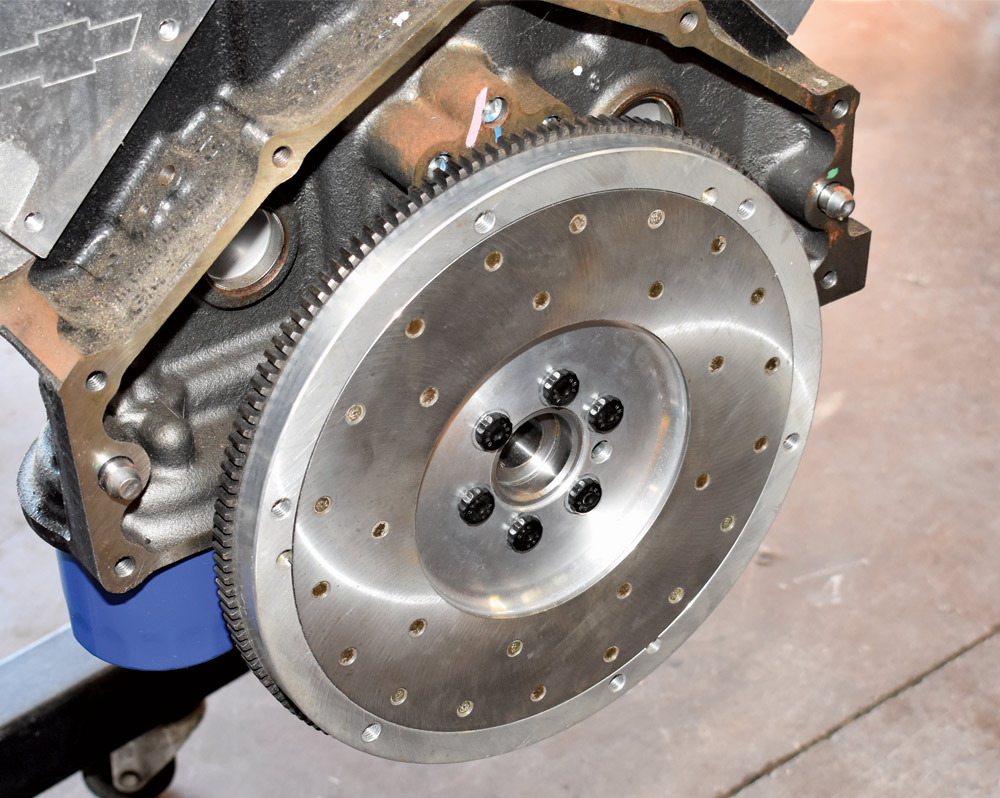
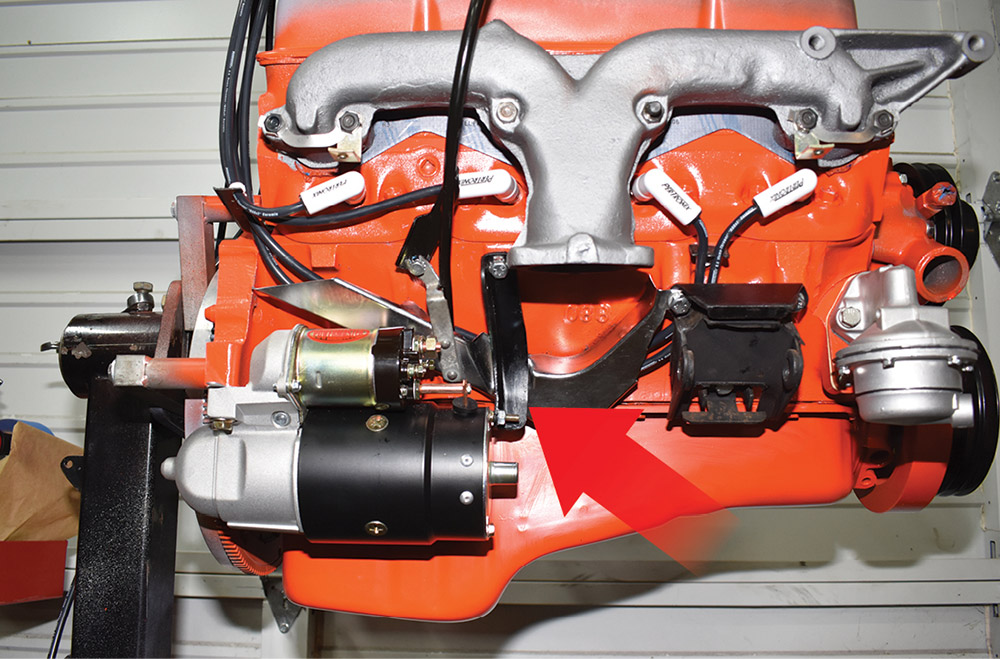
In the age of Chevrolet’s revolutionary LS engines one has to wonder why anyone would choose to repower a vintage car with anything else. But then there are those diehards among us, so we decided on a Chevrolet Performance Gen II small-block because an LS just wouldn’t look right (address all hate mail directly to ACP editor Nick Licata). When it comes to selecting a Chevrolet crate engine, Gandrud Chevrolet has a variety in stock that range from mild-mannered drivers to asphalt shredders. Ours is the SP350/385, the 350ci version that generates 385 hp with 405 lb-ft of torque—that’s 85 more horsepower and 45 more lb-ft of torque than the original 327.

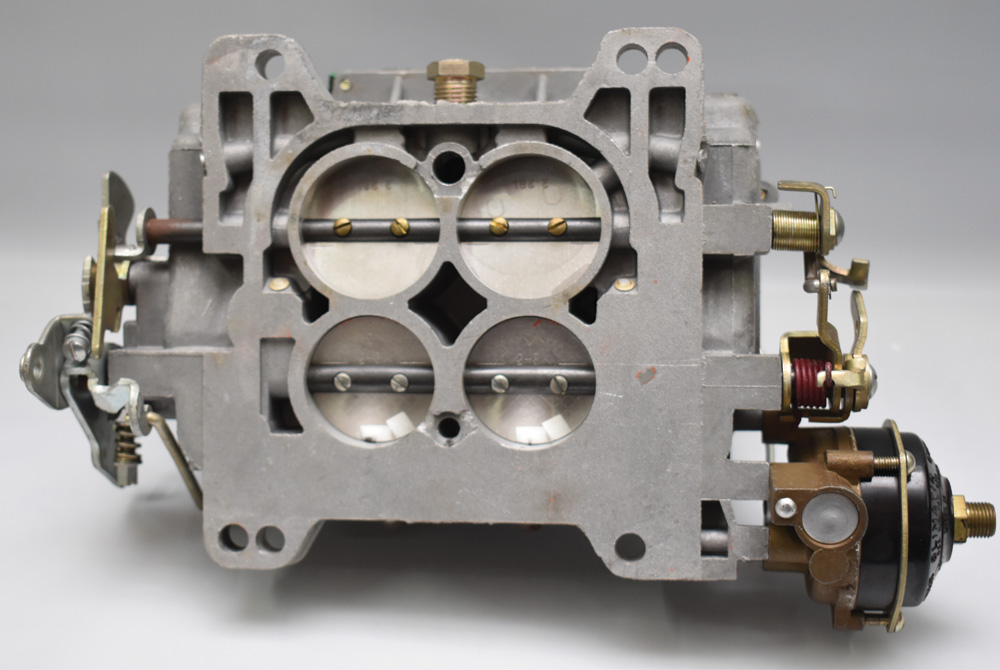
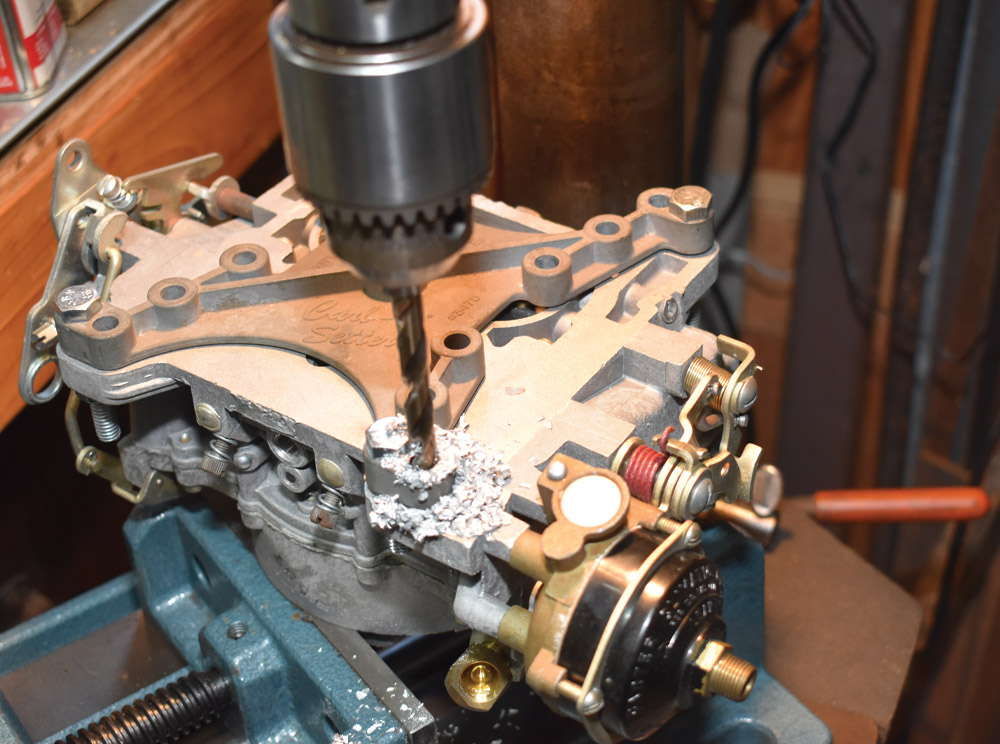
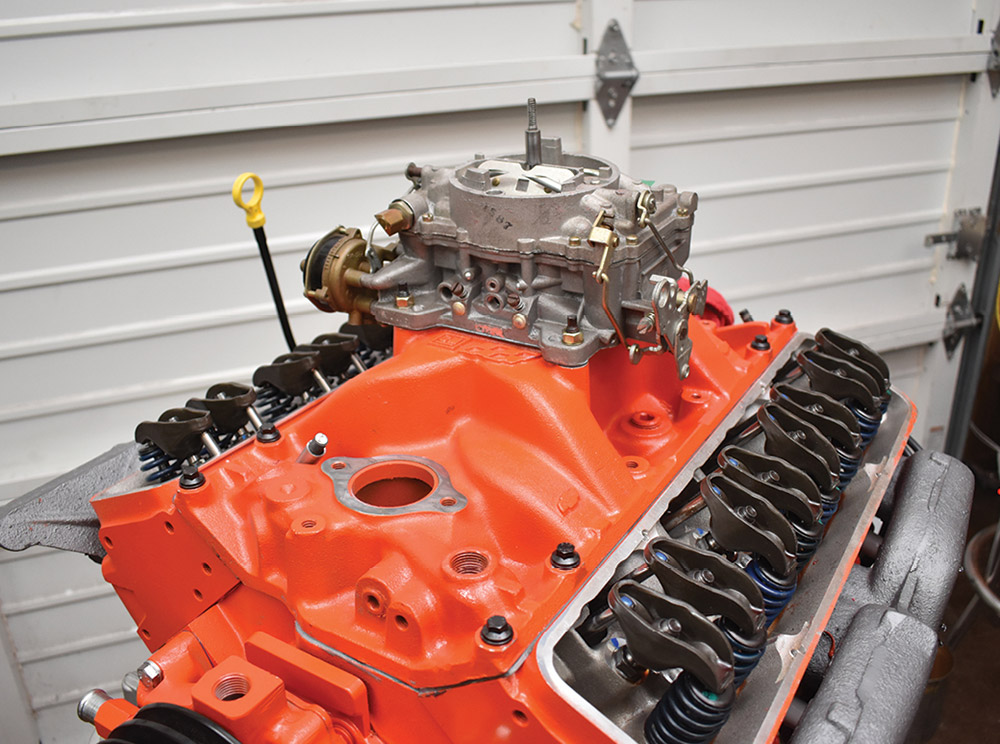
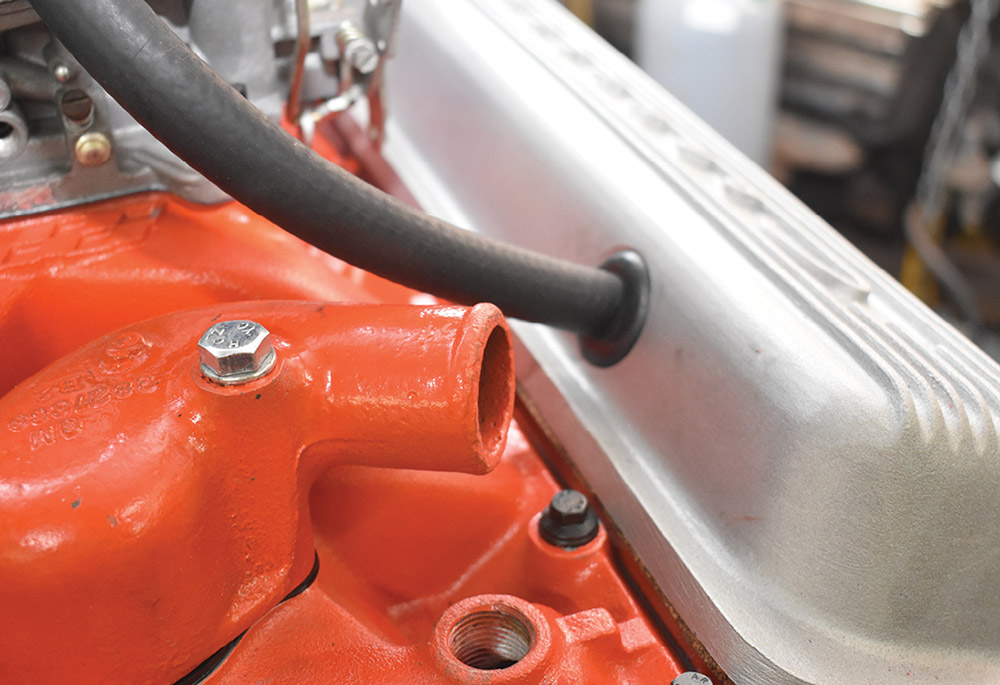
While we aren’t trying to fool anyone, one of our goals for this swap was to maintain the spirit of the original engine, if not the exact appearance. Interestingly, our new engine came with heads that were drilled for the late-style eight-bolt intake manifold as well as the early 12-bolt style. However, while the boltholes line up, our early cast-iron manifold did not match the ports in the new heads. To solve the intake manifold dilemma, we simply used the new aluminum manifold, which did require redrilling the Carter AFB carburetor we’ve had on the shelf since 1977 (proof that you should never get rid of any car parts). However, using the late manifold meant that we no longer had a way to put oil in the engine or introduce fresh air into the engine for the positive crankcase ventilation (PCV) system.

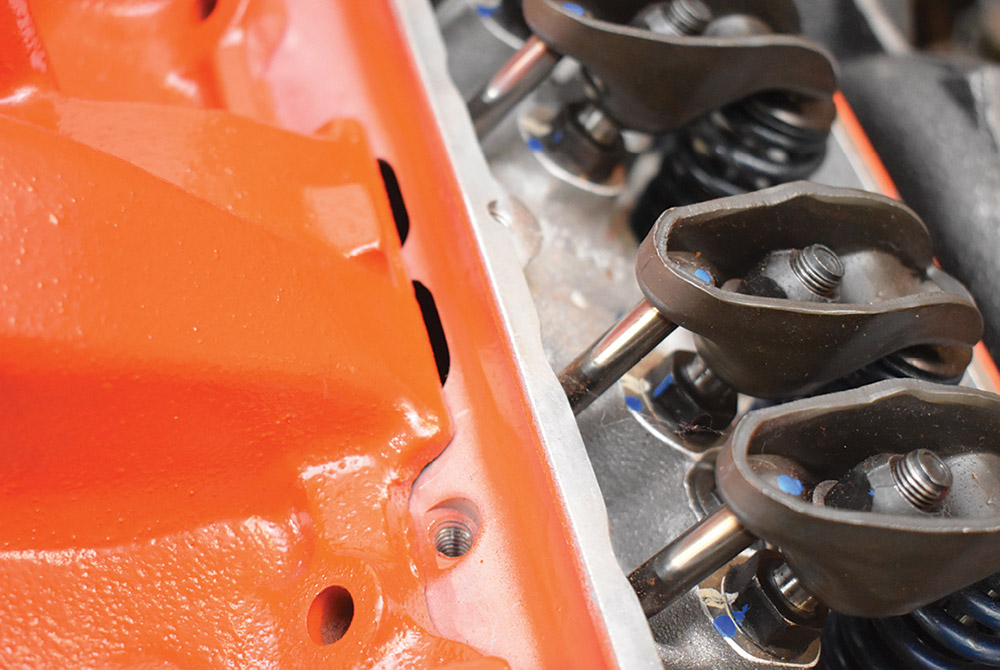
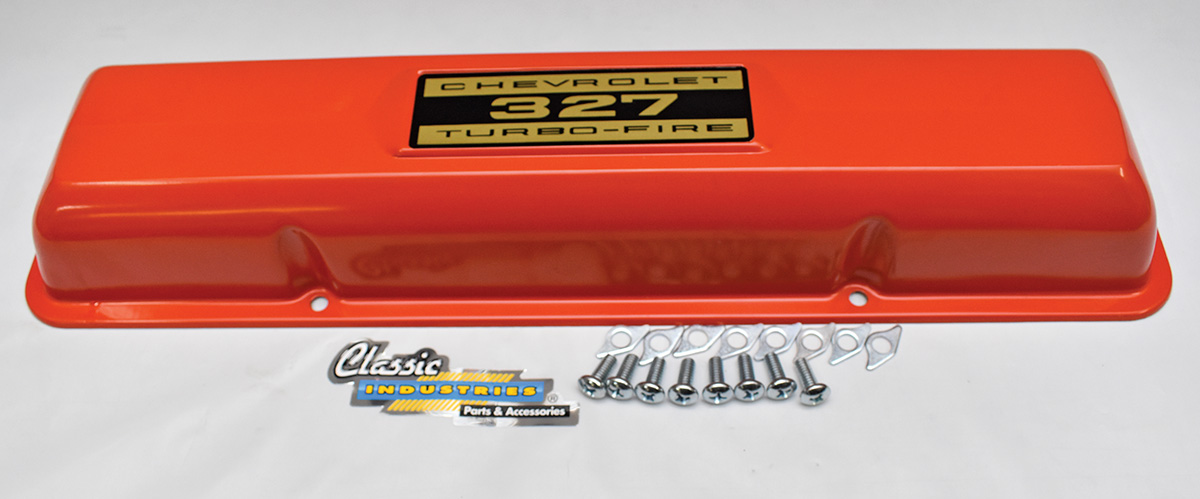
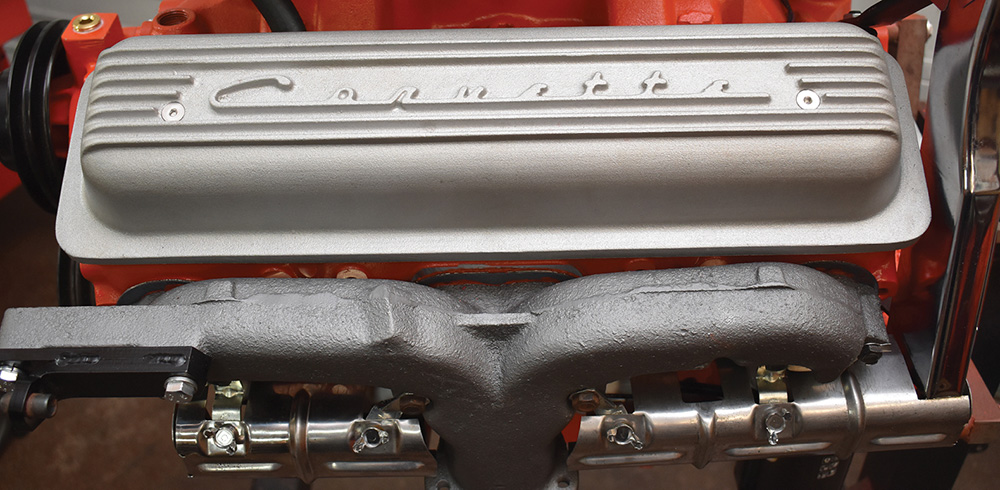
In addition to dual intake manifold attachment points the new heads are drilled for late-style center-bolt rocker covers as well as the earlier perimeter bolt design. Again, the boltholes line up, but the covers won’t work as the pushrod ends of the rocker arms hit the insides of our cool new reproduction covers from Classic Industries. The solution to that was a set of cast-aluminum, Corvette-style rocker covers from PML. Along with solving our rocker arm clearance issues, holes were provided in each cover for the PCV system. Additionally, now oil can simply be added to the engine through one of the grommet holes with a flexible funnel PML provides.

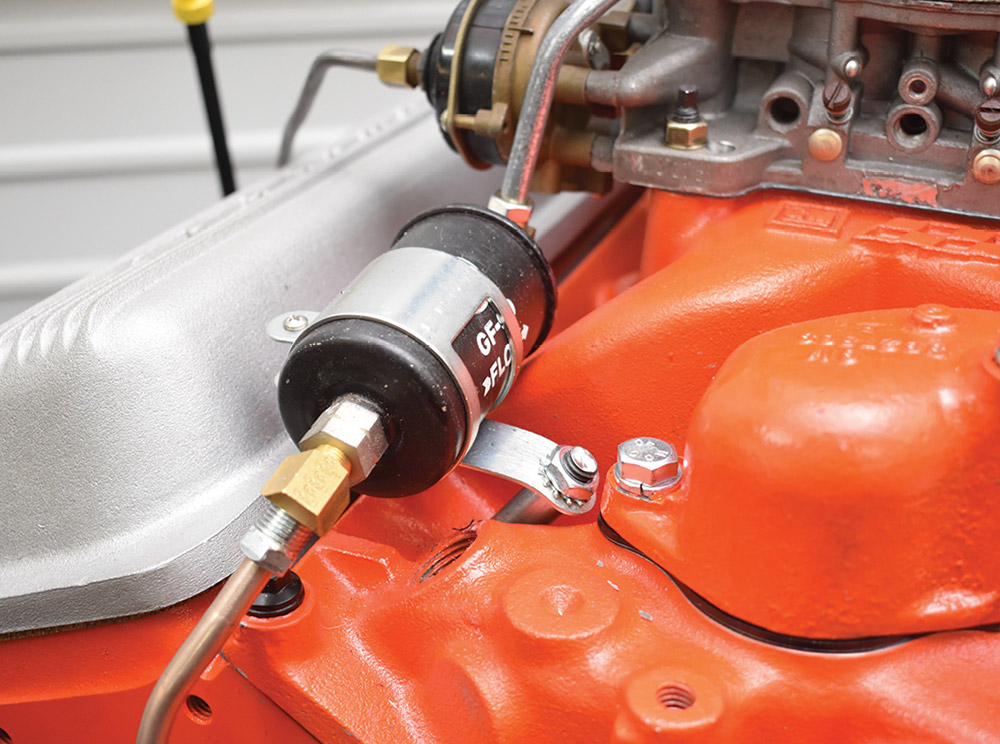
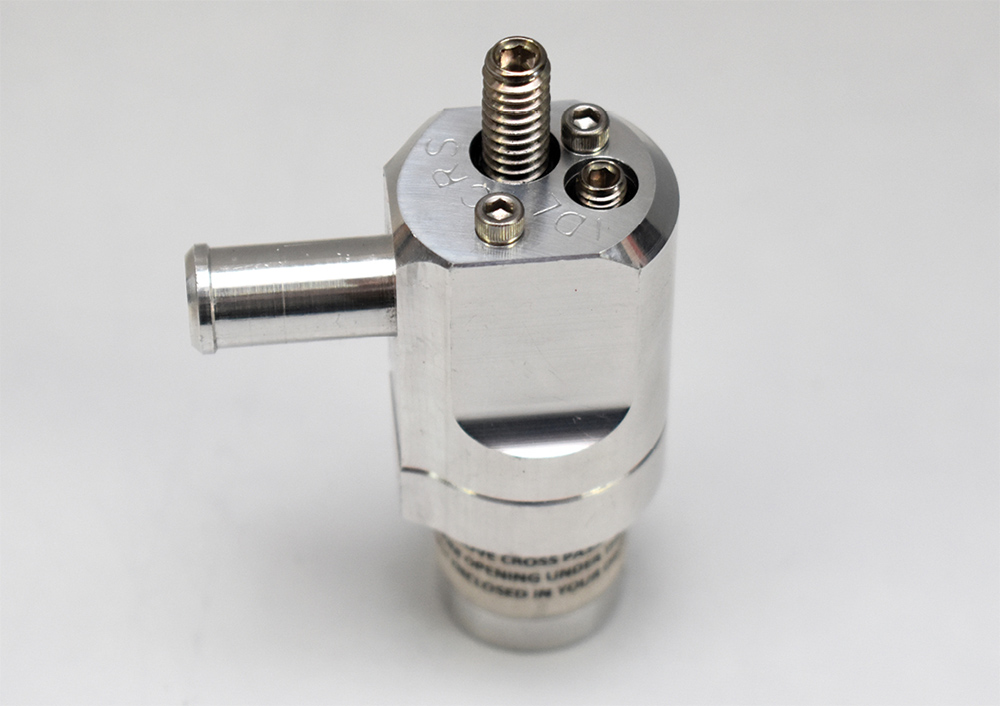
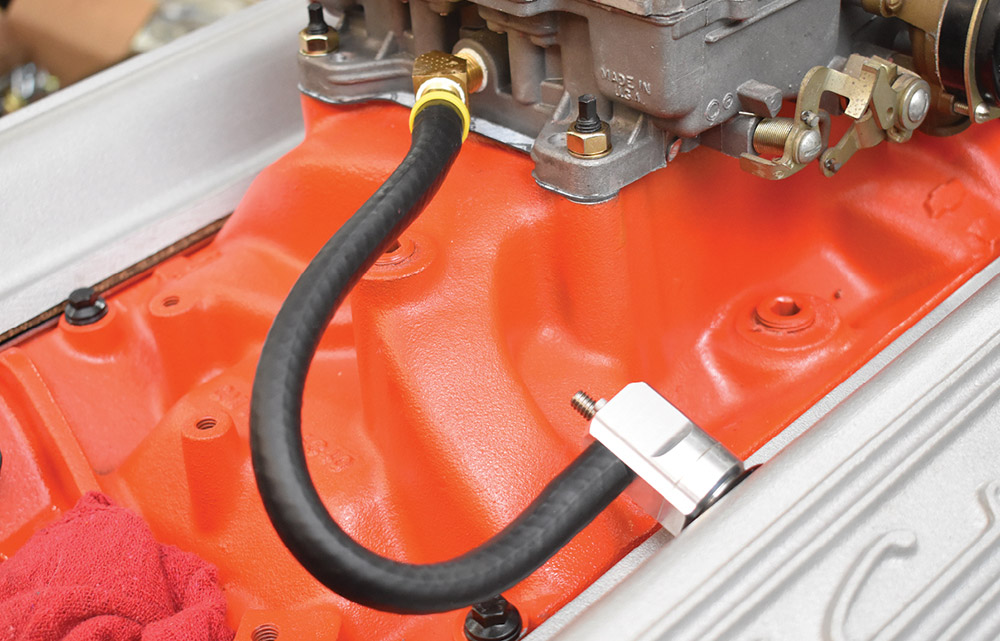
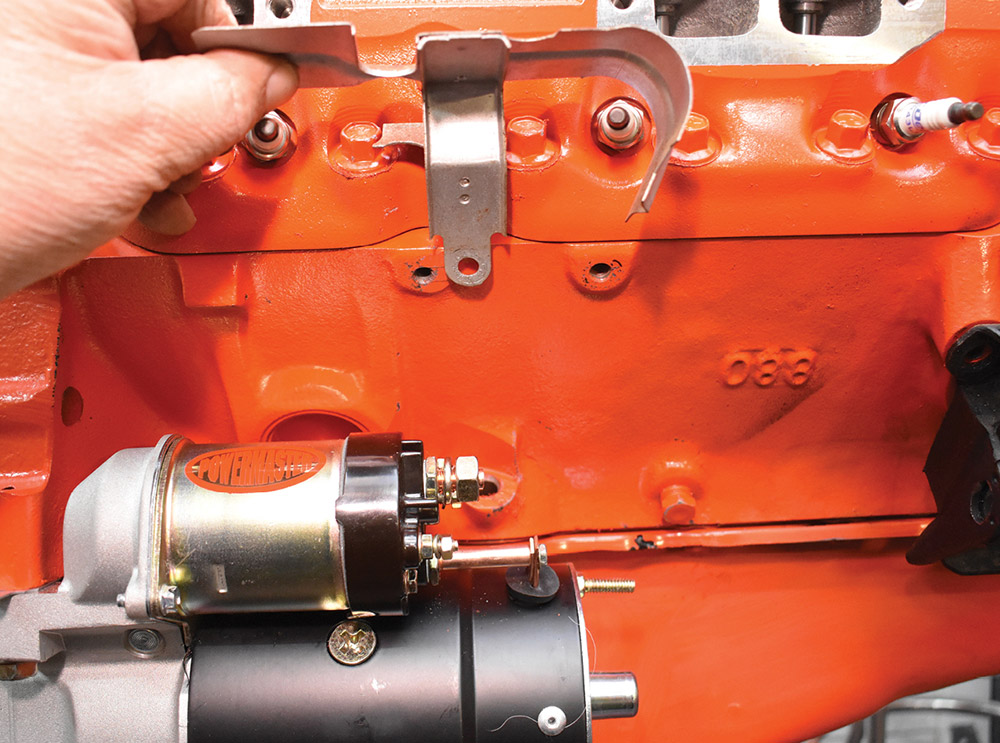
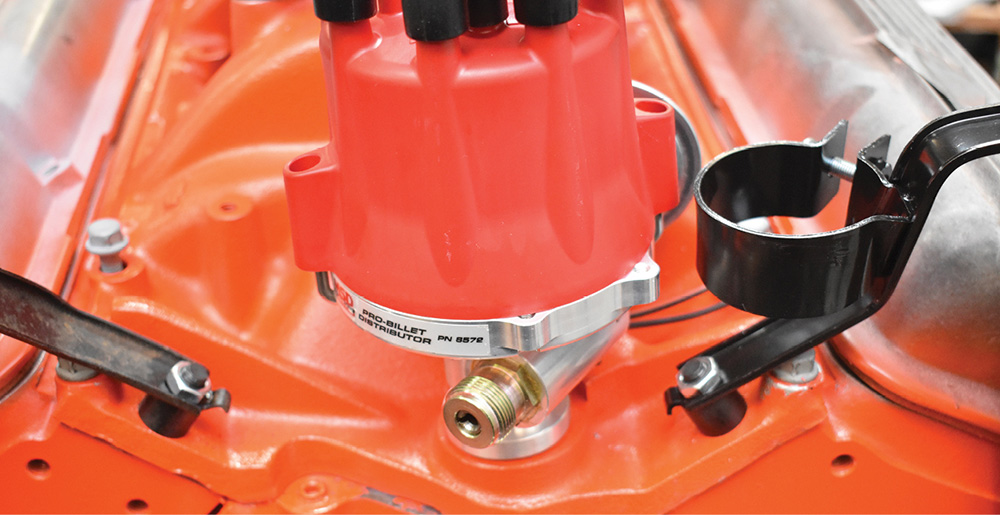
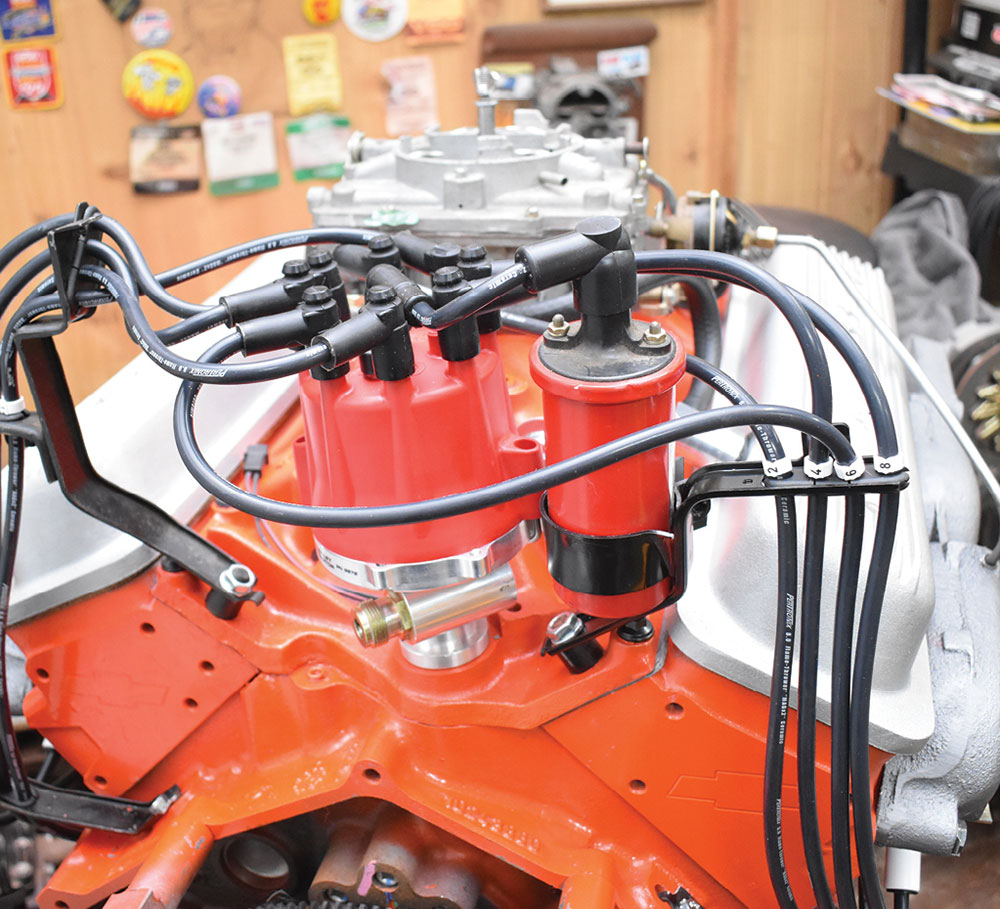
The final touch on our engine swap was to add the original ignition shielding; like most Corvettes, ours used a variety of brackets to mount them. Two for the ignition shield brackets and the one for the fuel filter were originally secured by the original intake manifold bolts, which we no longer had. To address that issue, we used a new intake manifold gasket with both manifold bolt patterns (Fel-Pro 1255) and drilled the necessary holes in the manifold and installed studs to mount the filter and shield brackets.

Our substitute small-block checks all the boxes on the list of attributes we were looking for. We wanted a modest increase in horsepower and torque and an engine that would run on today’s fuel and not look out of place when we opened the hood. We got all that and a 24-month or 50,000-mile limited warranty. The good old days just got better.

Transmission side view of engine on stand
2. There are some obvious tells that this is a Gen II small-block: The right-side dipstick and center-bolt PML Corvette-style rocker covers are giveaways.
Arrow pointing to balance weight on flexplate
3. Gen II engines are externally balanced. Ours came with a weighted 153-tooth flexplate. The arrow points to the balance weight (arrow).
Balance weights on flywheel
4. As we would be using a manual transmission, we installed a Centerforce billet aluminum flywheel. Note the balance weights (arrow) and the mechanically retained ring gear (bolt-on rather than press fit).
Flywheel on transmission
5. The Centerforce flywheel features a replaceable, heat-treated friction surface. The flywheel bolts are from ARP.
Close up of pilot bearing
6. A small but important part, a pilot bushing or bearing must be installed in the crankshaft to support the input shaft of a manual transmission.
Exposed cylinder heads
7. Our SP 350/385 came with aluminum fast-burn heads that feature D-shaped exhaust ports and angled spark plugs.
Exhaust gasket on manifold
8. The D-port exhaust gasket showed there was a mismatch between the reproduction, early style ram’s horn exhaust manifolds and the ports in the heads.
Manifold in vise to port-match gasket
9. It might not make much difference in performance, but port-matching the manifolds to the heads made us feel better.
Exposed engine block
10. Typical of pre-’69 blocks: The hole to the left connects to the oil filler tube in the manifold (arrow A), the hole on the far right is for the road draft tube or PCV valve (arrow B). Also, note the heat riser passages in the heads (arrow C).
Top side of cylinder head
11. The Gen-II block accommodates roller lifters, and the holes at the ends of the block and the heat riser passages have been eliminated.
Early 327 intake manifold
12. This is an early 327 intake manifold with an oil filler. The small tube connects to the air cleaner as part of the PCV system.
Gap in ports between intake manifold and cylinder head
13. While the Chevrolet Performance heads are drilled with the early intake manifold bolt pattern, there is a serious port misalignment issue as the gaps show.
Bottom of N.O.S. Carter carb
14. We elected to use the new dual-plane aluminum intake manifold with an N.O.S. Carter carburetor, however it was not drilled for the new square-flange intake manifold.
Drilling new holes into AFB's baseplate
15. Using our vintage Offenhauser carburetor stand, we drilled the necessary holes in the AFB’s baseplate.
Carb installed onto intake manifold
16. More new and old parts combined. The vintage AFB bolted to the new eight-bolt intake. ARP fasteners were again used.
Fuel filter installed
17. An original-style A/C GF-90 mounts to the intake manifold with a stud that was added.
New valve covers
18. Our original plan was to use reproduction valve covers and mounting hardware from Classic Industries, but due to the design of the new heads there was interference with the rocker arms.
Corvette valve covers installed
19. To solve our rocker clearance dilemma, we opted for a set of aluminum PML center-bolt Corvette valve covers.
Inside view of Corvette valve covers
20. Inside the PML covers are baffles that allow the use of a PCV valve and fresh air intake.
PCV valve
21. This is an adjustable PCV valve from M/E Wagner—it allows airflow to be controlled during idle and cruise conditions.
PCV system installed
22. We had the PML covers drilled for a PCV system. The M/E Wagner valve is on the right side and connects to the base of the carburetor.
PCV intake tube
23. The fresh air intake for the PCV system comes from the air cleaner and connects to a baffled grommet in the left valve cover.
Original spark plug heat shields misaligned on block
24. We were not able to use the original spark plug heat shields due to the location of the threaded holes in the block.
PerTronix spark plug wires
25. To eliminate cooked spark plug boots, we chose wires from PerTronix with ceramic ends.
Corvette spark plug wire shield
26. Note the Corvette spark plug wire shield and the support bracket (arrow) on the Powermaster starter.
Spark plug wire covers installed on left side
27. Similar to the right side, the left side spark plug wire cover and the wire guide are between cylinders 1 and 3. The brackets on the manifold bolts are for the spark plug covers.
MSD distributor installed
28. Another update is an MSD distributor with a mechanical tach drive. Note the ignition shield/plug wire brackets are mounted by studs in the new manifold with spacers to place the distributor shield at the proper height.
Distributor installed
29. Our MSD distributor came with the melonized drive gear that GM Performance requires to prevent premature wear with a roller camshaft.
Ignition shields installed
30. Here all the factory ignition shields are in place. Zip Corvette supplied the factory-style wing nuts. Note manifold to carburetor heat tube for the choke.
HEI-style distributor cap
31. We used an HEI-style distributor cap. For clearance under the cap, we trimmed off the wire retainers on the boots (compare these to photo 29).
New standard rotation water pump installed onto block
32. Our crate engine came with a long, reverse rotation water pump, that was swapped for a short, standard rotation Edelbrock aluminum pump from Summit Racing.
Automotive Racing Products
(800) 826-3045
arp-bolts.com
Centerforce
(928) 771-8422
centerforce.com
Classic Industries
(800) 854-1280
classicindustries.com
Gandrud Chevrolet
(888) 284-7491
gmperformancemotor.com
M/E Wagner Performance
(579) 899-4544
mewagner.com
MSD
(866) 464-6553
holley.com
Pertronix
(909) 599-5955
pertronixbrands.com
PML
(310) 671-4345
yourcovers.com
Powermaster Performance
(630) 957-4019
powermastermotorsports.com
Summit Racing Equipment
(800) 230-3030
summitracing.com
Zip Corvette Parts
(800) 962-9632
zip-corvette.com