

ACP department heading TECH
InTheGarageMedia.com
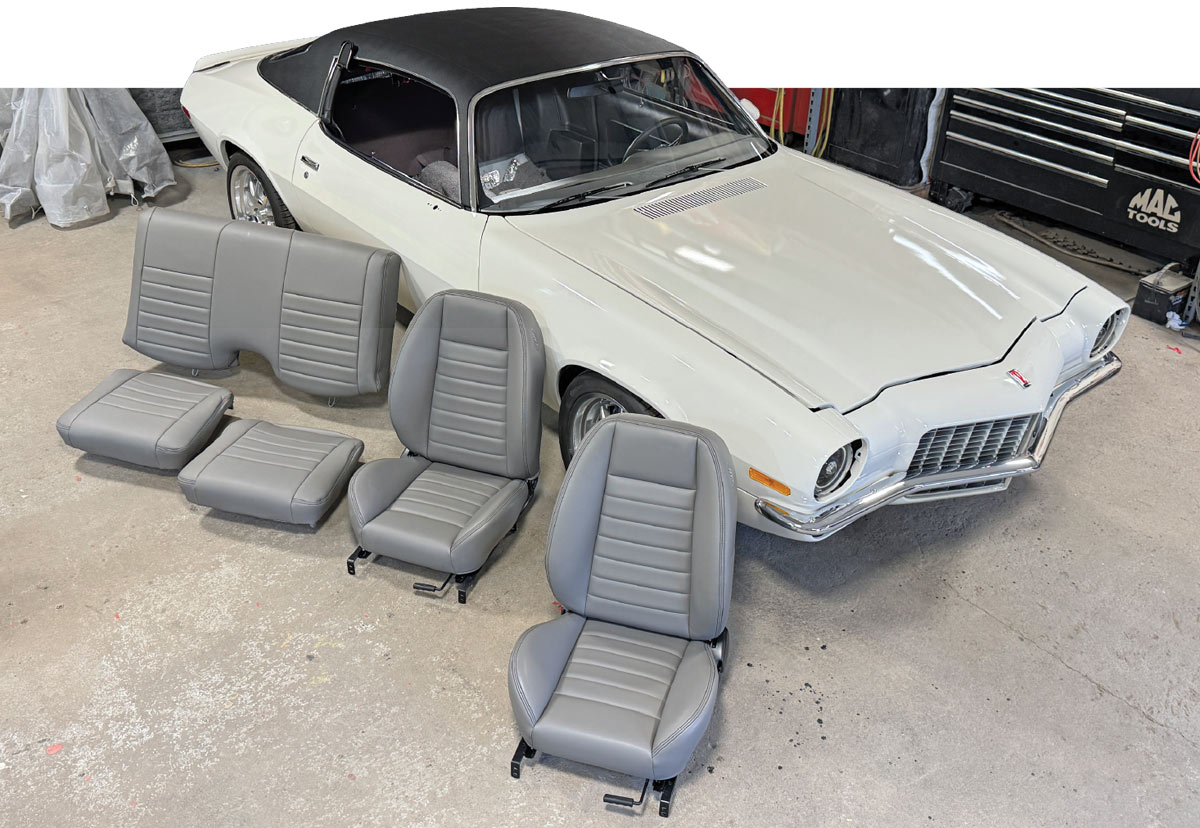
High-angle view of a white second-gen Camaro with a black vinyl roof parked in a garage. Two grey front bucket seats and two rear seat sections are laid out on the concrete floor in front of the vehicle.
By Chuck Vranas Images by The Author
Upgrading the Business Office
Installing Fresh Threads in a Second-Gen Camaro
R

egardless of whether you’re working on a fresh build or making provisions to improve your existing ride, one of the most important decisions you can make is how to address the interior seating. Picture your Chevy with its buckets or bench removed and study the real estate left within the cabin. This gives you the opportunity to examine the area and make decisions with regard to the vast options available through the aftermarket to give it a timeless new look. Choosing between a custom look, OEM-style, or something in-between offers an endless stream of possibilities regarding colors, textures, and materials available to set the vibe.

Familiar to many of our regular readers, we’ve covered the buildup of this 1971 Camaro over the past few years in All Chevy Performance magazine. Commencing with a bare shell, it’s taken us on a journey through all aspects of the build, including suspension and brakes, LS engine, cooling, exhaust, sheetmetal, wiring, and insulation, just to name a few. Featuring a scorching 5.3L LC9 linked to a T-56 six-speed manual transmission, it’s a perfect power combination for hitting the streets. This time we’re completing the business office with new material and seating to make driving a dream.

We stopped by Procision Industries in Taunton, Massachusetts, where shop owner Pat O’Brien was ready to move forward by selecting the ideal components to bring just the right amount of style and comfort to the cabin. He contacted TMI Products to check into their numerous offerings of high-quality interior components, including everything needed to retrofit the Camaro, including seating, consoles, floor coverings, and headliners. There’s also the opportunity for plenty of customization if needed, as everything is handled in-house by their skilled team.

After reviewing all the options, O’Brien selected their Cruiser Collection Pro-Low Back front seats and matching rear seat upholstery kit, which is now available in five different color choices, including black, gray, red, brown, and tan. The seats come fully assembled and ready for installation showcasing a fully welded 1-inch-diameter mandrel-bent tube frame, full reclining seat backs, and easy-sliding seat tracks.

To complete the project, Classic Industries offers everything needed to help reupholster the back seats, including new rear seat foam sets and necessary hardware to handle the job. In addition, Classic Industries supplied all the related components, including a vast selection of door panel choices from PUI, front kick, and rear side panels from OER, as well as hardware from AMK Products to help with the installation.

Let’s follow along as we work to complete the interior!

Pat O’Brien holds a black interior door panel with a cloth insert against the open door of a white second-gen Camaro during the installation process.
1. Preparing the new PUI door panels, sourced through Classic Industries, for installation, Pat O’Brien of Procision Industries started by cutting the perforated access holes on the back of the panel for mounting access to the door handles and armrest pads. Slight updates were needed since he modernized the look with one-piece panels from the 1978-79 Type LT/Berlinetta models with the custom cloth interior option. He followed by adding the OER reproduction nylon door panel clips to secure the panel to the door shell.
Close-up of a person using a Phillips-head screwdriver to install a screw into the underside of a black vinyl armrest on an interior door panel.
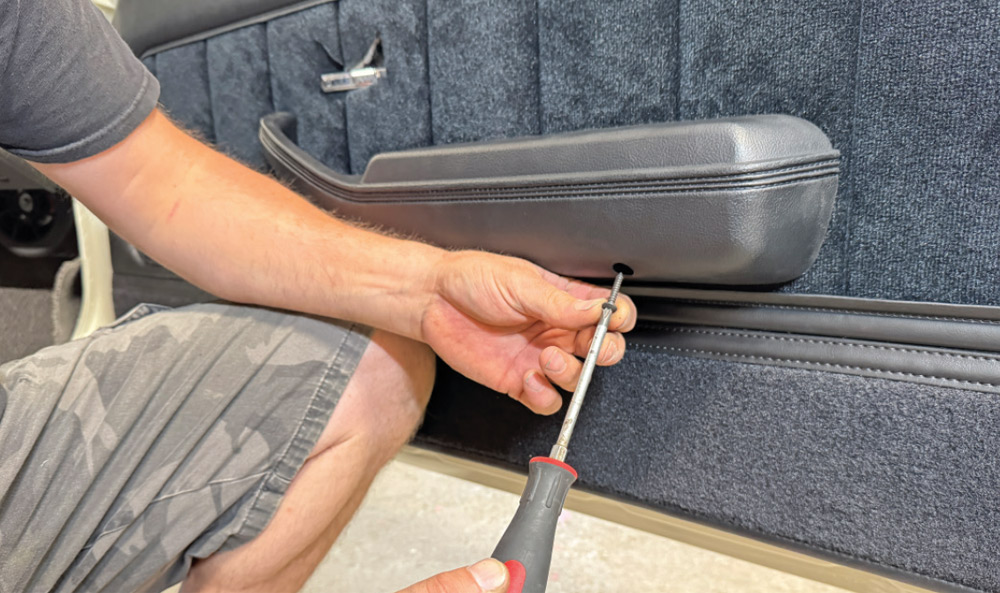
2. Next, he installed the OER armrest assembly using an AMK Products Arm Rest to Door hardware set and a Phillips-head screwdriver.
Close-up of a person using a Phillips-head screwdriver to install a black inner door handle escutcheon onto a door panel featuring a black cloth insert.
3. The OER reproduction inner door handle escutcheon was set in place with hardware from AMK Products.
The finished black interior door panel is mounted on a white car door shell. It features a center cloth insert with vertical stitching, a black armrest, a chrome inner door handle, and a chrome door lock knob at the top.
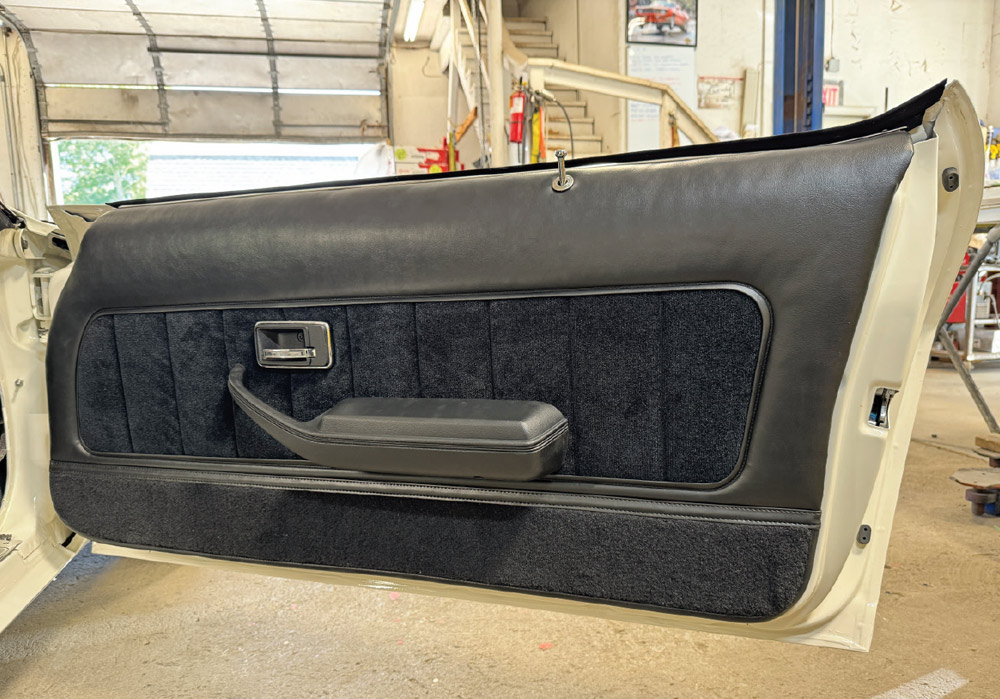
4. The completed door panel installation adds a perfect amount of class to the interior thanks to the updated look of the 1978-79 custom cloth interior option. A new set of OER chrome door lock knobs completes the look.
Hands positioning a black plastic kick panel in the passenger-side footwell of a Camaro. The dashboard above displays a "Camaro" emblem and air vent, while the floor is covered in grey looped carpet.
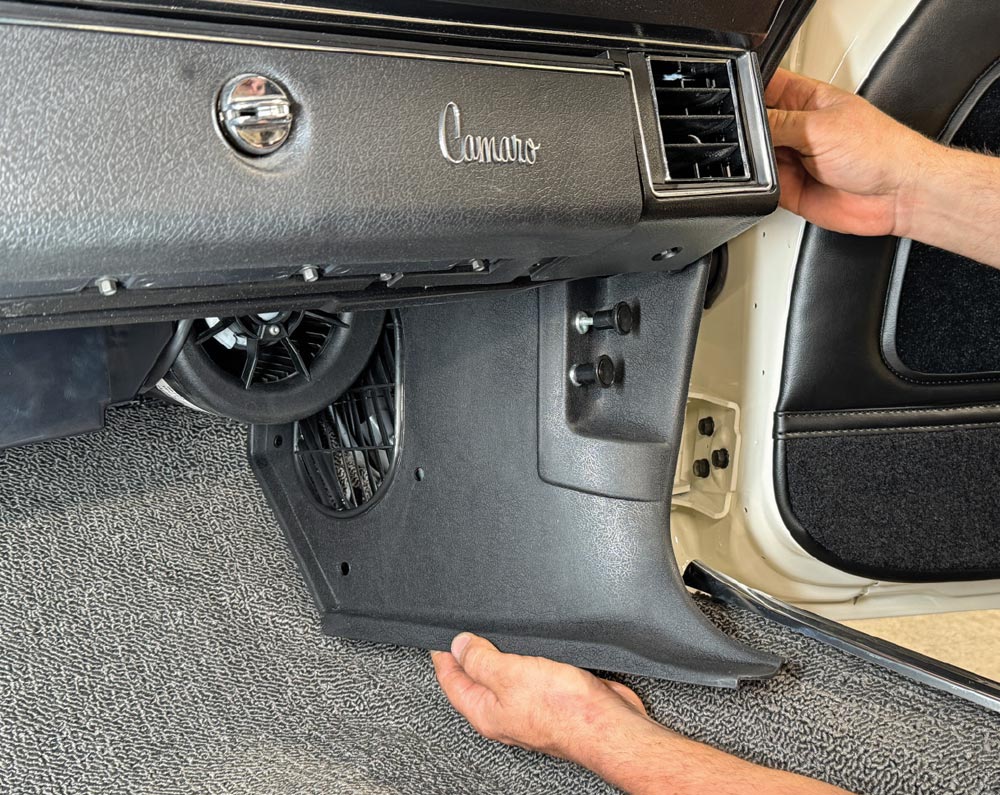
5. The new kick panel (without A/C) was connected and set in place using the supplied hardware.
Pat O’Brien aligns a molded black plastic rear interior side panel against the inner body of the white Camaro, just above the grey looped carpet.
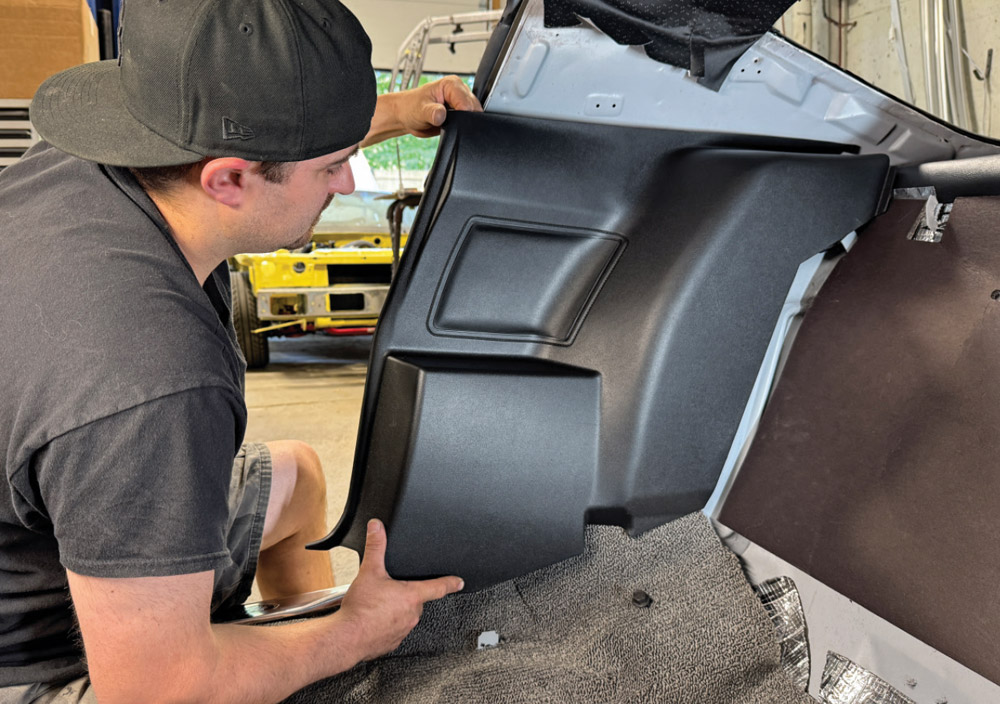
6. Moving rearward, the lower rear side panel was secured in place using the factory tab guides.
Hands position a black textured sail panel trim piece against the upper rear interior pillar of the Camaro, aligning it above the previously installed lower side panel.
7. Next, the sail panels were mounted using the lower locking tabs to the upper section of the lower side panel. The upper panel was then secured.
Interior view of the Camaro’s rear passenger area with black lower side and upper sail panels installed. The rear seat area is empty, revealing insulation on the bulkhead.
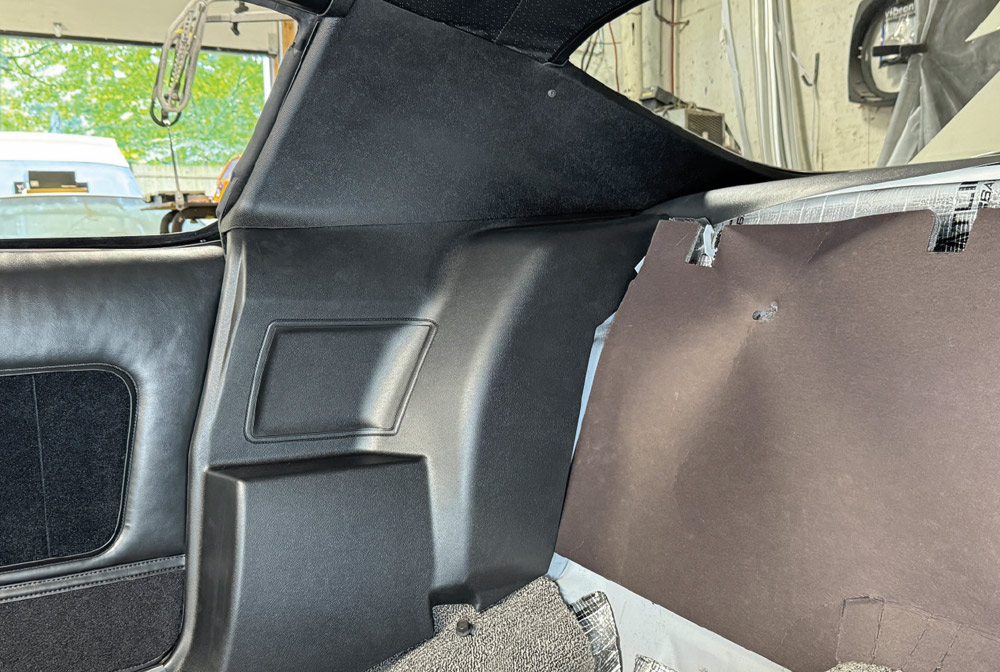
8. The completed rear panels showcased the high-quality reproduction parts, making it factory-fresh and waiting for the new seating to complete the look.
Three pieces of worn black vinyl rear seat upholstery with vertical pleats are laid out on a concrete floor. The set includes a large upper backrest section and two smaller lower seat cushions.
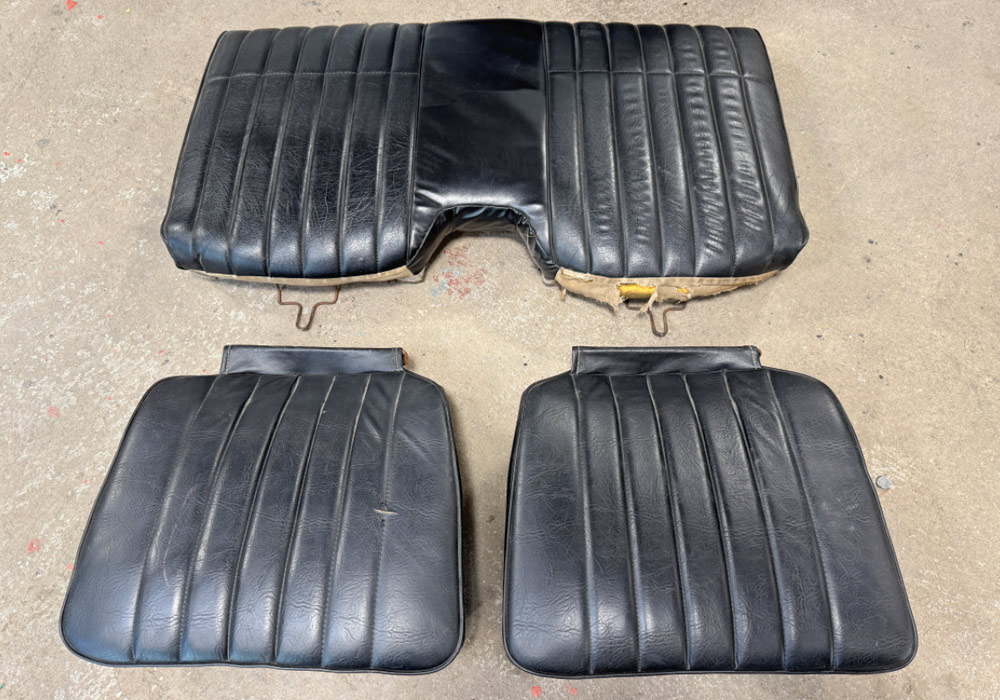
9. The original factory rear seating had served its purpose over the past decades and had seen far better days, so it was time for a refresh.
Pat O’Brien uses a pair of pliers to remove metal hog rings from the wire frame on the back of a car seat backrest, revealing the yellow foam interior.
10. Starting with the rear seat backrest, O’Brien began the teardown process by first removing all hog rings, which secured the upholstery to the back of the seat frame.
A person holds up a rusted metal seat frame that has been detached from a large, weathered yellow foam cushion. The foam retains some remnants of the old black upholstery at the bottom.
11. From there, the seat frame was separated from the foam cushion and upholstery.
Close-up of a person using pliers to remove metal hog rings from the wire springs on the underside of a black vinyl seat cushion.
12. Continuing to the seat bottoms, the factory hog rings were removed from the seat frame and original upholstery.
Close-up of a person using a flat-head screwdriver to separate the rusted metal inner support frame from the seat springs.
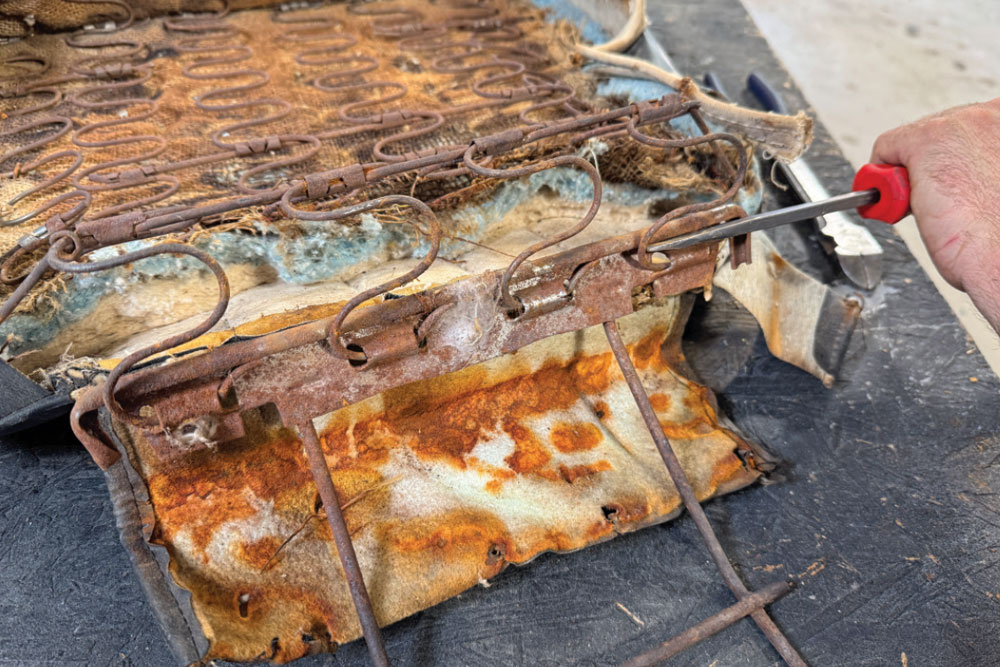
13. To complete the removal process, the inner support frame was separated from the inner springs by using a hammer and standard screwdriver.
Three freshly painted grey metal wire seat frames and a matching set of three white molded foam cushions are laid out on a concrete floor.
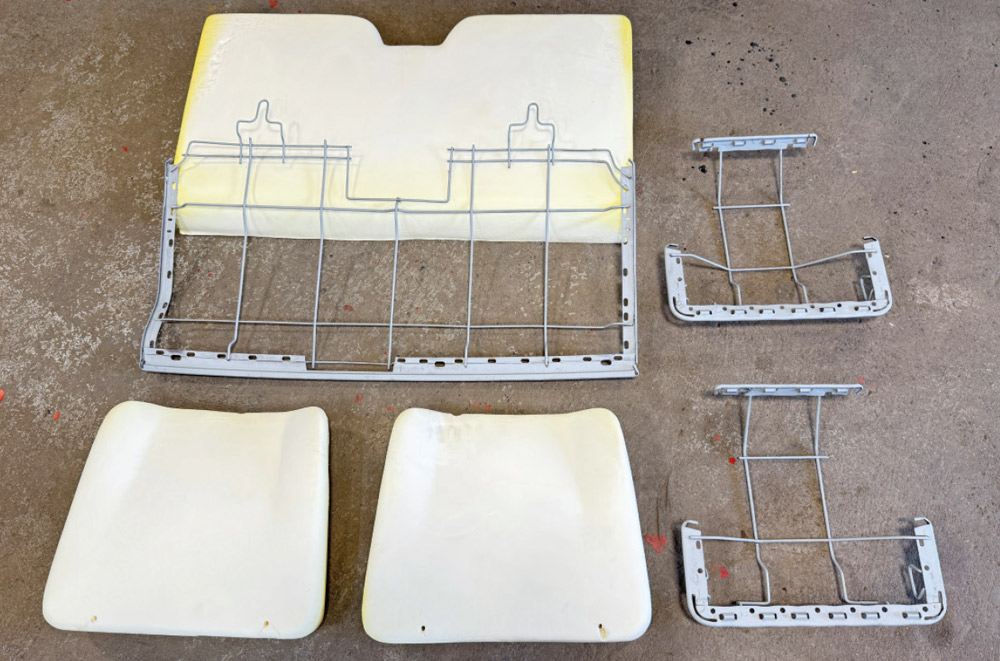
14. With the seat frames blasted clean and treated to fresh paint, it was the perfect way to start, especially when matched with the new three-piece molded rear seat foam set from Classic Industries.
Pat O’Brien stretches a grey vinyl seat cover over the edge of a white molded foam cushion on a padded workbench.
15. TMI Products supplied the rear seat upholstery kit from their popular Cruiser Collection in Medium Earth Gray vinyl. Starting with a padded bench top to protect the new upholstery, O’Brien began installation of the cover to the foam insert, ensuring that it is equally stretched to fit all corners.
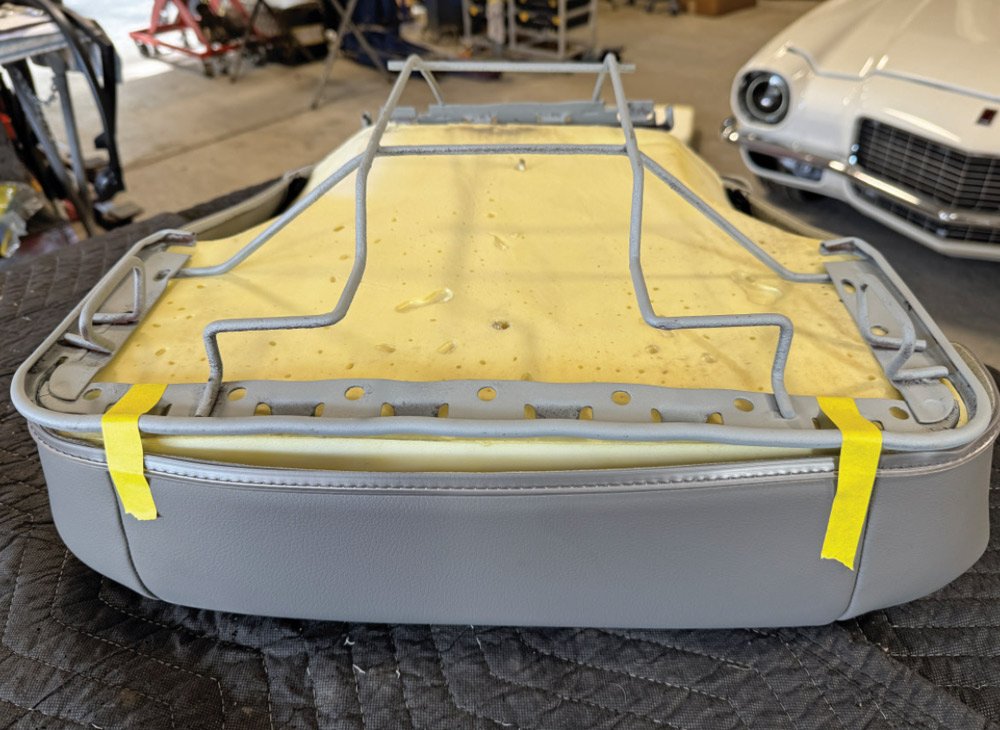
A grey car seat frame sits on yellow foam within an upside-down grey vinyl seat cover on a workbench. Two strips of yellow masking tape are placed on the front edge of the vinyl cover as alignment guides.
16. Flipped upholstery side down, he followed up by lining up the seat frame to the front of the seat pad, using masking tape as a guide to ensure all seams are properly matched to the frame.
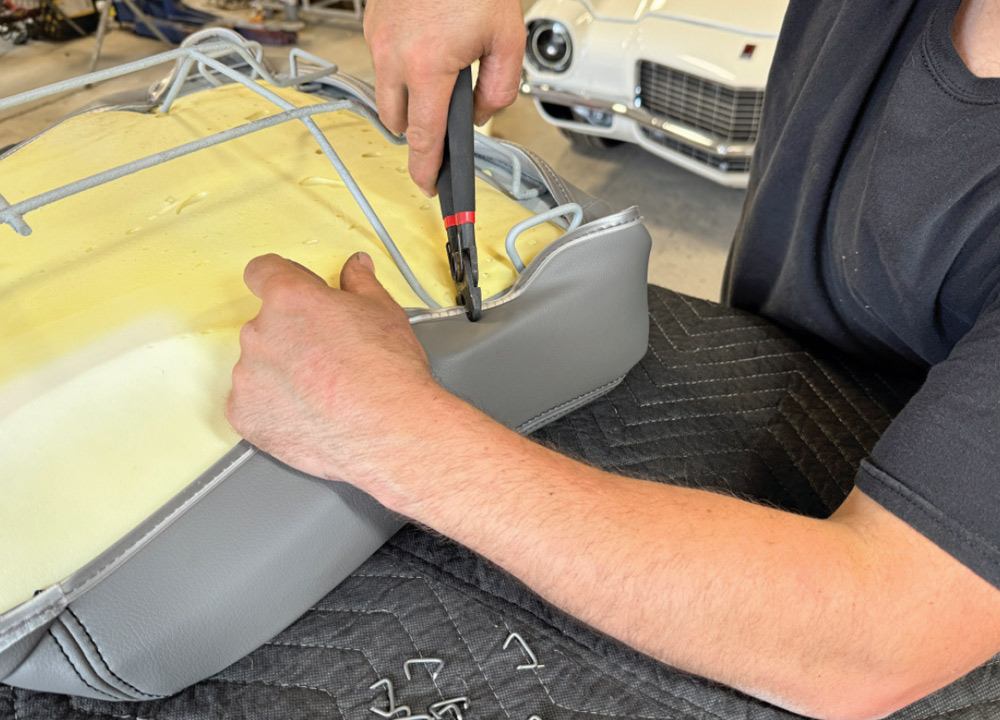
Hands use hog ring pliers to crimp a metal ring, attaching the edge of a grey vinyl seat cover to the metal wire frame on the underside of a seat cushion. Yellow foam is visible between the cover and the wire frame.
17. Using new hog rings, O’Brien secured the new TMI Products seat cover to the seat frame using a pair of hog ring pliers.
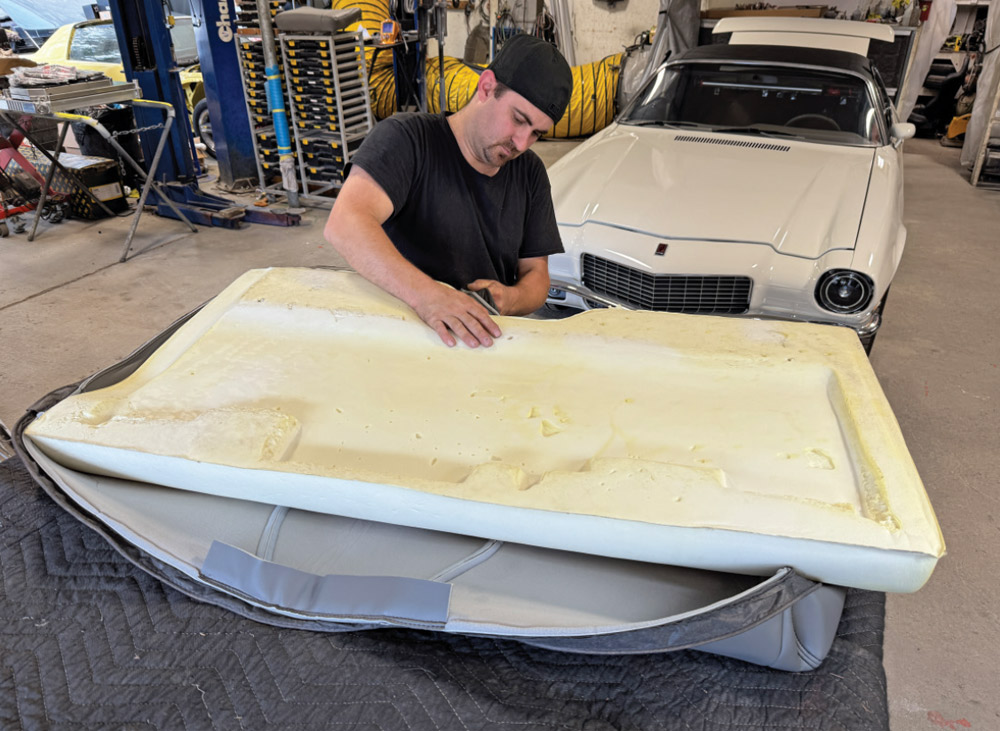
Pat O’Brien fits a large piece of white molded foam onto the back of a grey vinyl seat cover laid face down on a padded workbench. A white Camaro is visible in the background.
18. With the seat back upholstery laid out face down he began the fitment of the molded seat foam to the cover. Be sure to stretch the fit to each corner equally.
Pat O’Brien uses hog ring pliers to secure the edge of the grey vinyl seat cover to the metal wire frame on the back of the rear seat backrest. White molded foam is visible beneath the frame.
19. He then lined up the seat frame to the seat foam and pad, proceeding to equally stretch and installed the pad to the frame using a set of hog ring pliers and hog rings until completed.
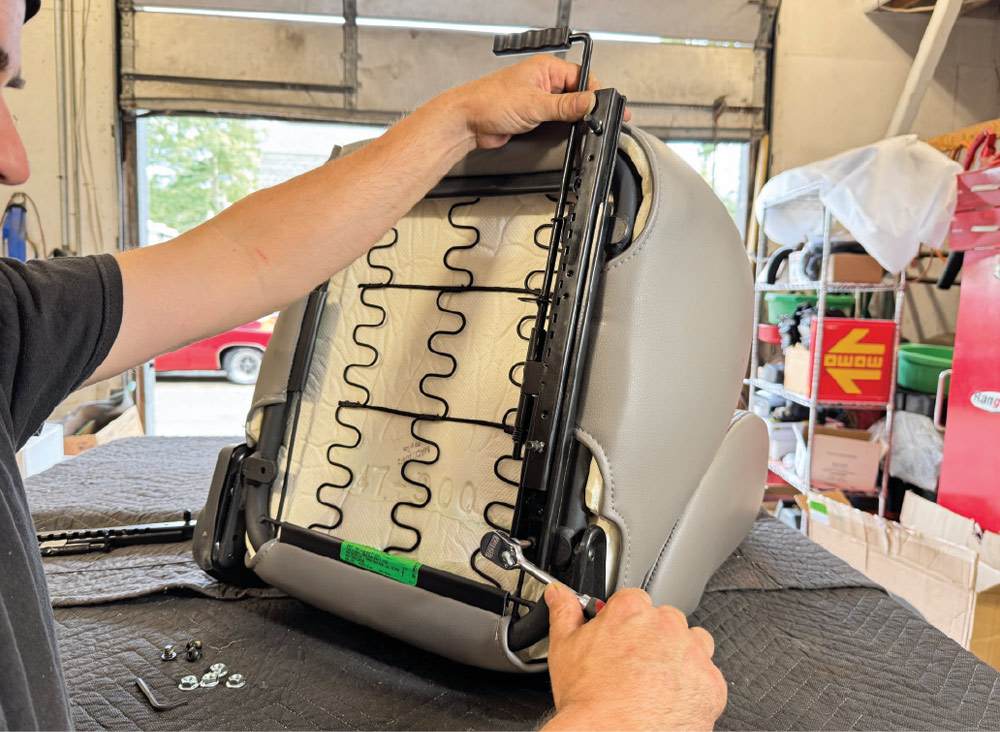
Hands use a socket wrench to bolt a black metal slider bracket to the bottom frame of a grey vinyl bucket seat. The seat is positioned upside down on a dark grey padded moving blanket.
20. To prepare the new front seats for installation, O’Brien started with a padded bench top to protect the new upholstery. Next, he installed the included left and right seat slider brackets to the seat frame with the supplied button head bolts.
Close-up of a hand positioning a thin wire rod with two small O-rings onto the black metal slider tracks on the underside of a grey car seat. The seat's internal structure shows black zig-zag springs over white padding.
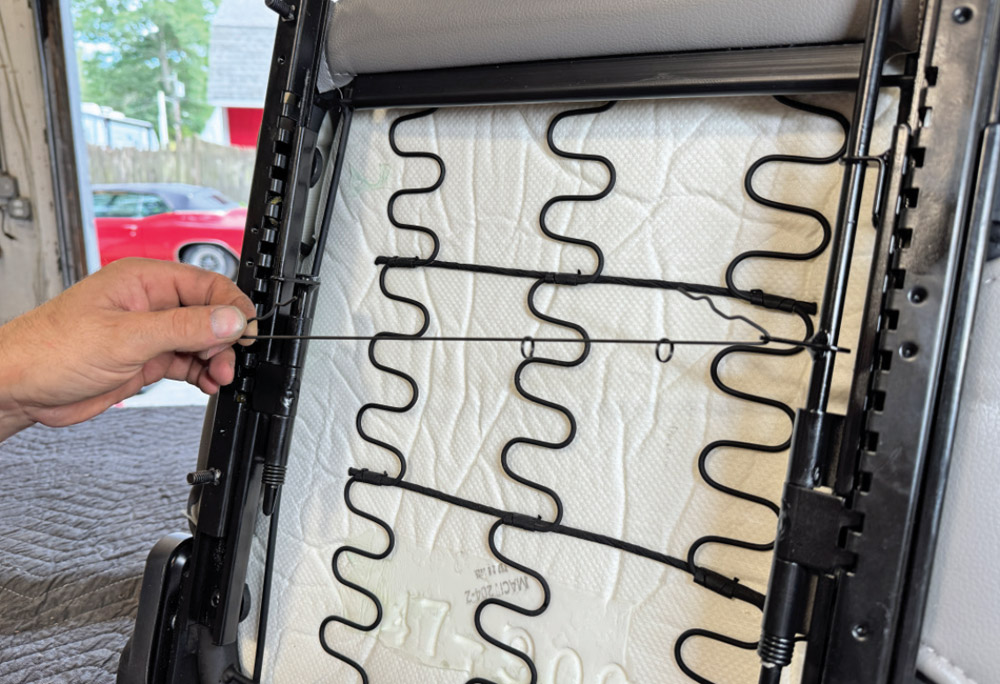
21. Next, the O-rings (two) slid onto the wire rod supplied in the slider kit. Each side was anchored to the designated holes on the slider.
Close-up of hands using pliers to squeeze the ends of a thin wire rod together on a black metal seat slider track.
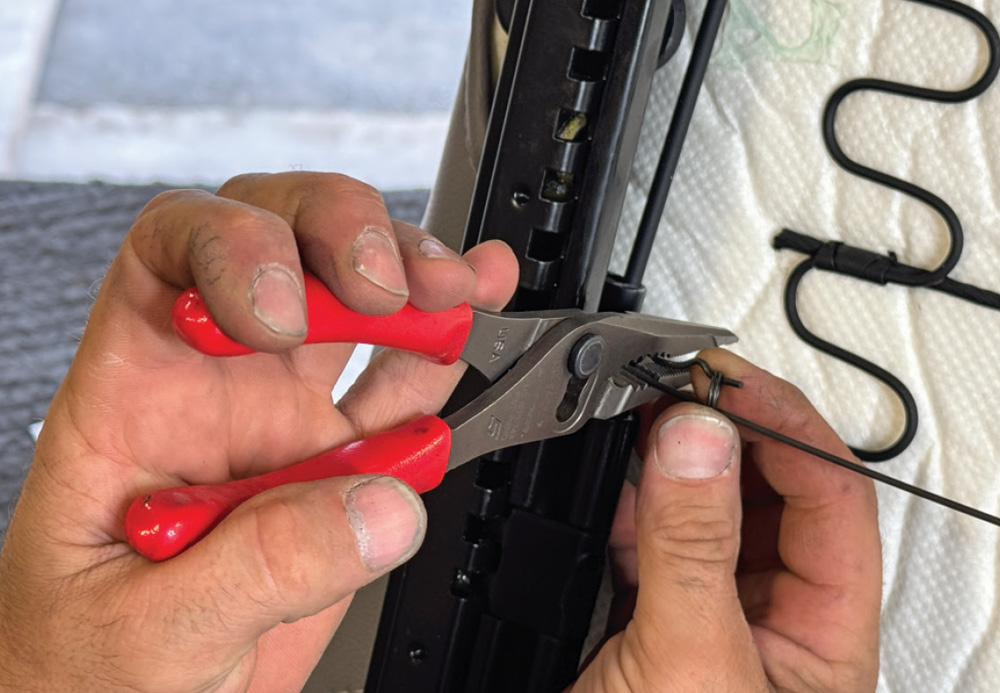
22. Using a set of pliers, he completed by squeezing the wire rod ends together to slide the O-ring into place, locking the wire rod to the sliders on both sides.
A person uses a power impact driver to tighten a hex nut onto a black metal adapter plate positioned on the underside of a grey vinyl car seat.
23. The seat adapter plates were then installed to the slider bracket studs using the supplied 5/16-inch flanged hex nuts.
Pat O’Brien installs the grey vinyl rear seat backrest into the Camaro, using a hand tool to secure a bolt at the base near the grey carpet.
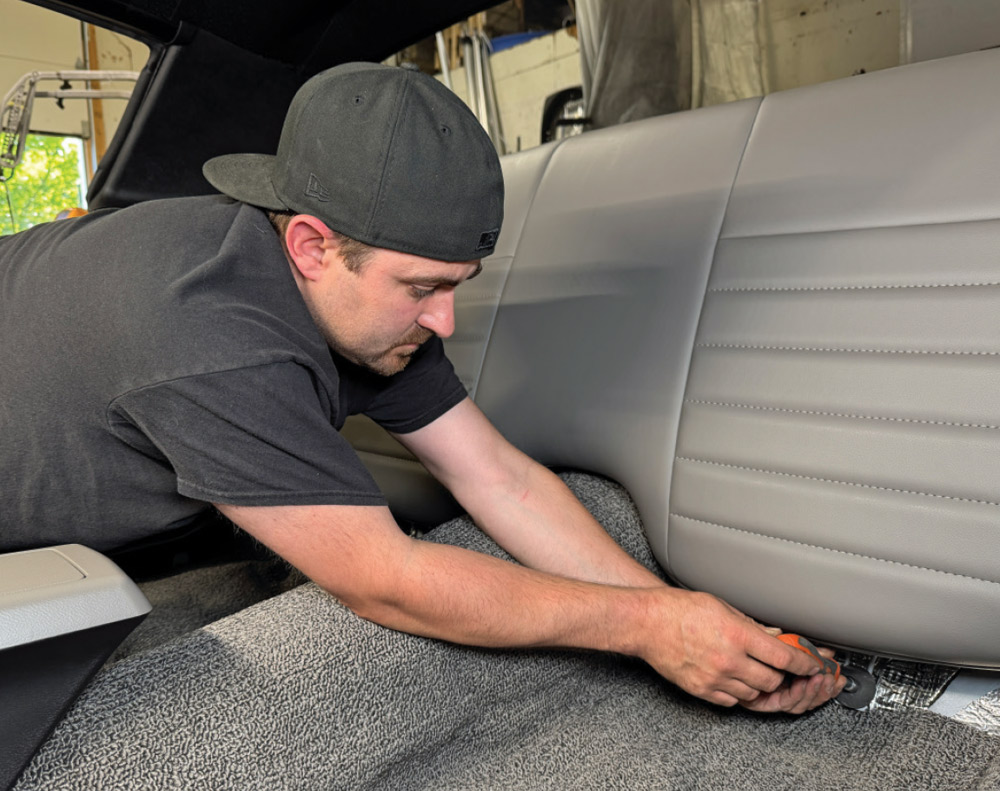
24. O’Brien then installed the rear seat back rest into place using the factory 7/16-inch bolts.
Pat O’Brien lowers a grey vinyl rear seat cushion into the passenger area of the Camaro, aligning it in front of the installed backrest.
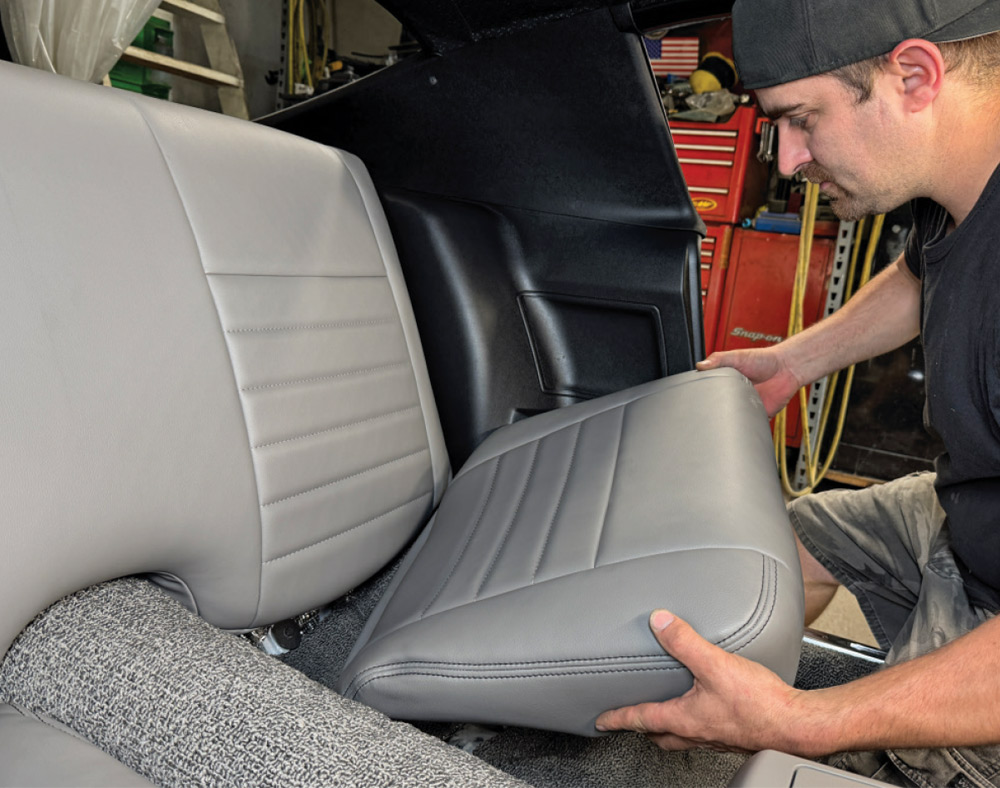
25. The rear seat bottoms were then secured in place to the factory mounts.
The completed rear interior of the Camaro features grey vinyl seat cushions and a backrest with horizontal pleats. The upholstery is installed over grey looped carpet and is bordered by black plastic side trim panels.
26. Here you can see just how nice the rear upholstery upgrade looks, especially with the fresh black side trim for accent.
Hands use a screwdriver to install a black metal seat mounting bracket onto the grey looped carpet on the car floor.
27. Engineered for a perfect it, the TMI Products seat mounting brackets were installed using 5/16-inch bolts to the stock locations.
Pat O’Brien lowers a grey vinyl bucket seat onto the black metal mounting bracket on the passenger-side floor of the Camaro. The newly installed grey rear seat is visible in the background.
28. The new seats were then carefully set in place to prepare them for final installation.
Close-up of hands using a tool to secure a button head Allen bolt into a black metal seat mounting bracket on the grey looped carpet.
29. Using button head Allen 5/16-inch bolts, the seats were secured to the mounting brackets.
The finished interior showing both TMI Products Cruiser Collection front bucket seats and the matching rear upholstery installed in the Camaro.
30. Upgrading with TMI Products Cruiser Collection Pro-Low Back front seats with matching rear seat upholstery added plenty of style and comfort to the Camaro as it prepares to hit the road.