ACP department heading TECH
InTheGarageMedia.com
A technician inspecting a classic maroon Chevrolet Chevelle SS in a body shop, with yellow tape markers indicating hail damage across the hood and roof.
The Redo From Hail
Repairing a Pelted Chevelle
By “Rotten” Rodney Bauman Images by the Author AND Tracy Paskey
R

ain on your proverbial parade is one thing. Hail on your pride-and-joy 1967 Chevelle is something else. In this particular instance, it’s an interruptive setback to happy motoring.

Around these parts of northwestern Montana, we hear our hail described as “baseball size” and even “softball size” on occasion. When the Big Sky hurls big hail, what’s caught outdoors will surely take a beating.

When we asked Andy Winters (our subject Chevelle’s owner) about his damages, he likened the offending hail size to that of Bing cherries. Although it could’ve been worse, Winters’ insurer might consider his car a total loss—at least according to the first appraiser to come and have a look.

It’s been 14 years now since Tony Smith of TBS Customs refinished Winters’ Chevelle, but prior to the hailstorm it showed no signs of deterioration whatsoever. One contributing factor to this older finish’s longevity is mil thickness—or perhaps mil thinness would be a better way to put it. At any rate, excessive mil thickness limits a finish’s all-important ability to expand and contract with temperature changes.

Last time, Smith began by abrasive blasting the car’s body sheetmetal down to bare steel. To ensure continued longevity, it really should be stripped again. Rather interestingly, however, the appraiser representing a known-and-trusted insurer of classic cars thinks otherwise. In line with company policy, insurance will help with repair costs, but it won’t cover the cost of stripping any existing finish.

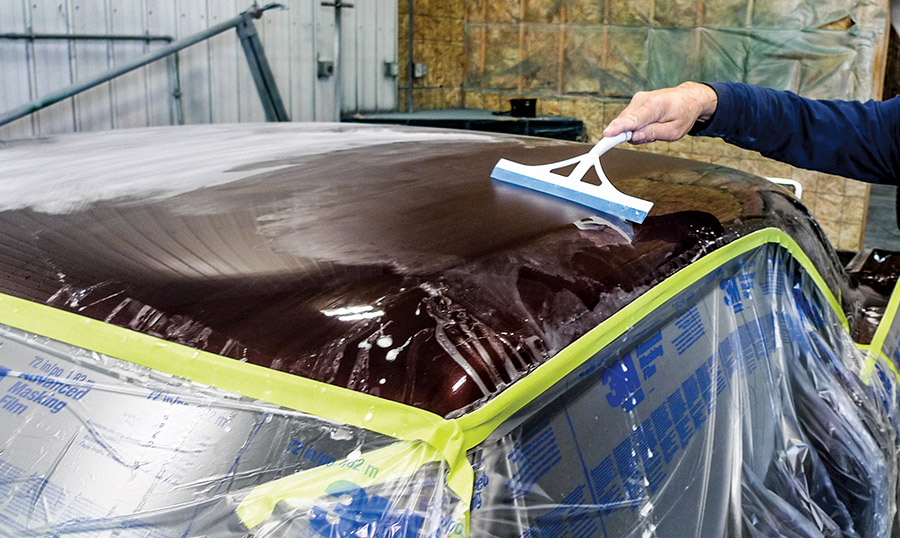
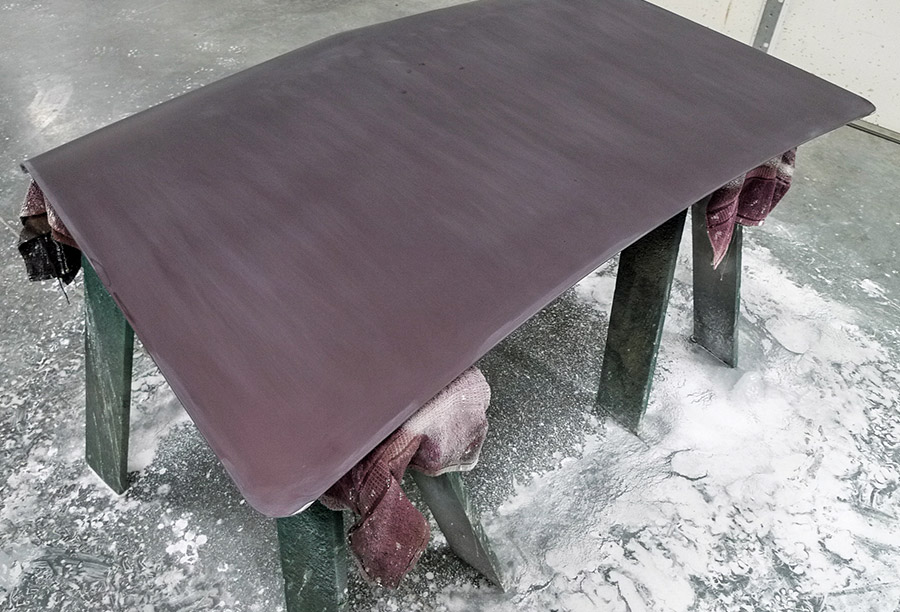
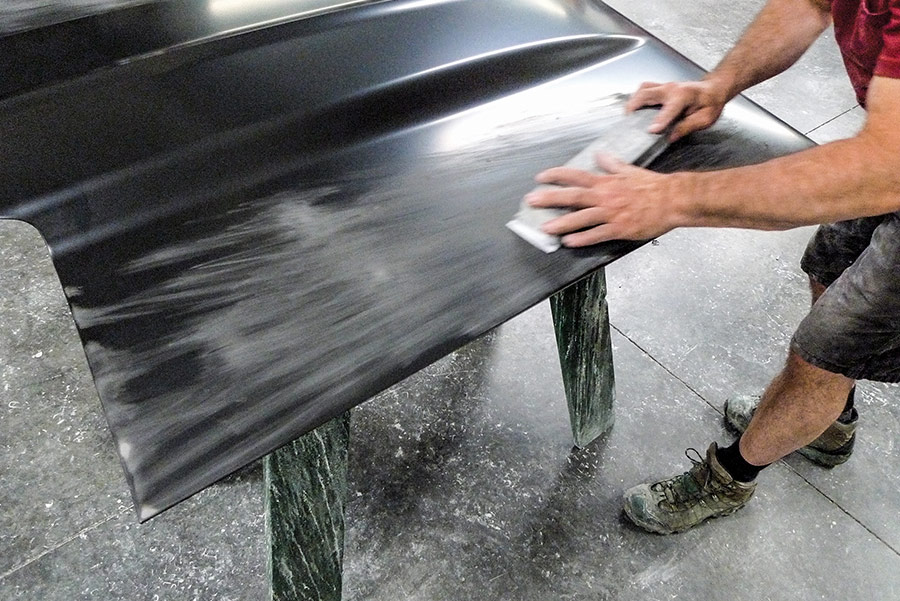
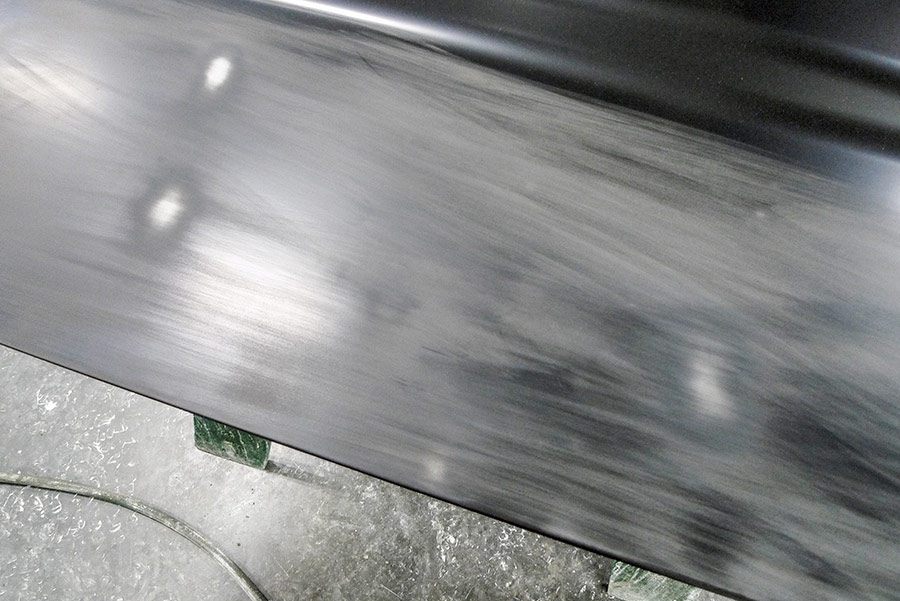
At times like these, it’s good to hatch a plan B. Apart from material buildup concerns, the existing finish could make a solid substrate for additional topcoats. If by chance it could be faired down far enough, we just might maintain some durability. If by chance we could also fair away countless hailstorm dings, well that’d be a win-win, wouldn’t it?

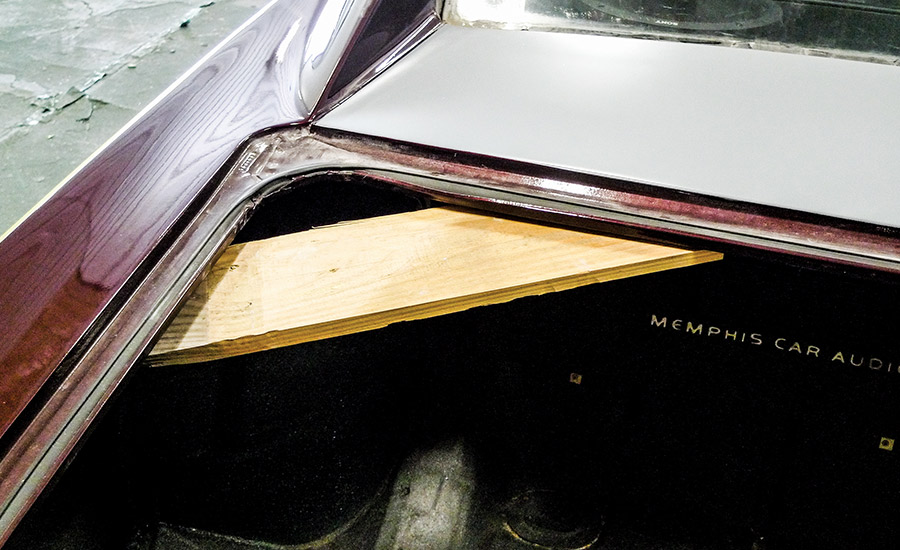
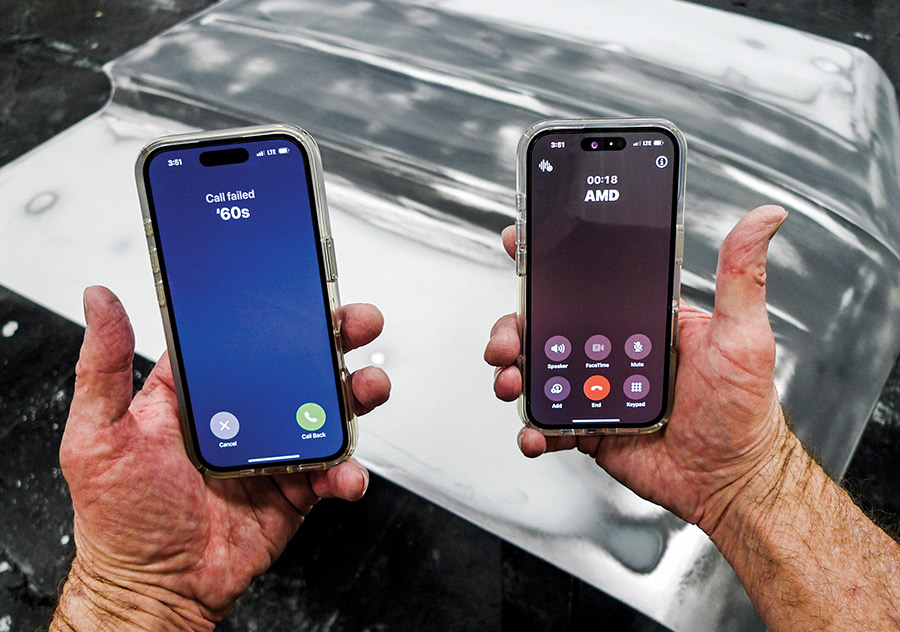
For the purpose of practicality, the OE roof skin really should be salvaged. If the decklid and filler panel happen to fair out and survive, we’ll gladly take that, too. Repair of this car’s older reproduction cowl induction hood might not be as practical, so we’ll consider a newer reproduction hood from Auto Metal Direct (AMD).

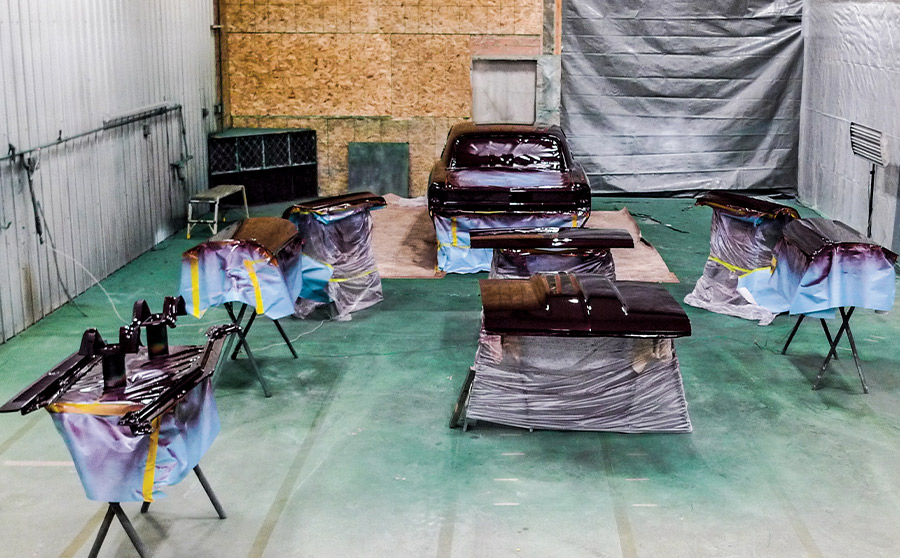
As this job progresses, you may note the absence of a typical automotive paint booth. For color consistency of the chosen pearlescent metallic hue, Smith knows to shoot all body panels in the same session. This car will be refinished in pieces, which wouldn’t fit in most booths at one time, anyway.

Day in, day out, Smith refinishes big trucks and heavy equipment, so the expanse of the building you’ll see is his paint booth. It’s well designed, kept clean, and rest assured, there’s more-than-adequate ventilation.

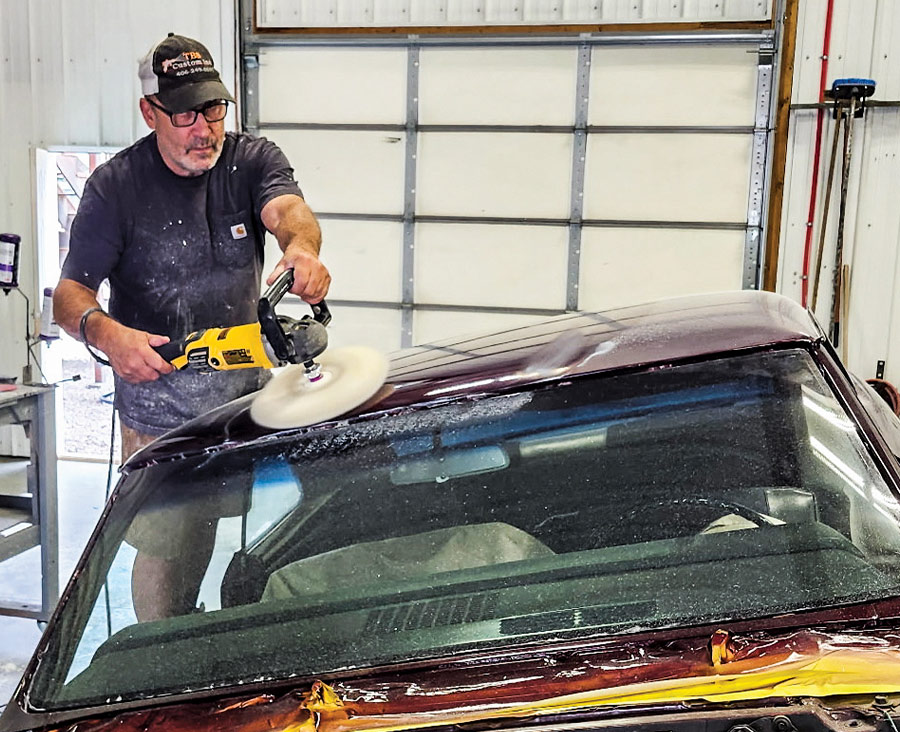
With those things said, the tech to follow won’t be so much about shooting as it will be about repairing the actual hailstorm damage. If anybody’s wondering, materials used will be Montana-compliant, but we won’t focus on brands that you might not have access to.

In such situations where we must do the same big job—twice, it’s nice to gain a little something. TBS Customs is the shop next door. Tony Smith is a respectable artist and craftsman—and we know him well enough to call him “friend.” We also know him well enough to know that pre-loss condition won’t be his stopping point. No indeed, he’ll make this old Chevelle even nicer than before.

High-angle view of a classic maroon Chevrolet Chevelle SS trunk with yellow tape markers for hail damage repair.
1. As we’re getting acquainted with the job at hand, we’re optimistic the existing finish might be enough to fair away this dang many dings. For the most part, this car’s body parts are still OE from GM.
An auto body expert inspecting a vintage muscle car with its hood propped open, using small yellow stickers to identify dozens of dents for a hail damage restoration project.
2. This OE-style cowl induction hood is not OE. It’s an older reproduction part. We suspect it’s stamped from something less than 18-gauge steel, as its dings appear deeper. It’ll be Tony Smith’s call, but this hood might be replaced.
Interior view of a classic car trunk with a custom Memphis Car Audio setup being braced for auto body repair work.
3. With the decklid removed, its hinges would still be in the way. If we popped the torsion rods we’d likely never get them reloaded. Smith handles it this way, and it just seems worth a mention.
Professional auto body technician sanding down the roof of a classic maroon car to repair surface damage in a restoration shop.
4. As seen on sociable media, here’s a sampling of the latest in blocking (we say fairing) technology at work. Smith begins with 180-grit wet as a test. He then switches to continue and finish with 500.
Close-up of wet-sanding prep on a vintage muscle car roof, featuring protective 3M masking film and a squeegee to clear residue for a smooth paint finish.
5. While fairing the roof skin wet, we don’t clearly see results as we go. Following this bit of squeegee action, we’re about to get a gander.
Close-up of protective clear masking film and yellow tape applied to the roof of a classic car during a paint restoration process.
6. The shiny spots are obviously hail damage. Quite fortunately, we see no cracking (it would’ve by now), so existing topcoats are at least somewhat flexible.
High-angle view of a classic car roof in a grey matte primer stage during a professional auto body restoration.
7. Roughly several hours later, this previously pelted roof skin has indeed faired out favorably. At this stage in 500-grit, it’s an OK candidate for recoating.
Hand sanding the rear quarter panel of a maroon classic car to smooth out body filler during a hail damage restoration.
8. While side panels aren’t so damaged, we must still fair them down for a new finish to last. Whiter areas are old urethane clear. To the right, the darker spot is old basecoat.
Detached classic car roof panel resting on sawhorses during the final wet-sanding stage of a maroon Chevrolet Chevelle restoration.
9. Well, what do you know—the OE decklid no longer shows damage. It’s been faired out wet, the same way as we’ve seen. Currently in 500-grit, it can be recoated as well.
Large shipping crate from Auto Metal Direct containing replacement body panels for a classic car restoration project.
10. Deciding to replace the heavier-damaged hood, Smith placed an order with AMD. Perhaps in shipping, the outer box took an obvious forklift hit, but there’s an inner box.
Technician hand sanding a new black primer-coated car hood on sawhorses as part of a classic car restoration project.
11. As it’s emerged from the unscathed inner box, this new hood looks really nice. Just a few passes with a fairing board, however, reveal the new hood’s needs.
Close-up of a black automotive body panel showing fine white dust patterns after a professional hand-sanding process.
12. The new hood’s raised centersection is just fine as it is. Here on this side, we now see highs and lows.
Detailed view of a matte black replacement car panel showing white sanding marks and surface preparation for a vintage vehicle restoration.
13. On the opposite side, the fairing board reading is about the same. It’s better than the old hood. We’re happy to get it, but it’ll require some work before paint—so know that.
A person holding two iPhones showing a failed call and an active call to AMD (Auto Metal Direct) during a classic car restoration project.
14. As we’ve come to find out, the new hood is not an AMD-manufactured item but rather an AMD-stocked item. Autobody survivors of the ’60s might tell you the surplus of OE parts they used were imperfect assembly line rejects, anyway—so know that, too.
Close-up of a technician using a metal repair tool on a sanded replacement car panel for a vintage Chevrolet restoration.
15. We won’t expound each step, but here’s minor filler work, finished, just prior to primer. Mil gauge readings vary up to 12 mils, which really don’t amount to much at all.
A classic maroon car and various body panels laid out on stands in a professional paint booth, showing the final stages of a full vehicle restoration.
16. Now let’s switch to living color! As we’ve said, shooting all panels in one session helps to ensure color consistency. For this pearlescent metallic hue, it’s just about a no-brainer.
A vintage muscle car undergoing a full paint redo, with windows, wheels, and trim carefully covered in protective plastic and masking paper in a body shop.
17. Before we proceed, a day or two in summer sunshine will promote the curing process. Then there’ll be all the usual cutting and buffing to attend to.
Two auto body technicians carefully inspecting and prepping a classic car panel for paint in a professional restoration shop.
18. Panels painted in horizontal positions are naturally susceptible to settling impurities, but these’ll buff right out. By the way, the reproduction hood turned out beautifully.
Professional auto body technician using an orbital power sander on the rear quarter panel of a maroon classic Chevrolet Chevelle to refine the paint finish.
19. There will still be manual color sanding, but here with 1,500-grit, a Hutchins Water Bug is speed equipment for such expanses. Quite conveniently, it’s a Summit staple.
Professional auto body technician using a squeegee to clear water and sanding residue from a classic maroon car’s rear quarter panel.
20. For checking progress often, the trusty squeegee is our timesaving little buddy. Here again, we’re about to get another gander—and instinct says we’ll be buffing soon.
Professional auto body technician using a DeWalt rotary polisher to buff the roof of a classic maroon Chevrolet Chevelle SS for a high-gloss finish.
21. Those of us who’ve done much buffing know about back pain—especially when we’re hunched over a roof, right? Here we might take a tip from Smith, as he’s tilted the car.
The finished trunk and rear quarter panel of a classic Chevelle Super Sport, displaying a mirror-like deep red metallic shine after professional paint correction.
22. It’s nice when a job of this size just reassembles itself overnight. Of course, that rarely happens. It’s not what’s happened here, but this isn’t a nuts-and-bolts story.
Front-angle view of a restored 1967 Chevrolet Chevelle SS with a mirror-finish maroon paint job and polished chrome grille.
23. No indeed, we’re just admiring our reflections. The OE front bumper had a peeling re-chrome job, so Smith opted to replace it with this beautiful reproduction, also from AMD.
Professional final detailing of a classic muscle car in a workshop, showing the mirror-like reflections on the deep red metallic paint after a full hail damage restoration.
24. With other jobs to juggle, this took about four months with upwards of 100 hours invested—and as we’ve expected, the redo from hail is levels above pre-loss condition.