


ACP department heading TECH
InTheGarageMedia.com
1965 Corvette, Roadster Shop Style
Part 2: Glass and ’Glass
Illustration of a blue 1965 Corvette Roadster with side exhaust and wire wheels.
By Ron Covell IMAGES Courtesy of Roadster Shop
I

n the first installment of our coverage on this remarkable Corvette—a full-scale reimagining being crafted by the talented team at Roadster Shop—we explored some of the work that went into reshaping the firewall, floor, and interior panels. This time, we’re taking a closer look at a different side of the build: what it takes to fit the glass and trim to a level that goes far beyond factory standards.

Beneath the hood, the inner wheel panels were smoothed and carefully reshaped to nestle cleanly around the new front suspension. New flanged fiberglass panels were fabricated and bonded into place, adding strength and giving the lower edges a finished, coachbuilt look.

The Corvette’s signature side vents also received a complete rethink. New pieces were machined from billet aluminum, and 3-D–printed polymer prototypes were created along the way to perfect the recesses before committing to metal. On the inside, hand-fabricated aluminum panels were added to properly duct air through the functional vents—blending design and engineering in equal measure.

One of the most dramatic changes was the decision to replace the entire roof and deck panel. The original body, though it appeared clean, had suffered from structural distortion over the years. Once the steel inner structure was straightened and realigned, new panels were painstakingly fitted and permanently bonded in place, establishing a solid foundation for everything that follows.

Even the installation of the rear glass was elevated far beyond original production methods. Rather than relying on the factory-style rubber gasket, a stout recessed flange was created so the glass could be bonded directly into the body. This secure connection not only improves rigidity but also allows the surrounding trim to be installed with surgical precision. Some original trim pieces were retained, while others were machined from billet—all with the goal of achieving a flawless, uniform fit.

Once all the body modifications were complete, the entire surface was sealed in catalyzed primer—protecting the car during the remainder of the build and establishing a stable, high-quality substrate for the color coats that will come later.

Stay tuned for future installments where we’ll continue following the build of this extraordinary Corvette as it makes its way from a bare shell to a world-class showpiece.

Classic car engine bay during restoration with tools resting on the block.
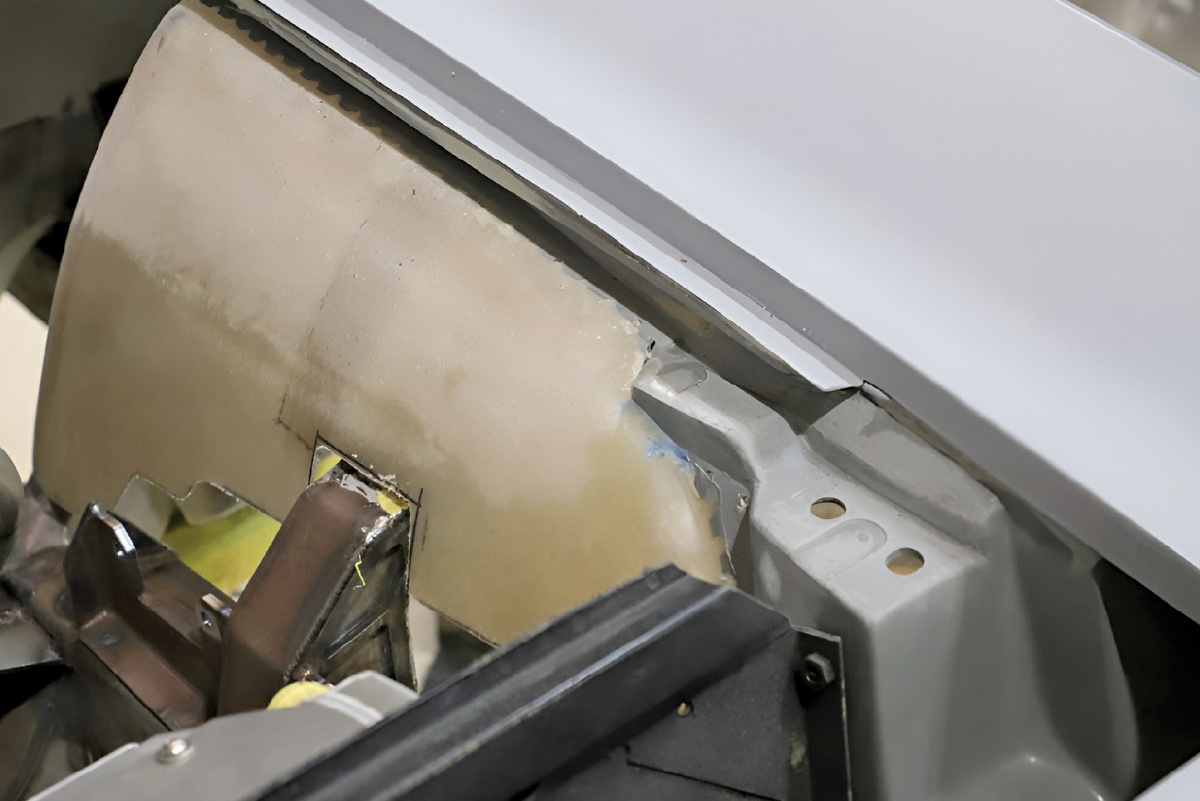
1. New fiberglass front wheelwells were fitted to the car then further modified to better integrate with the Roadster Shop chassis.
Close-up of internal body panels and metal fabrication inside a car's engine bay.
2. The first step was notching the wheelwell to clear the section of chassis supporting the new front suspension.
Fabricator shaping a custom aluminum trim piece on a metal workshop table.
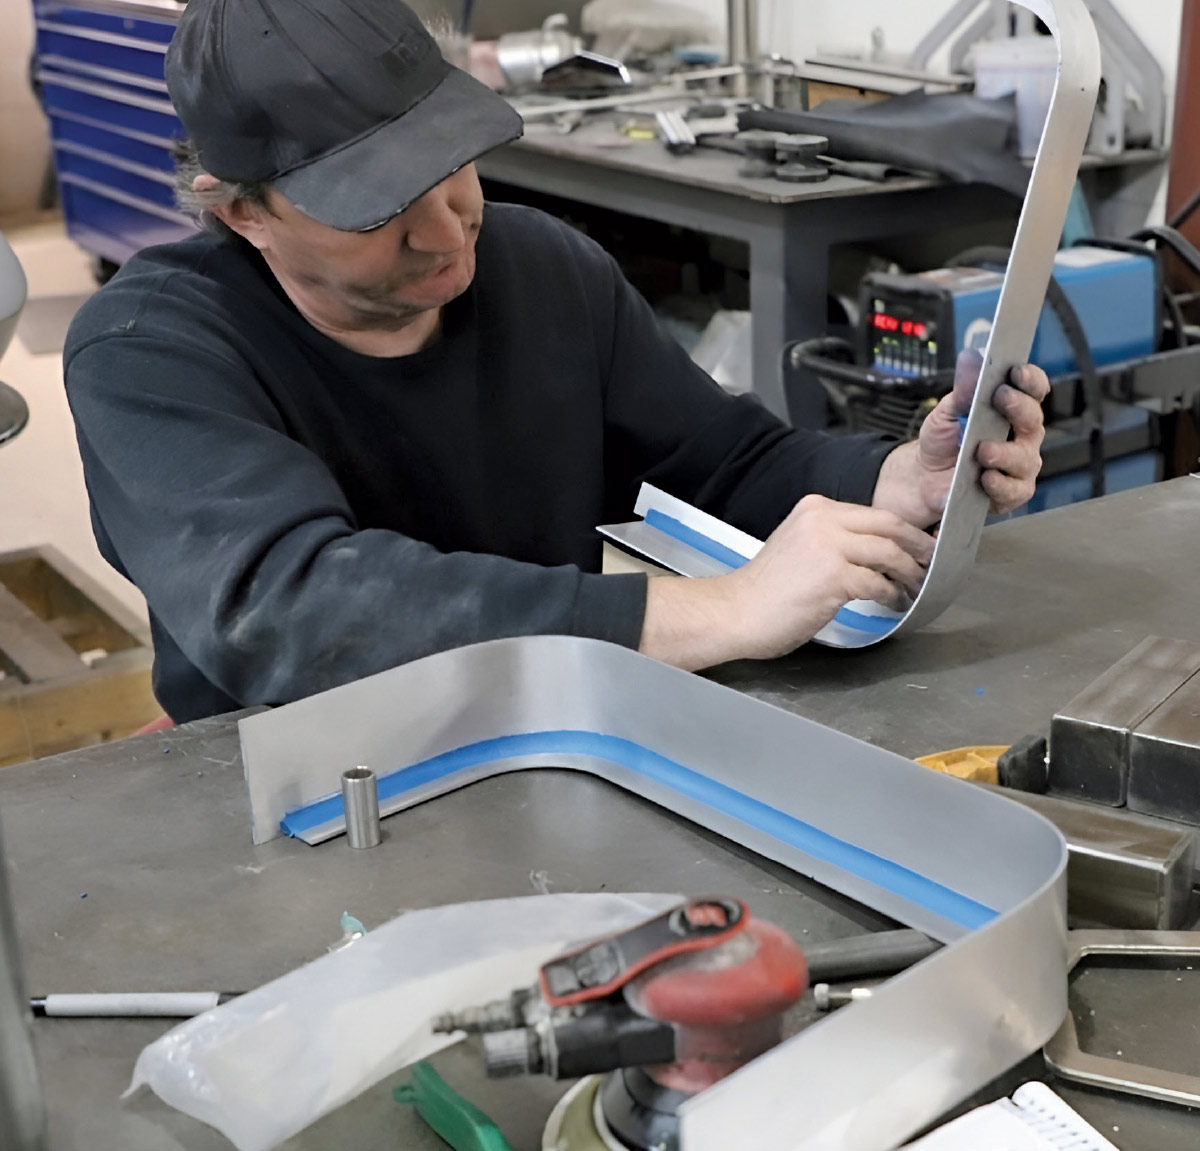
3. To create new fiberglass flanges, simple sheetmetal forms were built. Here, clay is pressed into the inner corner to form a smooth fillet, which will translate into a rounded corner on the final fiberglass piece.
Two custom-shaped white metal trim components resting on a work surface.
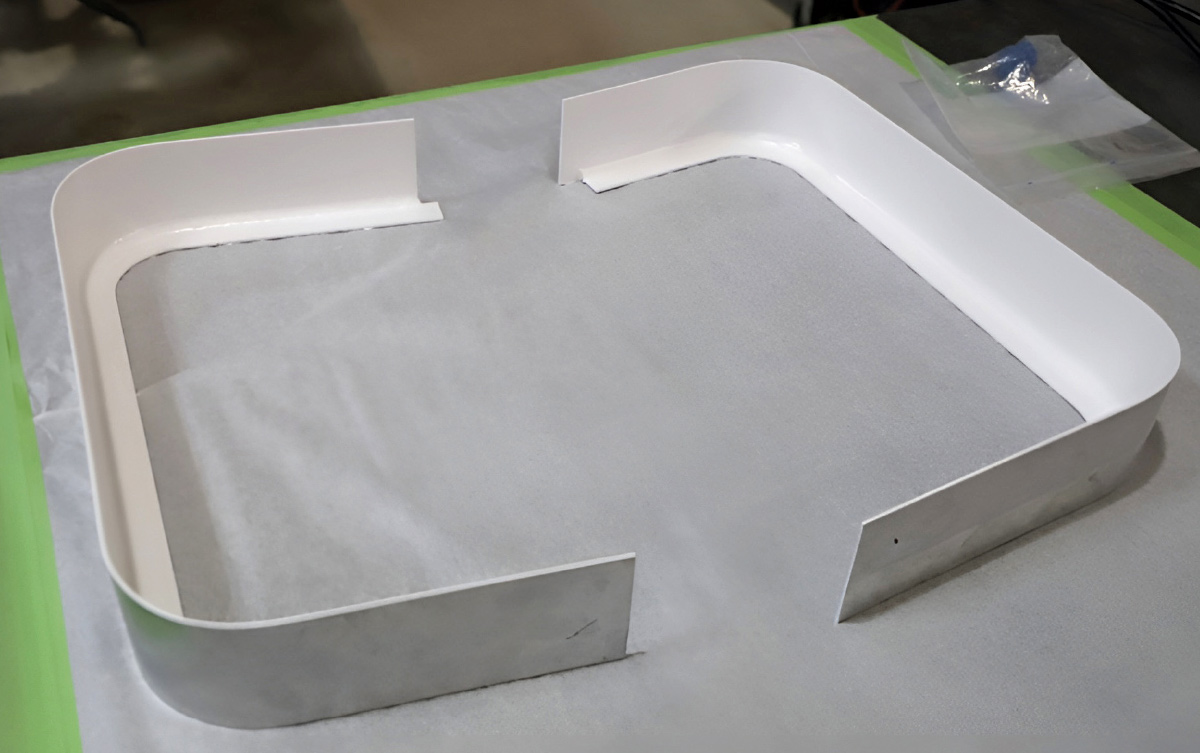
4. The forms are sprayed with gelcoat, preparing them for the layup of glass cloth and resin.
Detail of custom suspension and chassis parts being fitted to a car frame.
5. The new flanges are now in position and will be smoothly bonded to the wheelwells.
Internal engine bay view showing custom aluminum panels and mounting hardware.
6. Significant effort went into reimagining the fender side vents. New inner panels were fabricated from sheet aluminum, blending nicely into the frame and firewall.
A large, fabricated aluminum heat shield or panel on a workshop table.
7. Louvers formed into the inner panels help duct airflow in a more efficient manner.
Mechanic using a heat tool and clamps to install a side vent on a car fender.
8. On the outer surface, achieving a precise fit for the vent trim required patience and technique. Here, clamps and a heat gun are used to help bring the fiberglass into perfect alignment.
Three black horizontal vents installed on the white surface of a car body.
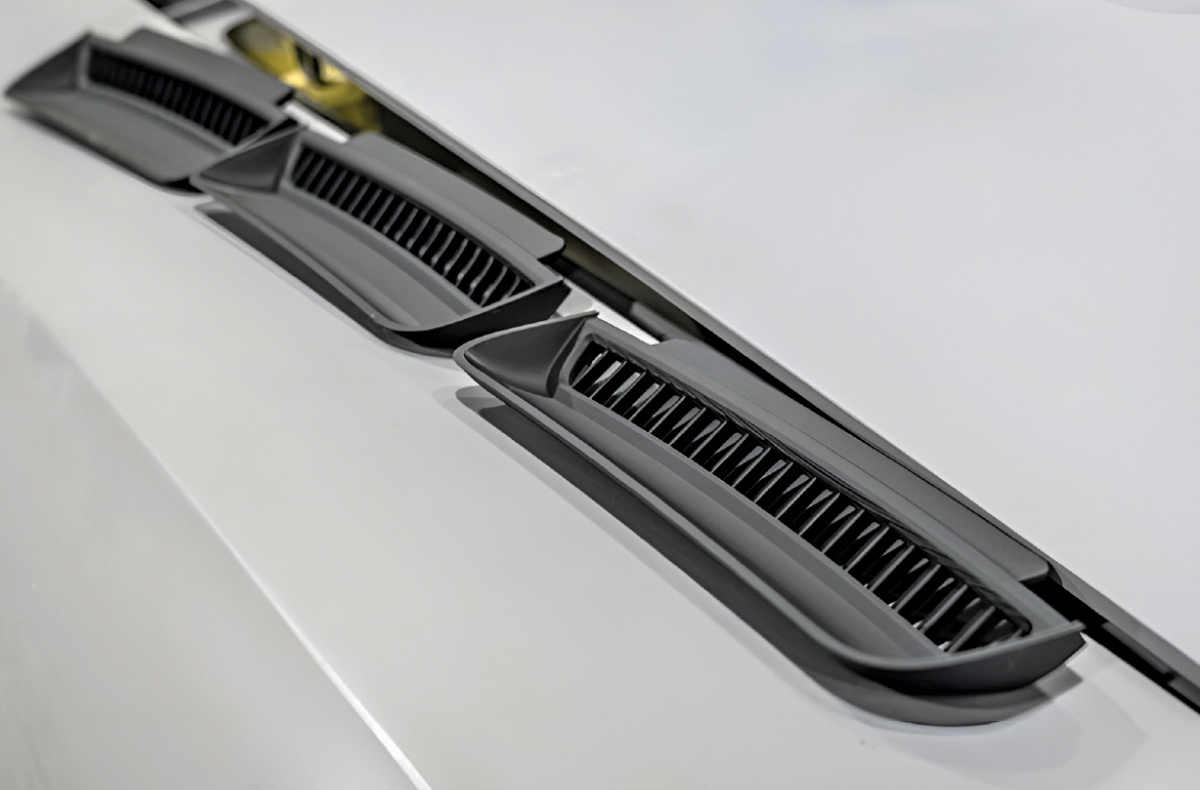
9. Trim pieces were designed in CAD and polymer prototypes were printed for trial fitting.
A black vent being clamped into place on a white car fender during assembly.
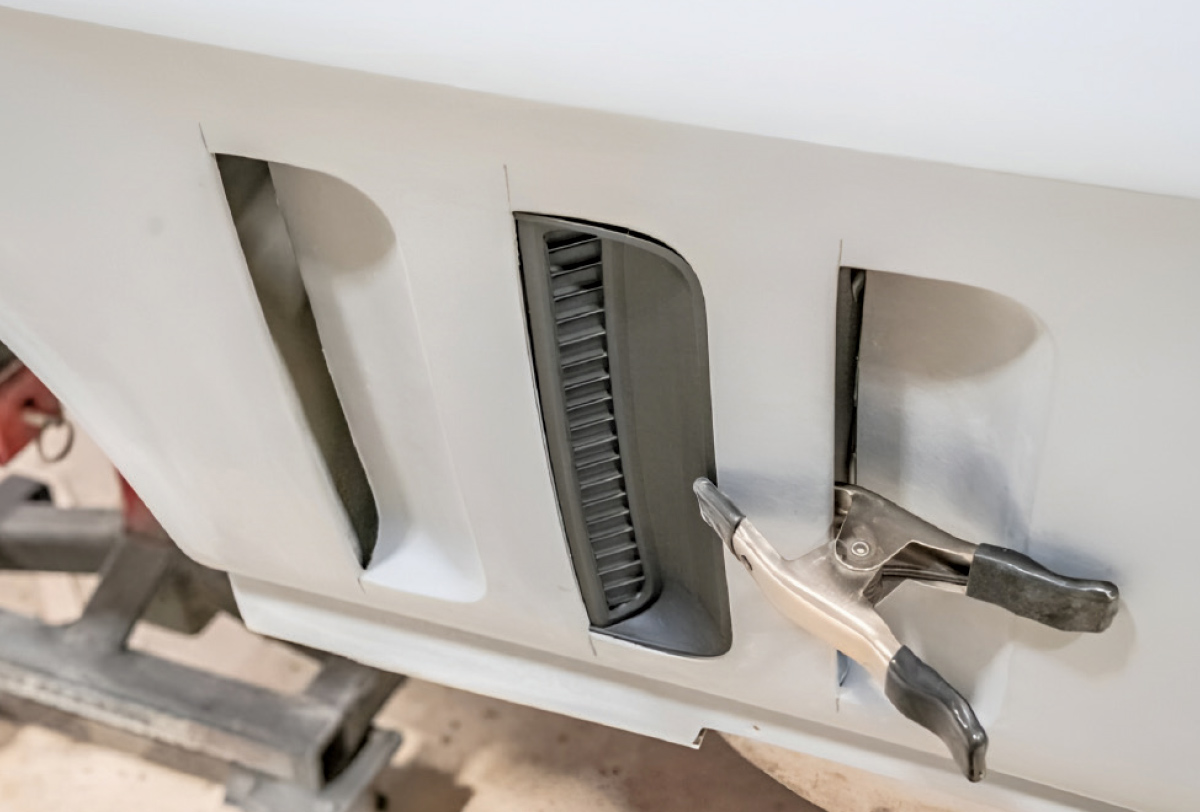
10. Numerous tweaks and adjustments were necessary to achieve the desired fit.
Three vertical vents on a car fender marked with handwritten labels P1, P2, and P3.
11. At this stage, the fitment is finalized with enough clearance to account for paint buildup. Screws temporarily hold the trim in place—the final production parts will use hidden studs for a cleaner appearance.
Polished aluminum vent components resting on a metal workshop table.
12. The final trim components were CNC-machined from aluminum billet.
Side view of a grey car fender with three vertical vents installed near the wheel well.
13. The result: trim pieces that nest perfectly into their sculpted recesses.
Rear view of a classic car body in a shop showing the fuel tank and chassis.
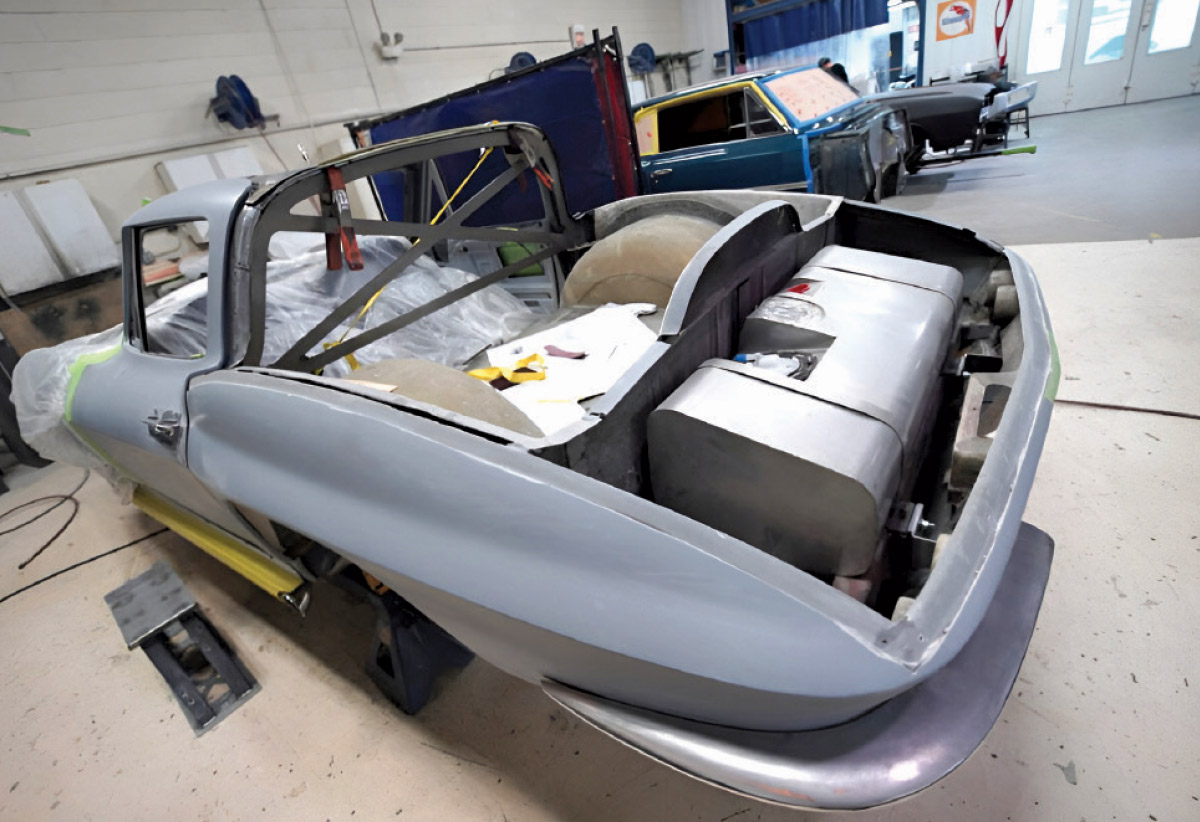
14. Although the project started with a seemingly clean donor car, significant discrepancies were found between the two sides of the body. After scanning the body, Roadster Shop removed the entire roof and corrected the inner structure to achieve symmetry.
Classic car chassis in a garage with the body removed, showing the internal frame.
15. Extensive grinding was required to create a proper recess for the new roof and deck panel.
A grey car hood panel resting on a stand in a workshop.
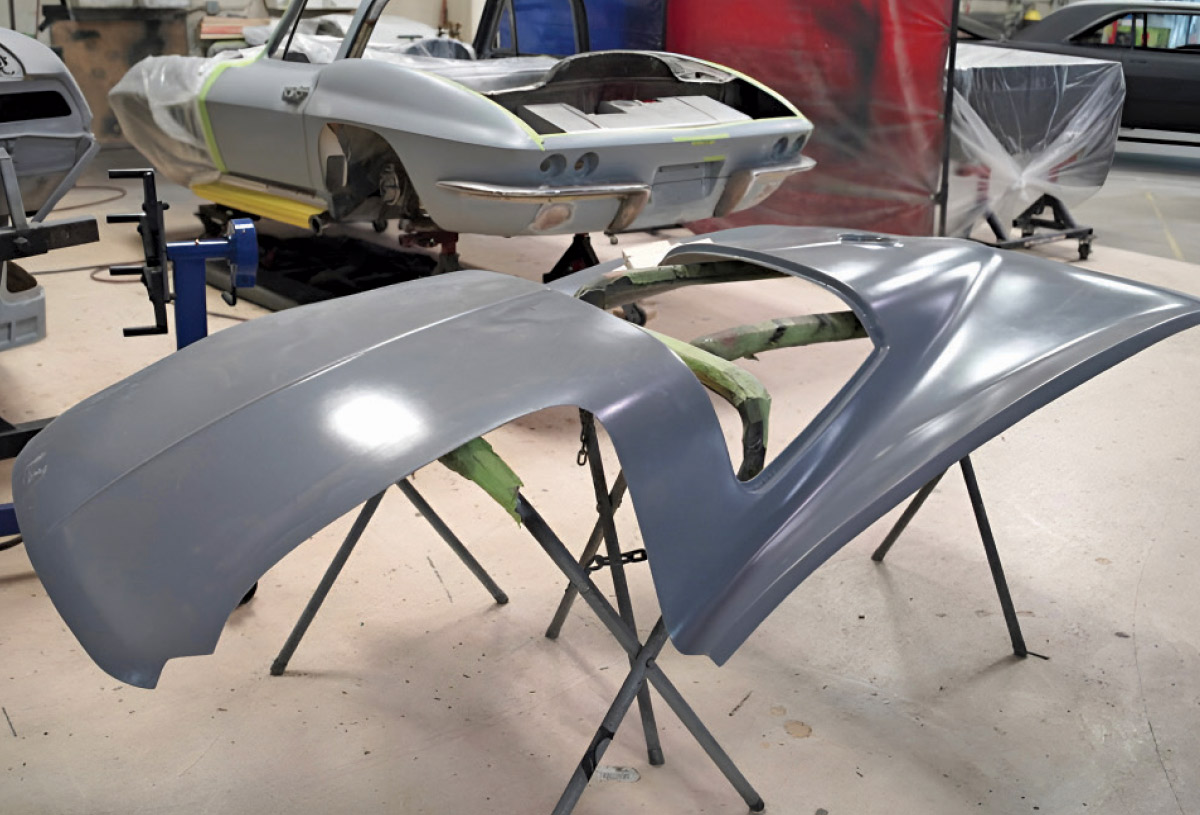
16. The new panel shown here is being prepped for bonding.
Rear view of a grey 1965 Corvette body on stands with clamps on the rear panel.
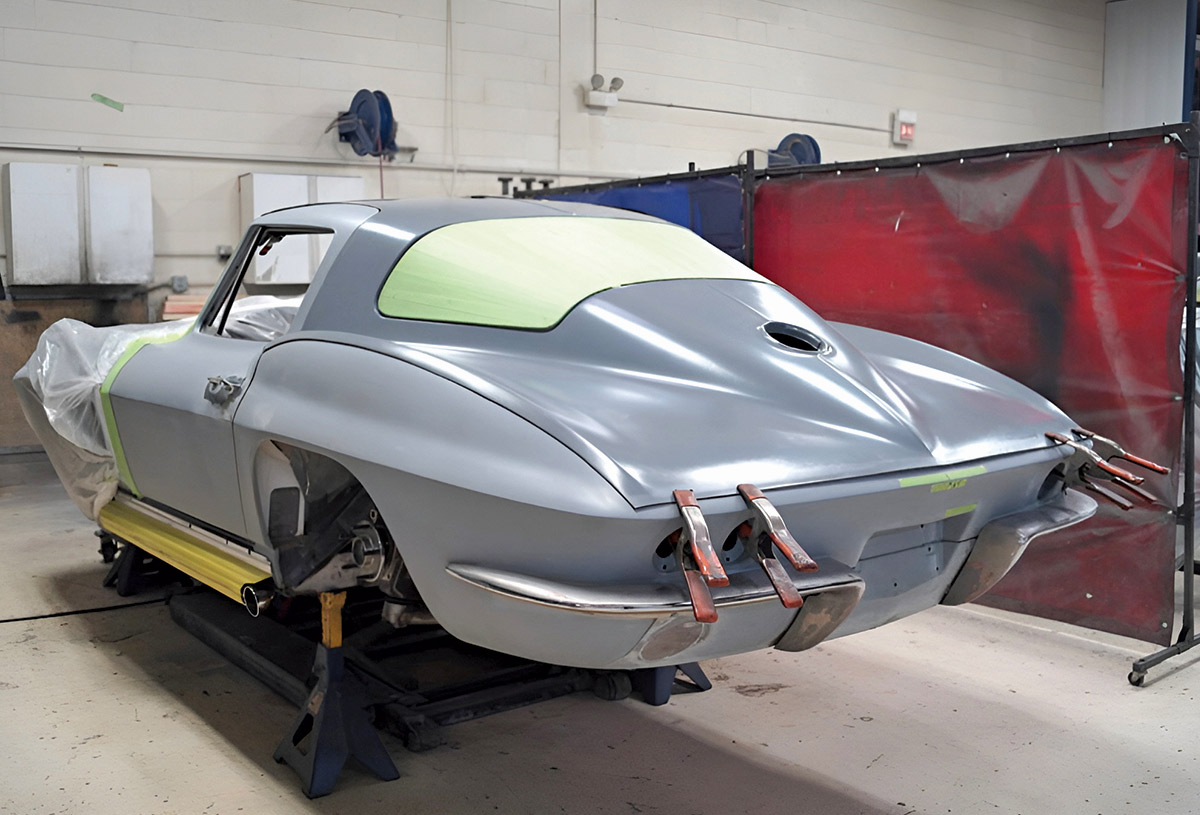
17. Spring clamps temporarily hold the panel in place while the fit is checked.
Metal clamps attached to the window frame of a car during restoration.
18. Once verified, the panel was permanently bonded using numerous clamps, ensuring each joint was secure.
Dozens of metal clamps securing the rear window seal of a car body.
19. Special attention was given to reinforcing the rear window opening. Eliminating the factory rubber gasket will allow the glass to be bonded directly, allowing the fit of the glass and trim to be perfected.
Rear view of a car body with the back window masked off with green paper.
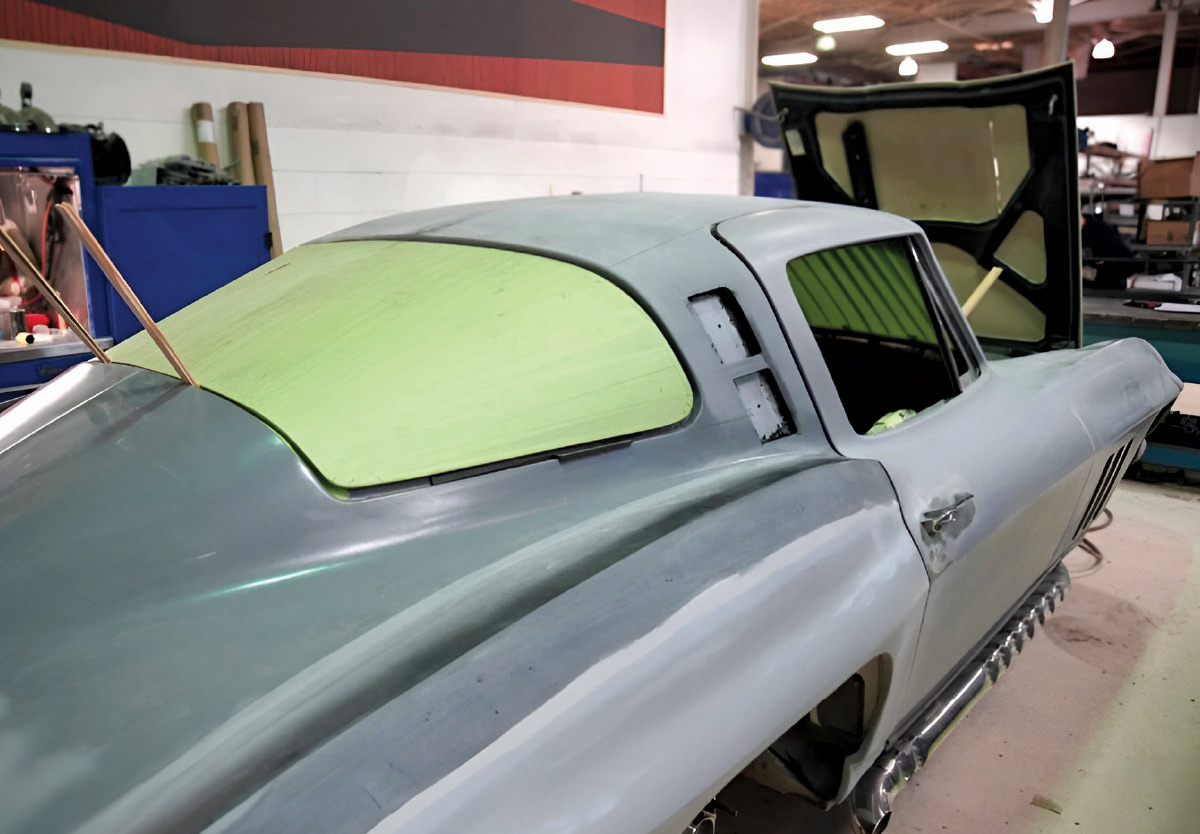
20. With the roof bonded in place, the rear glass was trial-fitted. More fine-tuning will follow to meet Roadster Shop’s exacting standards.
Close-up of a car's rear roofline showing a custom-cut window opening.
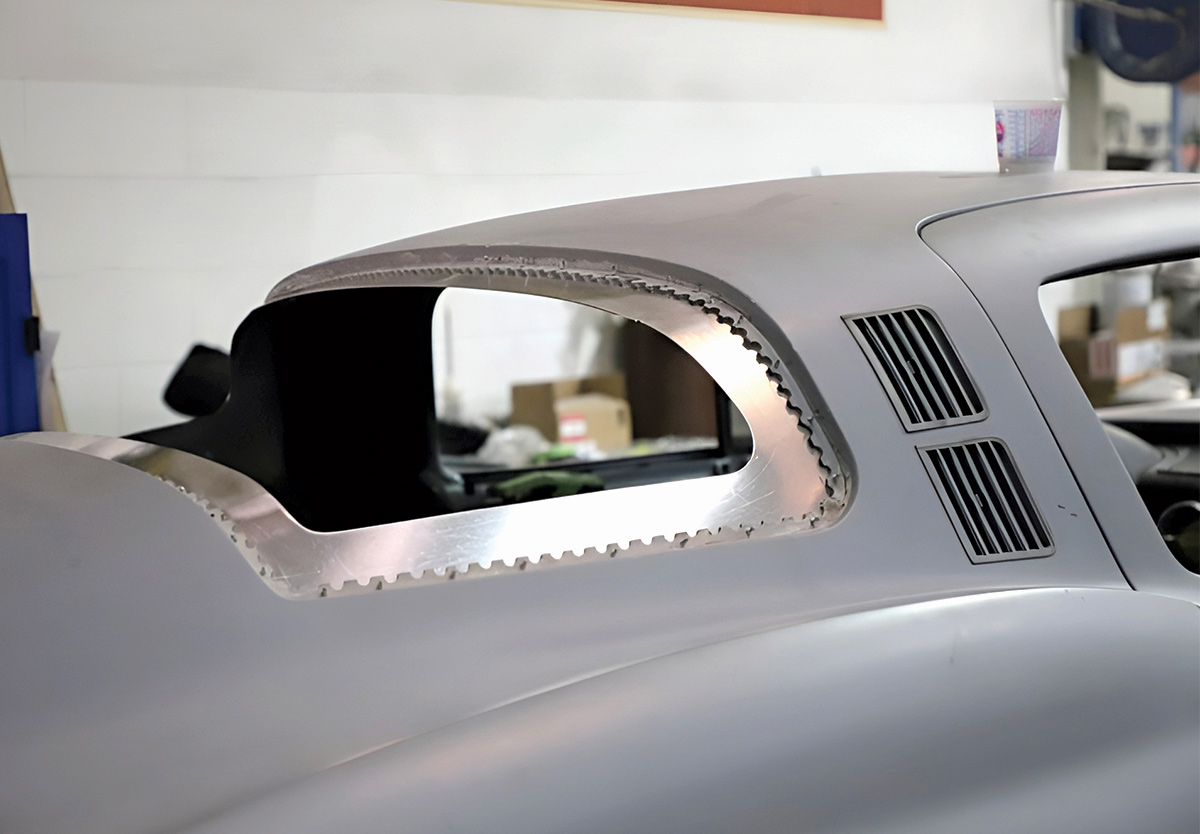
21. A sheetmetal form was temporarily installed to allow laminating a new, thicker flange around the window opening. Notice how the original edges were scalloped to promote strong adhesion between old and new fiberglass.
Rear window area of a car covered in plastic and surrounded by fiberglass resin.
22. The new fiberglass laminate has now been laid up around the window opening.
Newly molded fiberglass lip around the rear window opening of a car body.
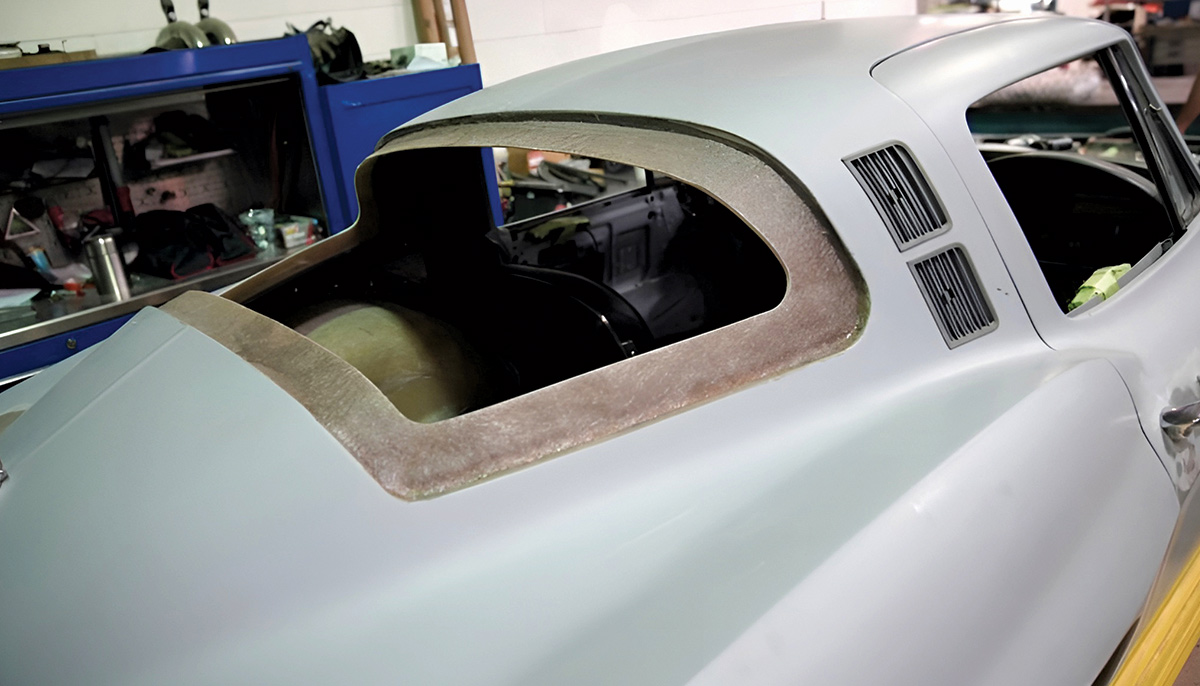
23. After curing, the bulk of the excess material is removed.
Rear window glass being test-fitted into a car body with blue tape.
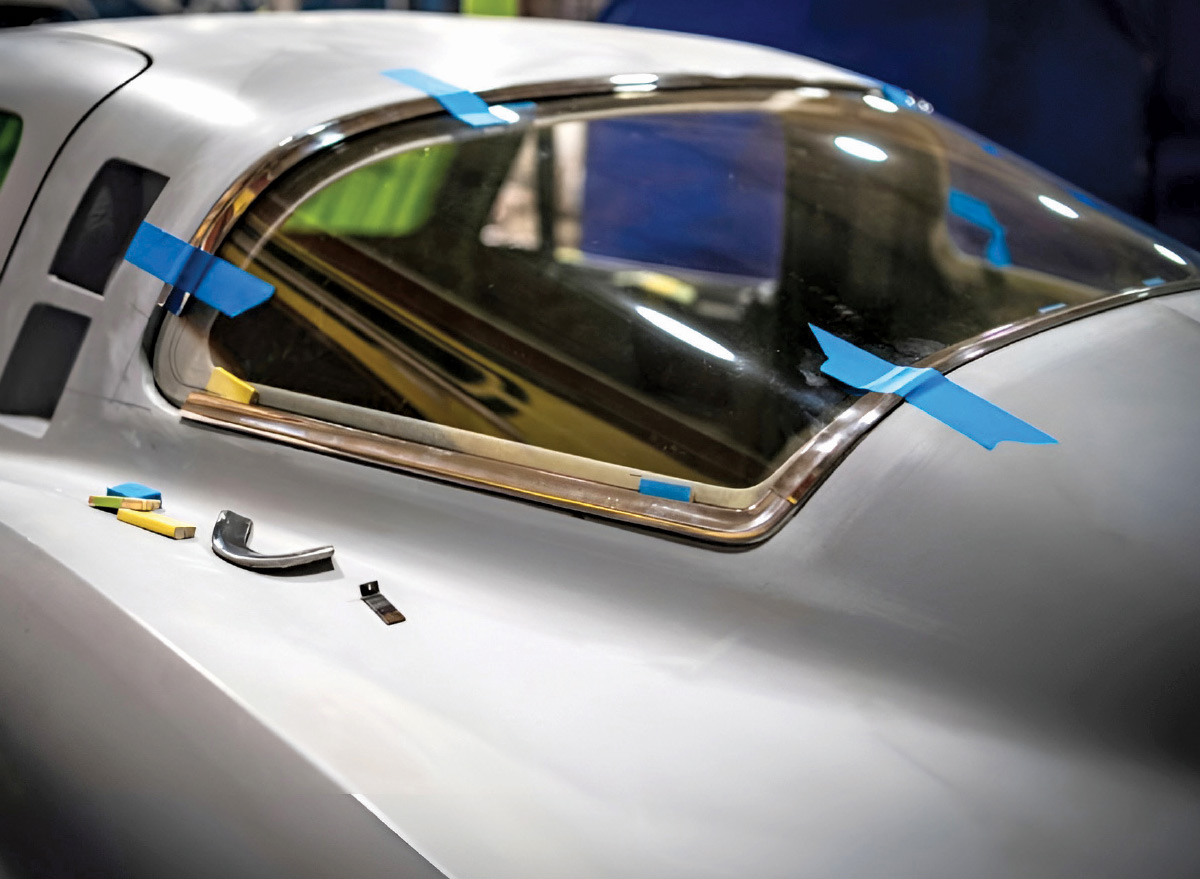
24. Trial-fitting the rear window with uniform spacers reveals exactly where adjustments will be needed to perfect the fit.
Rear window of a car featuring polished chrome trim being fitted.
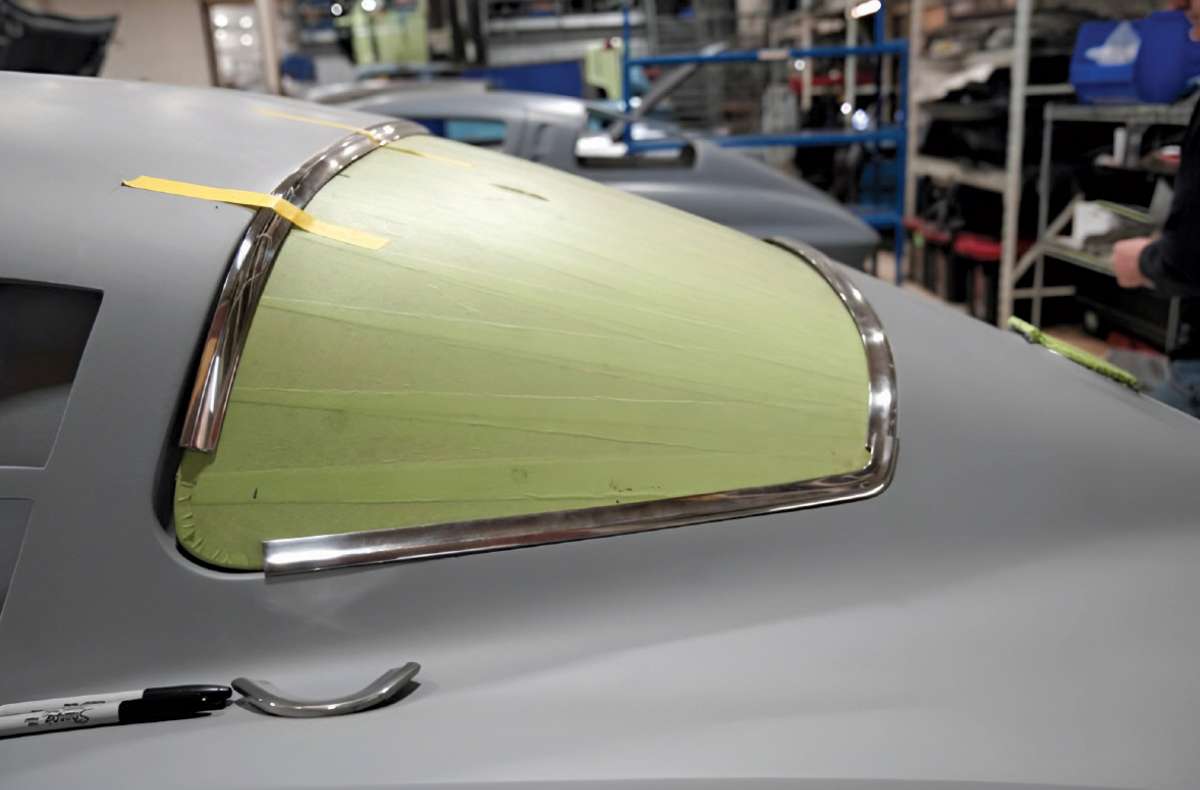
25. Original trim pieces are being tested here. Some will be retained, while others will be replaced with billet stainless components machined to exacting tolerances.
Detail of rear window glass and chrome trim secured with blue painters tape.
26. Every detail of the trim fit was treated with the same care as any other part of the build.
Chrome trim being aligned with the roofline of a car using blue tape.
27. Tape temporarily secures the trim pieces while the fit is finalized.
Front windshield of a grey car covered in green masking tape and chrome trim.
28. The windshield was fitted to the same meticulous standards.
Mechanic using a yellow tool to sand the window frame of a car.
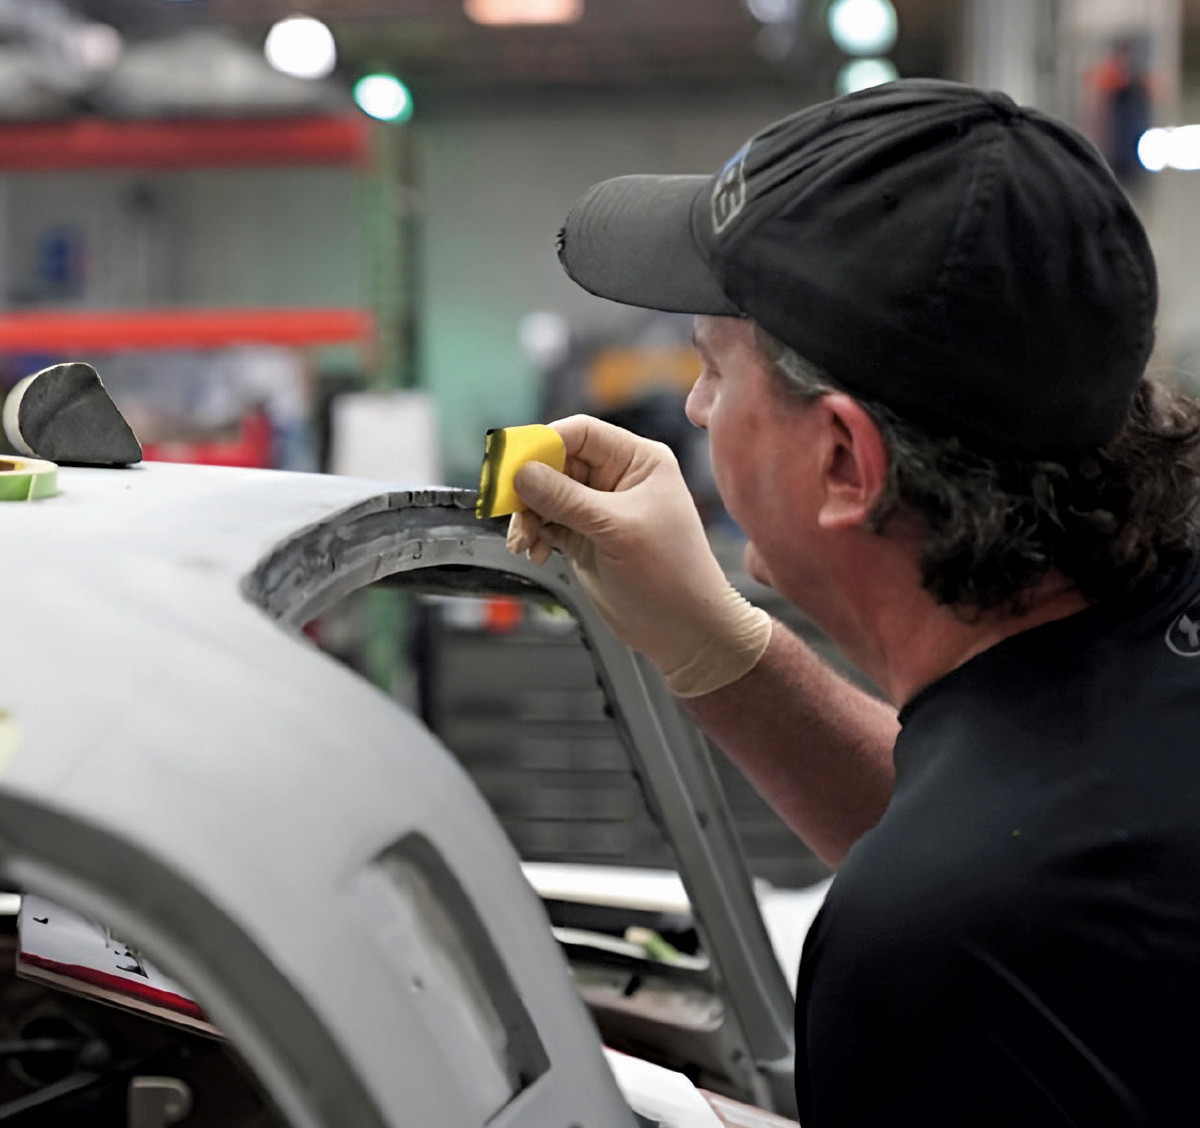
29. Once all components were finalized, any remaining irregularities were perfected before the entire body was coated in primer.
Rear view of a primer-grey car body on a shop dolly inside a paint booth.
30. In the paint booth, catalyzed primer seals the body and provides a premium foundation for the color coats to come.