ACP department heading TECH
InTheGarageMedia.com
Throwback
Building a Small-Journal 327ci Street Engine With an Old-School Vibe
By Jeff Smith Photography by The Author & Cam Benty
S

treet car engine building is not always about ultimate power. Sometimes it’s more about projecting the right image. Steve Strope had a vision—a Pure Vision, if you will—which happens to be the name of his car building company—to construct an early 327ci Chevy with an early ’70s vibe for a project car that he’s assembling.

One secret to successful car building is to project a consistent theme. Strope had an early 327 small-journal block, crank, and a pair of ’70s large-chamber heads and he wanted those parts assembled into a streetable small-block.

The plan was to build a streetable 327 with its factory steel crankshaft into a suitable little small-block with decent compression, a nice lope to the cam, and a tunnel ram with a pair of Holley 600 carburetors. We’ll be honest and say that most of Strope’s ideas had merit–except for maybe the heads. But that’s what he wanted, so that’s what we built.

The heads he dropped off were a pair of 3973487 castings that trace back to 1971 and the low-compression version of the LT1 350 engine. These heads featured screw-in studs, guideplates, 2.02/1.60-inch valves, and decent ports for castings that have survived more than 50 trips around the sun. They are not bad heads, but then neither are they great. But they are what he wanted to use because they take him back to a time in his life when these were sought-after pieces.

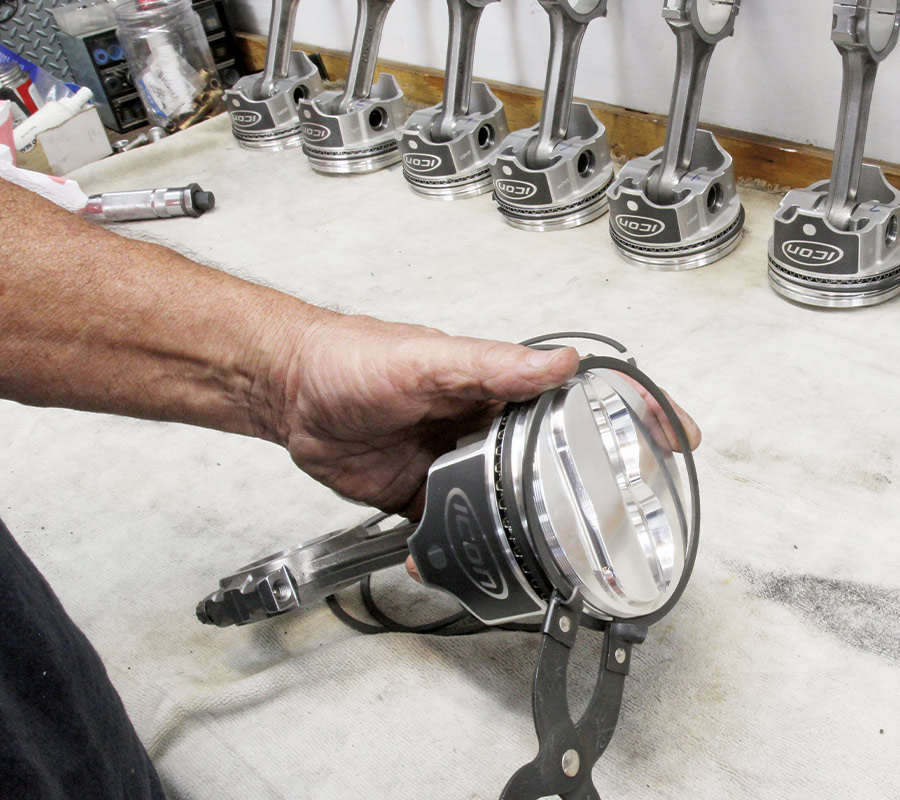
This changed the packaging of this little 327 when it came time to choose pistons. First off, our compression ratio program spelled out bad news if we were to stick with a generic flat-top, four-eyebrow piston. A flat-top piston with a 3.25-inch stroke matched with a 74cc chamber would drop the compression to a paltry 8.75:1. Since this engine needed to be snappy, we decided to add compression by adding a small dome to the piston.

We had already decided against a hypereutectic piston as Strope liked the idea of strength from a forged piston. A short search brought us to an ICON piston with a 6.3cc dome that could pump the compression up to 9.8:1 using a 0.010-inch deck and a 0.041-inch-thick composite head gasket.

The issue with a domed piston is that it impedes the combustion process by lengthening the path of the flame front. A much better solution would have been a more modern aftermarket head with a tighter, 62cc chamber and a flat-top piston. This would have created an improved 10.15:1 compression ratio that would also shorten the path traveled by the flame front with no peaks or valleys.

If we were searching for ultimate power, we would also have decked the block to bring the pistons up to near zero deck, or we could have ordered a thinner head gasket to improve power. But that wasn’t necessary here.

With compression now settled, we continued the vintage vibe by selecting a flat-tappet, hydraulic camshaft. Summit Racing offers a line of Muscle Car camshafts that dial it back to the bygone era. From a wide list of potential candidates, we selected a cam that emulates the original L79 350hp 327 camshaft that was used in Corvettes, Chevelles, and the Chevy II.

We’ve included the cam specs in a separate chart but with a relatively short duration of 221 and a wide lobe separation angle (LSA) of 114 degrees, this cam will offer a mild lobe, yet still deliver some decent power with valve lift approaching 0.450 inch. This cam seemed like the perfect match to Strope’s visual approach with the engine.

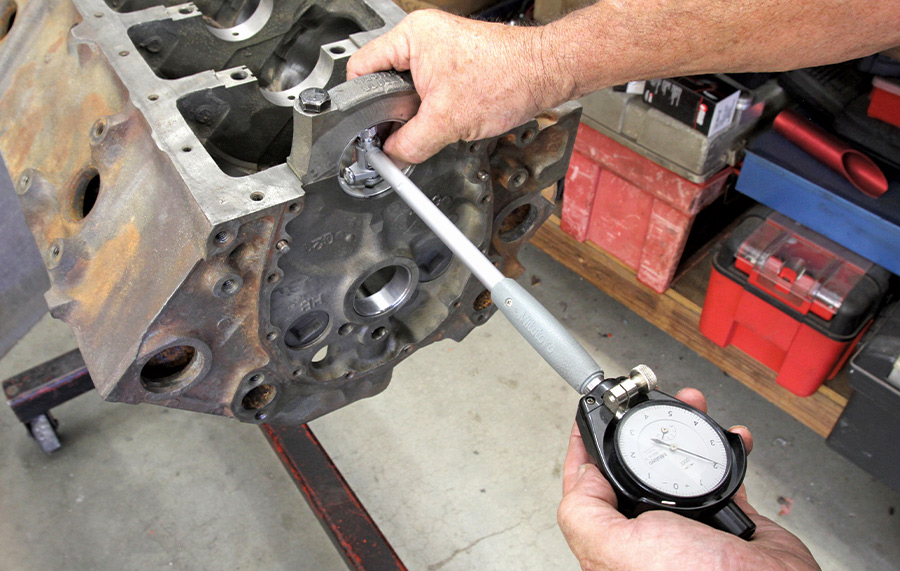
We had Don Barrington at Barrington Engines in Canyon Country, California, just north of Los Angeles perform the basic block restoration routines that included boring 0.060-over and torque plate honing. This block has seen some rough times and it also demanded line honing of the mains. The 0.060-inch overbore was necessary to clean up a nasty ridge at the top of several cylinders. This is near the outside edge of the bore envelope, but this block was up to the challenge with sufficiently thick cylinder walls.

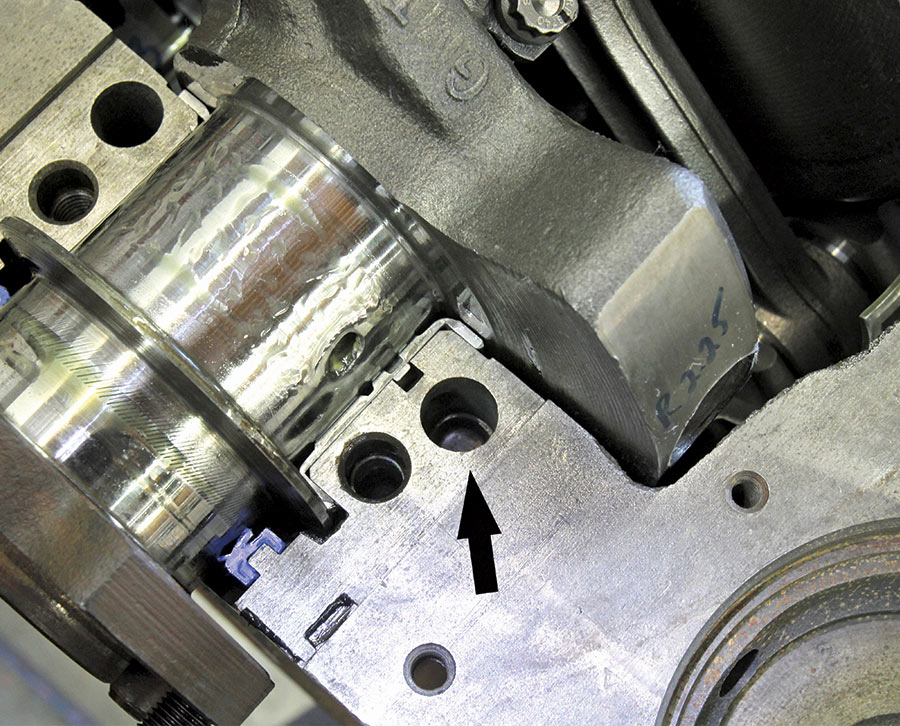
The cost to rebuild the stock connecting rods was close enough to the price of a new set of Scat 5.7-inch rods, which made the selection easy. Barrington installed the floating pins and opened up the small ends slightly to ensure there was room for lubrication. The ICON pistons were machined for the classic 1/16-, 1/16-, 3/16-inch ring package and we filled those with a set of Hastings rings that we custom set the endgaps using Summit Racing’s electric ring grinder.

We also used a set of Clevite rod and main bearings to complete the rotating assembly after the entire package was balanced by our friends at SoCal Diesel in Santa Clarita, California. Our standard preassembly ritual checked all the important clearances, including rod, main, and crankshaft endplay dimensions. Once the block machining was completed, the assembly procedure went smoothly.

After washing the block, it’s still not clean. We used white paper towels and a splash of Marvel Mystery oil to deep clean the honing grooves. We keep wiping with a new towel until it comes back red and not gray. This will also keep that honing grit out of the oil during new engine startup.

Strope wanted a little flash to bleed through this build so he spec’d a finned, cast-aluminum pan for the small-block and we finished that off with a specific package of a high-volume oil pump with an extended pickup to better use all the oil that this pan could contain.

Having already chosen the cam to use, the only other requirement was to degree it in using a new Cloyes timing chain set and using our degree wheel to ensure the numbers were all in agreement.

Barrington had also tapped the front oil galley holes for us as well, which makes the plugs less likely to push out under high oil pressure. This is a good idea for early blocks like this one that had already been rebuilt at least once. Now it was onto assembling the top half of the engine.

We chose to assemble the heads ourselves to reduce the bill at the machine shop and also to ensure that we removed the inner springs in order to reduce the load on the camshaft during break-in. This is an important step because the break-in process is critical and even with high-zinc Summit Break-In SAE30 oil, a reduced spring load will also greatly assist in establishing a proper wear pattern on all 16 lobes.

With the heads torqued in place with ARP bolts with sealant on the threads to prevent any coolant leakage into the oil, the final step was to install the intake. Strope wanted an older-style tunnel ram that we found used with a pair of Holley 600-cfm vacuum secondary carburetors. This package looks wild and also harkens back to the early ’70s look that he was after. The final piece is an early small-block distributor to finish off the look with smaller 7mm plug wires.

Strope also took the time to remove all the external casting flash from the block and heads and then painted the engine with actual Chevy Hugger Orange automotive paint after making sure the block and heads were surgically clean. The overall effect is stunning and will look outstanding sitting in his ’29 roadster pickup. Even if it is just another small-block Chevy, this one will run as good as it looks.

Cam specs chart
Parts list chart
The only way to accurately measure bearing clearance is with a set of good micrometers and a dial bore gauge. We measured each rod and main journal and recorded the measurements.
1. The only way to accurately measure bearing clearance is with a set of good micrometers and a dial bore gauge. We measured each rod and main journal and recorded the measurements.
Next, we then transferred the micrometer journal diameter for the mains to a dial bore gauge. With the main bearings torqued in place, the dial bore gauge will display the clearance. On the first main, we have it right at 0.0021-inch clearance, which is very close to ideal.
2. Next, we then transferred the micrometer journal diameter for the mains to a dial bore gauge. With the main bearings torqued in place, the dial bore gauge will display the clearance. On the first main, we have it right at 0.0021-inch clearance, which is very close to ideal.
Setting endgaps on rings can take a lot of time. If you don’t build a lot of engines, those inexpensive manual ring grinders are perfectly fine. We bought one of Summit’s new electric ring grinders that really save a lot of time working on the top and second 1/16-inch rings.
3. Setting endgaps on rings can take a lot of time. If you don’t build a lot of engines, those inexpensive manual ring grinders are perfectly fine. We bought one of Summit’s new electric ring grinders that really save a lot of time working on the top and second 1/16-inch rings.
Make sure this plug is installed–we used this photo from a different engine, but make sure the oil plug under the Number 5 main bearing is in place or the engine will not make oil pressure.
4. Make sure this plug is installed–we used this photo from a different engine, but make sure the oil plug under the Number 5 main bearing is in place or the engine will not make oil pressure.
Ring manufacturers now recommend using a ring expander instead of spiraling on the top two rings. Place the ends in the ring groove and expand the ring until it just slips into place. This prevents scratching the piston with the ends of the rings.
5. Ring manufacturers now recommend using a ring expander instead of spiraling on the top two rings. Place the ends in the ring groove and expand the ring until it just slips into place. This prevents scratching the piston with the ends of the rings.
Early small-blocks were not fitted with harmonic balancer bolts, relying on the press fit on the crank snout. We enlisted our local machinist Lucki Candoff to drill and tap our crank for much more security. Plus, we can now use a generic harmonic balancer tool for installing and pulling.
6. Early small-blocks were not fitted with harmonic balancer bolts, relying on the press fit on the crank snout. We enlisted our local machinist Lucki Candoff to drill and tap our crank for much more security. Plus, we can now use a generic harmonic balancer tool for installing and pulling.
Long ago we learned our lesson to always torque rod bolts using ARP’s rod bolt stretch gauge. This is their newest digital version gauge, but regardless of the gauge, this is a critical step to ensure the rod bolt clamp load is correct.
7. Long ago we learned our lesson to always torque rod bolts using ARP’s rod bolt stretch gauge. This is their newest digital version gauge, but regardless of the gauge, this is a critical step to ensure the rod bolt clamp load is correct.
We chose a Summit Muscle Car flat tappet hydraulic cam that is a reproduction of Chevy’s original L79, 350hp 327 cam for this project. Using our degree wheel, we made sure the intake centerline was right at spec with the intake lobe centerline at 110 degrees.
8. We chose a Summit Muscle Car flat tappet hydraulic cam that is a reproduction of Chevy’s original L79, 350hp 327 cam for this project. Using our degree wheel, we made sure the intake centerline was right at spec with the intake lobe centerline at 110 degrees.
With the deeper cast-aluminum pan, our initial oil pump and pickup was too shallow, so we had to change to a high-volume pump and performance pickup in order to place the pickup near the bottom of the pan. Shoot for a 3/8- to ½-inch pickup clearance to the bottom of the pan. Remember to include the thickness of the pan gasket in your measurements.
9. With the deeper cast-aluminum pan, our initial oil pump and pickup was too shallow, so we had to change to a high-volume pump and performance pickup in order to place the pickup near the bottom of the pan. Shoot for a 3/8- to ½-inch pickup clearance to the bottom of the pan. Remember to include the thickness of the pan gasket in your measurements.
We had Barrington Machine upgrade the heads with better exhaust seats, new Erson stainless steel valves, Viton rubber valveguide seals, and dual springs. To assist in the cam break-in process we removed the inner springs, which will be reinstalled after the cam is fully broken in.
10. We had Barrington Machine upgrade the heads with better exhaust seats, new Erson stainless steel valves, Viton rubber valveguide seals, and dual springs. To assist in the cam break-in process we removed the inner springs, which will be reinstalled after the cam is fully broken in.
The early small-block Chevys used a canister oil filter that is a pain to change. We used a Trans-Dapt oil filter adapter to convert this block to a spin-on style filter. This adapter uses a Ford-style Fram PH8A filter.
11. The early small-block Chevys used a canister oil filter that is a pain to change. We used a Trans-Dapt oil filter adapter to convert this block to a spin-on style filter. This adapter uses a Ford-style Fram PH8A filter.
New flat tappet cams must be properly broken in and that require a specialty oil to ensure the lubricant has sufficient levels of zinc and phosphorous (ZDDP). We used Summit SAE30 Break-In oil to ensure this part of the break-in task would be covered.
12. New flat tappet cams must be properly broken in and that require a specialty oil to ensure the lubricant has sufficient levels of zinc and phosphorous (ZDDP). We used Summit SAE30 Break-In oil to ensure this part of the break-in task would be covered.
We used a set of Fel-Pro composite head gaskets instead of the older tin head gaskets to ensure a good seal and then clamped them in place with a set of ARP head bolts.
13. We used a set of Fel-Pro composite head gaskets instead of the older tin head gaskets to ensure a good seal and then clamped them in place with a set of ARP head bolts.
To retain the early engine flavor, we also used new Summit stamped steel rockers and Summit 5/16-inch pushrods for this throwback 327. We pressure-lubed the engine until we had oil on all 16 rockers to make sure they were properly lubricated before startup.
14. To retain the early engine flavor, we also used new Summit stamped steel rockers and Summit 5/16-inch pushrods for this throwback 327. We pressure-lubed the engine until we had oil on all 16 rockers to make sure they were properly lubricated before startup.
Strope’s goal was an early ’70s look so he polished the Weiand tunnel ram to produce this image topped with a pair of Holley 600-cfm vacuum secondary carbs, velocity stacks, and Corvette cast valve covers.
15. Strope’s goal was an early ’70s look so he polished the Weiand tunnel ram to produce this image topped with a pair of Holley 600-cfm vacuum secondary carbs, velocity stacks, and Corvette cast valve covers.
SOURCES