ACP department heading TECH
InTheGarageMedia.com
Governing With Less Guesswork title
speedometers
1.The dash in this ’57 Chevy has been upgraded thanks to a Classic Instruments Direct Fit gauge package. The added features from stock will ensure the driver is fully aware of the vehicle’s operational status.
Governing With Less Guesswork title
An Updated Gauge Cluster Provides More Information
BY Ryan MansonPhotography by THE AUTHOR
W

hen it comes to the gauge cluster of most classic Chevys, few provided much information past vehicle speed, fuel level, and an engine temp that ranged between hot and cold. In fact, the dash cluster in our project ’57 reflects just that, which leaves, literally, more information to be desired than is actually provided. Engine speed, oil pressure, and the state of the charging system was left up to the driver’s imagination, lest an “idiot light” or two. With today’s trend of ever-higher horsepower drivetrains and ever-increasing electrical loads, the need to keep a closer eye on the goings-on under the hood has never been greater.

In the case of our ’57 Chevy, the temp gauge provides a simple range of temps, the speedo reads inaccurately, and the fuel gauge suffers from “needle bounce.” The aforementioned lack of oil pressure, engine speed, and charging state from the cluster means we’ll be driving blind when it comes to the situation underhood.

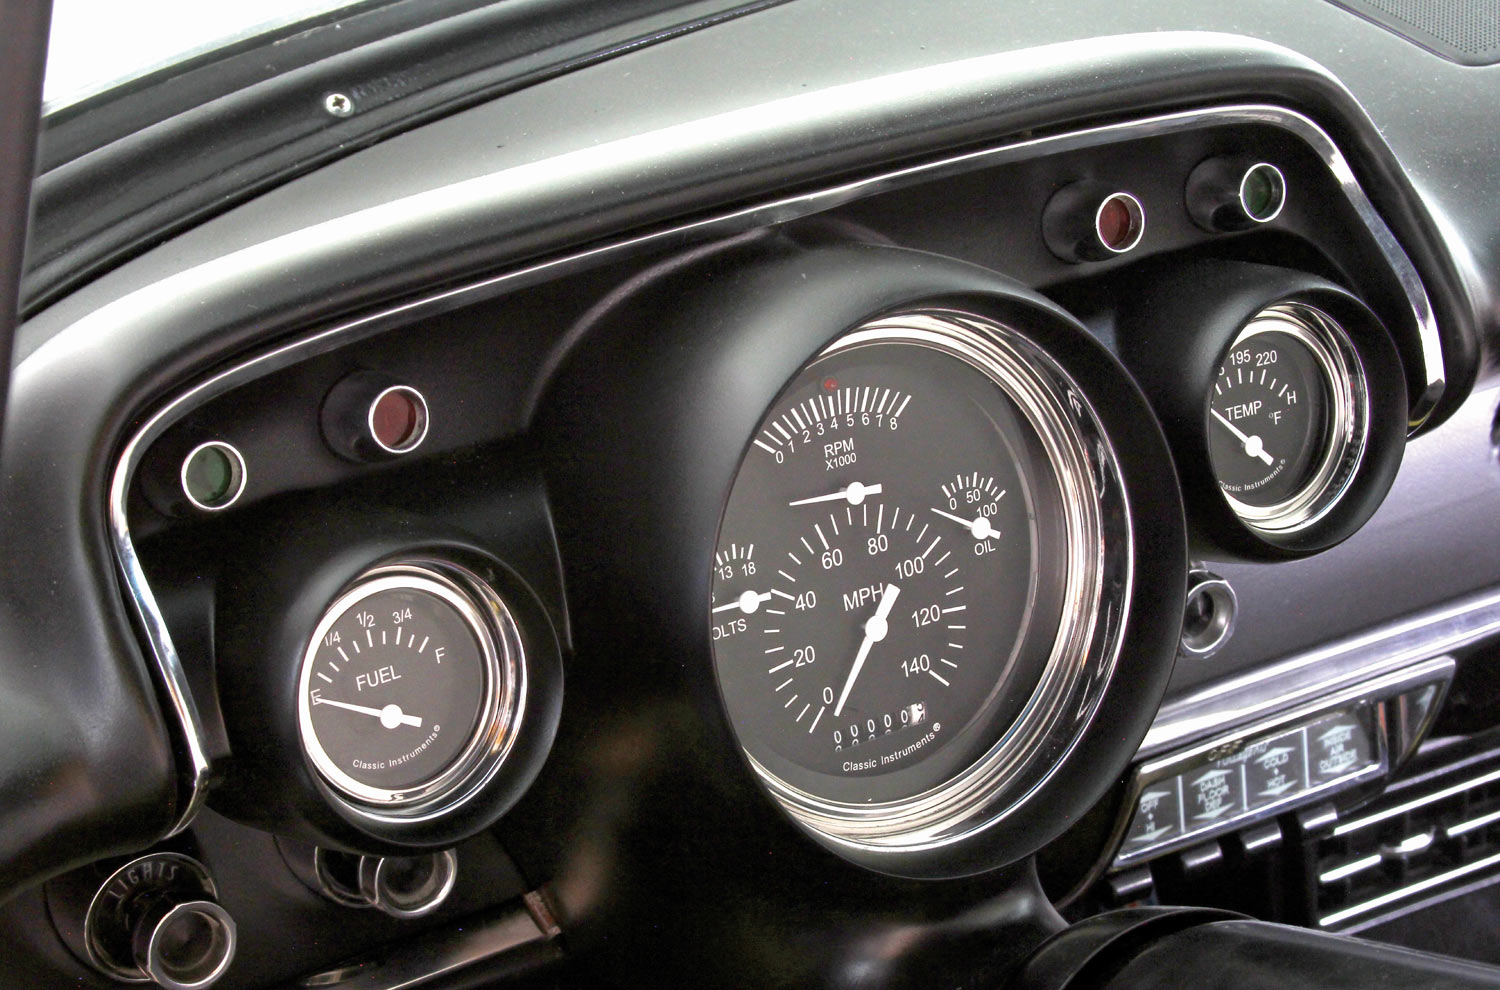
Thankfully, there are companies like Classic Instruments that step in and provide a wide range of gauge options that improve the coverage for nearly every classic Chevy on the market. Not only that, but they do so in a plug-and-play manner, many times using the stock gauge housing and bezels. The result is an updated gauge cluster that looks the part but performs superior.

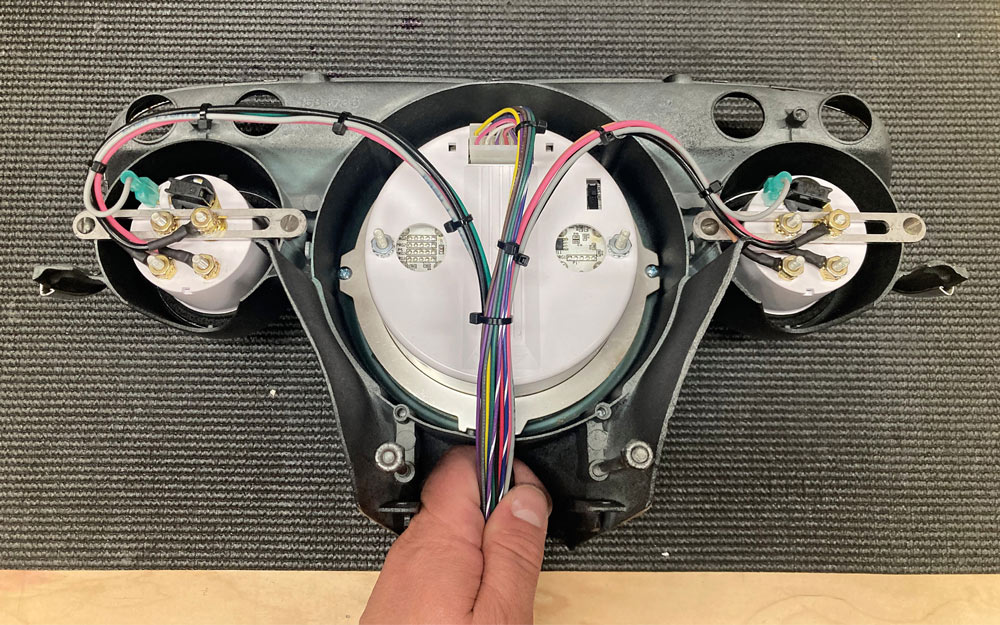
Classic Instruments’ line of Direct Fit gauges are perfect for those builders who want an increase in coverage without cutting additional holes in the dash or adding pod-mounted gauges to the A-pillar or steering column. For the ’57, incorporating a number of separate gauges in a single, central gauge allows Classic to include more information in the same real estate as stock, without any modifications to the original gauge housing. Flanking the center cluster are a pair of electric gauges providing accurate engine temperature and fuel level. The result is a huge improvement in information relayed to the driver in a package that looks like it came from the factory, a win-win in anybody’s book!

trio of Classic Instruments gauges
2. The trio of Classic Instruments gauges features a central cluster that includes a 140-mph speedometer, 8,000-rpm tach, voltmeter, oil pressure, and high-beam indicator. Turn signal indicators are also available as an option. Replacing the original water temp and fuel level gauges are similar units that match the central gauge and feature improved accuracy and display over stock.
clock that features quartz movement and push-button adjustment
3. Another add-on option is a matching clock that features quartz movement and push-button adjustment.
Direct Fit fuel gauge
4. The Direct Fit fuel gauge doesn’t ship with a sending unit and comes preconfigured to mate to the original sending unit’s 0- to 30-ohm range. For a more accurate experience, Classic Instruments offers this Holley Easy Level sender that uses LiDAR, laser imaging, detection, and ranging technology to precisely measure the depth of fuel in the tank. On-board buttons are used for setup and calibration, which can be done before installation. The dampening rate can also be adjusted to reduce gauge bounce due to fuel slosh, as well as the speed in which the gauge reacts to fuel level change.
electric sending units
5. Electric sending units for the oil pressure and water temperature gauges, however, come standard.
oil pressure sending unit for the LS engine
6. The oil pressure sending unit for the LS engine will be located on the stock block-off plate near the oil filter …
temp gauge
7. … while the temp gauge sending unit mounts in the driver side cylinder head.
original gauge cluster
8. Installation of the gauge package begins with complete disassembly of the original gauge cluster. The stock gauge housing is reused, as are the chrome bezels.
three retaining brackets
9. Three retaining brackets are included in the Classic Instruments kit to hold the gauges in place.
screwdriver being used to affix a large bracket to gauge housing
10. Four screws affix the large bracket to the gauge housing, securing the center 4 ⅝-inch gauge.
two flanking gauges held in place
11. The two flanking gauges are held in place using the other brackets and provided hardware.
completed cluster assembly
12. The cluster assembly is complete.
handful of loose wires
13. The main, center gauge has a handful of loose wires that need connecting. From left, these connections are left turn indicator, tach input, dash light power, oil pressure sender, 12V switched, SN16 pulse signal generator, high beam indicator, right-turn indicator, not used, setup push button, ground, and speed signal.
water temp and fuel level gauges wired separately
14-15. The water temp and fuel level gauges are wired separately, each requiring a ground, 12V switched, dash light power, and respective sending unit connections.
gauge cluster fully wired
16. The gauge cluster is fully wired and ready to be connected to the vehicle’s wiring harness and sending units.
turn signal indicator wire
17. We opted to use the stock turn signal indicators in the dash housing, so these will need to be wired as well.
yellow wires used for setting clock
18. Wiring requirements of the clock consist of ground and 12V constant, in addition to dash light pigtails (not pictured), while the yellow wires mate to a push button used for setting the time.
assembled gauge
19. The assembled gauge housing is now ready for installation!
SOURCES