ACP department heading TECH
InTheGarageMedia.com
Project Stocker Title
We Build a 5.3 LS Short-Block Capable of 1,200 Reliable Horsepower Subtitle
BY Jesse Kiser Photography by The Author
T

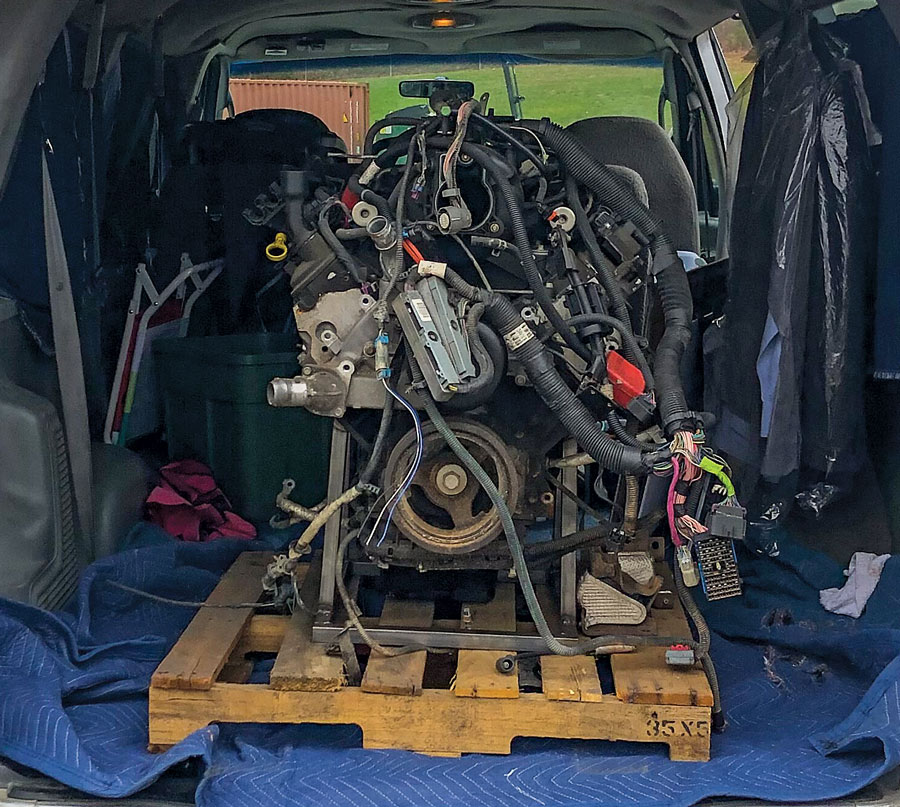
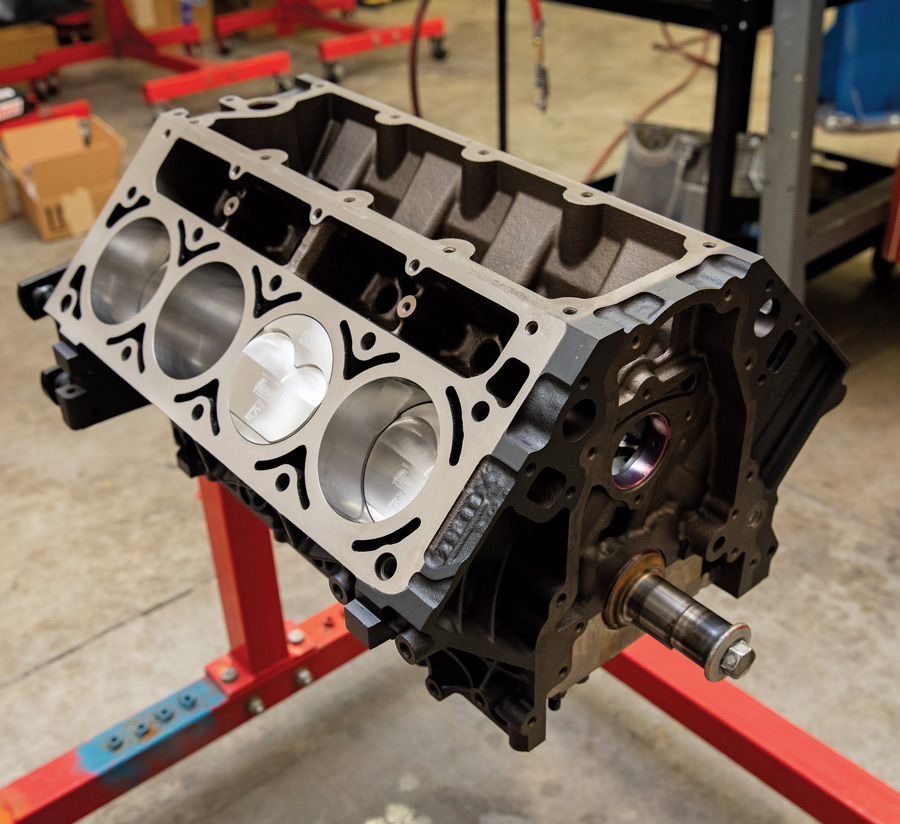
he LS engine has long been the king of high-output budget builds. Grab a junkyard truck engine, add a cheap turbo, and make quadruple-digit power. We start our supercharged 1,200hp LS build with a short-block capable of considerable, reliable power on a budget.

There are millions of forum pages dedicated to the topic of LS budget builds, so tread lightly. The sloppy fans will tell you the true budget LS is one that goes straight from the junkyard in between the fenders of your hot rod. There’s some truth to that, as the LS features many architectural improvements over its predecessor, the small-block Chevy. Advancements include a Y-block design with six main bolts (four vertical, two horizontal), extra-long head bolts, a taller deck, better flowing heads, larger cam journals, and a cam centerline that’s higher in the block. “The GM engineers have done a very good job. If you don’t get too far off the map from OE, you shouldn’t have to make many more changes,” Dennis Borem, owner of Pro Motor Engines (PME) says. “These engines are built to last hundreds of thousands of miles.” 

Record chasers have made around 1,200 estimated flywheel horsepower with stock bottom ends, and around 1,800 hp with stock blocks. But, we want this engine to remain versatile with the ability to street drive and use for later testing, so we need a better rotating assembly that can reliably handle the abuse. “You can make that kind of power with a stock engine, but it takes a very skilled tuner and an optimized setup,” Tick Performance owner Jonathan Atkins says, who volunteered to build this engine in conjunction with PME. “The better rods and pistons may survive a tuning misstep that stock parts would not, but really they’ll perform better and last much longer.”

It seems 1,200 hp is that rough maximum for the basic aftermarket support. “When you start climbing over that power range, the price of the components goes significantly higher,” Atkins says. Companies like Summit Racing and ARP make bolt-in components to help bring us to that level of reliable power.

Engine Specifications Table
The complete iron-block 5.3L engine was $300 from a friend, with unknown details. Depending on the condition, a complete and running LS runs between $300 and $1,200. So, we’re off to a good start. We initially thought it to be a run-of-the-mill Gen III LM7 engine due to its valley cover (Gen III valley covers feature two large holes for the knock sensors), but once we pulled the heads, we realized it uses Gen IV head bolts (Gen III uses two different length bolt, and Gen IV uses all the same length).

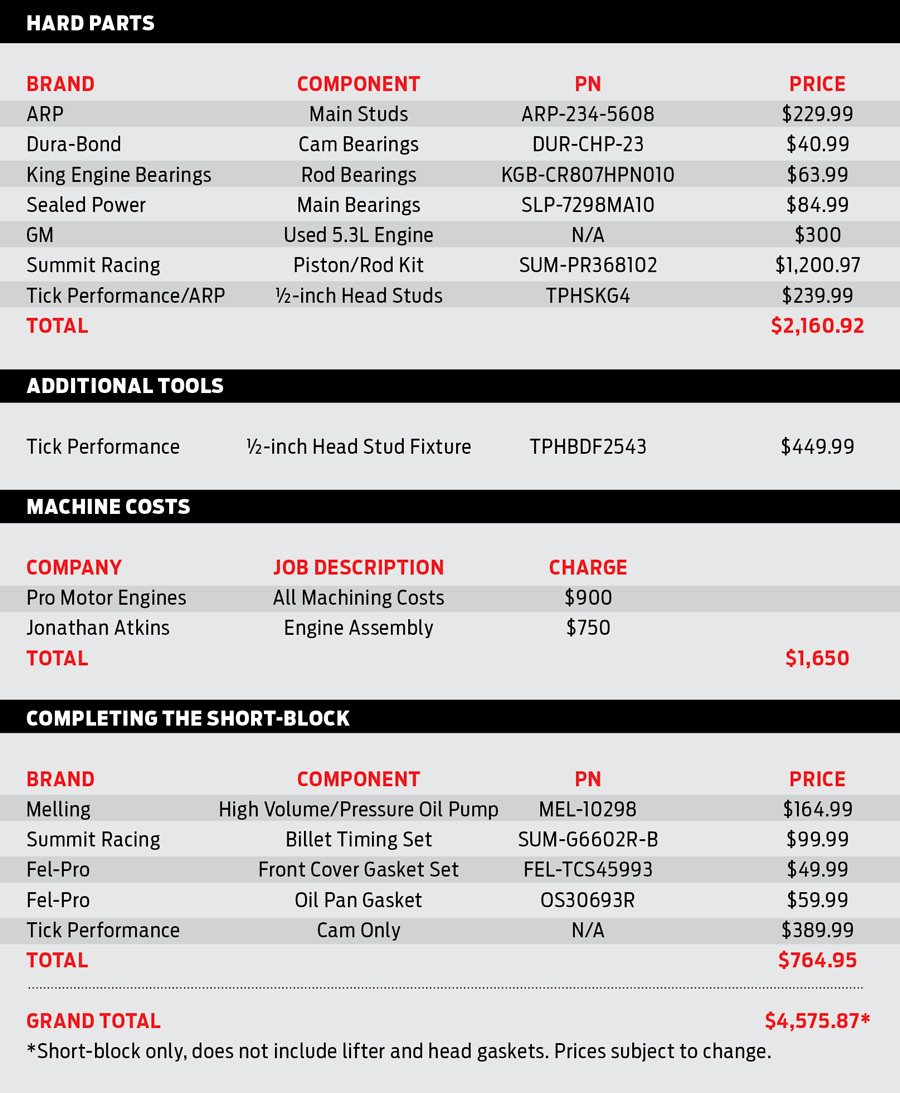
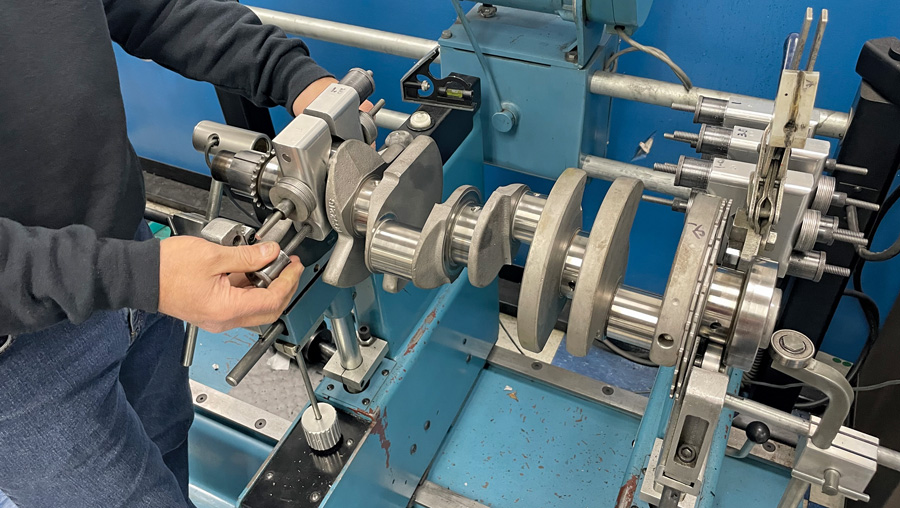
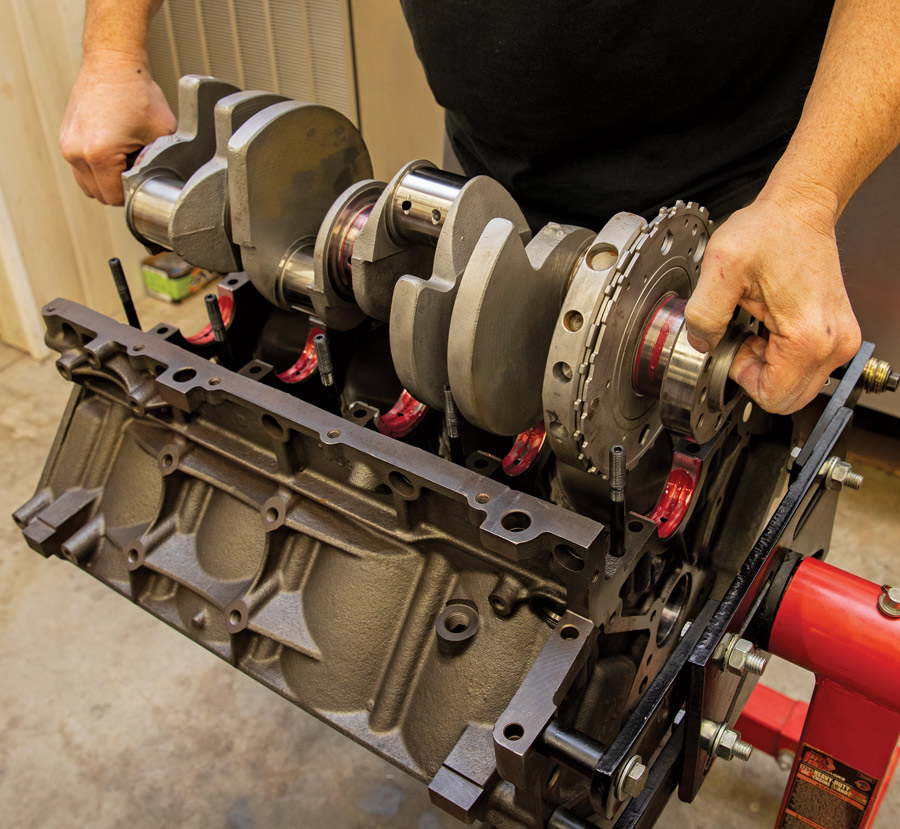
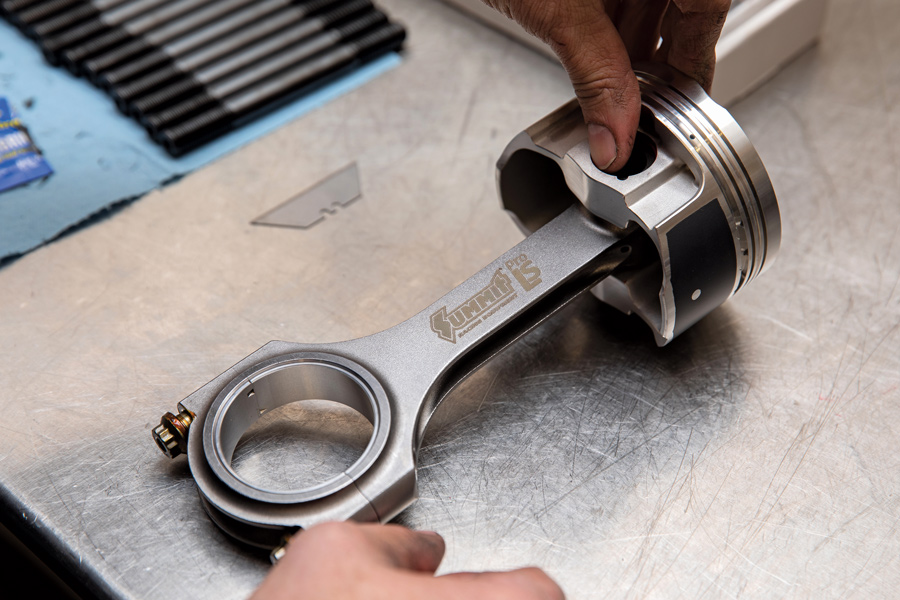
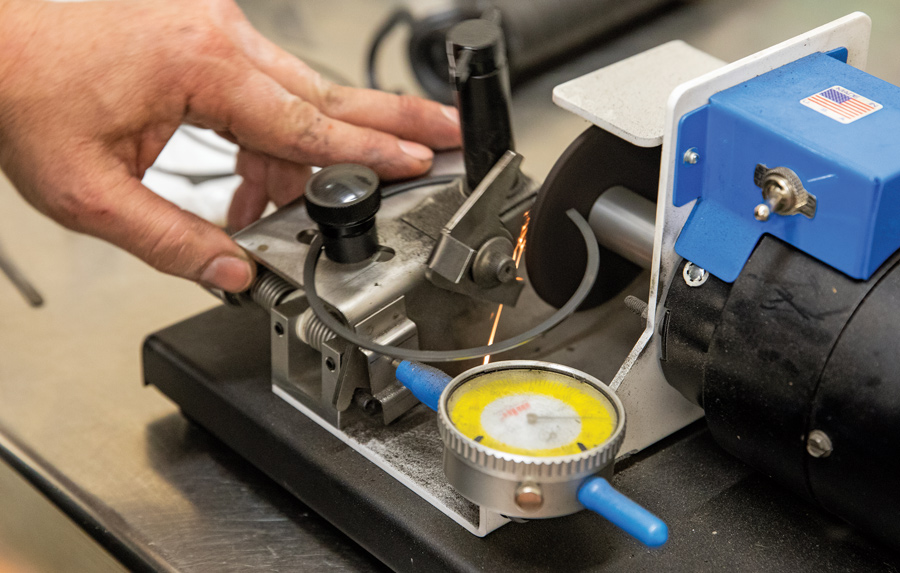
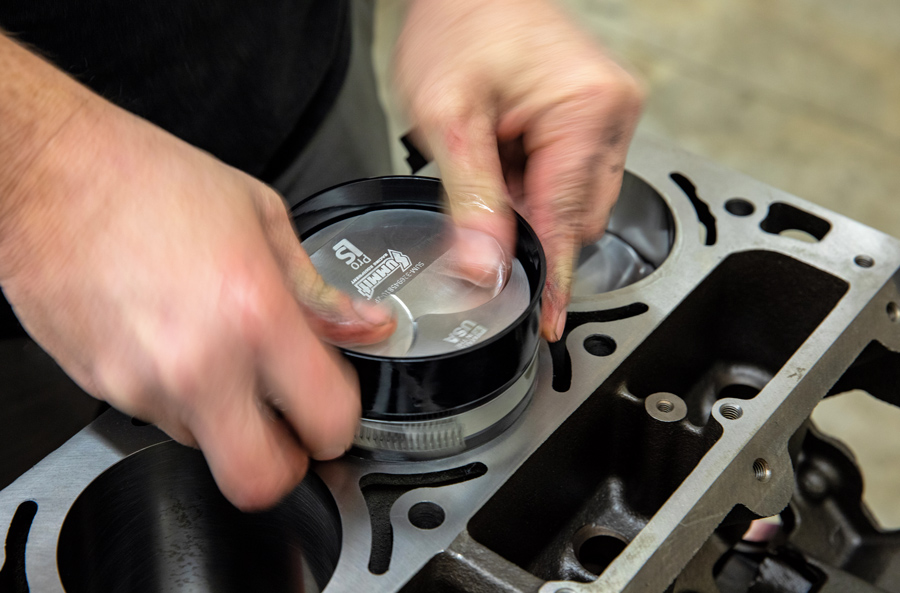
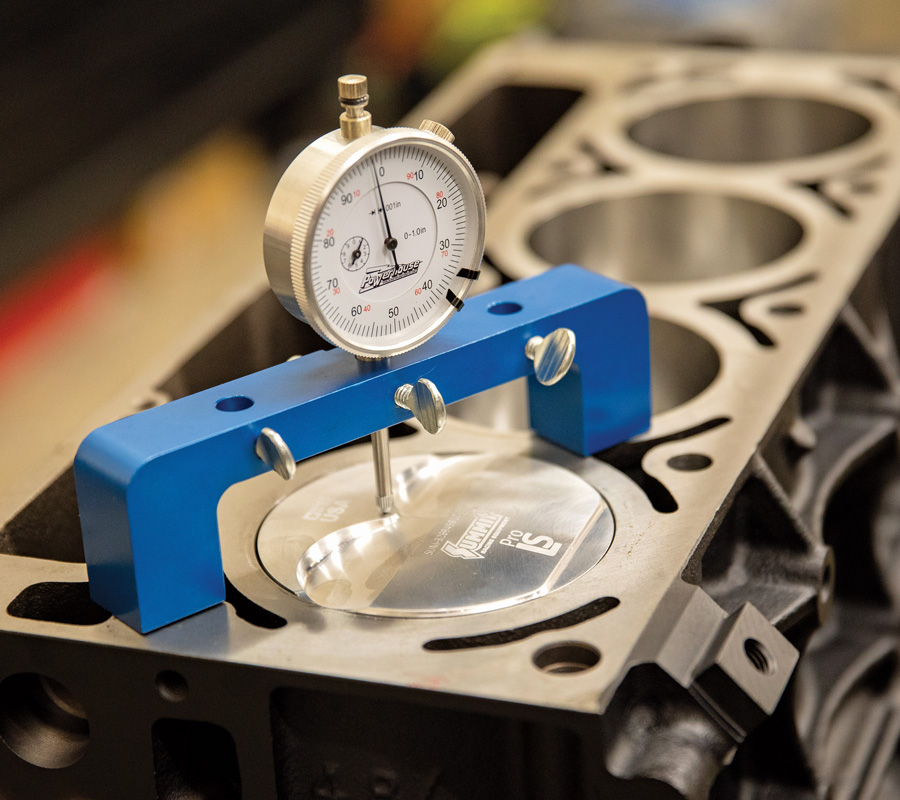
A set of stock-style pistons would cost around $300, but for only $900 more we can upgrade to the Summit Racing Pro Series forged rod and piston kit. PME magnafluxed and ground the stock crank 0.0010 inch, so we opted to save some money and keep it. This kit is great for boosted applications and includes pistons, piston rings, wristpins, ARP rod bolts, and both PME and Atkins have had experience with the kits. 

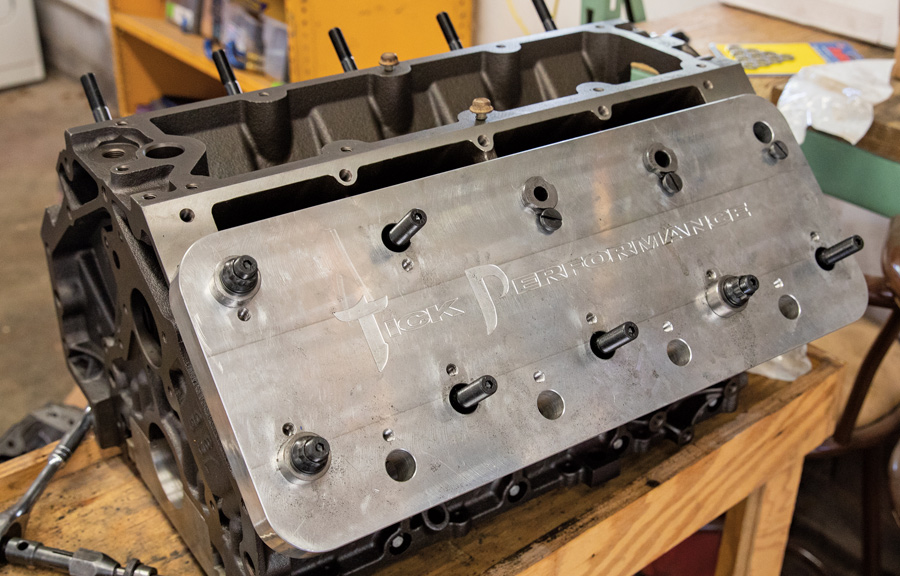
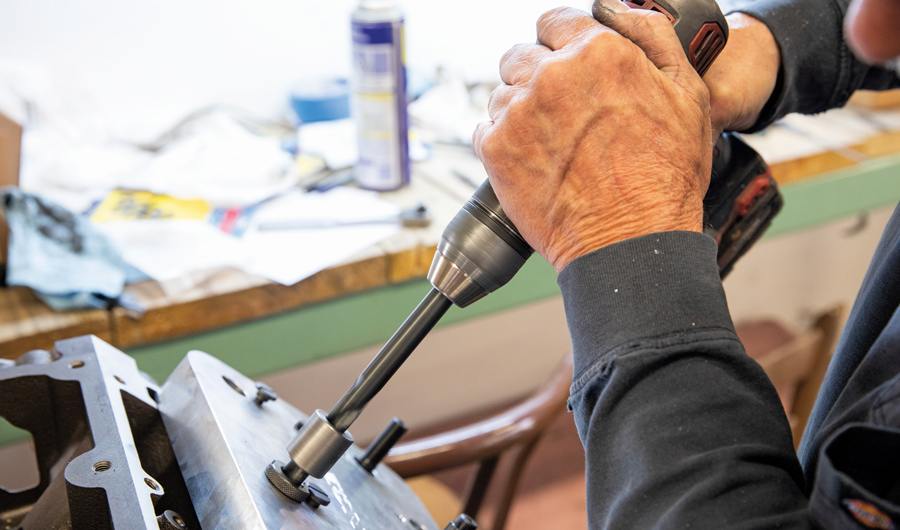
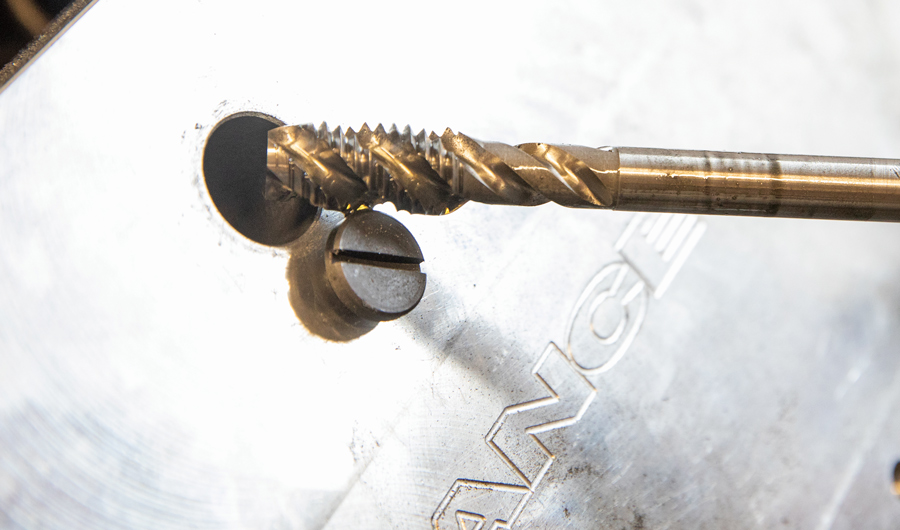
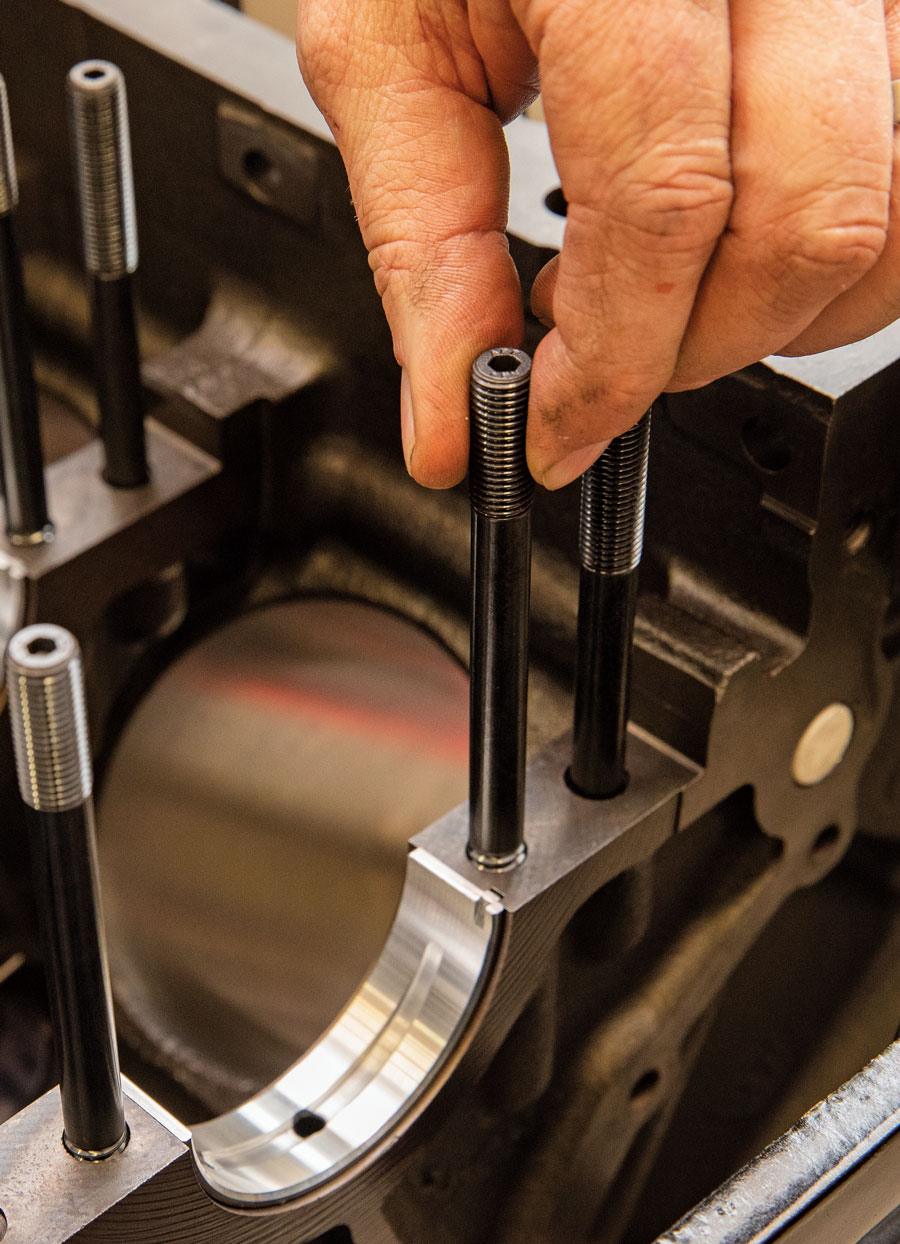
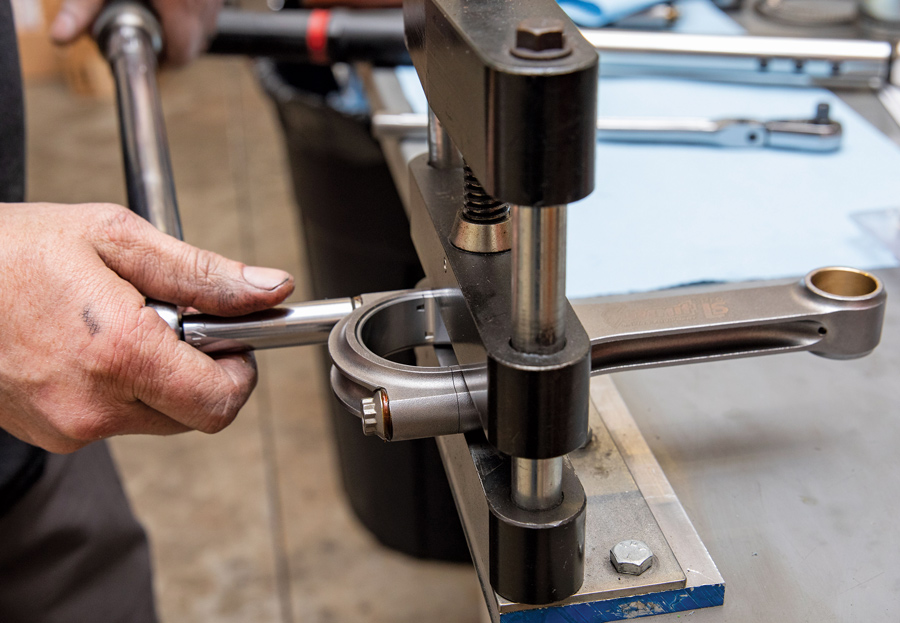
Boost is the answer, no matter the question. Another technique for keeping boost in the engine is upgrading from factory 11mm head bolts to ½-inch ARP head studs. We use the Tick Performance DIY ½ Head Stud Fixture Kit, which allowed us to do the job at home and save on machining costs. This upgrade is another heavily debated topic, likely because you can’t perform this operation easily on small-block Chevys as the boltholes are too close to the water jackets. The LS does not have this problem, and there’s plenty of meat in our iron block.

“You’re clamping two parts together, so you’re increasing clamping force. It’s cheap insurance for a boosted application,” Borem says. The stock head bolts and studs torque at lower yields than the ½ inch, which require a final torque of 120 lb-ft. It requires much more force to lift the head with these studs compared to stock size.

We start by stripping the engine and sending the block to PME in Mooresville, North Carolina. They’re known for circle-track race engines, supplying Super Stock Late Model, NASCAR, and Trans Am TA packages. They provide sealed engines to various series, including the Trans Am TA2, which uses an LS2, so they know their LS stuff. PME stripped and cleaned the block by heating off the gunk and tumbling it.

LS Gen III LM7 5.3L engine
1. Purchased from friend Matt Goins, we believed our $300 LS was a Gen III LM7 5.3L but discovered it’s a Gen IV 5.3L with a Gen III valley cover. This reminds us of the important lesson: always check before ordering parts. We didn’t want Active Fuel Management or DOD and didn’t care about the rods since we planned to change them anyway, however, if you’re doing a stock-bottom-end setup you want Gen IV LS rods, as they’re stronger.
We took the block back home and performed a ½-inch head stud upgrade with a Tick Performance ½-inch head stud fixture kit
2. We took the block back home and performed a ½-inch head stud upgrade with a Tick Performance ½-inch head stud fixture kit. This allows us to perform a machining job on our home workbench with a basic cordless drill. We borrowed the fixture from Tick Performance owner Jonathan Atkins, which didn’t hit our total bill and saved us additional machining costs. Plus, ½-inch head studs are cheaper than standard head studs. We mount the large aluminum fixture on the block using leftover head bolts.
we blow out the holes with compressed air in between drilling, use cutting fluid on the drills, and tap and repeat the process on all holes
3. We measure the depth of the holes and the top of the threads. We position the supplied bushing in place, finger-tight the setscrew, drill to the bottom of the hole with the smaller 27/64-inch drill bit, and check the depth against our measurement to make sure we fully drilled the hole. Then, swap the bushing, set the stop on the 33/64-inch drill based on the depth of the threads from the top of the block. We drill to the stop, it’s under an inch in the hole. Of course, we blow out the holes with compressed air in between drilling, use cutting fluid on the drills, and tap and repeat the process on all holes.
we slide a bushing onto the provided spiral flute tap
4. Finally, we slide a bushing onto the provided spiral flute tap (a beautiful tool designed to push the metal up and out as it taps) and tap the hole by hand. We repeat the process for the entire block, swapping out head bolts for new ½-inch head studs to hold the fixture in place. It’s the same process for aluminum blocks, but much easier on the hands.
Pro Motor Engines (PME) weighs the new Summit Pro Series rod and piston kit and uses that data to balance the crank
5. Pro Motor Engines (PME) weighs the new Summit Pro Series rod and piston kit and uses that data to balance the crank. The formula is the rotating assembly “big end,” two rods, and two pairs of bearings, plus 50 percent of the reciprocating weight, which is a calculated total of the other end of the rods and everything on top of them (rings, pistons, and so on). Then add 3-5 grams to account for oil. That weight is added to the crank and then balanced. “Some people overbalance a race engine, but not for this,” Dennis Borem, owner of PME says. “They’ll do that with higher-rpm applications for better harmonics, but it’s kind of a science and people have their theories. For street applications, 50 percent of reciprocating is the standard here.”
The block was bored 0.025 over and then honed an additional 0.005 inch (for a total of 0.030 over)
6. It’s recommended to perform the ½-inch head stud upgrade before final machining, but according to Tick Performance customers have done it after, too. PME decked, magnafluxed for cracks, checked the main and cam bearing surfaces, and line honed. The block was bored 0.025 over and then honed an additional 0.005 inch (for a total of 0.030 over). It’s common to bore an iron block to LS1 sizing (3.898-inch LS1 bore versus 3.780-inch 5.3L bore), but we don’t need the extra cubes or extra machining costs as the price increases when boring more than 0.030 over. To get started with assembly, we install ARP main studs (PN 234-5608, $229.99) along with new Sealed Power bearings (PN SLP-7298MA10, $84.99). Atkins has already installed the cam bearings before we arrived, Dura-Bond Cam bearing set (PN CHP-23, $40.99).
Atkins measures the crank journals with a mic and finds them all very close to 2.5485 inches—exactly like we expected as PME turned the crank 0.010 inches
7. Atkins measures the crank journals with a mic and finds them all very close to 2.5485 inches—exactly like we expected as PME turned the crank 0.010 inches. We transfer that measurement to the dial bore gauge and check the journals. We discovered all are within a couple tenths of 0.0030-inch clearance. “For something you’d drive a lot, I’d say around 0.0025 clearance,” Atkins says. “But, if you’re shooting for a big number, 0.0030 would be good, but it’s getting a little on the loose side.” With an aluminum block LS, we’d run 0.0005 tighter, as clearances get looser when the engine warms up. The nodular iron crank will have some flex when making power, so clearance will allow for some movement. We make no changes to our bearings and lay the crank in place with Red Line assembly lube.
We opt for the standard 3.622 stroke with a 2cc dome piston.
8. According to Summit Racing, the Pro Series Rod and Piston kit is tested to over 1,200 hp. We opt for the standard 3.622 stroke with a 2cc dome piston. This will net us with around 10.4 to 11:1 compression, depending on the head chamber size. To the old-school guys that may seem high for a boosted application, but modern experience has shown otherwise. PME offers cylinder heads in various chamber sizes, so we have some freedom moving forward.
On the bench, we measure the ARP rod bolts for stretch, then torque them per the instructions
9. On the bench, we measure the ARP rod bolts for stretch, then torque them per the instructions, starting with 30 lb-ft and then a final pass of 50 degrees (77 lb-ft per our torque wrench). The bolts are within the recommended 0.004- to 0.005-inch stretch. So, to make our job easier, we simply torque all rod bolts to 30 lb-ft then 50 degrees. We torque every rod with our King Bearings Rod Bearings (PN KGB-CR807HPN010). Our ideal range is 0.002 to 0.0025 inch, and most measure around 0.0025 and 0.0026 inches. Like the crank, our rod clearances are a bit on the loose side, but that’s fine for our 1,000-plus hp street application.
The kit includes Summit Racing file-fit piston rings, which are advertised to provide maximum ring seal, reduced friction, and tensions optimized for wet sump engines
10. The kit includes Summit Racing file-fit piston rings, which are advertised to provide maximum ring seal, reduced friction, and tensions optimized for wet sump engines. The bore is about 0.003 and 0.0035 clearance—spot-on for what PME expected—and the oil rings have the minimum 0.015 inch, as advertised. Taking experience and a couple different recommended instructions into account, we decide on a ring gap of 0.024 inch top and 0.026 inch for the second. A little wider than recommended street blower application but it gives us freedom for increased boost. “Heck, you can run over 0.030 and it’ll run good, just use more oil,” Atkins says.
The 2618 alloy pistons are great for boost and nitrous applications
11. The 2618 alloy pistons are great for boost and nitrous applications, with maximum ring land thickness and pressure-fed pin oiling with durable chromium steel wristpins. Specially profiled and coated piston skirts make for a tight piston-to-wall clearance. Generous valve reliefs for extra piston-to-valve clearance in case we run a radical cam.
Finally, we check compression height, as the block has been decked. We find 0.002 in the hole, which is important when we find the right heads
12. Finally, we check compression height, as the block has been decked. We find 0.002 in the hole, which is important when we find the right heads.
The hard part is done, but it’s arguably not a short-block until the cam, lifters, and front cover are installed
13. The hard part is done, but it’s arguably not a short-block until the cam, lifters, and front cover are installed. Lifters are another area of great debate as they can range greatly in price. The LS7 drop-line lifters have long been the go-to performance lifter for under $200, but they tend to be on backorder. Morel makes a great drop-in lifter at around $200 retail (PN MRL-7717). We’ll likely tune the engine for 800 rwhp for street use, so the Morel 7717 would work. But to make 1,200 hp comfortably—the point of the article—we’ll likely spend the extra dough for link-bar lifters. Morel Tie-Bar-style hydraulic roller lifters are $498.37 (PN 5290) and Johnson Tie-Bar slow leak down lifters cost $848.68 (PN 2116LSR). It’s up to an extra $500 in this build, but it’s the one area where performance LS engines seem to have the most failures, so it’s extra insurance.
Automotive Racing Products
(800) 826-3045
arp-bolts.com
Pro Motor Engines
(704) 664-6800
pmeengines.com
Summit Racing
(800) 230-3030
summitracing.com
Tick Performance
(336) 719-0599
tickperformance.com