ACP department heading TECH
InTheGarageMedia.com
1971 Camaro undergoing interior assembly with matte black body and steering column prep
Ready for Action typography
Updating the Steering, Pedals, Shifter, and Console of a Second-Gen Camaro
BY Chuck VranasImages BY THE AUTHOR
R

egardless which style of hopped-up V-8 you’re packing underhood, the most important part of linking it all to the street lies in your controls. Once you’ve hit the starter, it’s all business in trying to channel every bit of that hard-earned horsepower once the wheels are turning. Sure, bone-stock parts always do their job but in the world of performance technology, there’s always a better way to raise the bar to the next level. When addressing the heartbeat of your classic Chevy, upgrading your steering, shifting, and pedals just makes great sense, seeing they’ll get quite a workout from street to strip and everywhere in between.

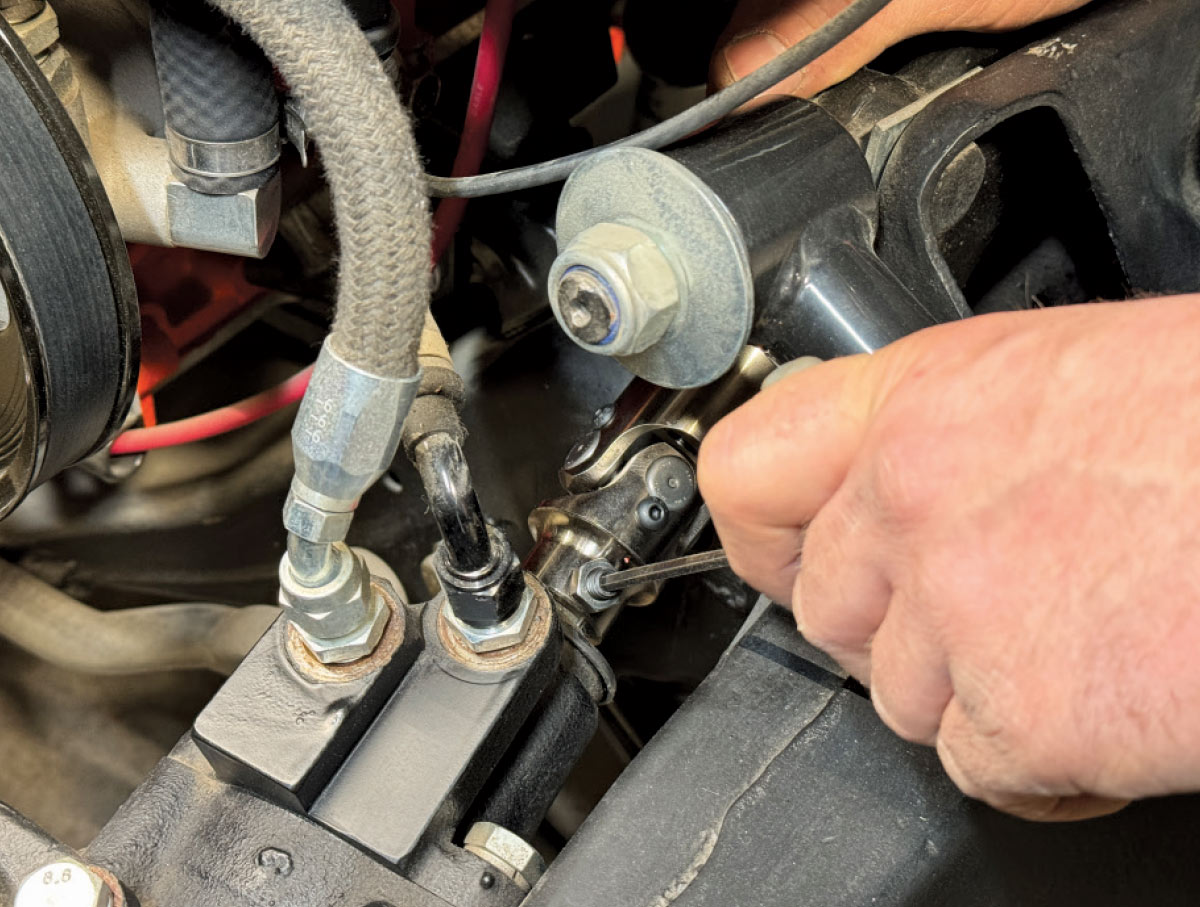
The 1971 Camaro laid out across our pages has become a familiar sight to regular readers of All Chevy Performance over the years. It’s been transformed from that of a bare shell with us covering all facets of the build, from suspension and brakes to its LS driveline, cooling, exhaust, sheetmetal, wiring, and even insulation. With all of the modifications fused into its resurrection, it was a perfect time to look deep into the business office to see the best way to upgrade its control systems with products from industry-leading manufacturers. Having a wicked 5.3L LC9 LS V-8 now residing between the framerails linked to a T56 six-speed manual transmission, it’s time to get the car ready for action.

On a recent visit, we followed up at Procision Industries in Taunton, Massachusetts, where shop owner Pat O’Brien was preparing to move forward by taking on this very subject. Faced with a blank canvas, he opted to start with selecting a new steering system that would link perfectly with the updated suspension and brakes. A call to Flaming River got it started with one of their Direct-Fit Tilt Columns for the 1970-78 Camaro, featuring an integrated GM-coded key assembly in the column. Available in three finish choices, it offers a GM 4¼-inch wiring connector as well as an OEM-style dash mounting bracket. A billet aluminum column dress-up kit is also included, which is a perfect accent in completing the column with one of their exclusively designed steering wheels. For this application, O’Brien selected a 14-inch Muscle “Tuff” Series steering wheel in hand-stitched Italian black leather, complete with polished 9-bolt wheel adapter and horn button. To link it all to the street through the factory steering box, we opted for Flaming River’s Lower Vibration Resistor U-Joint featuring thermoplastic rubber to absorb road feel-type vibration matched to their CNC-machined from aircraft steel upper Billet-Joint universal joint with a sealed needle bearing design. It’s all linked together through their Slip-Shaft, adjustable steering shaft with a 1-inch DD shaft, ¾-inch DD shaft, and protective bellows, allowing for a flawless installation.

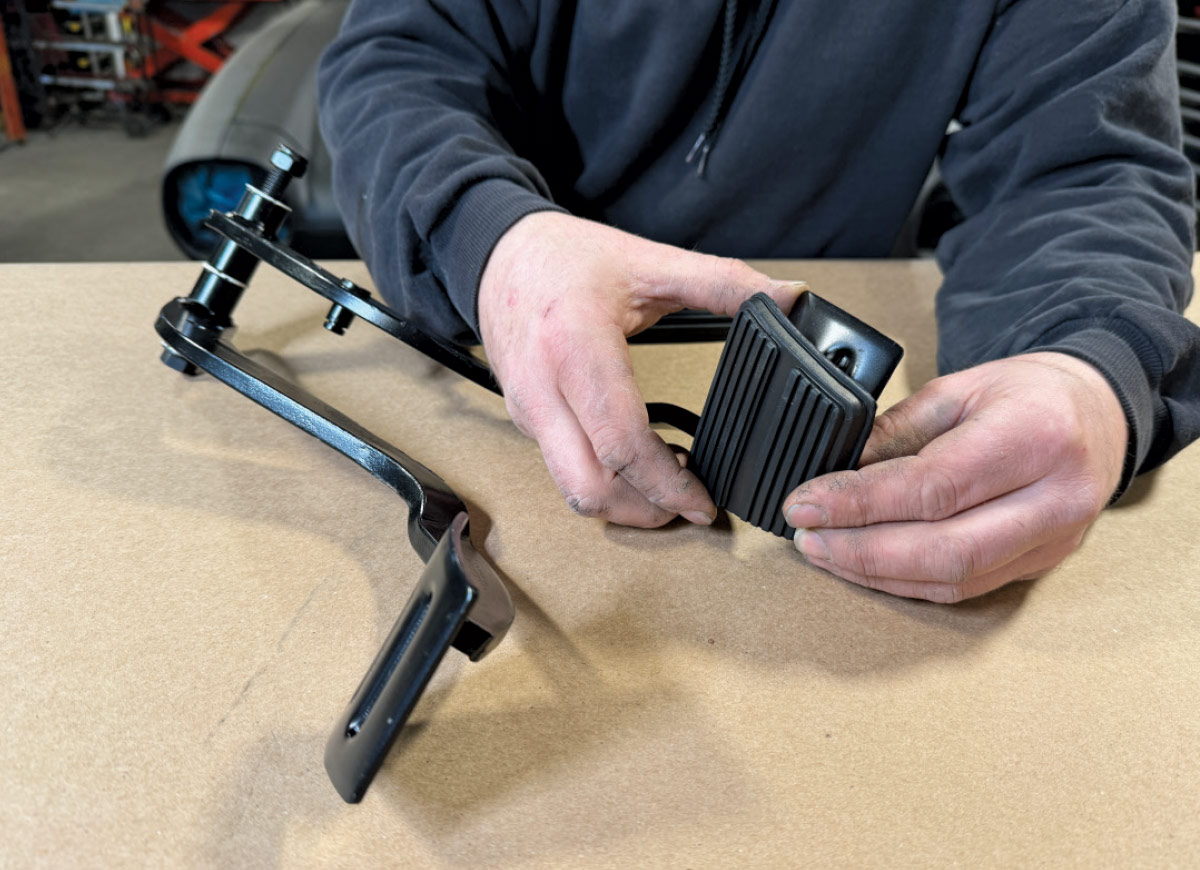
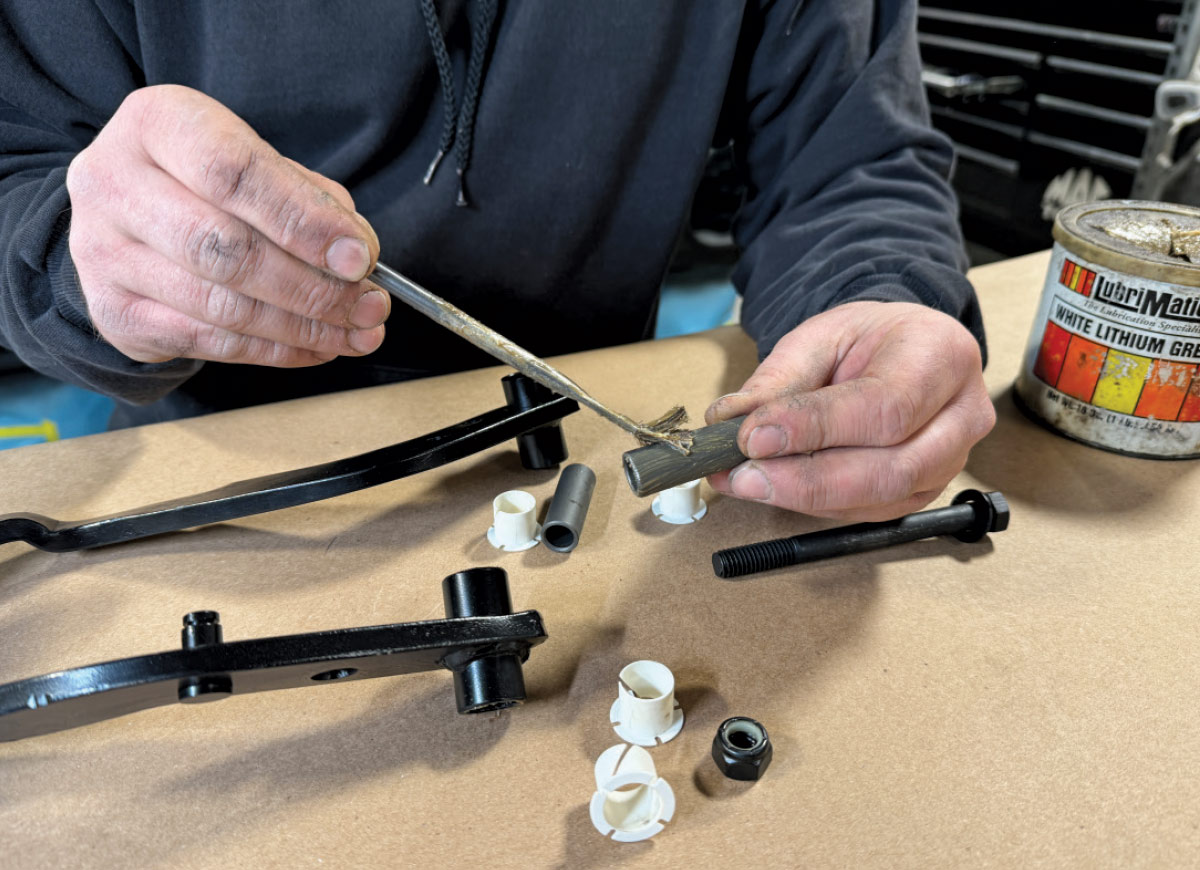
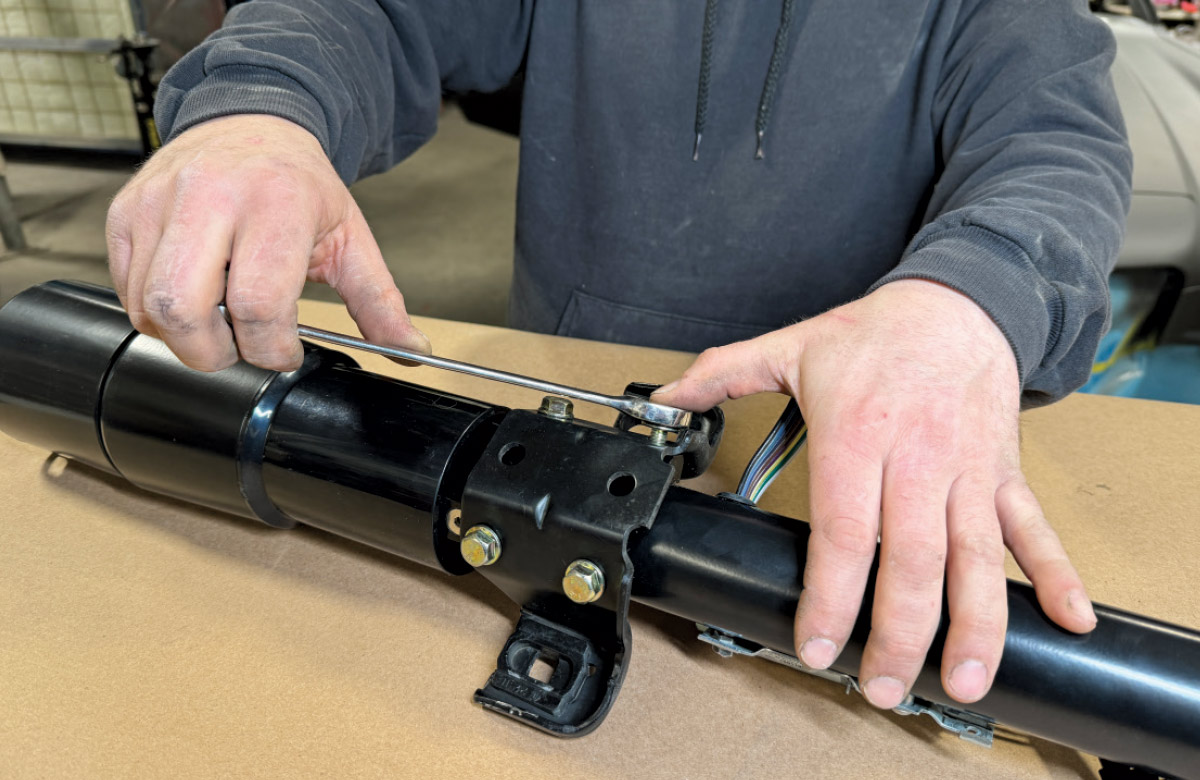
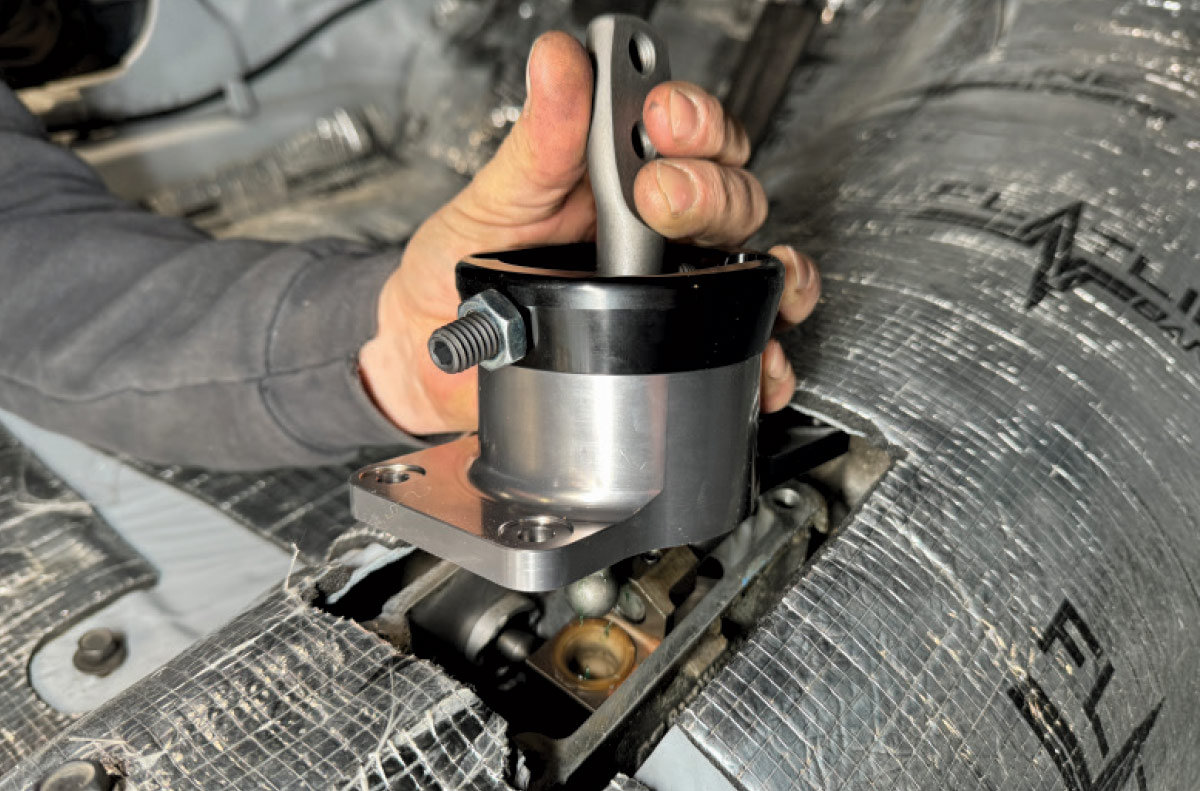
When it comes to addressing the final elements—the pedals and shifting—we went with a winning combination from Classic Industries, GM, and Hurst. A fresh set of pedals from Classic Industries deftly matched to a C5 Corvette accelerator pedal assembly with an electric pedal adapter from Detroit Speed & Engineering can handle anything the rowdy LS can dish out. Delivering the goods through the upgraded T56 trans was a job best delivered by a Hurst Billet/Plus shifter incorporating a high-ratio pivot mechanism for reduced shifter throw by 30 percent. Their patented adjustable bias spring loads allow stick tension to be tailored to the driver’s preferences along with self-centering alignment for improved shifts. For a custom touch, a Clayton Machine Works 8-inch truss-style shift arm, machined from billet aluminum, with a 30-degree kickback designed to fit a standard 2-bolt flange grabs gears topped by a Lokar 2-inch black anodized aluminum shift knob. To complete the installation, Classic Industries supplied an OER reproduction manual transmission center console, gearshift boot and retainer plate.

Let’s follow along as Procision Industries makes all the updates.

1971 Camaro throttle pedal being test-fit for interior install
1. Pat O’Brien, of Procision Industries, started by adding a set of fresh pedal pads to the new brake and clutch pedal assembly from Classic Industries (PN KW327).
1971 Camaro clutch pedal linkage getting prepped with bushings and lithium grease
2. To prepare the pedal assembly for installation, first remove the pivot bolt along with the sleeves and nylon bushings. Follow by lubricating the sleeves with white lithium grease.
1971 Camaro pedal assembly being lubricated during interior installation
3. Next, lubricate the inner pedal sleeves with white lithium grease.
1971 Camaro clutch pedal shaft assembly with fresh bushings and pin fitment
4. Reassemble by inserting the sleeves followed by the nylon bushings for each individual pedal.
1971 Camaro clutch pedal linkage being mocked up inside firewall
5. Prepare the pedals for installation to the support bracket by first aligning the individual clutch and brake master cylinder pushrods to the pedal mounting holes.
1971 Camaro dual pedal assembly being torqued into place under dash
6. Next, reinstall the pivot bolt to the assembly and secure in place using a 5/8-inch wrench and socket to mount the pedals.
1971 Camaro clutch and brake pedals mounted inside raw interior tub
7. Complete the mounting of the clutch and brake pedals to their respective master cylinder units using factory hardware and we are ready for action.
1971 Camaro steering column shaft getting secured with Allen fastener
8. To prepare the Flaming River Direct Fit tilt column (PN FR30015BK) for installation of their Swivel Floor Mount (PN FR20101CA), first remove the output shaft retaining plate.
1971 Camaro steering column with custom mounting plate and splined shaft detail
9. With the Swivel Floor Mount on the column base, replace the output shaft retaining plate and secure in place. Leave the Swivel Floor Mount loose to adjust for final fitment once the column is installed in place.
1971 Camaro steering column bracket being torqued to spec during final assembly
10. Secure the original factory upper column mount to the new Flaming River tilt column using a 13mm wrench and (four) bolts.
1971 Camaro steering column bolted in through firewall with wiring routed and pedals visible
11. Slide the column into place and loosely secure to the upper support bracket using the hardware from the AMK Products Master Interior Fastener Kit.
1971 Camaro pedal assembly alignment checked against firewall-mounted steering shaft plate
12. With a fresh steering column firewall seal in place, secure the swivel floor mount to the firewall using ³/8-inch bolts from AMK. Follow by final tightening all upper and lower mounting bolts.
1971 Camaro throttle pedal bracket fastened to firewall support near steering column base
13. Install the GM C5 Corvette accelerator pedal assembly (PN 19417903) in place with Detroit Speed electronic pedal adapter to the firewall.
1971 Camaro interior showing mounted steering column with full clutch, brake, and gas pedals
14. Here you can see the completed install of the new Flaming River tilt column and pedal set.
1971 Camaro steering shaft U-joint secured to steering box under engine bay
15. Upgrading the steering underhood started with installing a Flaming River Lower Vibration Resistor U-joint (PN FR1898) to the factory steering gearbox.
1971 Camaro Wilwood master cylinder and steering linkage fitment visible near headers
16. We followed by installing a Flaming River Billet-Joint (PN FR1710DD) upper universal joint to the steering column and secured in place.
1971 Camaro steering linkage clearance measured in tight engine bay layout
17. Measure the dimension required for the installation of the Flaming River Slip-Shaft steering shaft upgrade (PN FR1856-S).
1971 Camaro steering shaft marked for custom length cut prior to install
18. Mark and prepare to cut the shaft to the required length.
1971 Camaro steering shaft installed with dual U-joints and tight clearance near headers
19. The Slip-Shaft made installation of the steering shaft a snap and will definitely be a solid upgrade to the system.
1971 Camaro shifter detent spring visible in transmission tunnel before shifter install
20. Since the Camaro will be running a T56 six-speed manual, O’Brien prepared the transmission for the shifter upgrade by first removing the factory shifter assembly. At this time remove any old gasket material and clean the mounting surface. Then, inspect the plastic cup bushing and replace if worn.
1971 Camaro billet short-throw shifter being placed on TREMEC transmission
21. After applying RTV or a similar sealant between the shifter mounting base and the transmission, install the Hurst Billet/Plus shifter (PN 3915060) making sure the ball on the stick bottom fits properly into the plastic cup bushing.
1971 Camaro shifter bolted to tunnel using DeWalt impact and black hardware
22. Fasten the Billet/Plus shifter to the transmission using the supplied hex bolts and flat washers, tighten evenly. Do not use the original factory bolts. Follow by testing the shifter through the entire gear pattern, making sure to engage each gear fully and that the stick moves freely from side to side in the neutral position.
1971 Camaro shift boot secured over new billet shifter on Flatline barrier
23. Install the OER upper gearshift boot and retainer plate (PNs 3973966 and 3973970) with hardware from AMK.
1971 Camaro B&M black billet shifter lever installed and tightened inside cockpit
24. For gear grabbing, a Clayton Machine Works truss-style 8-inch shift arm was added.
1971 Camaro HVAC vent assembly being reattached to factory console panel
25. In preparing the new OER console from Classic Industries for installation, secure the manual transmission console shift tunnel (PN 3973964) to the console shift plate (PN 3991787) with speed nuts from AMK.
1971 Camaro console test-fit into dash during interior assembly with gauges in view
26. First, secure the OER center console (PN 397598) to the factory floor mounting brackets followed by adding the completed tunnel and shift plate using chrome hardware from AMK.
1971 Camaro shift knob test fit on billet lever inside full factory-style console
27. Complete the shifter by spinning on a Lokar 2-inch black anodized aluminum shift knob (PN SK-6930) for the ultimate in control.
1971 Camaro turn signal lever reinstalled with Flaming River column internals exposed
28. Install the Flaming River Billet Aluminum Dress-Up Kit (PN FR20112BK), which includes turn signal, tilt lever, and hazard knob.
1971 Camaro Flaming River steering column torqued down during final interior reassembly
29. Next, add the Flaming River polished aluminum 9-bolt steering wheel adapter (PN FR20113). Make sure to pull the horn wire though the adapter prior to tightening.
1971 Camaro aftermarket steering wheel being secured to polished hub with Allen key
30. Install the Flaming River 14-inch Muscle-Tuff Series steering wheel (PN FR20174KT) using the provided hardware.
1971 Camaro horn contact and wiring being installed behind custom steering wheel center
31. The final step is adding the Flaming River horn button to complete the job.
1971 Camaro interior nearly complete with dash, console, and shifter mounted over Flatline insulation
32. The installation looks factory fresh with a twist, making sure all the controls on the Camaro are ready for action.
SOURCES