ACP department heading TECH
InTheGarageMedia.com
Welding an exhaust pipe
AN EXHAUSTING PROPOSITION
Building a DIY Stainless Steel Exhaust System
By Ryan Manson 
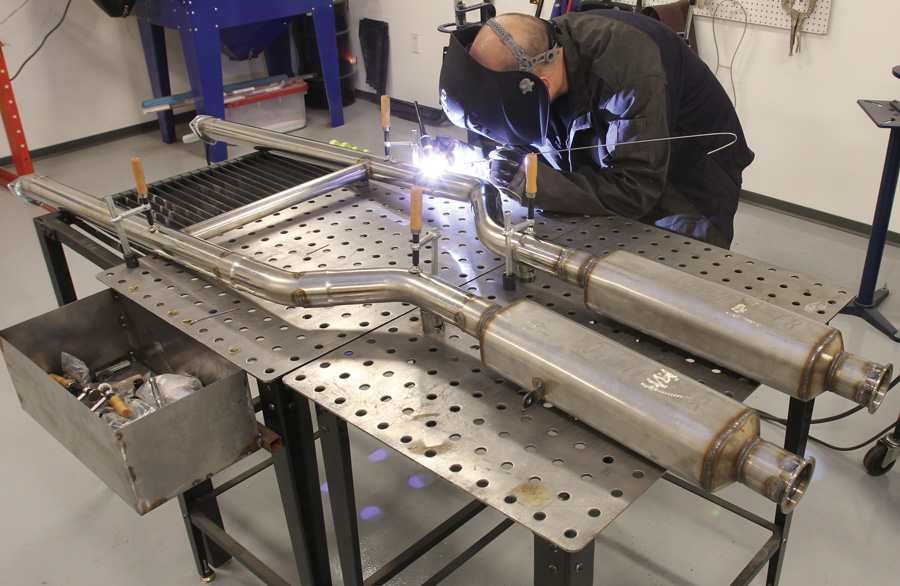
Photography by The Author
W

hen it comes time to sorting out the exhaust system on that muscle car or street machine, most of us are concerned with two things: sound and performance. But finding that aggressive tone without resulting in so much excessive drone that your fillings fall out can be a challenge. Larger mufflers tend to provide a more mellow tone, but there isn’t always the room to mount such a can underneath that A-body. And choking down that 572ci big-block with the wrong muffler is so counterproductive we don’t even need to mention that one!

So, like many things in our hobby, designing the right exhaust system to match your vehicle often comes down to a compromise between what you want, what will fit, and what the engine wants.

For a lot of car guys, building an exhaust consists of a trip to the local muffler shop, picking out a pair of chambered cans, and leaving their ride in the hands of the guy with the welder. A dual set of aluminized pipes is usually the result with the mufflers hanging in the easiest spot, without regard to problems like in-cabin drone and increased passenger compartment temperatures due to their location. For most of us, there really isn’t another option, unless you’re capable of welding and have access to a lift. But if those two points are not a hindrance, there are a number of options available that can result in a much nicer exhaust system.

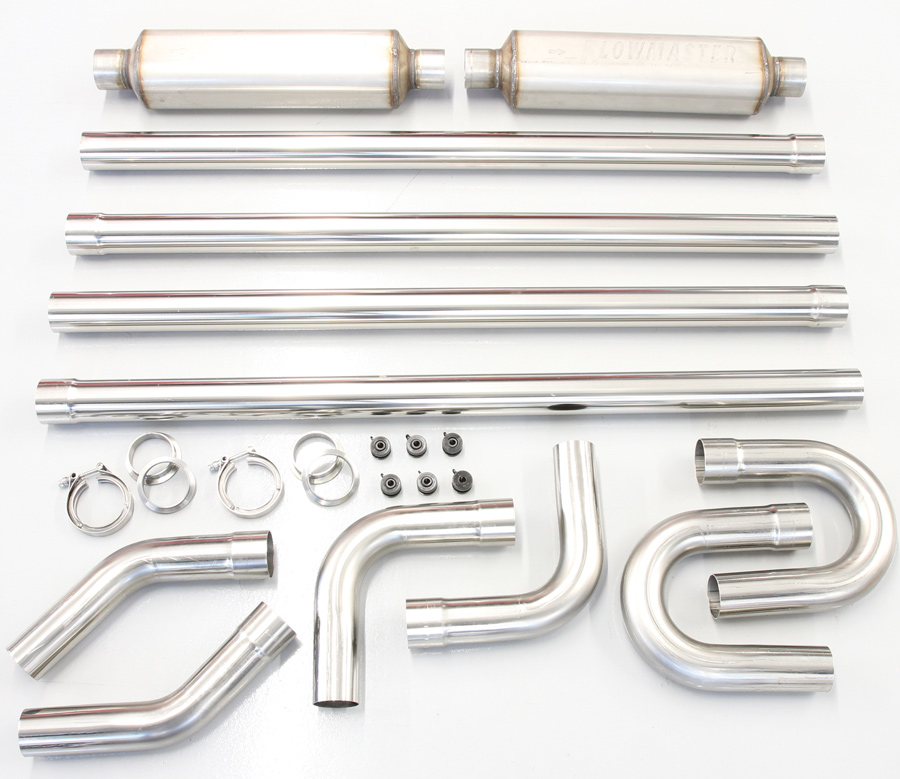
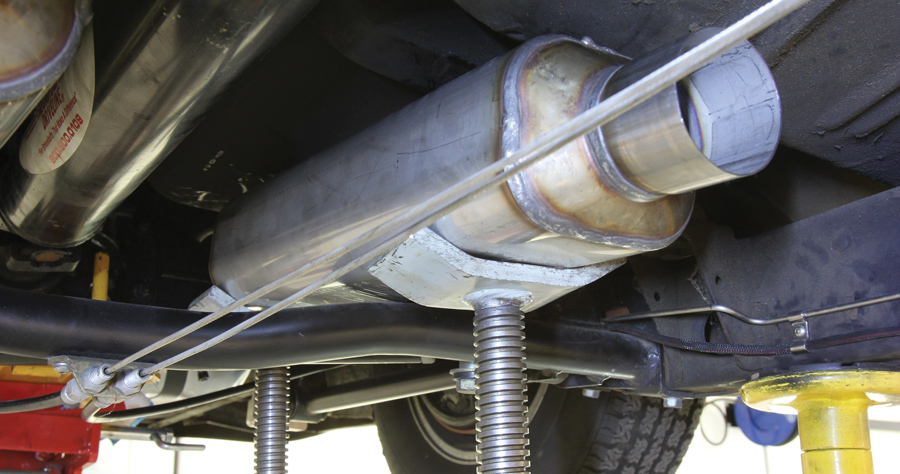
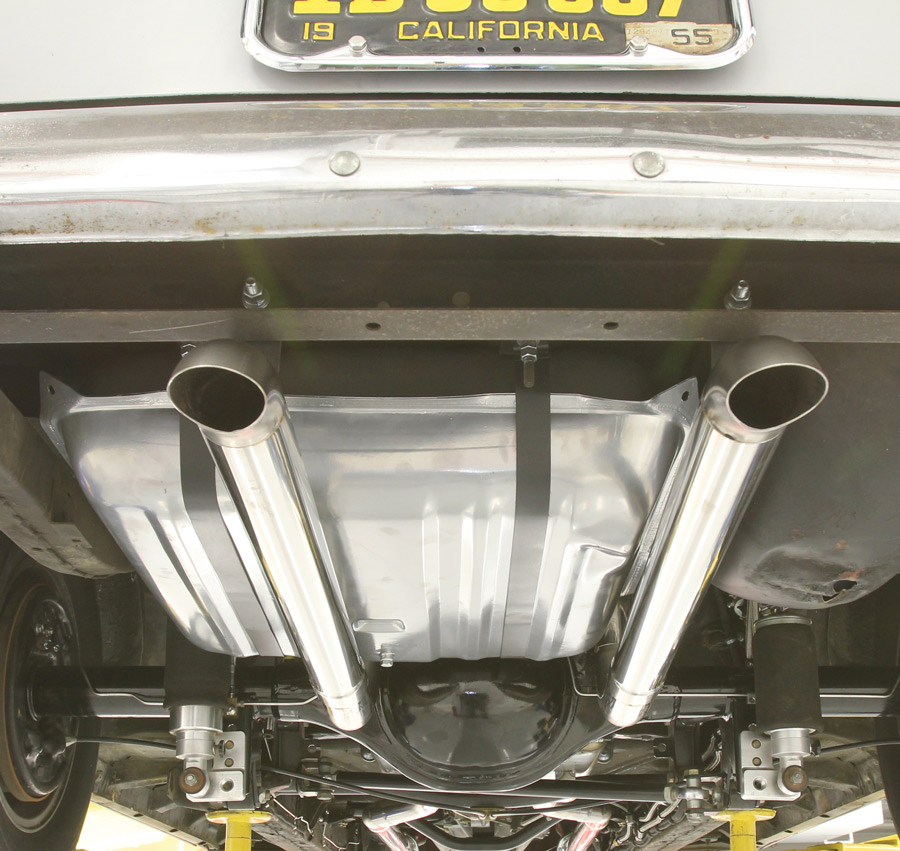
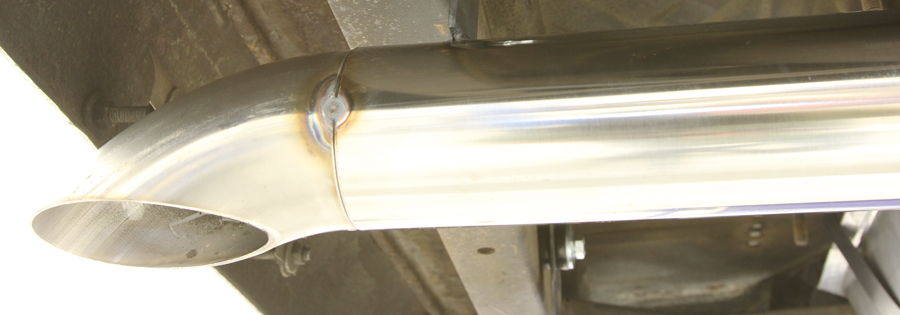
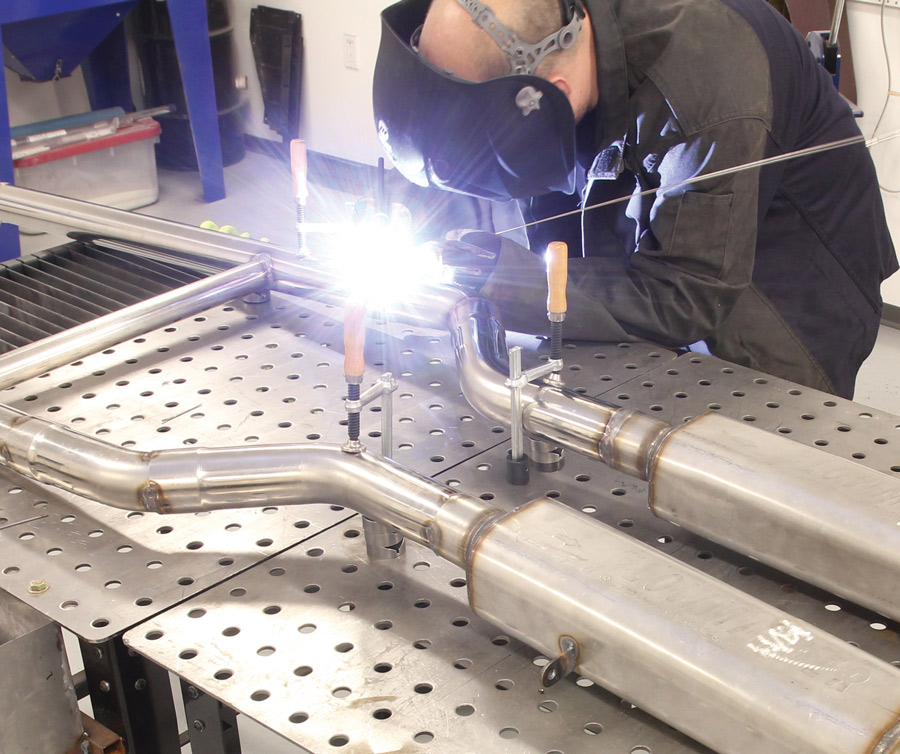
For starters, the option to use a more exotic material like stainless steel makes for a huge upgrade and a much nicer end result. The weld seams won’t rust (a common problem when typical aluminized tubing is MIG welded), and the finished result can be easily coated in a myriad of high-temp coatings or even polished to a near-chrome finish. Personally, taking on the exhaust responsibilities also allows the builder to choose a location for the mufflers that will ensure a more pleasurable driving experience. Moving them aft of the passenger compartment, for example, can help reduce resonance and droning inside the vehicle while also moving a common source of ambient heat away from the occupants. And let’s face it, some of us just have to do everything ourselves.

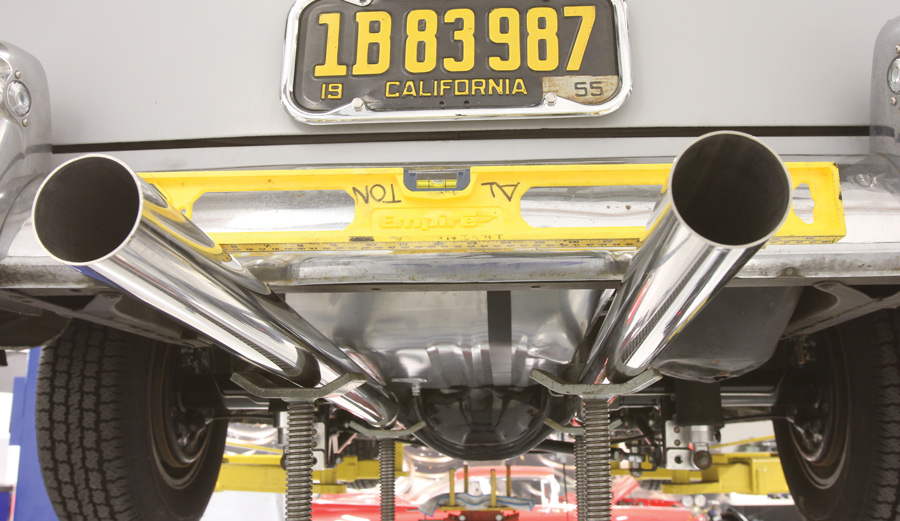
If you’re a DIY guy like me, you’ve no doubt considered building your own exhaust. When it came time to address the exhaust system on my 1955 Chevy two-door hardtop, I knew I wanted to tackle it myself, given the particulars that I would be pretty picky about. Thankfully, I only had to look so far as Speedway Motors’ catalog to find everything I needed to fabricate a custom exhaust, from the headers to the turndowns under the bumper. Armed with a handful of part numbers, I ordered up everything I needed from Speedway to fabricate a fully custom, one-off stainless steel exhaust system exactly the way I wanted.

383ci small-block Chevy engine
1. Here’s the 383ci small-block Chevy engine in our 1955 Chevy that we
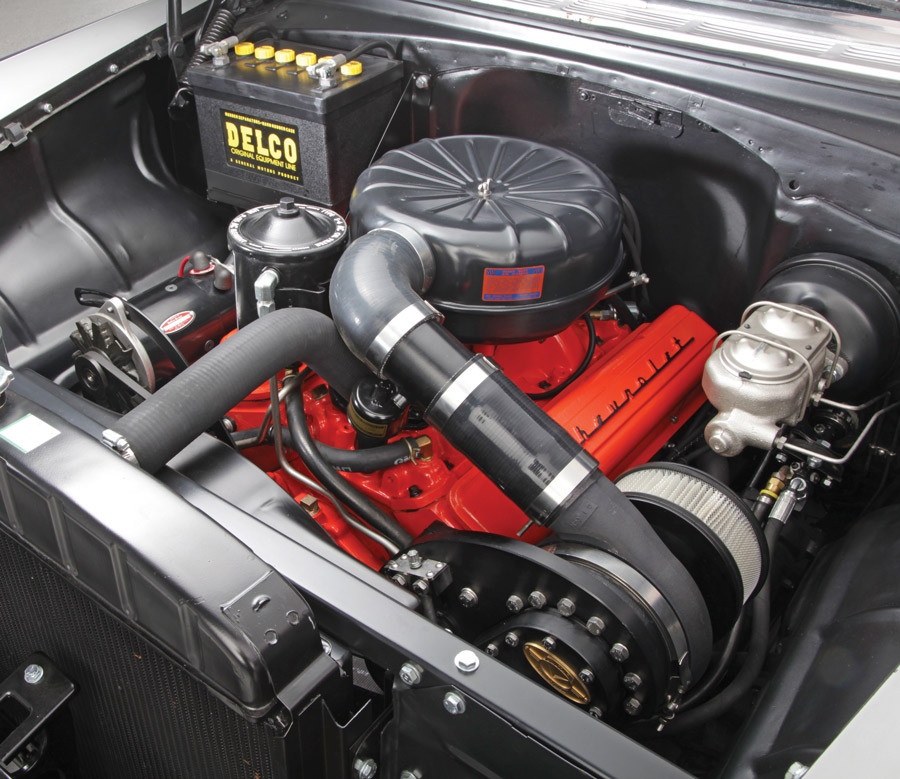
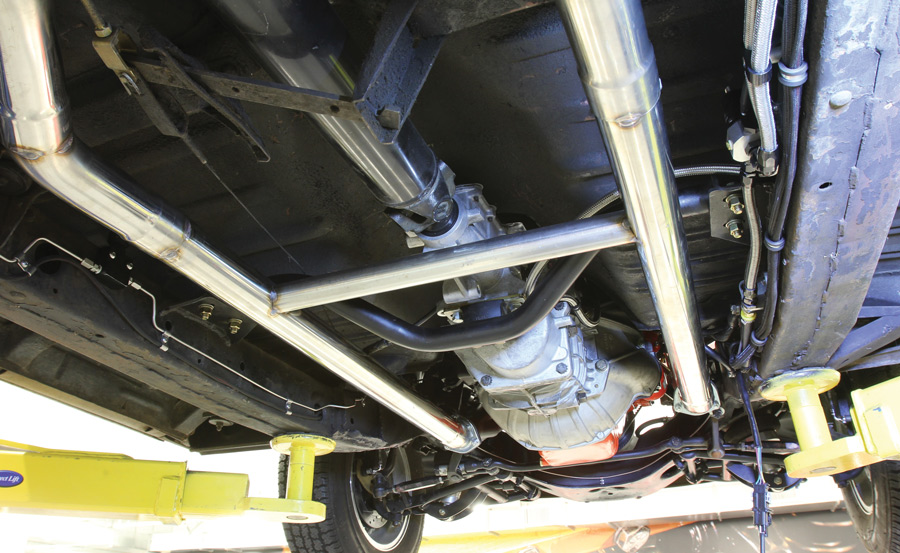
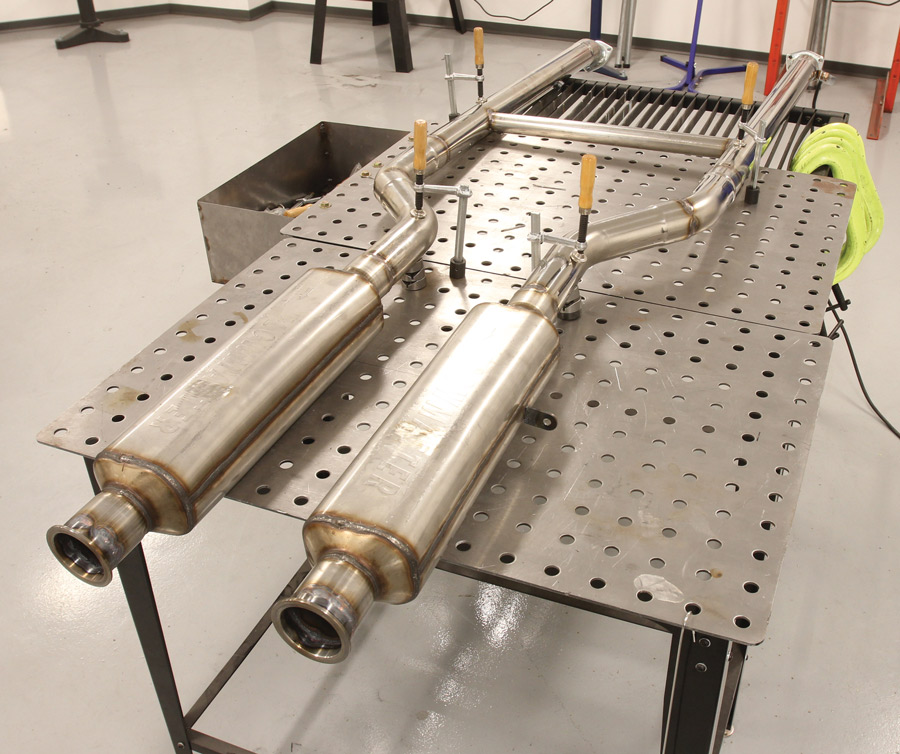
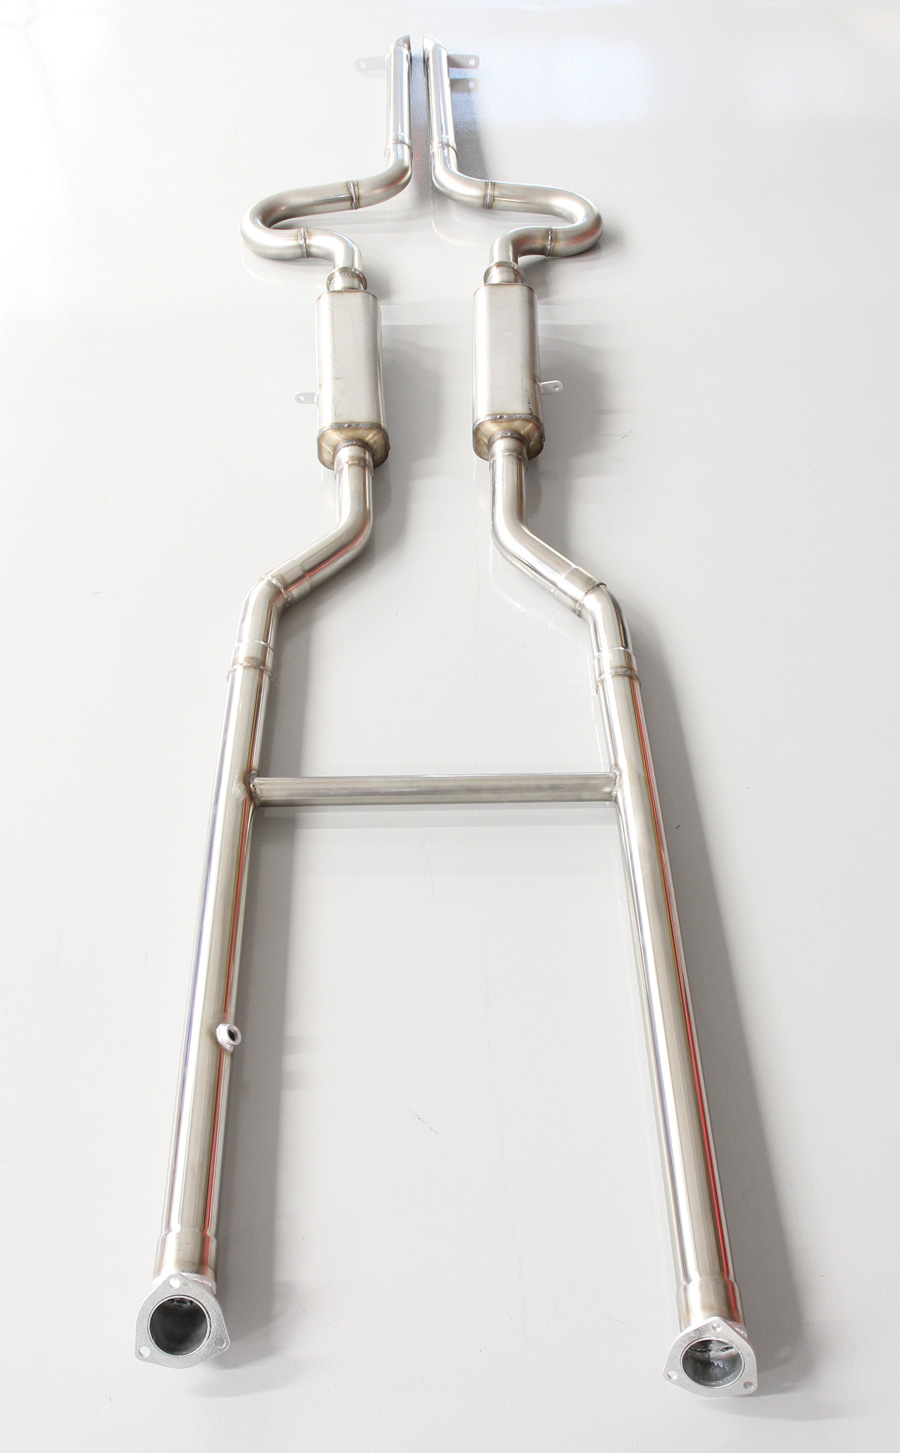
need to exhaust. The fuel-injected stroker is supercharged by a centrifugal TorqStorm blower and made 620 lb-ft of torque and 578 hp on the dyno. A pair of Doug’s full-length headers (PN 447D356-B) are tucked in tight on either side of the engine. (Photo by Jorge Nunez)
pair of 304S stainless steel 18-inch Flowmaster HP-2 mufflers
2. To help mellow the tone of our blown Chevy, a pair of 304S stainless steel 18-inch Flowmaster HP-2 mufflers (PN 37812518304) will be used. We like these laminar core mufflers for their compact size and moderate tone. A 21/2-inch Universal Stainless Steel Dual Exhaust Mandrel Bend Kit (PN 91013828) from Speedway Motors is a great option for the DIY guy, providing enough tubing to fabricate a complete exhaust system at home. Lastly, a pair of Dynatech V-Clamp Collar Assembly Kits (PN 31179491225) will allow us to split the exhaust system up in two sections just in front of the rearend for easy removal/installation.
Poly Grommet
3. A half-dozen Poly Grommet Bushing and Hanger Brackets (PN 9108855) will ensure our exhaust remains securely mounted to the chassis while still allowing for proper expansion and movement of the system.
locating the mufflers
4. I like to start any exhaust job by locating the mufflers first. Luckily, these Flowmaster HP-2s are narrow and compact, making fitment in even the tightest of spaces a breeze.
header collector
5. Looking forward toward the header collector, we can visualize the path that the exhaust will be routed.
relatively straight shot from the header past the transmission crossmember
6. It’s a relatively straight shot from the header past the transmission crossmember …
slight jog required to meet each muffler
7. … with a slight jog required to meet each muffler.
maintaining symmetry between the two exhausts
8. One of the hardest aspects of building a custom exhaust is maintaining symmetry between the two sides. One method we use to keep things nice and even is to use a level to ensure that everything is plumb, relative to each other.
Marking pipe with a sharpie
Hole in the pipe
9-10. With the first half of the exhaust routed, we decided it was a good time to choose the location for our H-pipe. This will serve to balance the exhaust gas pulses between the two cylinder banks, helping with exhaust scavenging while producing a consistent, deeper exhaust tone.
H-Pipe
11. While there is a science regarding the location of an H-pipe, it’s far more common for the location to be dictated by the available space in any given vehicle. For our 1955, we opted to install the H-pipe just behind the transmission crossmember.
Marking placement of O2 sensor with a sharpie
12. Our small-block is equipped with a throttle body EFI system, which requires a bung to be welded in the passenger’s side pipe just aft of the header collector to accept an O2 sensor.
first exhaust hanger location
13. The HP-2 mufflers are located just above the rear four-bar crossmember, making for a perfect location for our first exhaust hanger location.
V-Clamp Collar
14. Just behind each muffler, and barely visible in this image, we installed a V-Clamp Collar assembly so that the exhaust can be easily removed/installed. Here, we’re playing with the angle of the J-bend that will be used to route the exhaust up and over the rearend housing. Like the level we used earlier, an angle finder helps keep the pipes symmetrical from side to side.
rear kickup perpendicular to the ground
15. We ended up mounting the rear kickup perpendicular to the ground, making matching the two sides a little easier. We then cut each J-bend the same length before they were installed. Here, we’re using a level again to ensure that the bottom of both pipes are the plumb.
short 90-degree elbow is used to route the exhaust under the gas tank
16. After the kickup, a short 90-degree elbow is used to route the exhaust under the gas tank …
rear of the vehicle
17. … and out the rear of the vehicle.
level once again being used to maintain symmetry
18. Note the level once again being used to maintain symmetry.
fabricated a pair of turn-downs using a spare section of a bend from our Speedway exhaust kit
19. Due to the low ride height of our hardtop, we didn’t want to deal with dragging the exhaust tips on every driveway and speed bump, so we fabricated a pair of turn-downs using a spare section of a bend from our Speedway exhaust kit.
closer look at one of the fabricated turndowns
20. Here’s a closer look at one of the fabricated turndowns as well as the location of the second exhaust hanger.
header collectors to the V-Clamp Collars has been clamped
21. While the exhaust has been fabricated from header to turndown, it’s only been tack welded up to this point. Here, the front assembly, from the header collectors to the V-Clamp Collars, has been clamped to our welding table to prevent things from moving around as we TIG weld the assembly.
good idea to back purge when welding stainless to ensure proper weld penetration and to prevent contamination of the back side of the weld
22. We’re using 1/16-inch Tungsten and ER308L welding rod to TIG weld the stainless steel exhaust. Though not shown in this image, it’s a good idea to back purge when welding stainless to ensure proper weld penetration and to prevent contamination of the back side of the weld.
complete stainless exhaust assembly
23. Hot off the welding table, here’s our complete stainless exhaust assembly, ready to be reinstalled under our Tri-Five. Note the O2-bung, H-pipe, V-Clamp Collar, and hanger locations.
completed stainless steel exhaust installed
24. The completed stainless steel exhaust system looks great, sounds even better, and will maintain those characteristics for years to come.
SOURCES
Clampdown Competition
clampdowncomp.com
Speedway Motors
(800) 979-0122
speedwaymotors.com
TorqStorm Billet Superchargers
(616) 226-9476
torqstorm.com