

ACP department heading TECH
InTheGarageMedia.com
Three mechanics are installing a transmission into a white third-generation Camaro lifted high on a yellow auto lift in a garage.
Five Speeds for a Third-Gen
Swapping Out a Tired Automatic Trans for a Manual Overdrive Box is Easy With a PerfectFit Kit
By Ryan Manson Images by Ryan Foss Video by Ryan Foss Productions
T

here are few things that can make a muscle car come alive like a manual transmission swap. That visceral feeling connecting man with machine is unmatched when compared to the experience, or lack thereof, found in an automatic trans car. Rowing through the gears and rolling onto the throttle while the rearend skates around ever so slightly after every gear is selected is just not nearly as enjoyable when you take the human element out of the equation. That slush box slipping through the gears leaving no clear clue as to what gear it’s in at any given moment not only leaves a lot of excitement at the door, it lacks it altogether. Yet, while there’s a place for an automatic transmission, there’s just no comparison when it comes down to the driving experience.

Our buddy Danny Nix has been laying down some miles on his 1989 Camaro RS, but when the front transmission seal started to leak recently, he decided it was time to replace the tired 700-R4 with a more modern TREMEC TKX five-speed manual transmission. As he hunted around for options, mulling over whether to build out the swap with individual parts or purchase them all as a kit, he found his solution with a PerfectFit kit from Silver Sport Transmissions (SST). Their kit not only provides everything from the transmission, bellhousing, clutch, and pressure plate, but also provides options such as mechanical versus hydraulic clutch and close- versus wide-ratio gearing options. A fabricated crossmember is included to support not only the rear of the transmission but also serves as the mounting point for the torque arm on Danny’s third-gen Camaro. All the small parts that might be subject to question when building a full kit independently are also included, taking the guesswork out of the equation, even down to the fluids.

What sets the latest TREMEC offering of the new TKX transmission apart from previous iterations is its compact, rounded case. This was designed on purpose with the ability to easily retrofit these into older vehicles. Capable of handling 600 lb-ft of torque and 7,500-rpm shifts, the TKX was also designed to handle even the brashest of street machines. Low-rpm cruising means an increase in fuel economy, upwards of 50 percent in some cases, a likely upgrade on its own for many thirsty muscle cars.

With a long day spent in the shop, the ACP crew had the old trans dropped out of the RS in no time and set their sights on getting that five-speed installed by that afternoon. After some initial prepwork, the trans was mounted, and the crew was soon filling the fluids as Danny anxiously stood by. Before the bell tolled 5 o’clock, Danny was in the driver seat of the Camaro, pulling the car out of the ITGM Tech Center while simultaneously pulling the First gear in his freshly swapped five-speed Camaro.
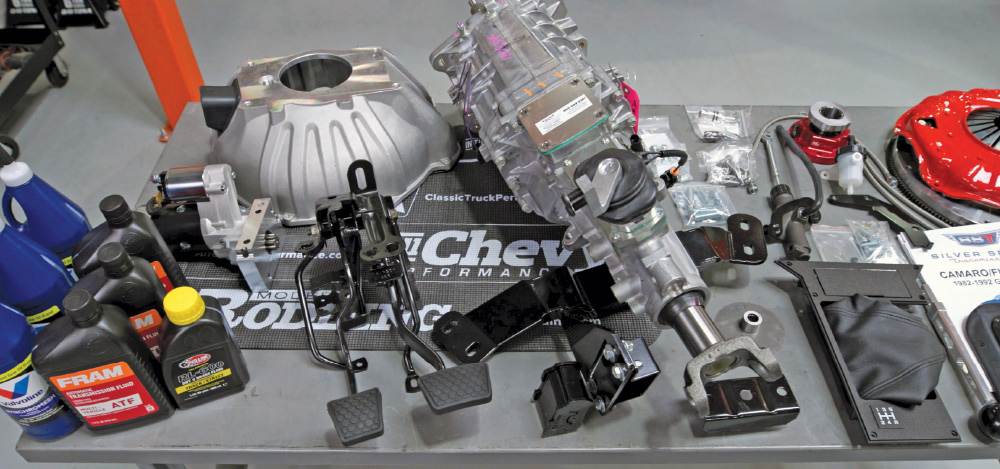
Overhead view of a manual transmission kit, including the transmission, bellhousing, clutch pedals, fluids, and small hardware components laid out on a table.
1. While it is possible to piecemeal a five-speed swap together, it’s way easier, cheaper, and more encompassing to go the kit route. We decided to go with a PerfectFit kit from Silver Sport Transmissions (SST). These five-speed kits come with a brand-new TREMEC TKX transmission, McCleod Racing clutch and flywheel, aluminum bellhousing, and all the small parts necessary to complete the swap, from the pilot bearing to the slip yoke.
A mechanic's view from beneath a raised car as he removes the old automatic transmission using a transmission jack.
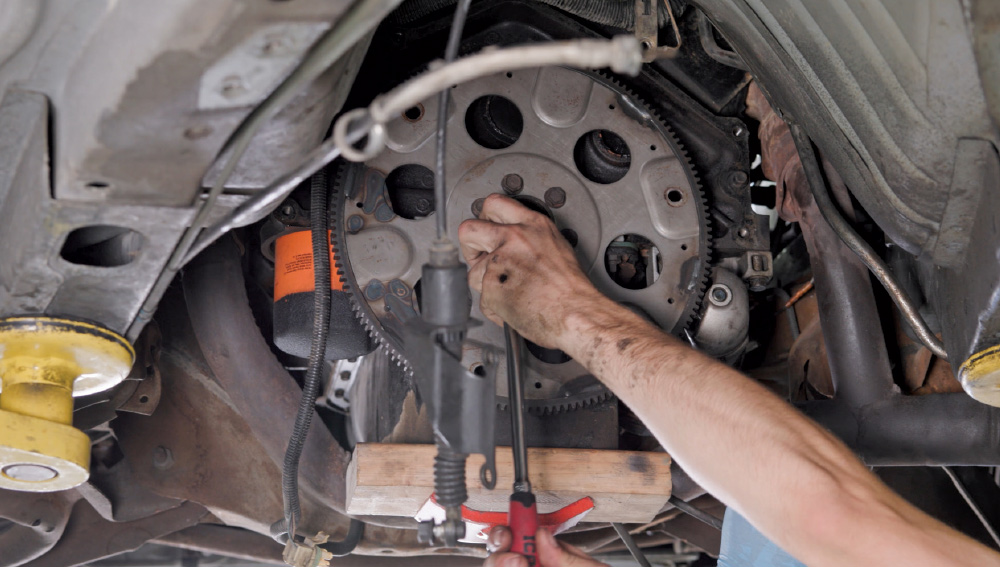
2. Dropping the tired 700-R4 transmission is the first task on the to-do list …
A mechanic's hand works underneath a raised vehicle, using a wrench to remove bolts from the flexplate near the engine oil pan.
3. … followed by the flexplate …
A mechanic's hand works underneath a raised car to remove the starter.
4. … and starter.
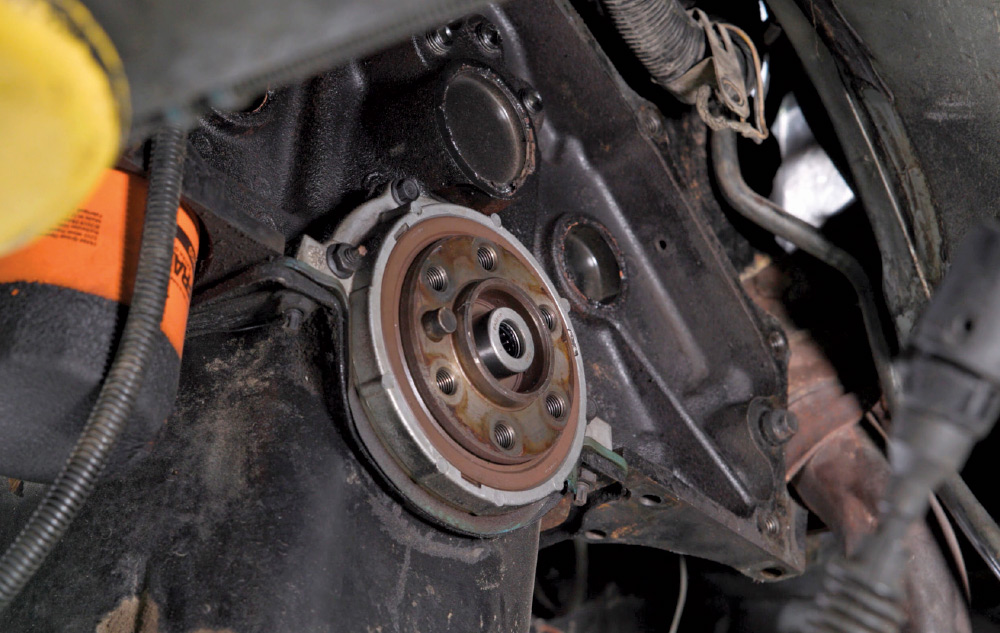
Close-up view of the rear of an engine block showing the pilot bearing where the automatic transmission was removed.
5. With the auto trans components out of the way, we can get the TREMEC installation started, beginning with the pilot bearing. This presses in the snout of the crankshaft flange and serves to support the input shaft of the transmission.
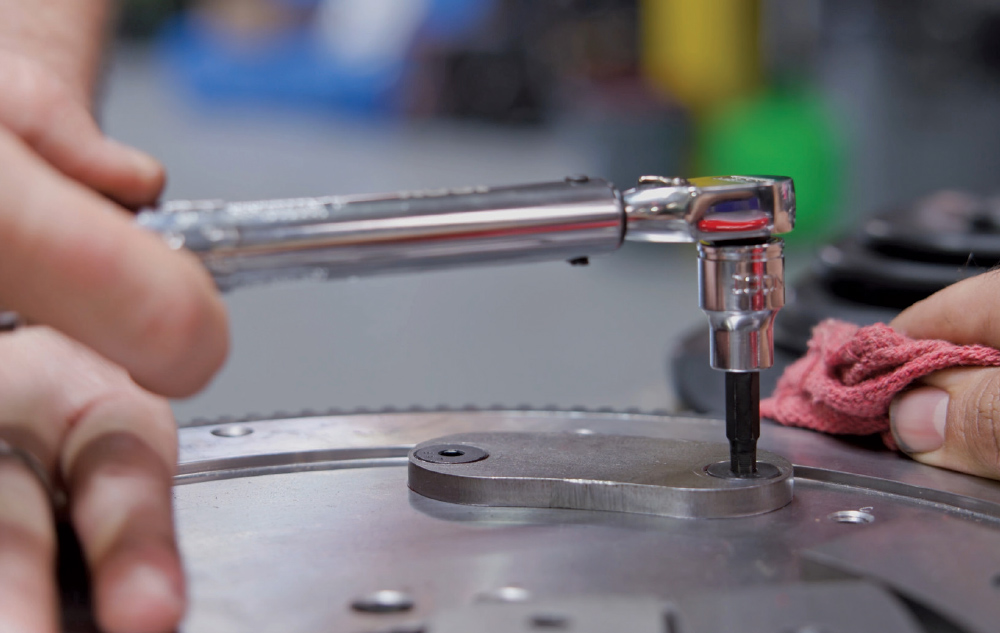
Close-up of hands using a torque wrench with an Allen bit to tighten a bolt on a clean, metallic flywheel assembly.
6. The McLeod flywheel comes balanced, but since our engine is externally balanced, a weight needs to be added to balance the flywheel to the engine. Detailed instructions provided with the kit relate which of the provided weights are to be used and where on the flywheel they’re to be installed. A dab of thread locker on each fastener ensures the weight will remain in place.
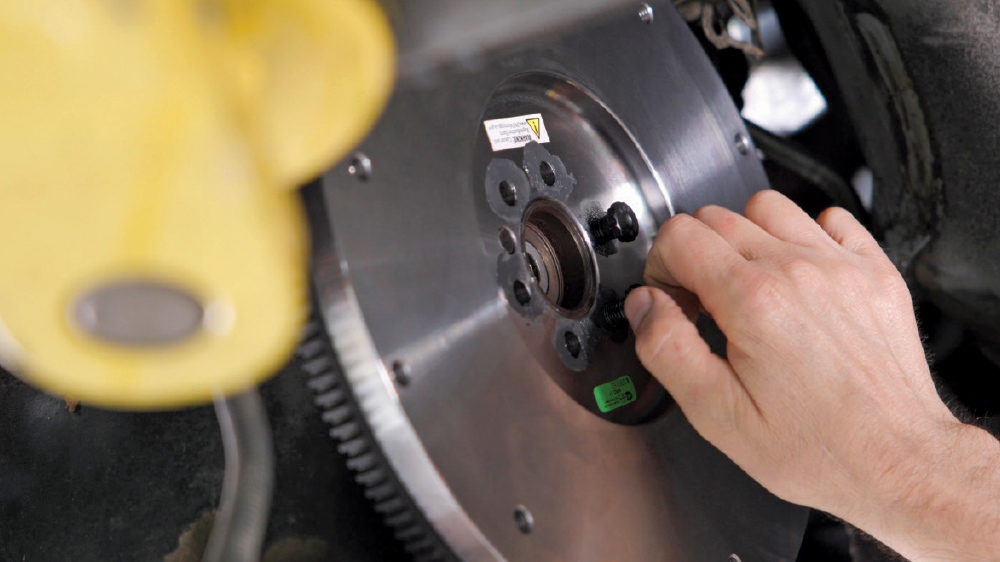
Close-up of a mechanic's hand installing a new metallic flywheel onto the rear of an engine, with the pilot bearing visible in the center.
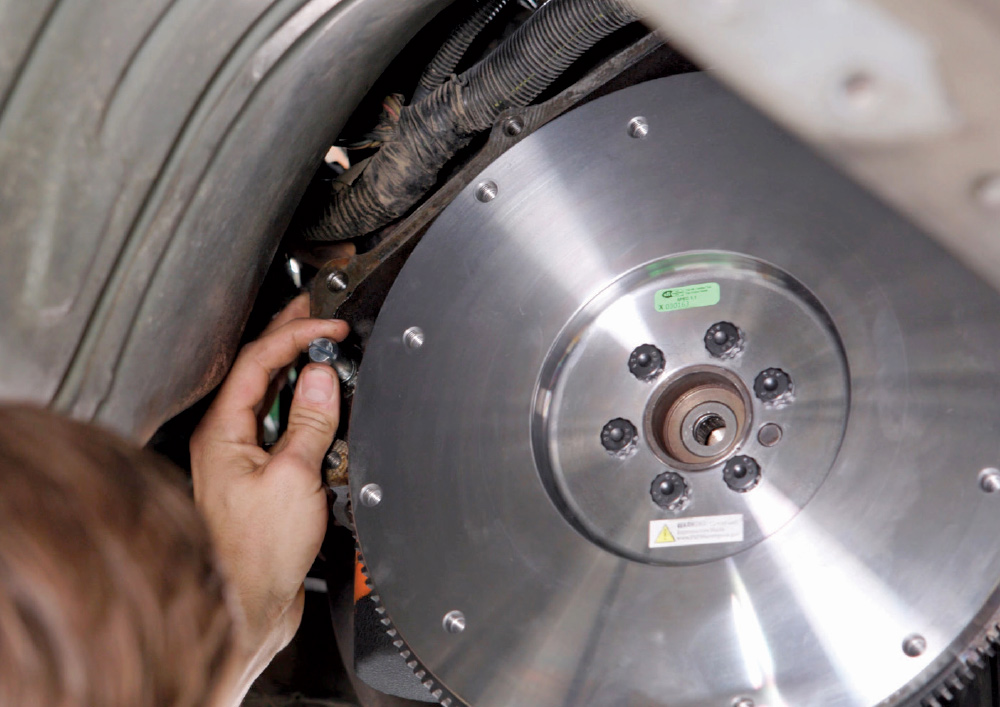
7. Next, the flywheel is installed onto the crankshaft using thread locker on the threads and lube under the flange of each fastener to ensure accurate torque readings (85 ft-lb).
A mechanic's view from beneath a raised car as he bolts the new silver bellhousing onto the rear of the engine block.
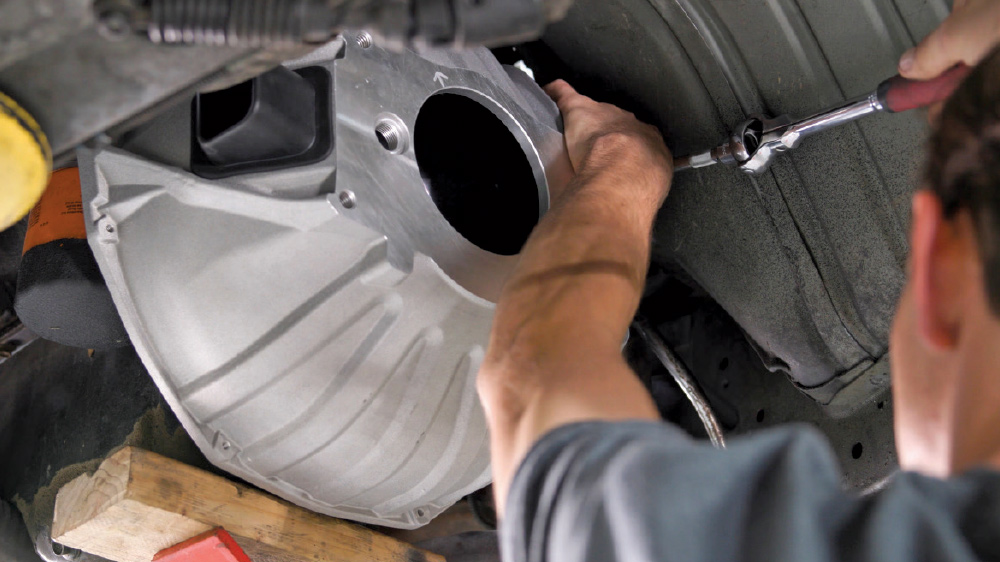
8. The bellhousing is installed temporarily as we prepare to check the runout between the transmission mounting register and the crankshaft centerline.
Close-up of a dial indicator tool mounted inside a silver bellhousing.
9. Due to machining variances and other uncontrollable variables, crankshaft centerline and the bellhousing/transmission centerline can vary. This can cause premature failure on transmission components and other undesirable factors. To prevent such a scenario, a dial indicator is mounted to the crankshaft and indicated off the transmission register hole on the bellhousing. A 360-degree tram of the dial indicator will determine the amount of runout between the flywheel and bellhousing register.
A mechanic's hand working under a car to secure the shiny new clutch assembly to the flywheel inside the bellhousing.
10. We found about 0.035-inch deviance, which we’ll sort with a pair of similarly spec’d offset dowel pins.
View from beneath a car showing two mechanics checking bellhousing alignment with a dial indicator and adapter plate before transmission installation.
11. These effectively shift the bellhousing in the necessary direction, putting the runout now to near 0.
A mechanic's gloved hands inserting a clutch alignment tool into the center of a newly installed clutch disc assembly.
Close-up view from beneath a car of a bright red clutch pressure plate bolted to the flywheel, ready for the transmission installation.
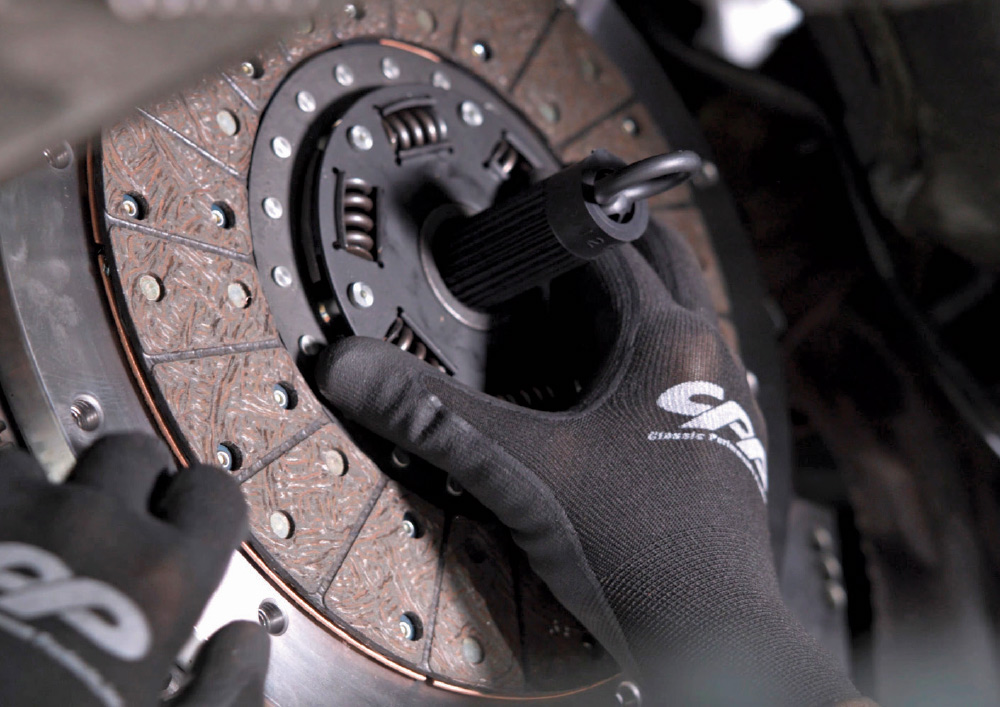
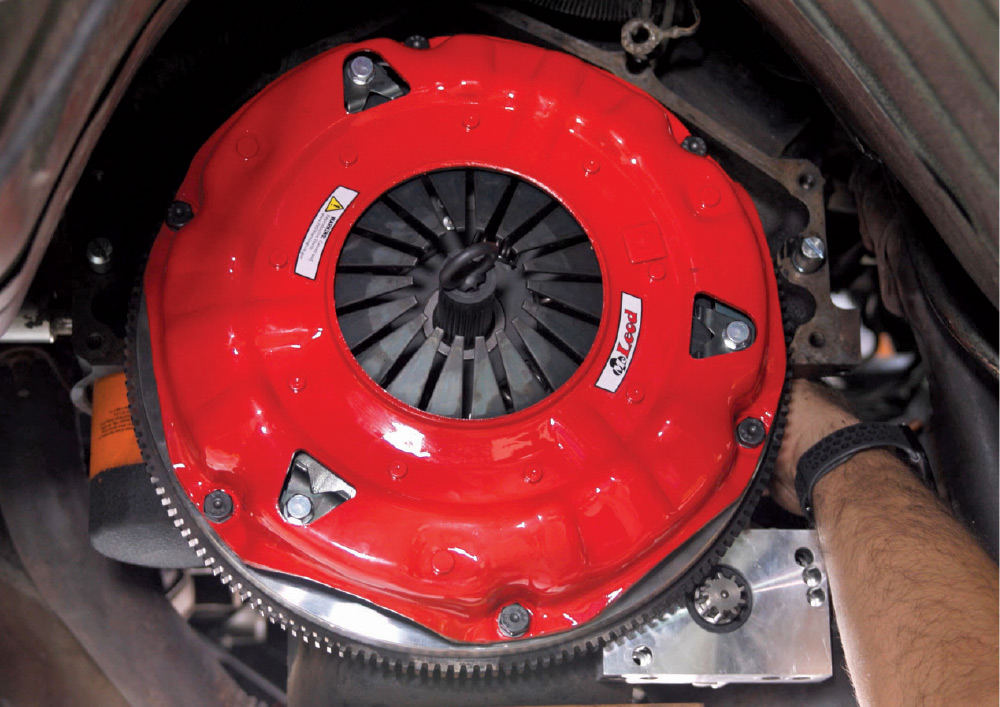
12-13. With the bellhousing dialed in, it’s removed once again and set aside as we install the McLeod clutch pack and pressure plate. Once again, thread locker is applied and the fasteners torqued to 45 ft-lb. Once the clutch installation is finalized, the bellhousing is reinstalled for the final time.
A mechanic assembling a red hydraulic throw-out bearing on a workbench, holding a thin metallic shim ring.
14. We opted to go with a hydraulic clutch setup, utilizing a hydraulic throwout bearing (as opposed to a hydraulic slave cylinder or mechanical clutch arm).
A mechanic wearing black "CPP" gloves installs a bearing or seal plate onto the end of a silver transmission housing.
15. This requires removal of the stock TREMEC front bearing retainer …
Close-up of a mechanic tightening bolts on a bright red hydraulic throw-out bearing assembly mounted around the splined input shaft of a transmission.
16. … replaced by the SST hydraulic throwout bearing.
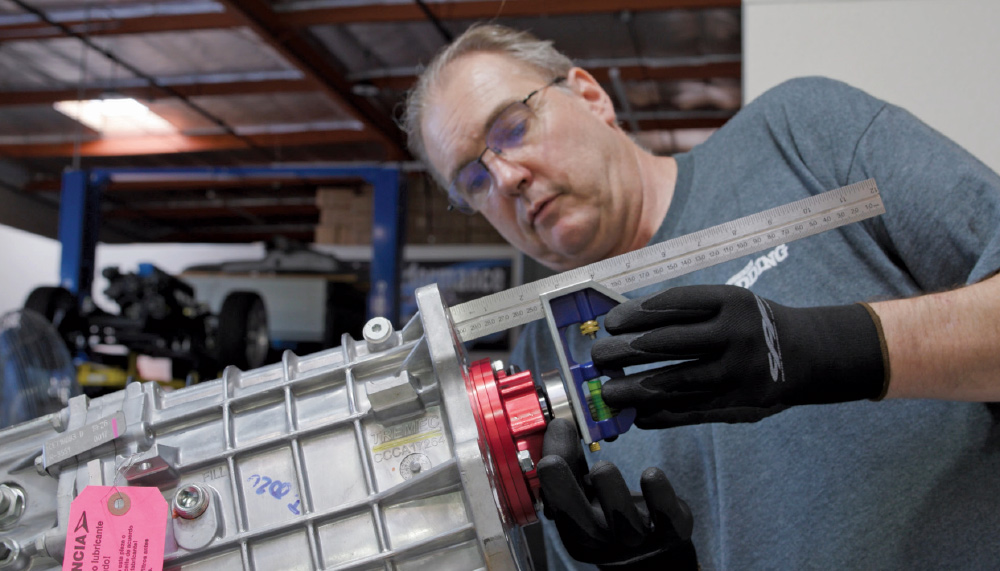
A mechanic wearing gloves and glasses uses a ruler to measure the position of the red hydraulic throw-out bearing on the front of a large, silver transmission.
17. Using a combination square, the distance between the edge of the transmission mounting surface and the contact surface of the throwout bearing is measured …
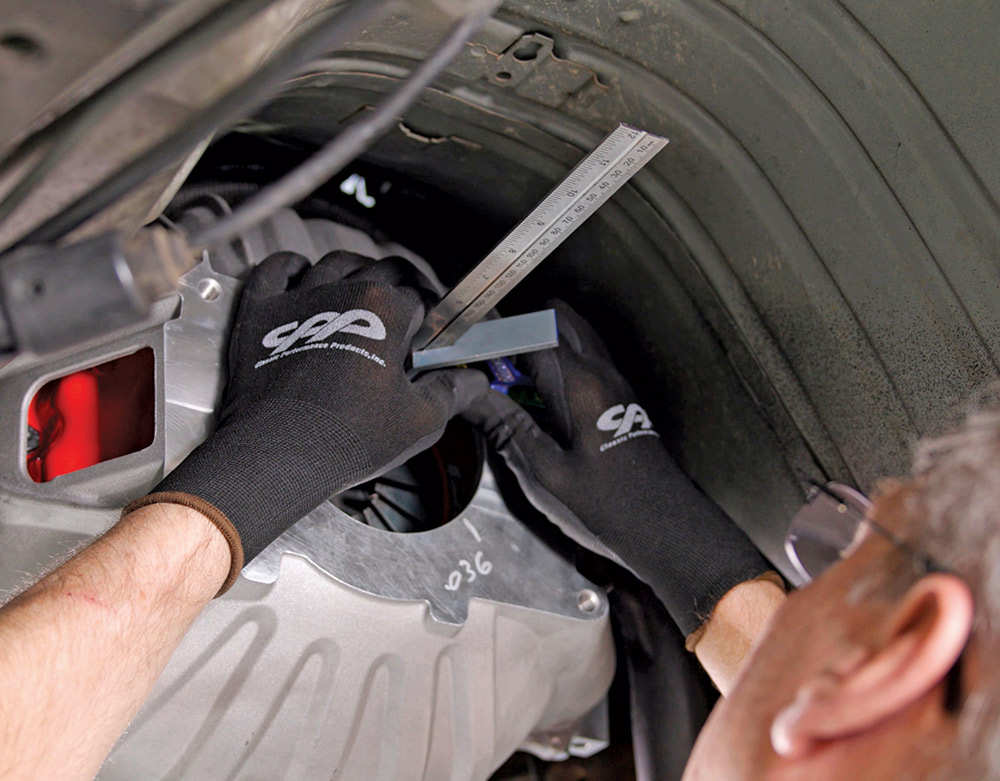
A mechanic in black gloves uses a small metal ruler to measure the depth of the pilot bearing inside the bellhousing mounted under a vehicle.
18. … and compared against the distance between the mounting surface of the bellhousing and the pressure plate fingers.
A mechanic's hand holds a smartphone displaying a photo of a ruler measuring the clearance between the clutch and the red pressure plate.
19. The result is around 0.100 inch clearance between the surface of the throwout bearing and the pressure plate’s fingers; well within spec.
A mechanic in black gloves attaches a braided stainless steel hydraulic line to the red throw-out bearing on the face of a transmission.
20. The hydraulic lines are installed and we’re just about ready to raise the TKX into place.
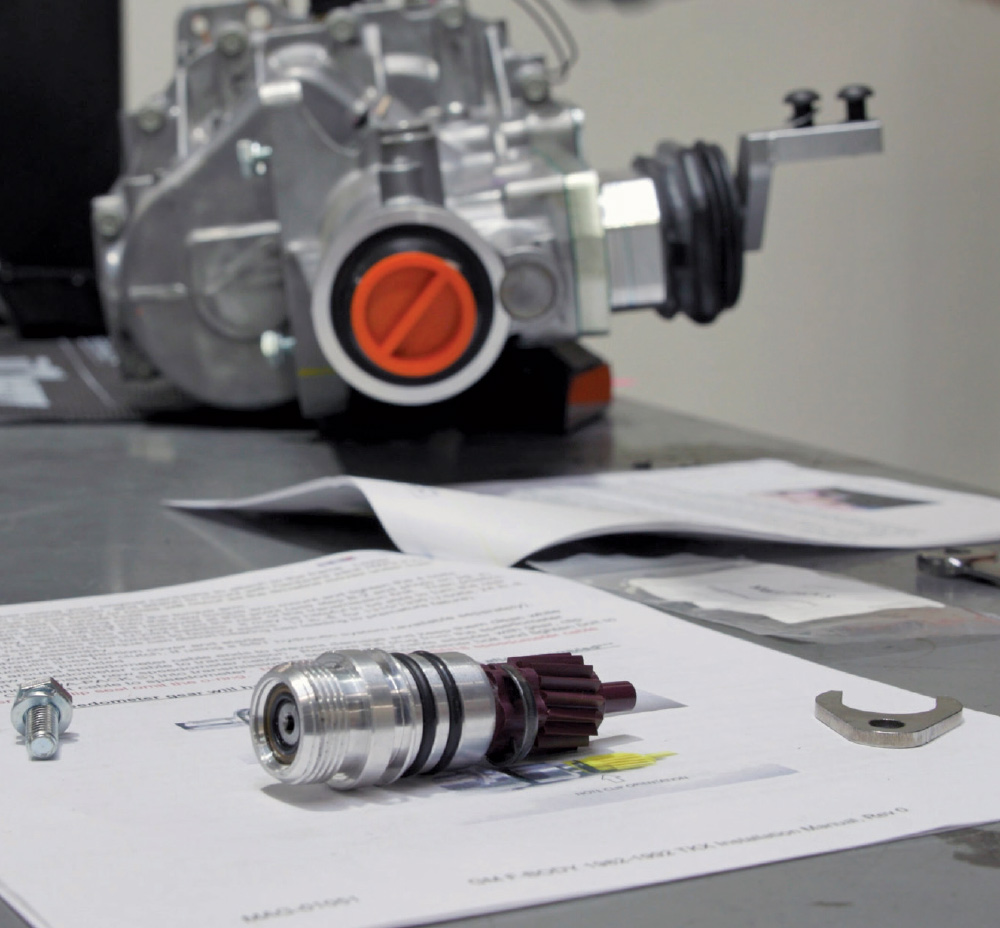
Close-up of a table showing a disassembled speedometer driven gear assembly and instructions, with a new silver transmission out of focus in the background.
A gloved hand installing the speedometer gear housing into the silver aluminum casing of a new transmission.
21-22. But first, we need to install the mechanical speedo gear assembly. There are a variety of gears available to ensure that the speedo reading is accurate, based on the specs of the rearend ratio and tire diameter.
A mechanic connecting colored wires to a harness plug near the car stereo and center console.
23. Inside the center console, there are a variety of wires that need to be connected. First, the purple and green/white wires are for the neutral safety switch. These can be run either to the integrated neutral safety switch on the trans or can be attached to a clutch safety switch mounted on the clutch pedal. These wires complete a circuit via the neutral safety switch when the trans is in either Neutral or Park, or the clutch pedal is engaged, allowing the starter to crank. The smaller blue and orange wires are for the reverse lights circuit and will be extended and connected to the appropriate switch on the transmission. The remaining wires will not be used.
Overhead view of a folded paper "CUTTING TEMPLATE" with a diagram and instructions for modifying a car's shifter opening.
A black layered rubber shifter boot/seal resting on a paper template, with a mechanic's gloved hand visible above it.
24-25. The original automatic transmission used a cable to connect it to the floor shifter, so we’re going to have to cut a hole in the floor to facilitate the TKX’s shifter. Thankfully, SST provides a template that locates the shifter’s position using existing features on the floor.
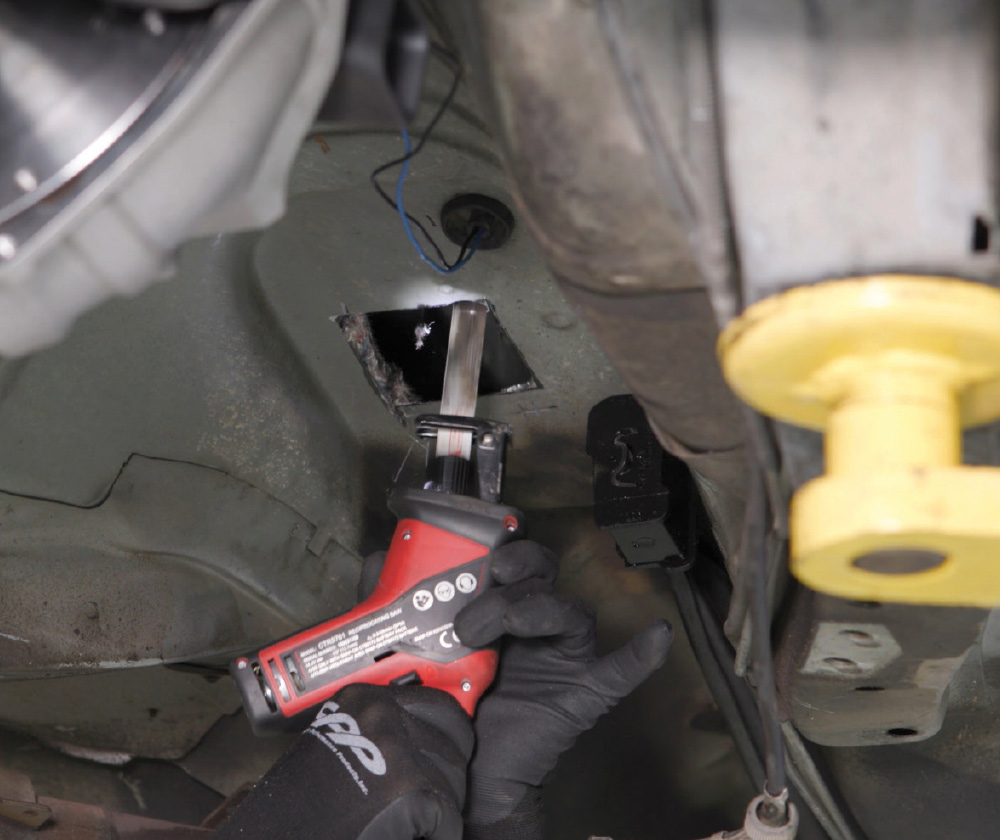
A mechanic uses a red reciprocating saw to cut a rectangular hole in the transmission tunnel floor of a car from underneath.
26. We managed to leave the center console in place and cut the floor from below, saving ourselves from the sea of swarf that would undoubtedly find itself embedded in the carpet if we cut from the inside of the car.
A gloved hand presses a black rubber shifter boot/seal into the newly cut hole on the transmission tunnel floor of a car.
27. We also trimmed the provided shift boot and installed it from below to weatherproof the shifter area.
The new silver manual transmission on a black transmission jack is being guided into position underneath a raised vehicle.
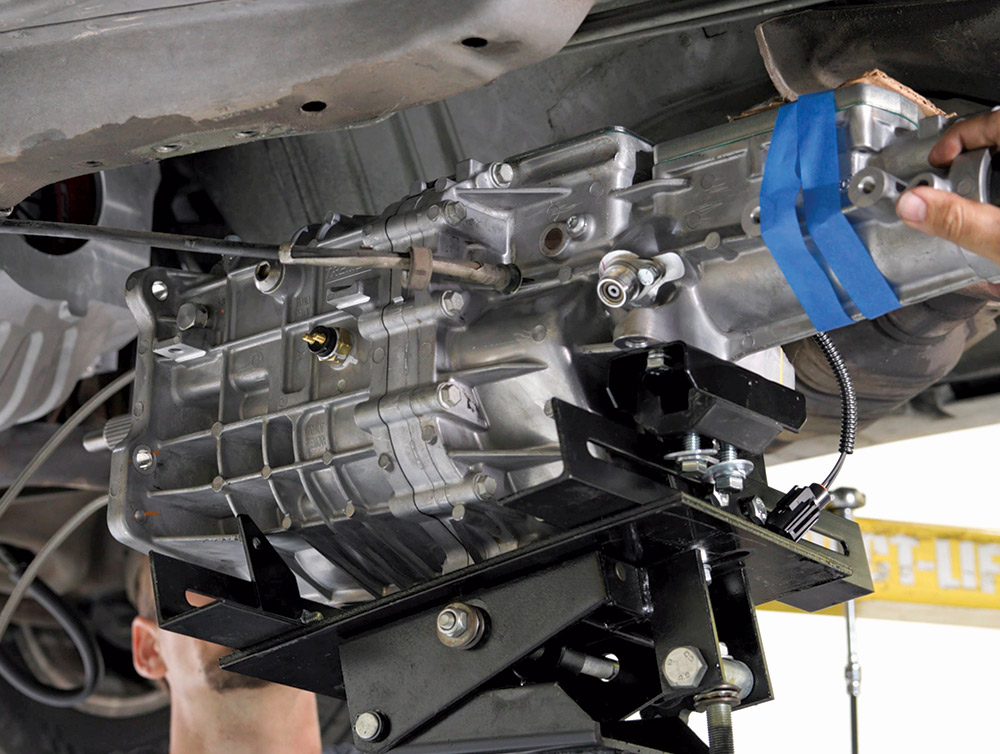
28. With that, the TKX is raised into place and installed behind the bellhousing.
Close-up of a hand shifting the new manual shifter with a silver handle and black boot, installed in a car's center console.
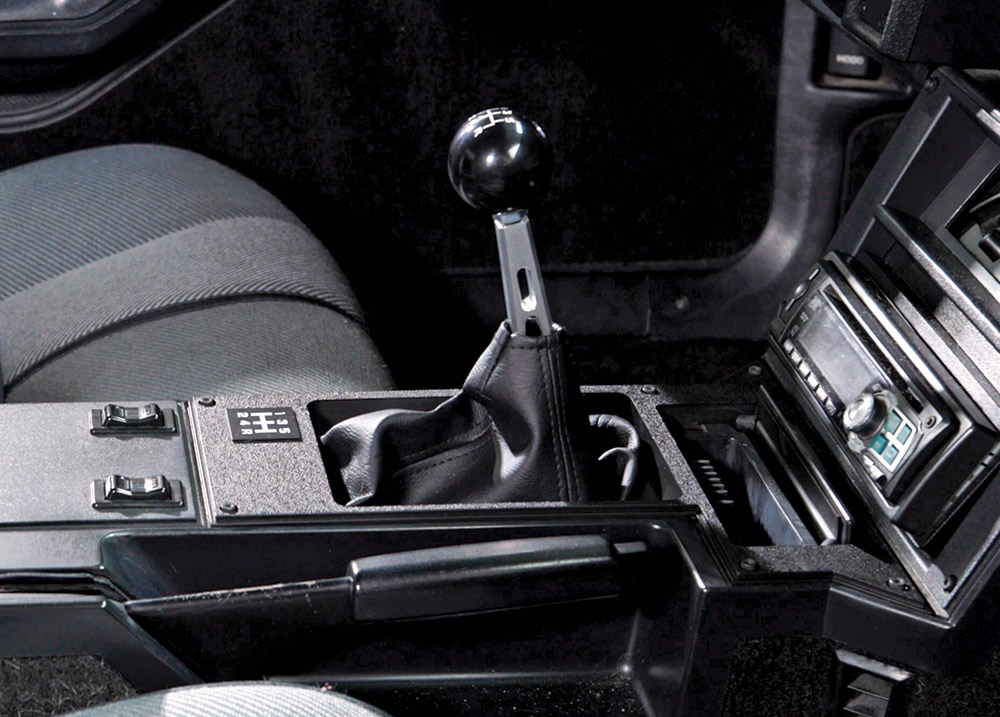
29. Inside, the shifter, knob, and boot have been installed, as has a five-speed panel from Classic Industries.
View from beneath a car showing a mechanic's hands bolting a black crossmember/mount to the chassis and the newly installed silver transmission.
30. SST provides a rear crossmember that not only supports the back of the TKX trans but also provides a mounting point for the torque arm.
A mechanic with a beard and glasses is removing or installing the black brake booster from the engine bay of a white car.
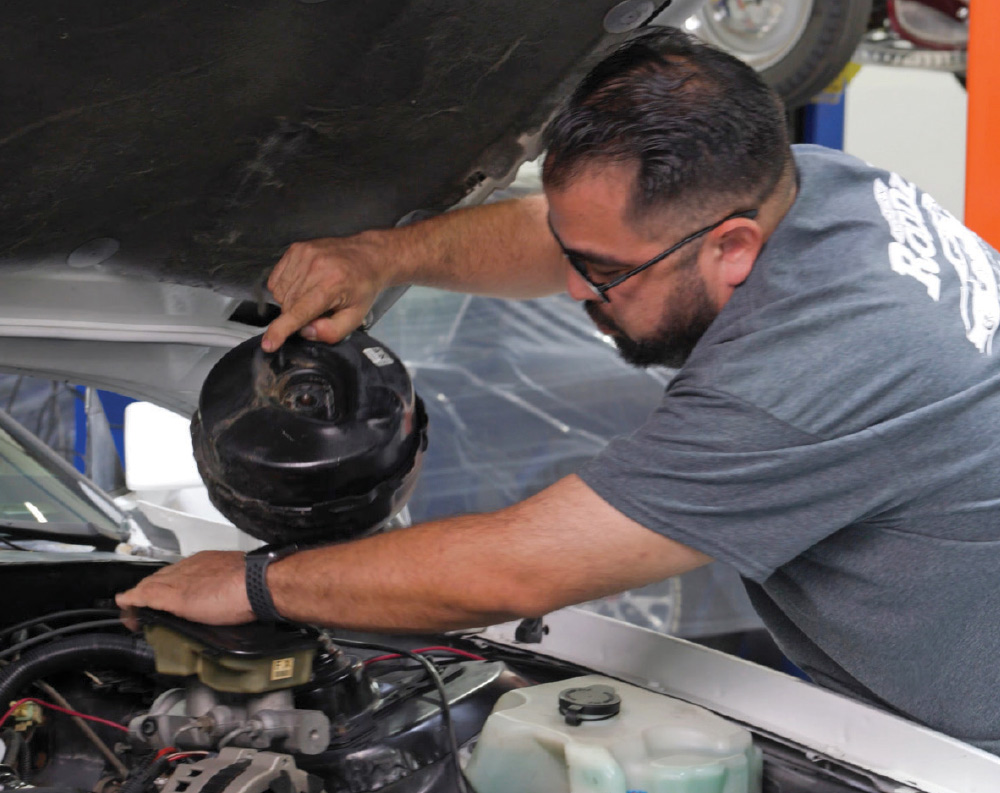
31. The brake booster is temporarily removed while the firewall is drilled for the clutch master cylinder, reservoir, and bracket.
Close-up of a mechanic's hands using a syringe to draw or add clear fluid (likely brake fluid) from a vehicle's master cylinder reservoir.
32. Before the clutch master assembly is bolted in place, we pushed some DOT 4 brake fluid into the system to help prime and bleed it. While we were at it, we also filled the transmission with the recommended fluids provided by SST. Once all the fluids were added and the clutch master and reservoir permanently in place, the brake booster was reinstalled.
Close-up of a car's interior showing a new manual shifter with a black ball knob and leather boot installed in the center console next to the handbrake and radio.
View from beneath a car showing the new silver manual transmission and bellhousing successfully installed and mounted with a black crossmember.
33-34. Thanks to the extensive nature of the PerfectFit kit from SST, our five-speed manual swap looks and feels like a factory conversion both inside the car and out.