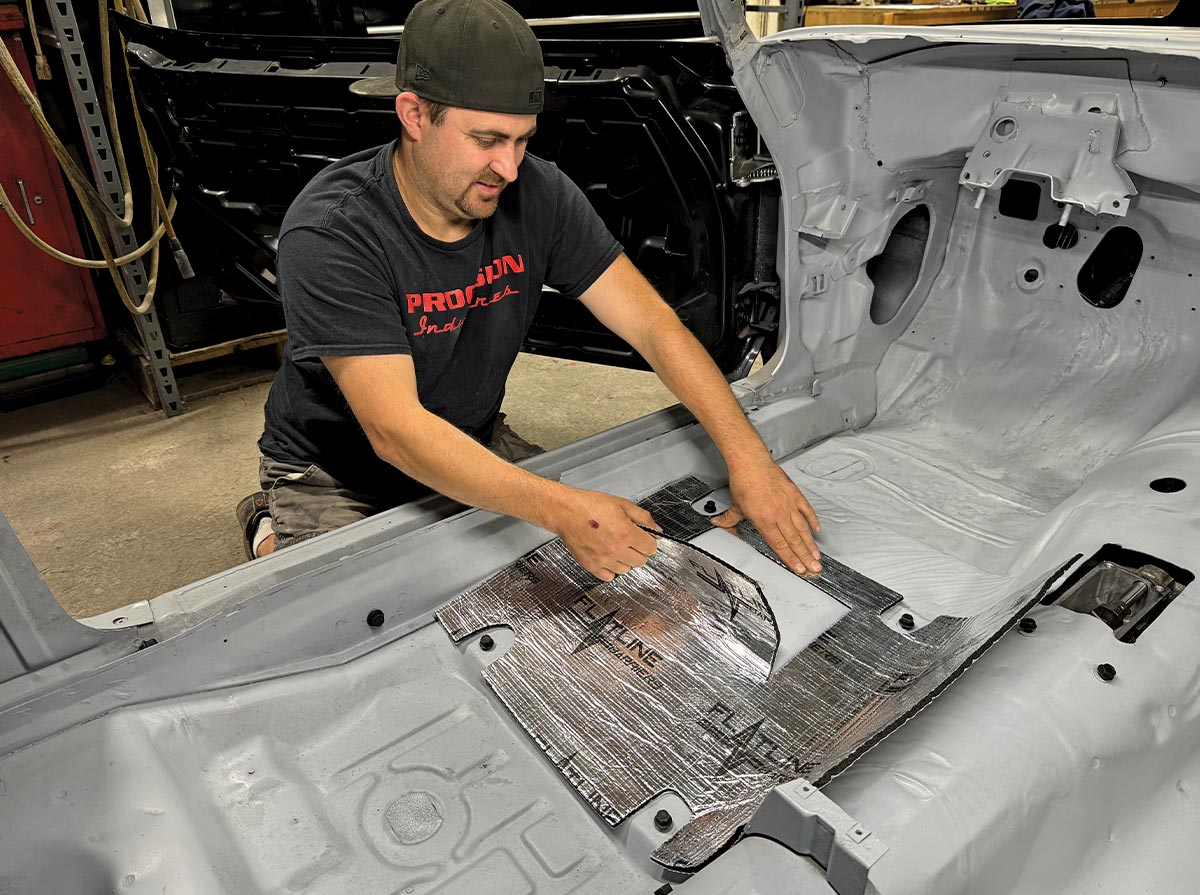
ACP department heading TECH
InTheGarageMedia.com
technician applying sound-deadening insulation in the interior of a Camaro's floorpan

Rattle No More

Increasing Second-Gen Camaro Cabin Comfort

BY Chuck Vranas Images by THE AUTHOR
T

here’s nothing worse than hitting the road in your high-performance Chevy and being assaulted by excess heat and vibration as you lay down the miles. Between adding an upgraded driveline and high-flow exhaust, the amount of heat generated has a direct connection through the floorpan. This moves straight into your interior and there’s no way the factory jute-style padding will suffice to handle the job. Regardless of whether you’re taking on a full build or simply making updates, it’s a solid idea to think about upgrading your insulation complemented by sound deadening to help tame all that rattle ’n’ roll generated by the road. We’re here to tell you that there’s a simple solution to the problem, one that you won’t even break a sweat over, when installing products direct from the makers of Flatline Barriers.

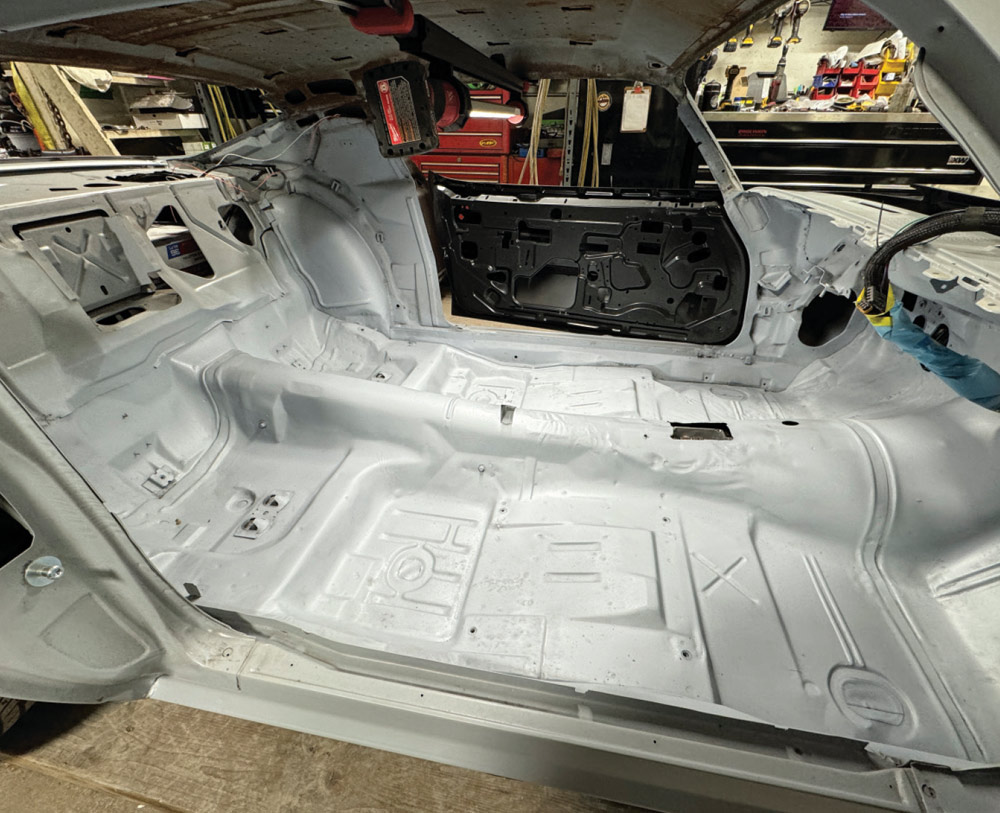
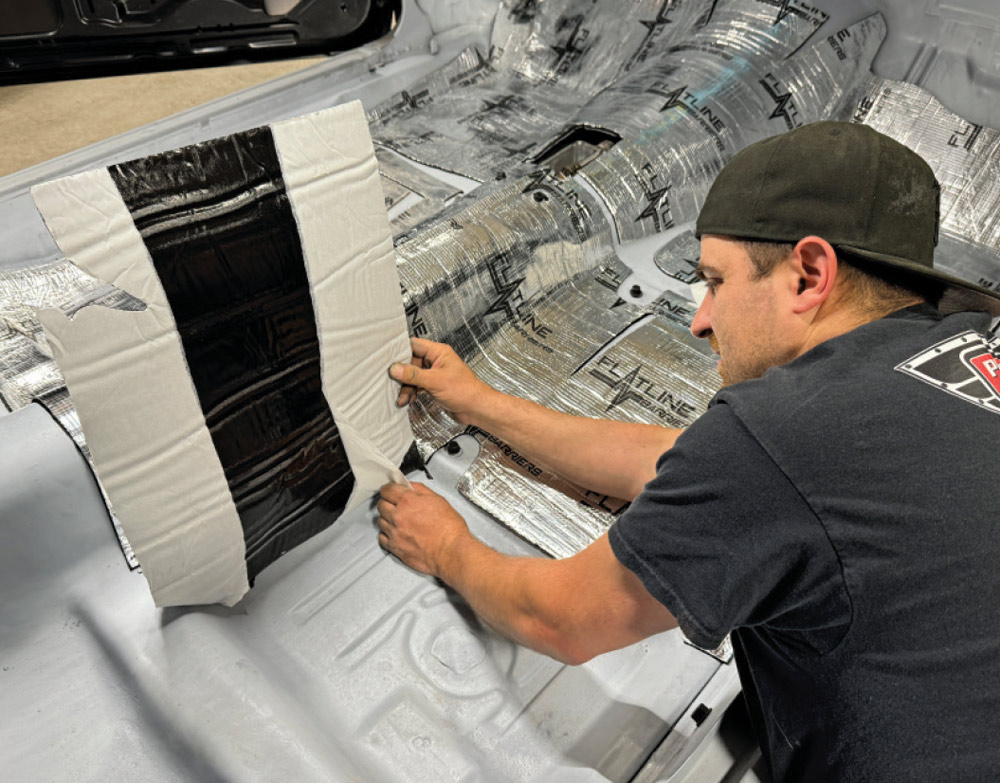
Regular readers of All Chevy Performance will recognize the 1971 Camaro showcased across our pages, having followed its transformation from that of a bare shell. Over time, we focused on its suspension, brakes, LS driveline, cooling, exhaust, sheetmetal, and wiring. As we head deep into the interior, our initial thought was to give it a more civilized experience by trying to eliminate excess heat and road noise, especially with it packing an aggressive LS underhood. Recently, we followed up at Procision Industries in Taunton, Massachusetts, where shop owner Pat O’Brien was preparing to move forward by taking on this very subject. After reviewing various offerings on the market, he made a decision to contact Classic Industries, one of the distributors for Flatline Barriers.

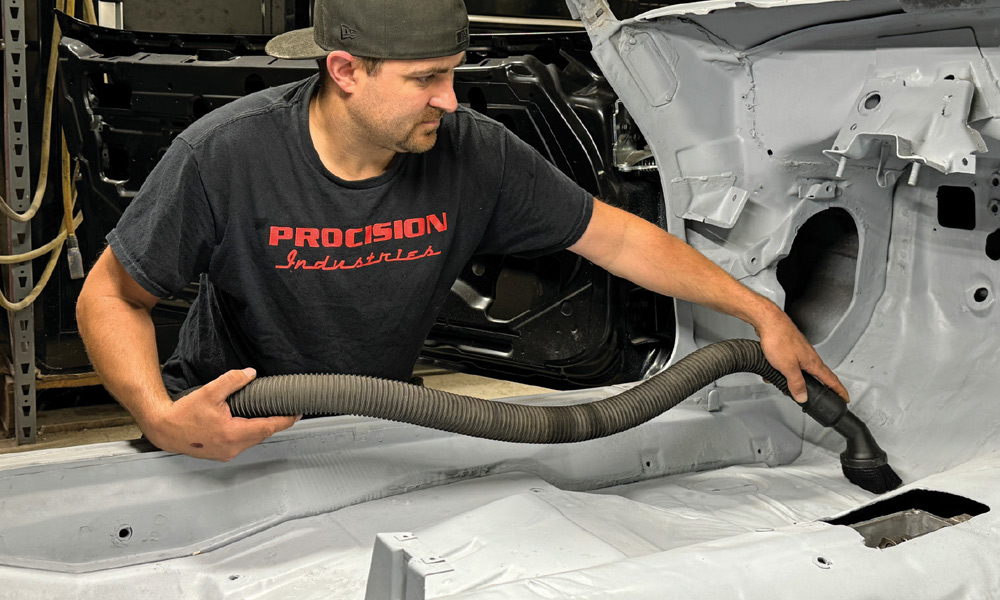
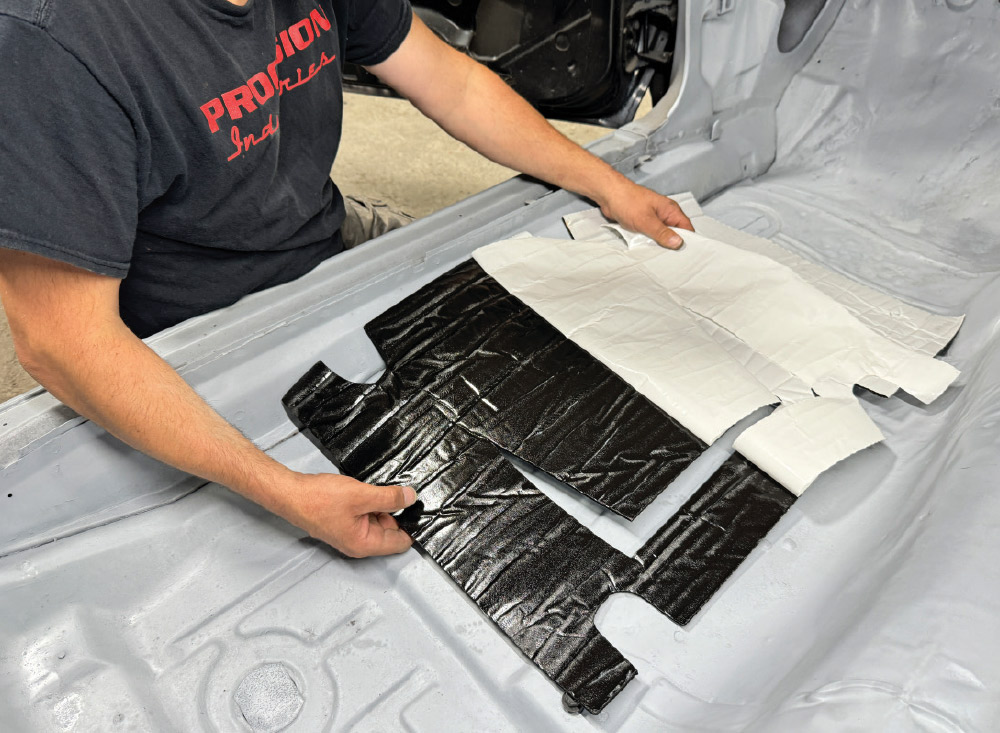
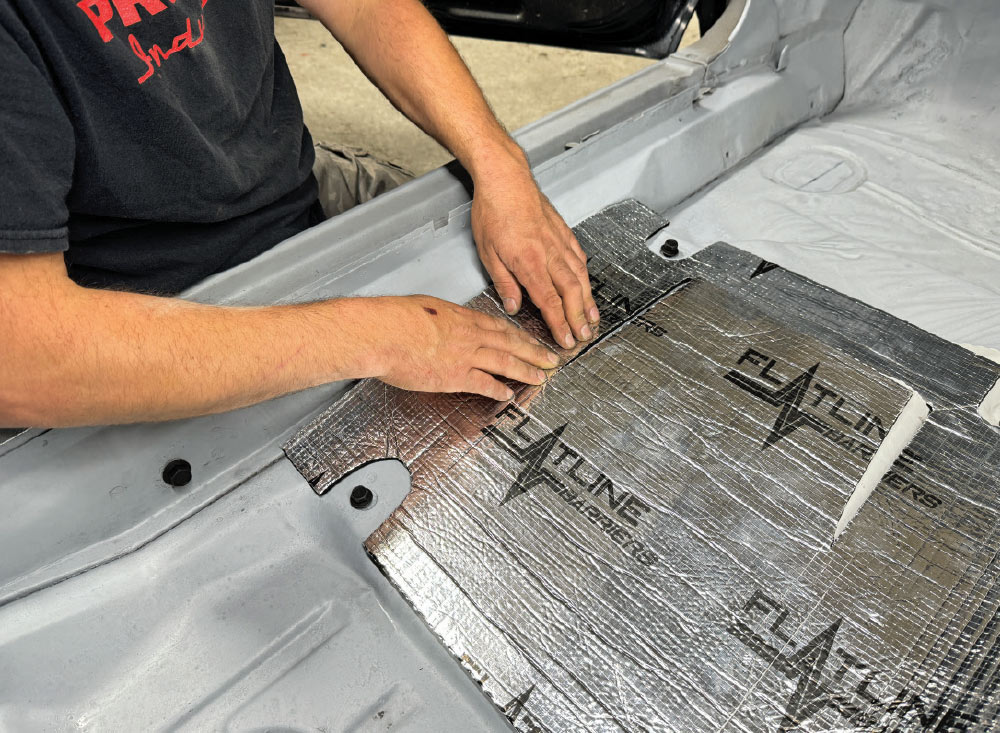
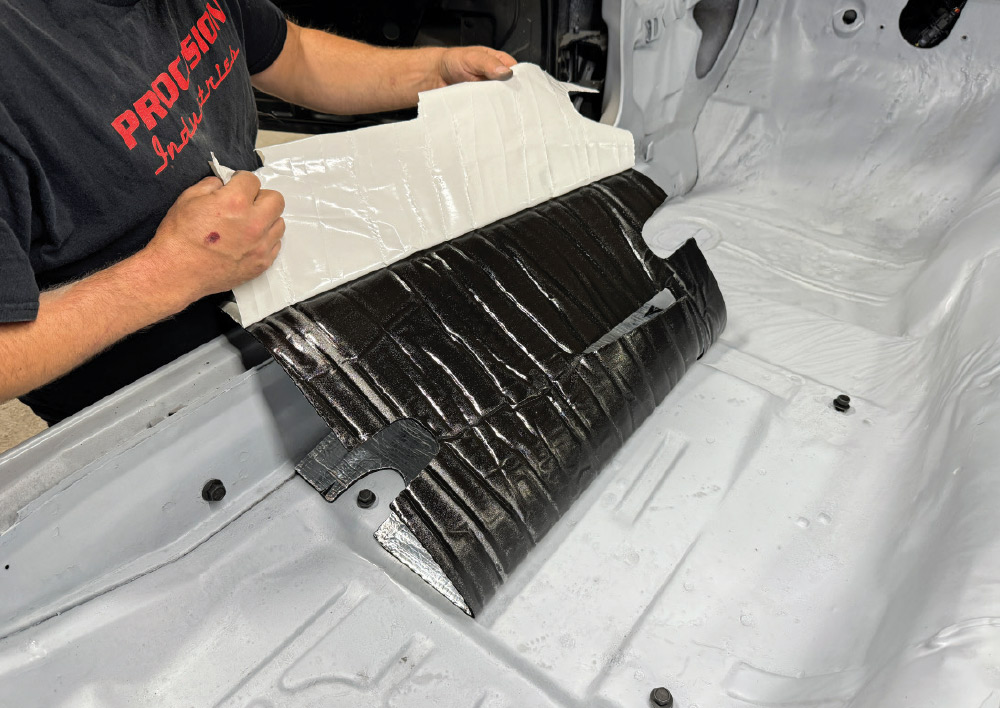
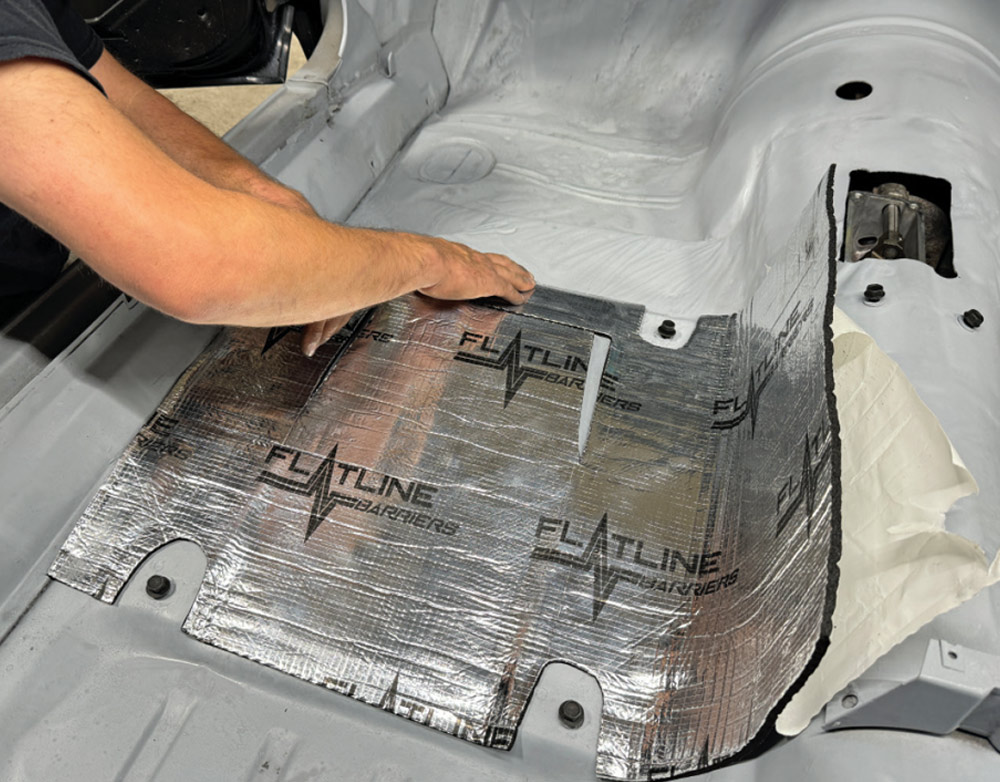
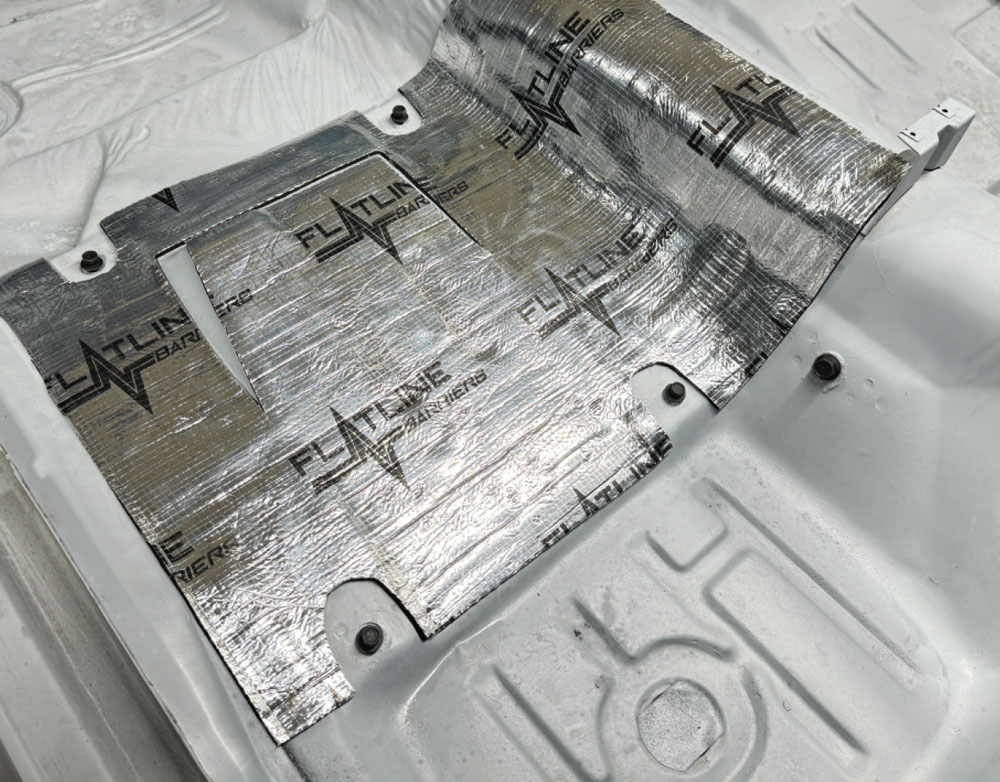
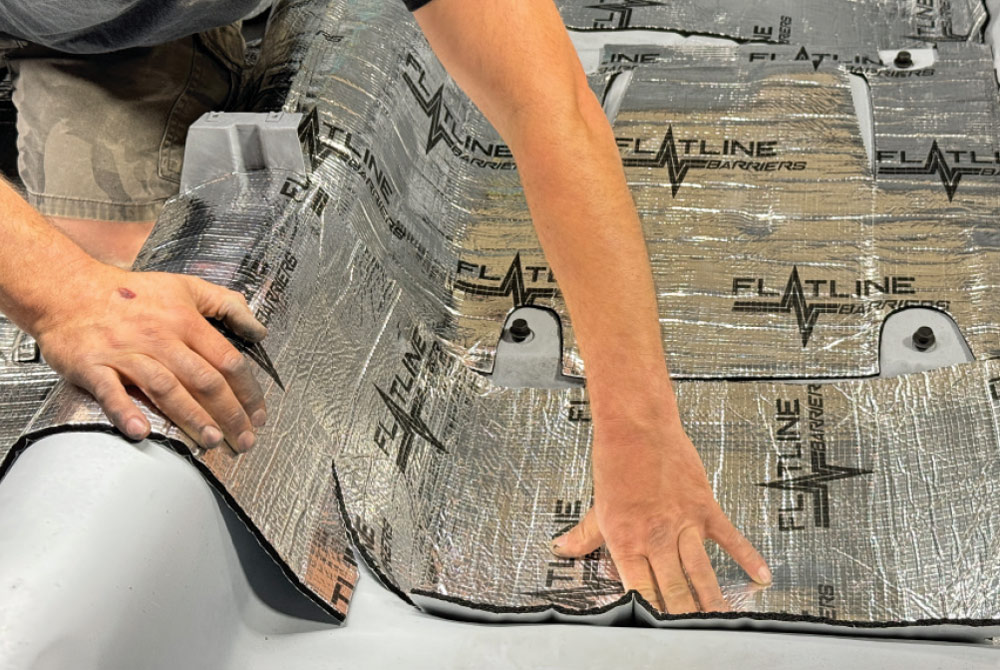
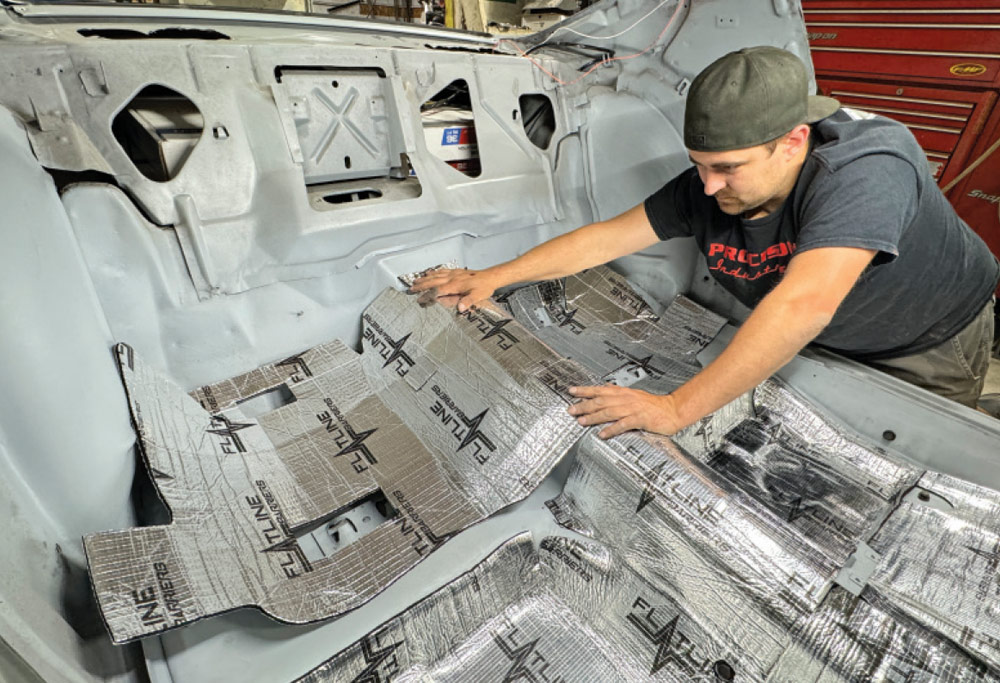
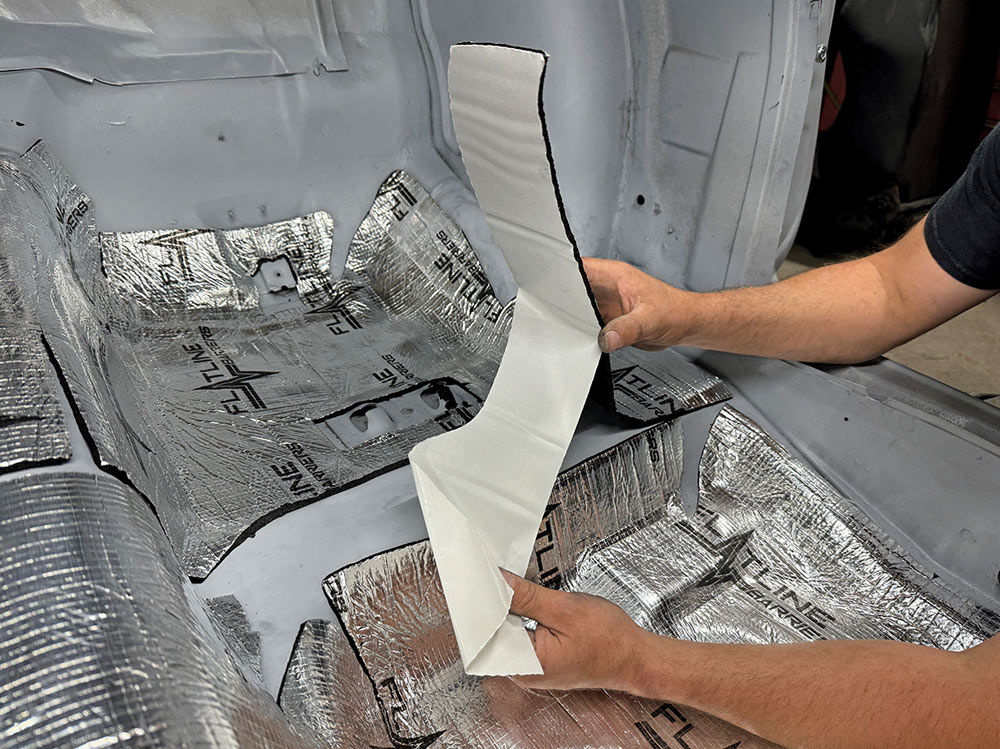
If your company slogan is “Where heat and sound meet their maker,” you’d better be able to live up to it. We’re here to tell you that the product, comprised of an external aluminum thermal barrier, eliminates radiant heat while its second layer of ultra-lightweight foam silences unwanted noise, vibration, and resonance with a totally light-as-a-feather formula. With its simple peel ’n’ stick application requiring no special tools except for hand pressure and a razor (or scissors) to occasionally trim, it’s a snap to install, especially for a DIY afternoon project once the area is prepped. It’s also important to note that the product is extremely flexible and able to be installed in any ambient temperature.

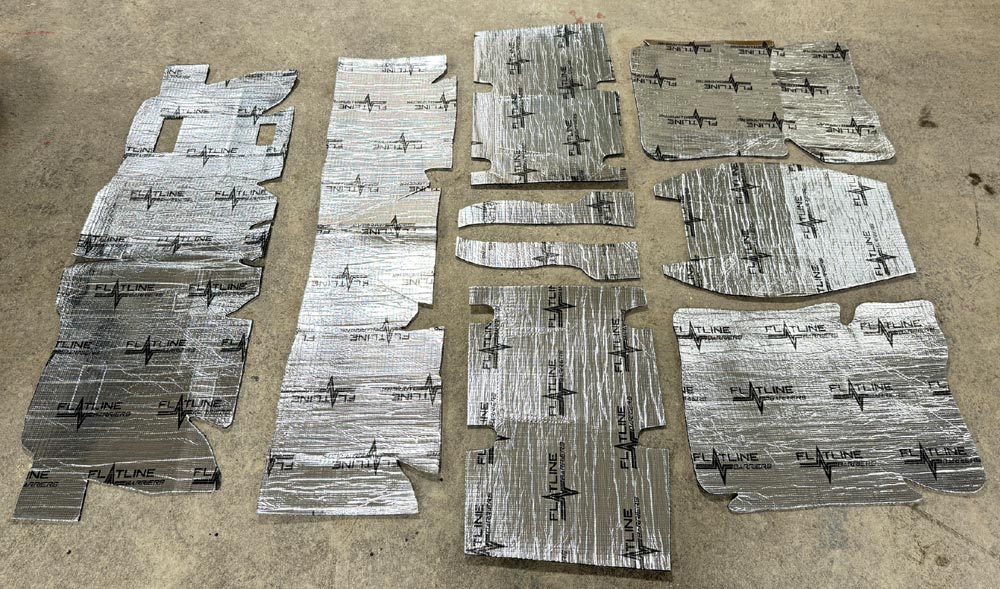
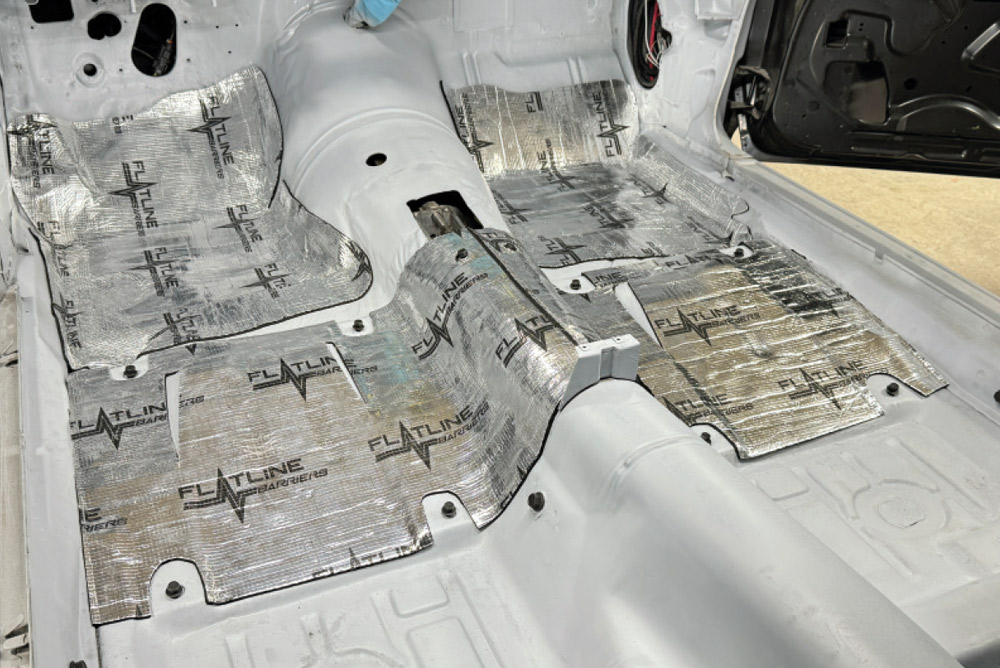
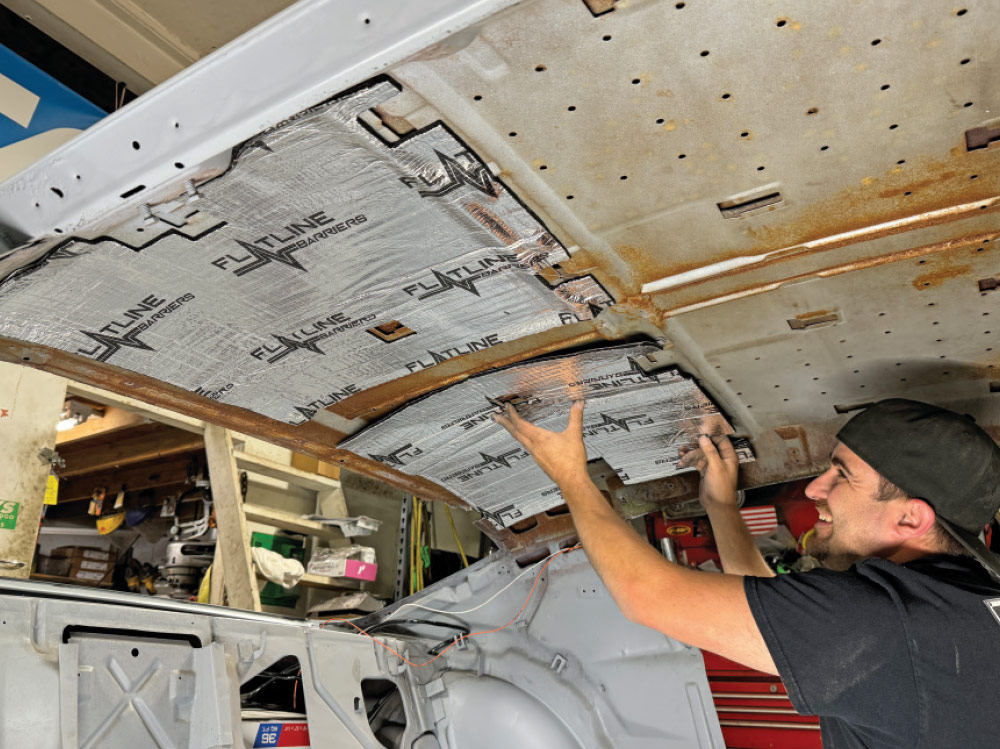
Flatline Barriers has engineered complete precut kits for an exact fit in an endless array of muscle cars and trucks while also offering universal kits for custom applications. For our installation, we selected three individual precut kits to cover the floor, roof, and door areas with part numbers TABF2012, TABF2031, and TABF2004, respectively. By raising the bar, they have incorporated cutting-edge technology and materials to create a true lightweight solution in significantly reducing unwanted heat and sound from your interior. Follow along as we show just how simple and effective an afternoon install can be.

partially restored Camaro in a garage, with Flatline insulation sheets prepared for installation
1. To add the perfect combination of insulation and sound deadening to the second-gen Camaro, we contacted Classic Industries for three Flatline Barriers Direct-Fit kits to work with our application, including ones for the entire floor, roof, and doors.
stripped and primed interior of a Camaro, ready for insulation and restoration work
2. Here, you can see the complete empty interior as this is an ongoing full build, which has been stripped to bare metal and sealed with epoxy primer.
technician vacuuming the Camaro's floor to prepare for insulation installation
3. To begin, Pat O’Brien of Procision Industries prepares to clean the area, starting with completely vacuuming it of any visible debris.
technician cleaning the Camaro's floor with compressed air and a microfiber cloth before applying insulation
4. Next, the manufacturer recommends cleaning the application surface with a degreasing agent. For this job, O’Brien used UPOL System 20 Fast Drying Degreaser (PNUP2012). Making sure to cover the entire application surface, spray one section at a time and wipe down with clean microfiber-style cloths. Then allow ample time to completely dry before proceeding to the next step.
flatline insulation sheets cut and organized for installation inside a Camaro
5. The direct-fit floor kit (PN TABF2012) comes complete with nine precut sections, as shown, ready for installation with the only tool needed being a razor blade and/or scissors for minor trimming, if needed.
technician installing fasteners in the Camaro's interior to secure components
6. Be sure to have all bolts in place for fitment in cutting access areas prior to installing the insulation sections. Here you can see the mounting bolts for the center console installed as a guide. Remember, any wiring you wish to have access to after the installation will need to remain above the insulation.
technician carefully laying down Flatline insulation around the Camaro's transmission tunnel
7. Test-fit every section prior to the installation. Here, the driver side floor seat section is precut to allow for the seat mounting bolts as well as raised area of the floorpan.
preparing adhesive backing for sound-deadening insulation in the interior of a Camaro
8. O’Brien then peeled back half of the adhesive barrier backing to begin the installation, Note, you should be sure of perfect alignment prior to placement as the self-adhesive barrier is extremely sticky and unforgiving to movement once set in place.
final adjustments being made as the technician installs Flatline sound-deadening insulation on the Camaro’s floor
9. With half of the section set in place, it’s as simple as applying hand pressure to the outer surface to secure it to the surface of the floor while following all the curves in the area.
technician peeling adhesive backing from insulation for Camaro’s interior installation
10. Follow by removing the balance of the adhesive barrier backing to prepare it for installation.
insulation being aligned and applied over the Camaro’s transmission tunnel
11. Press into place and move across the section, moving toward the center of the floorpan.
cutting insulation to fit around components inside the Camaro's floorpan
12. As the section was approaching the transmission tunnel, a simple cut was made to accommodate the bolt for the center console using a razor blade.
insulation positioned and fitted around fasteners near the Camaro’s transmission tunnel
13. One simple cut made for a perfect fit.
insulation fully applied over the Camaro's transmission tunnel and floor
14. The completed section was a snap to install; note how perfectly it conforms to the floorpan.
final insulation pieces secured and aligned in the Camaro’s floorpan
15. The front driver and passenger floor seat sections are now set in place.
technician pressing sound-deadening insulation onto the Camaro’s firewall area
16. The driver side footwell section was then test-fitted as the next step of the installation.
adding black underlay insulation layer to the Camaro’s interior floor
17. Once fitment was confirmed, half of the adhesive barrier backing was removed to get started. Continue to complete while pressing the panel into place.
completed insulation covering Camaro's rear floor and transmission tunnel
18. Here you can see the completed installation to the front half of the interior floorpan.
technician applying insulation to the Camaro's interior kick panel area
19. The transmission section was then test-fitted into place.
technician trimming insulation around the shifter opening for a precise fit
20. Since there are many variations for transmissions, depending on whether your car is stock or modified, the section is left blank, allowing the user to customize it to fit their needs. This area was completed with a razor blade once confirmed.
completed insulation covering the Camaro's floor and transmission tunnel
21. Nice, clean fitment to the tunnel is complete.
technician pressing insulation into the contours of the rear seat area
22. The rear passenger footwell area comes in one large section. Be sure to test fitment before getting started.
applying black underlay to the Camaro's floor for added soundproofing
23. For ease of installation, O’Brien chose to remove small sections of the adhesive barrier backing and start the placement from the transmission tunnel, working his way outward on each side into the footwells.
technician fitting insulation panels to the Camaro’s rear interior
24. The largest single section for installation was for the rear seat area of the floorpan. Once again, test-fit to ensure fitment and gradually remove adhesive barrier backing and press into place, conforming to all areas.
technician peeling adhesive from insulation for rear floor installation
25. Next, the smallest filler panel sections were set into place.
fully insulated floorpan with neatly fitted sound-deadening material
26. Here, you can see the incredible amount of coverage provided by the kit, covering every area of the floorpan with Flatline Barriers insulation and sound-deadening material.
installing insulation on the Camaro’s roof for noise reduction
27. Placement of the roof insulation and sound-deadening kit (PN TABF2031), once the surface area was prepped, was simple, taking only a few minutes to install.
interior door panel prepped with Flatline Barriers insulation
28. Our final step was prepping the doors for the sound deadening and insulation kit (PN TABF2004). Here you can see the inner sections once they were set in place.
passenger side door fully insulated for sound and heat protection
29. Finally, a test-fit was done on the inner door section; once confirmed, the adhesive barrier backing was peeled, and they were set in place. Note there are several pre-punched areas that can be opened up for inner door access, if needed.
complete interior of the Camaro fully lined with Flatline Barriers insulation for sound and heat reduction
30. The finished installation is simply amazing with not only its complete interior coverage but also the time saved during the installation process. The second-gen will now benefit from excellent sound deadening once it hits the road, and to us that’s well worth the investment.
SOURCES