 Tech
Tech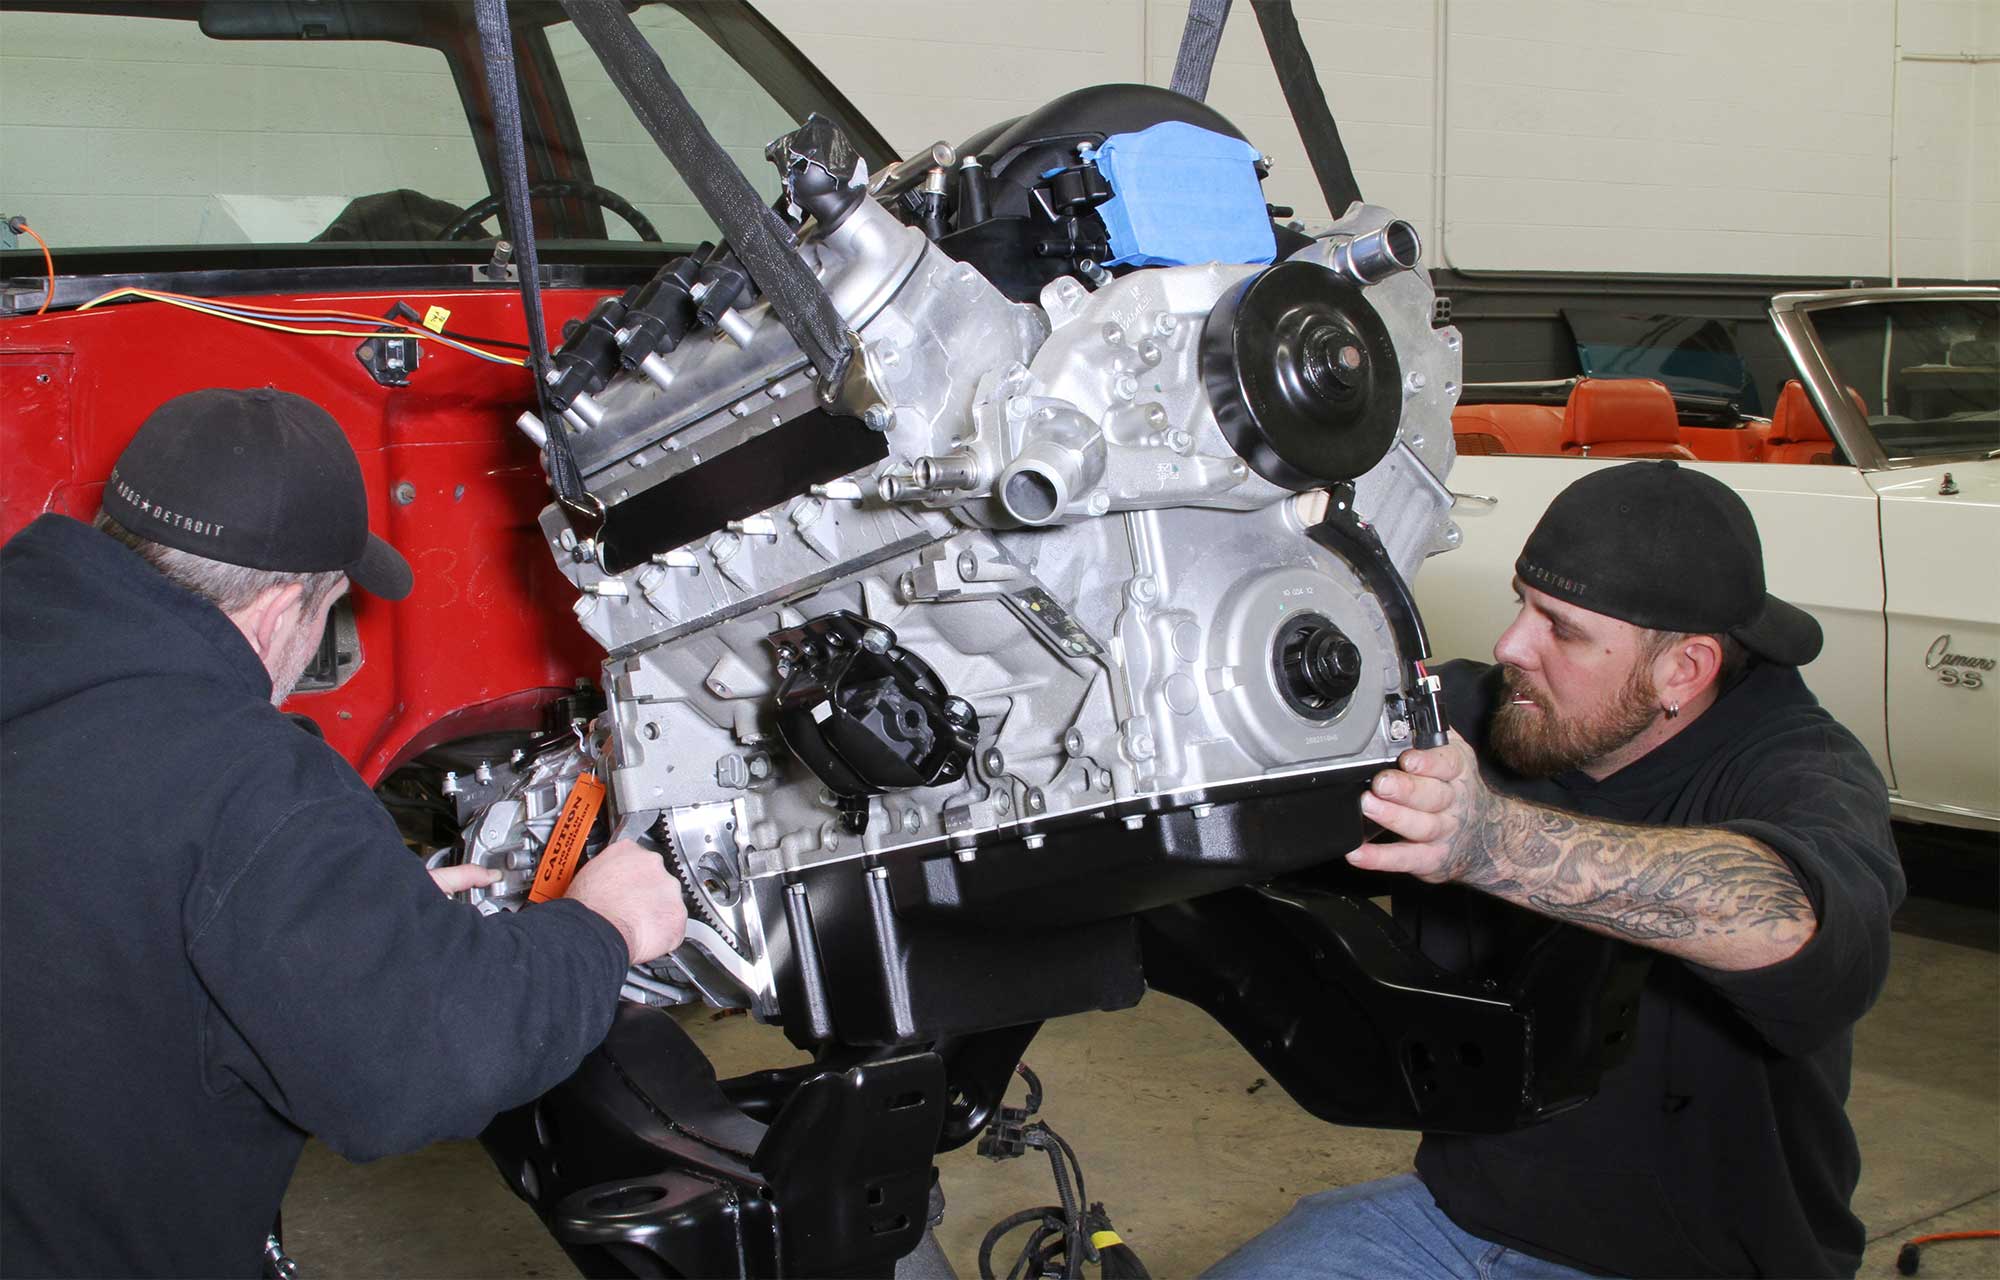
swaps are so common these days that it’s easy to get complacent about the project if you’ve never attempted it. After all, swap kits are plentiful, with most tailored to popular A-, F-, and G-bodies, as well as vintage Chevy trucks.
“With all the swap parts available today, dropping in the LS engine and getting it running is the easy part,” Matt Gurjack, the man behind the welder at Detroit-area hot rod and Pro Touring fab shop Sled Alley, says. “It’s everything else to support it that can bog you down, cause headaches, and ratchet up the cost.”
He says that for popular vehicles, such as first-gen Camaros, the muscle car–era Chevelles, and some of the trucks, the aftermarket swap kits and correlating parts enable the do-it-yourselfer to install an LS engine and transmission without the need for a welder and little or no cutting. But there’s more to an LS swap than engine mounts and an oil pan. Regardless of whether you’re using a junkyard 5.3L out of an old truck or one of Chevrolet Performance’s crate engine packages, there are a myriad of details that have to be executed in order to make it all work out correctly. That’s what we’re laying out here—the general steps and helpful tips to make your swap go smoothly.
Fundamentally, the design of the LS block and its mating position with the transmission generally means the engine must be mounted an inch or so forward on the chassis, compared to a traditional small-block–powered vehicle. That’s mostly to provide adequate firewall clearance, but there’s more to it than that. For Gurjack, the swap’s success is all in the little things.
“Again, it’s easy to throw on an intake tube with the mass air sensor in it and get the engine started,” he says. “But is it routed so that it’s not drawing in too much hot air from around the engine? And does it have enough straight length for an accurate sensor reading? If you get those things wrong, the engine won’t run right and the performance will fall off.”
The cooling system is another biggie.
“The older cars—even the muscle cars with the more-powerful engines—just weren’t engineered for the power levels of the LS engines,” Gurjack says. “You can’t take that for granted and drop in any old radiator that fits. You’ve got to take the time to figure out exactly what the car needs for that engine and work it out correctly, or it will get hot right away.”
Even with good-fitting swap kits that theoretically should allow a bolt-in installation, Gurjack’s experience suggests that’s not always the case.
“We’ve done back-to-back installs in 1969 Camaros, and the first one went in by the book, but the second one fought us all the way,” he says. “In a 50-year-old car, there might have been floor repairs over the years and even production-line variances that cause interference with the headers or transmission mount. So, while you can plan for a bolt-in installation, you can’t count on it in older cars.”
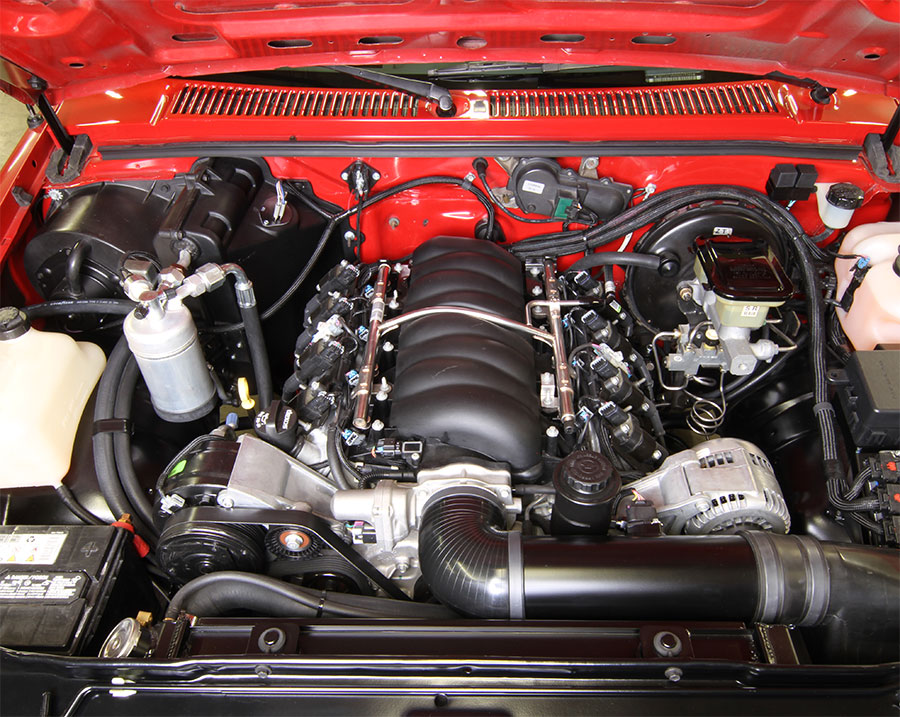
The accompanying photos show a swap performed on a 1991 S-truck, but the procedures apply to all vehicles undergoing an LS engine installation. It’s all the stuff you’ll have to deal with to get the engine and transmission installed, and get it running with the first turn of the key. The procedures fall into these categories:
- Engine installation, including exhaust manifolds/headers and the air intake system
- Cooling system
- Fuel system
- ECU/wiring harness, including compatibility with gauges
- Transmission choice and installation
“Look around and ask others about cheaper solutions to the supporting parts of the project,” Gurjack says. “For example, you could easily spend two or three times more on the fuel system than you really need to. There are plenty of ways to save money on an LS swap and plenty of ways to balloon your budget.”
While it’s true that it’s never been easier to do an LS swap, it’s also true that easier is not the same as easy, or inexpensive. The key to success is knowing what’s involved and planning for it.
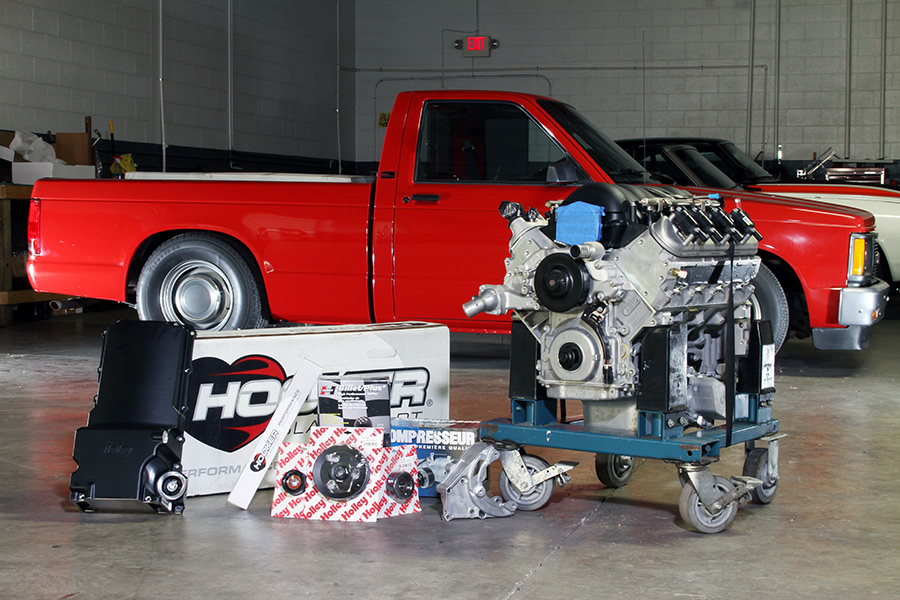
Before sourcing all the necessary parts separately, investigate whether there is an inclusive swap kit available for your vehicle. Typically, they will include the engine and transmission mounts and sometimes the exhaust headers and maybe even an oil pan.
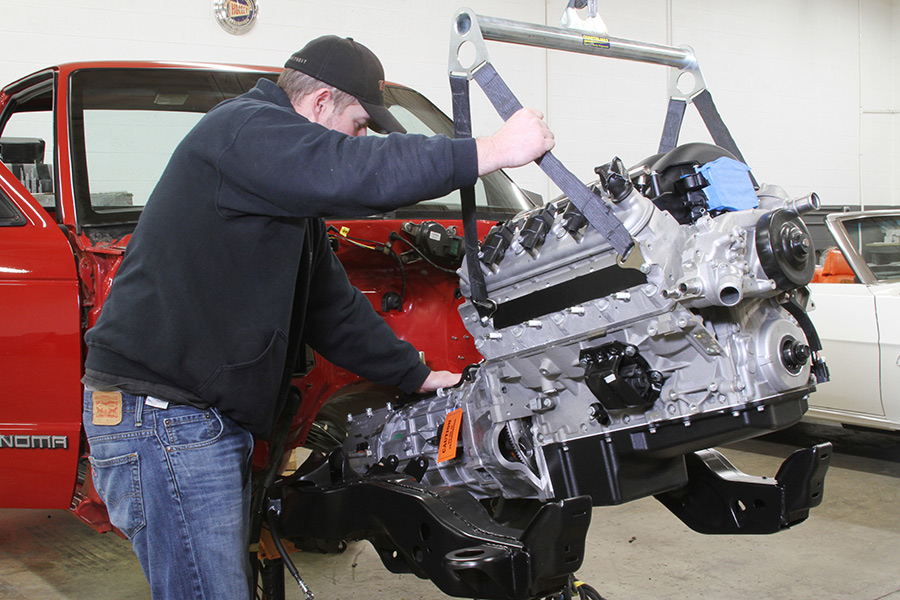
If time and space permit it, doing the engine swap with the front fenders removed makes it a whole lot easier. There’s more room to maneuver, especially when checking clearances at the rear of the engine and with the chassis. That will be especially helpful when it comes to installing the frontend accessory drive system. Trust us on that.
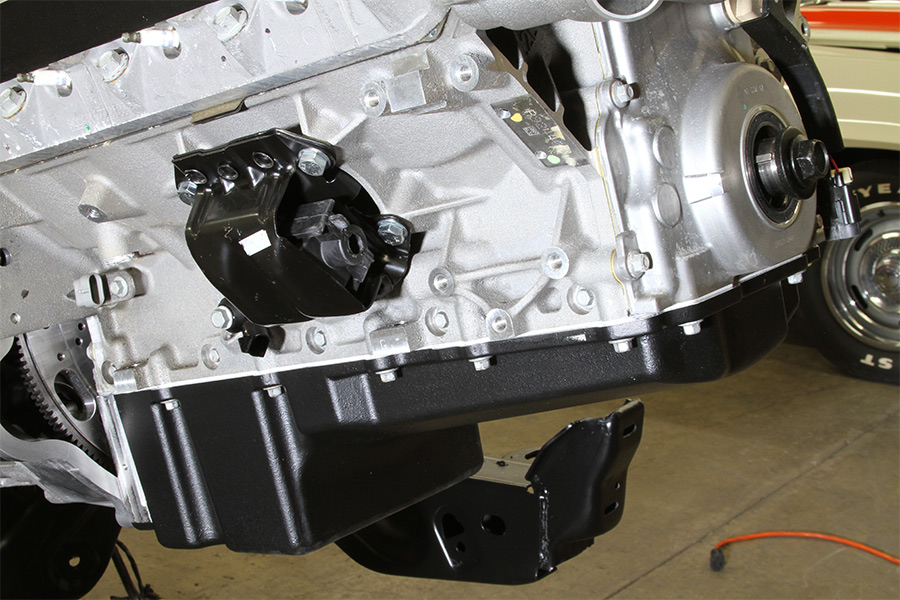
Most factory oil pans on LS engines won’t fit the crossmember on most older vehicles, meaning the original oil pan must be replaced before the engine is lowered into the chassis. Holley, Chevrolet Performance, and other manufacturers offer pans designed with the rear sump and slim front profile required for most vintage vehicles. Some truck-based LS engines and their oil pans may work with some older truck frames, but you’ll have to take some careful measurements.
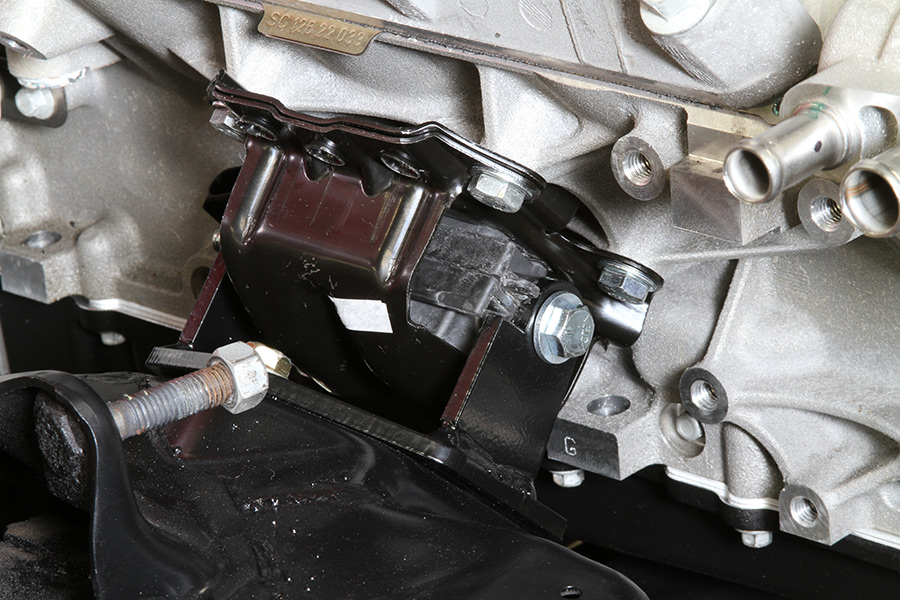
Engine mounts are fundamental to the installation and the swap mounts on the market are designed with separate adapter plates that attach to the engine and bolt to matching mounts that bolt onto the crossmember. Because the transmission mating point for an LS engine differs from small- and big-block engines, the mounts generally move the LS forward about an inch or so to help with firewall clearance. Keep that in mind if you have to fab mounts for an application that doesn’t already have tailored swap mounts.
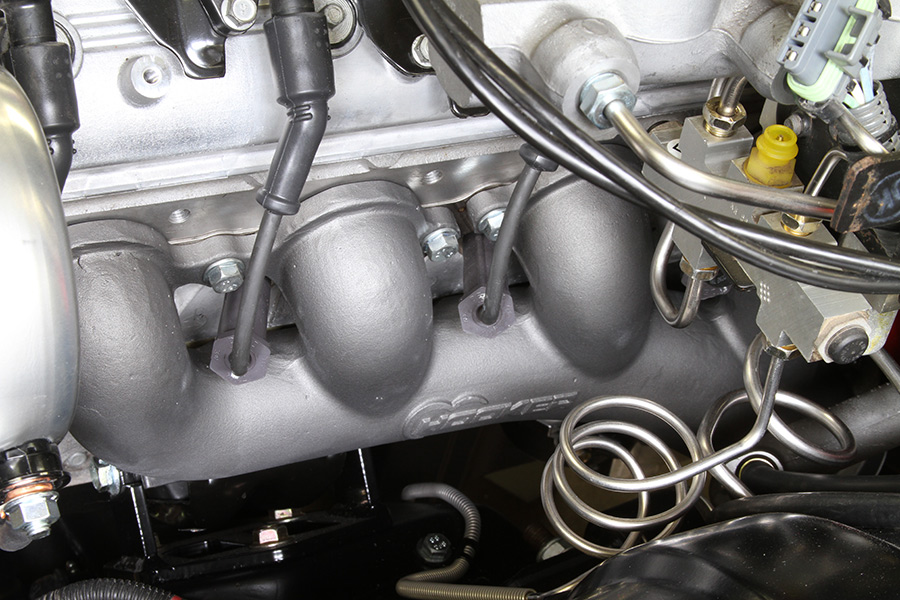
Swap-specific exhaust manifolds and headers are available for most popular vehicles, but just as tailored headers have vexed builders for decades, even they may require a dimple here or there to clear the steering shaft or other components. If no kits are offered for your vehicle, there are universal kits available that feature the flange and just enough of the primary tubes to serve as a starting point for custom headers.
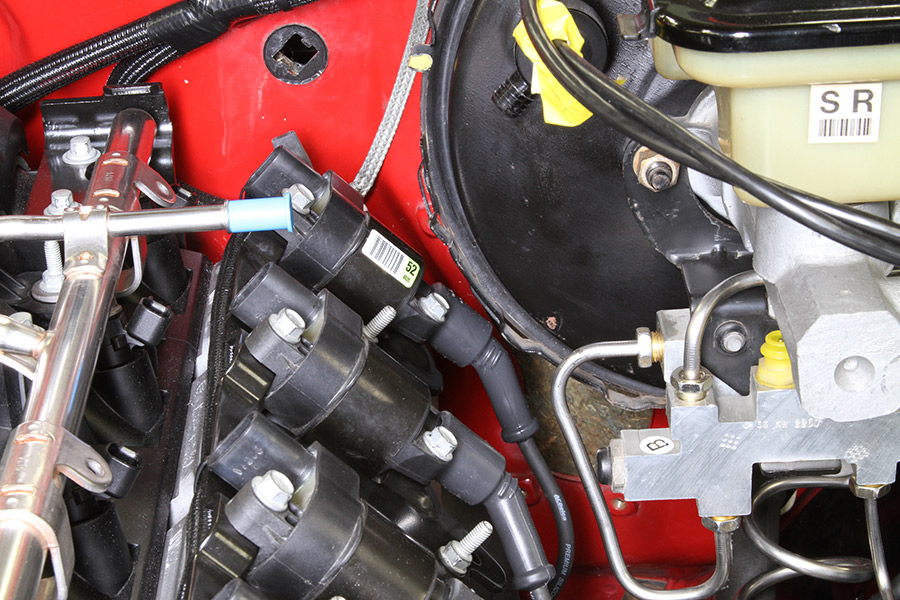
Because of the transmission mating point, firewall clearance is one of the biggest challenges with an LS swap. But even if adequate spacing is achieved between the engine and firewall, the rocker cover-mounted ignition coils can present their own clearance issues, particularly with the brake master cylinder. On the passenger side, it may be a clearance issue with climate system–related components, such as the blower motor plenum. Coil relocation kits are available,if the stock positions simply won’t work with the other firewall-mounted components.
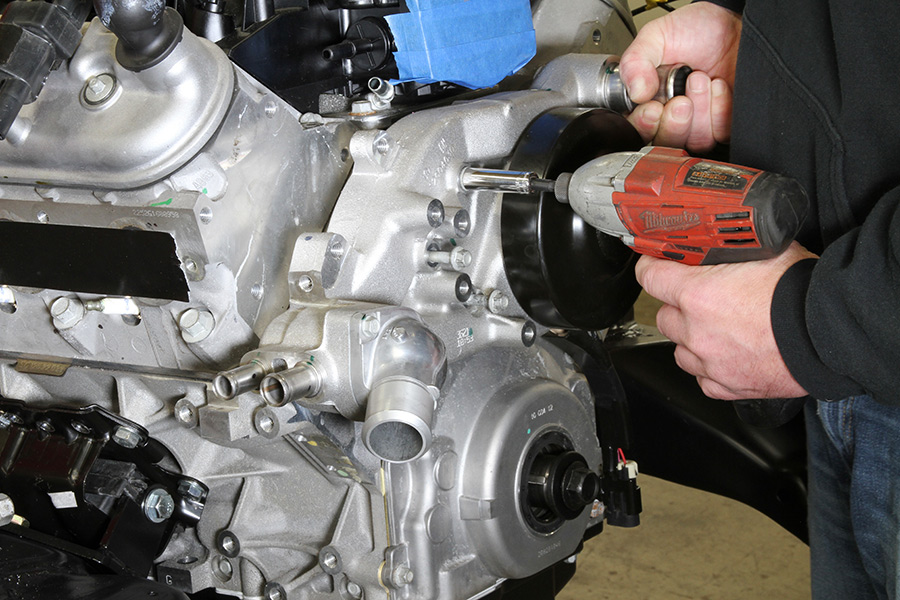
That tube spanning the cylinder heads on an LS engine is the steam tube and it’s a necessary component that helps prevent overheating by providing an escape route for hot spots in the cooling system. With an LS swap, it’s important for the tubes to connect someplace in order for the air to escape. The easiest method is connecting the tube to the water pump spacers or the water pump housing itself. Connecting to the radiator is another method, but the water pump option is typically easier and cleaner looking. If using the water pump housing itself, a hole has to be drilled in the top of it, but you can run the line right into the water pump spacers.
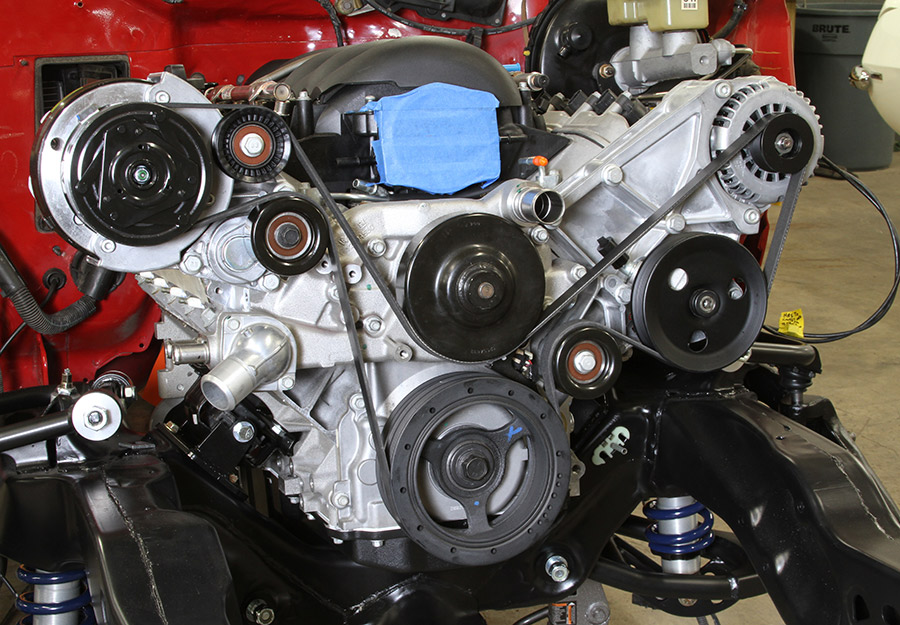
Like the oil pan, the accessory drive system is one of the things that will have to be changed from the stock configuration in order to work with the chassis of an older vehicle. That’s because many of the accessories such as the air conditioning compressor and power steering power—and the alternator on some engines—are mounted so low on the engine that they interfere with the crossmember or other chassis parts. Fortunately, there are seemingly countless aftermarket kits and even drive systems from Chevrolet Performance designed to reposition those accessories higher on the engine. These kits are not universal, so care must be taken when ordering one; and if it’s your first swap, it’s probably a good idea to call the manufacturer to discuss your vehicle and the accessories you’re running.
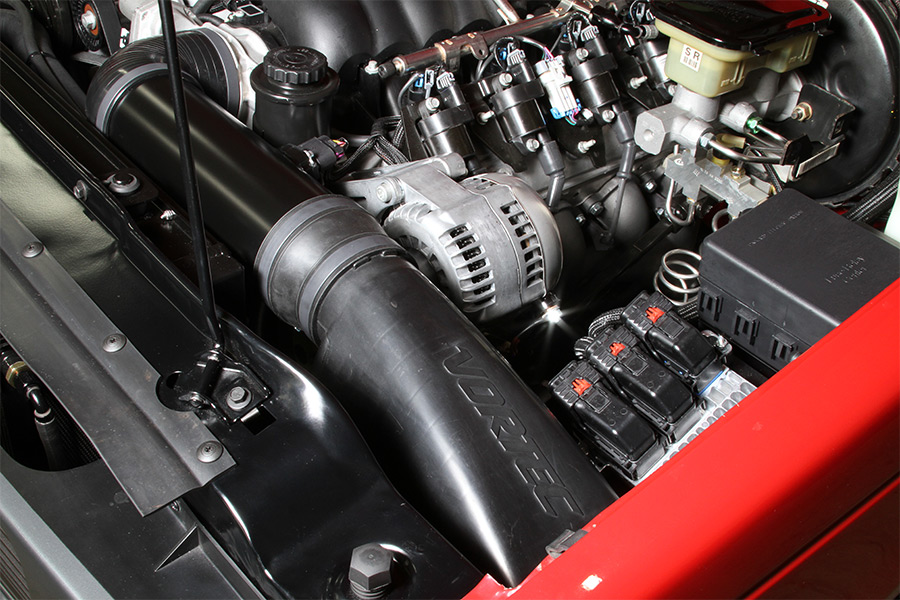
Some swap kits may come with an air intake tube, but generally, it will have to be fabricated and the mass airflow sensor installed in it. The mistake many make with it is not leaving a sufficiently straight flow path, which should be a minimum of 6 inches in front of the sensor. Also: Don’t cap the tube with a small, exposed filter that is close enough to the exhaust manifold to draw hot air. Take the time to route the intake as far away from the engine as possible. Use a large filter and shield or encase it, if possible, to keep the heat at bay.
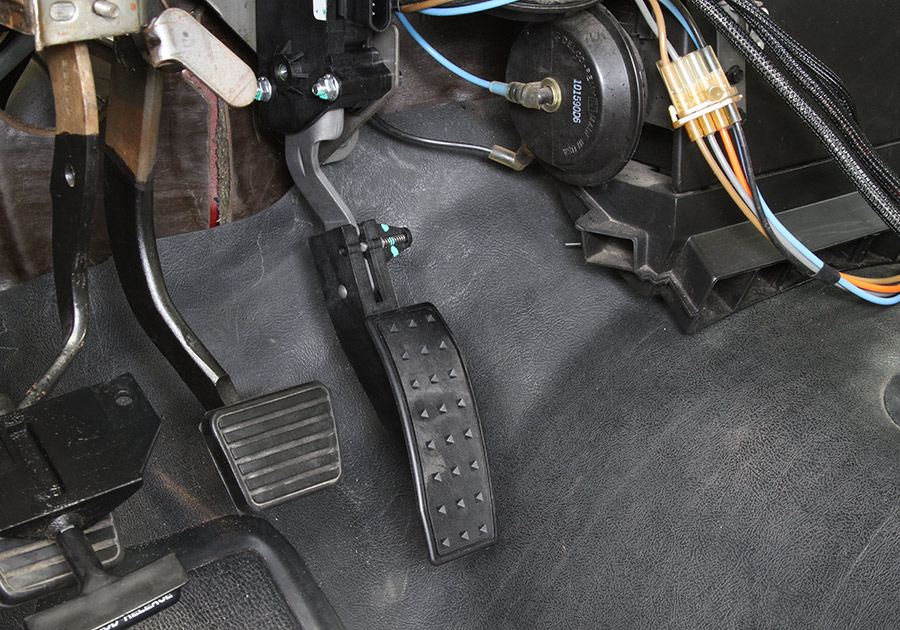
If you’re using an early LS engine with a cable throttle, it will connect to the car’s existing linkage without too much trouble, but when using a later engine with an electronic throttle the gas pedal must be replaced with a “drive by wire” pedal that is connected to the engine controller. They’re included with Chevrolet Performance’s crate engine controller kits.
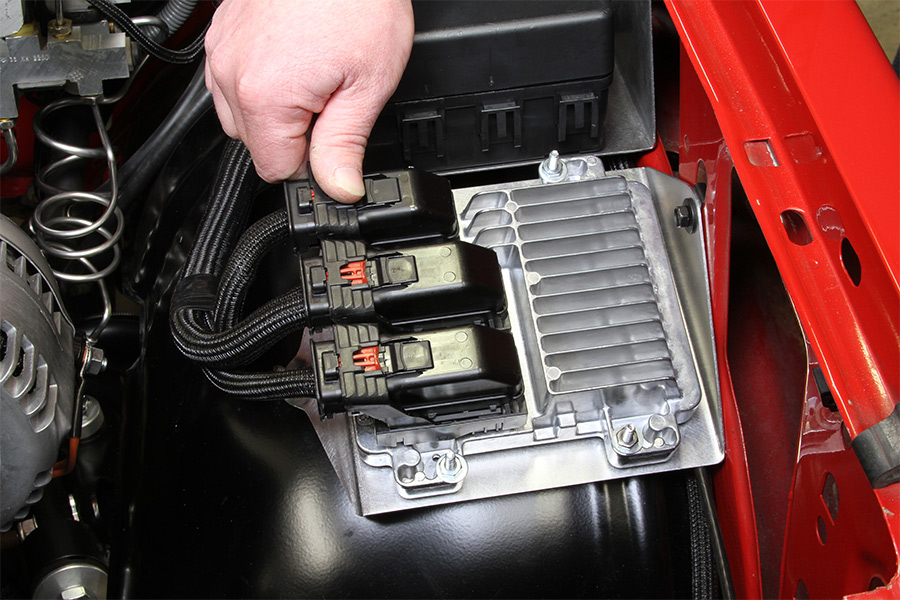
Speaking of controller kits, there are a number of options when it comes to engine management and the related wire harnesses. Systems from companies such as Chevrolet Performance and Holley are designed for plug-and-play operation; and they’ve been refined to the point of user-friendly installation and connections. Using a used controller and harness is a less-expensive option, but you’ll spend more time deleting unnecessary features and their wires associated with them—and that’s if you have the know-how to do it yourself rather than paying to have someone do it. The aftermarket kits may cost more, but are ultimately easier.
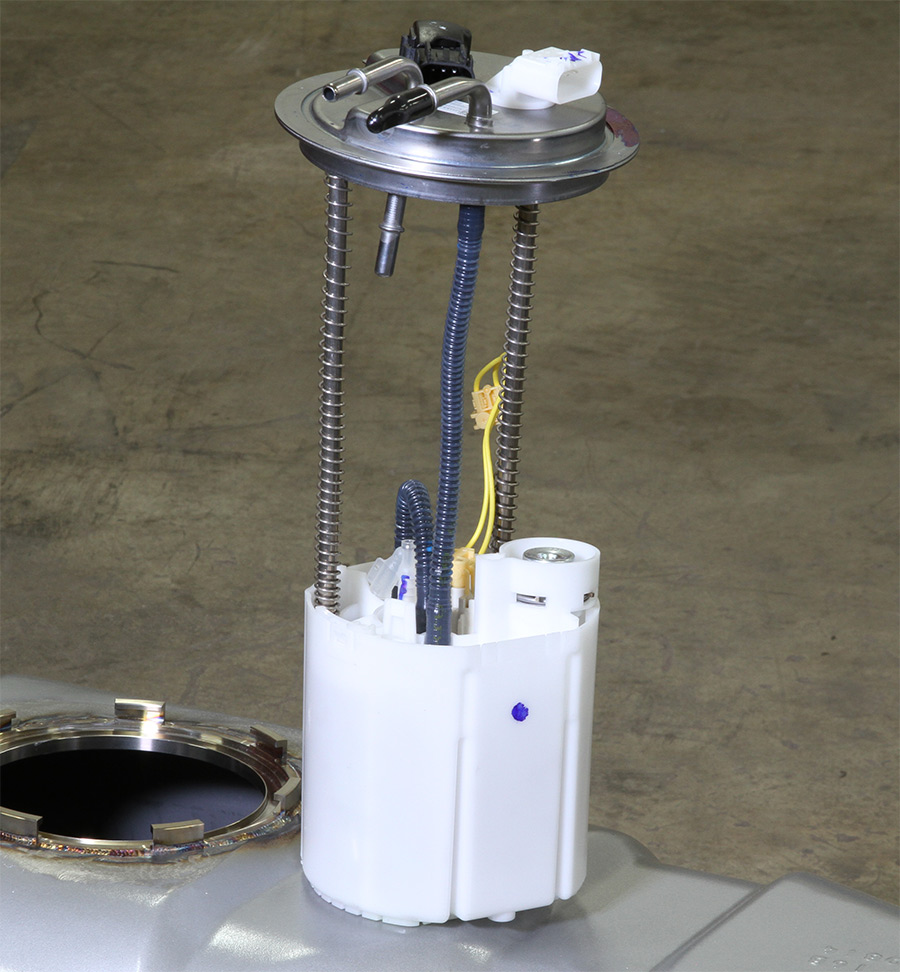
Adding electronic fuel injection to a previously carbureted vehicle requires significant fuel system upgrades, starting with a fuel pump that will deliver sufficient volume at 58 psi. As a rule of thumb, a 255-lph pump will support most LS engines, with higher-power combinations needing a little more—and about 30 percent greater capacity, if you plan to run E85. An in-tank pump is the preferred option, because it is continuously pressurized, while the fuel line with an inline pump is pressurized only after the pump—meaning the pump itself must be mounted below the tank for gravity feed. That can be a problem if the feed is interrupted. An in-tank pump setup is also quieter. Additionally, a return line will have to be plumbed back to the tank.
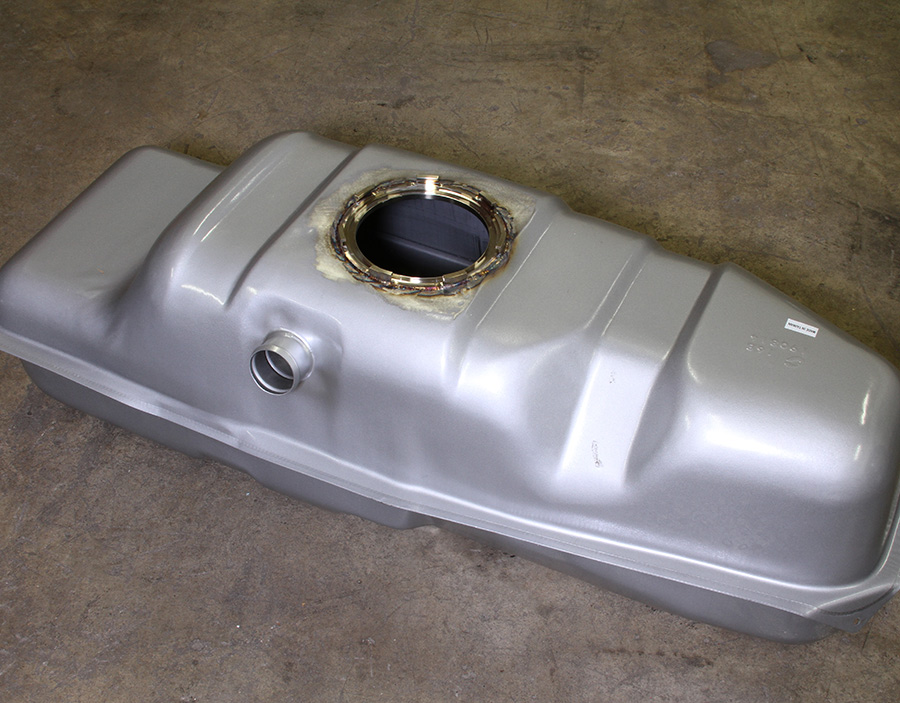
Use of an in-tank pump requires modifications of the tank, including enlarging the opening to insert the pump and sender assembly. The simplest solution, if it’s available for your vehicle, is a replacement tank that is already modified for EFI. Fortunately, they’re available for most popular vintage Chevys. And don’t forget the vapor vent!
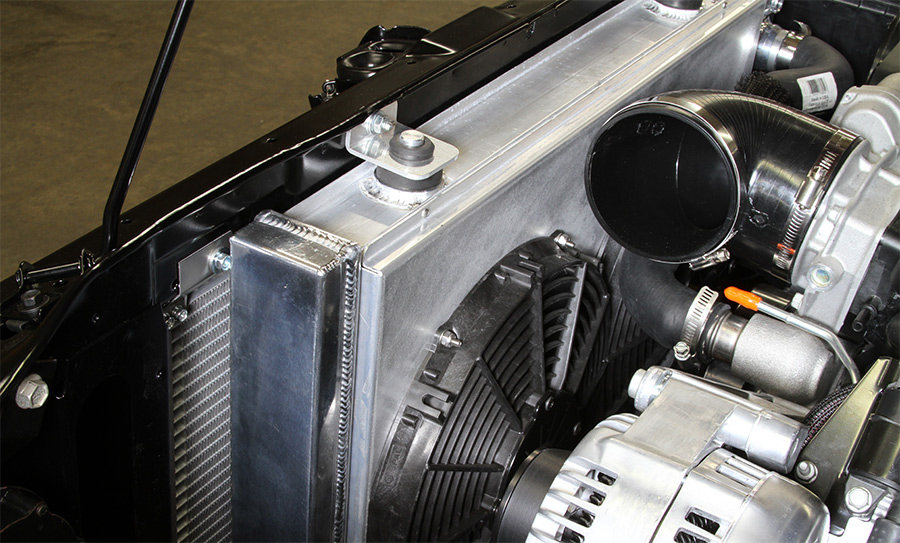
An adequate cooling system is one of the biggest challenges with an LS swap. Along with higher output than the engines in older vehicles, LS engines simply run “hotter,” making it tougher to keep them at normal operating temperatures. That generally means a thicker, higher-capacity radiator, but space can become a problem with the generally forward-mounting position of the engine and depth of the accessory drive system, especially when electric cooling fans are mounted to the rear of the radiator. Airflow through the grille in some older vehicles can also be a problem with higher-power LS engines, including the LS7, which run ever hotter, making a high-capacity radiator imperative for cool running. Bottom line: Don’t skimp when sourcing the radiator.
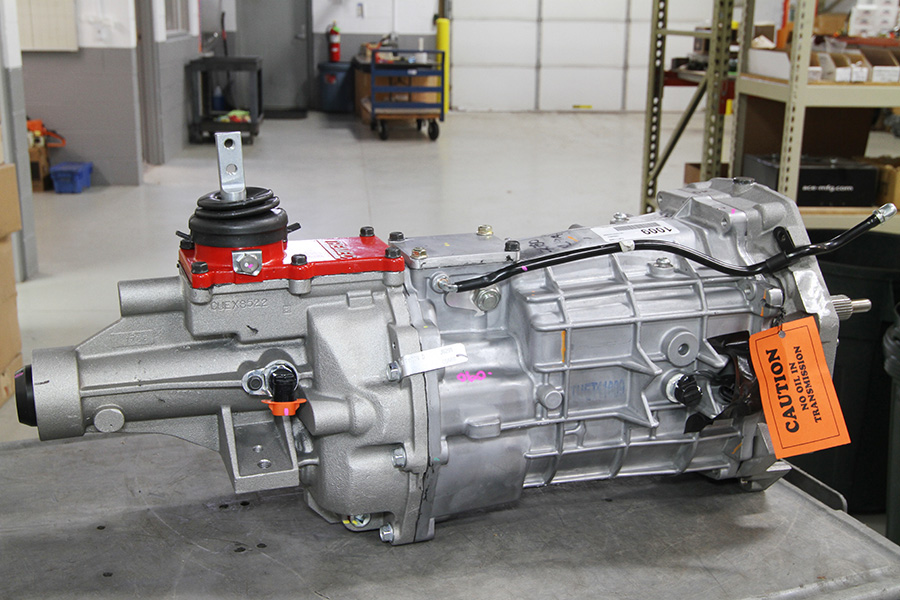
When matching the LS engine with a modern manual gearbox, keep in mind that a TREMEC six-speed will bolt right up, but the older TREMEC five-speeds need additional components because the input shaft isn’t long enough to reach the LS crankshaft. That means changing the bellhousing, adding a new pilot bushing, and a thicker flywheel, such as GM PN 12561680, which is 0.400-inch thicker, soaking up the spacing difference between bellhousing and crankshaft. Adding one of these hydraulic five- or six-speed transmissions also requires adding a complementing master cylinder to the firewall.
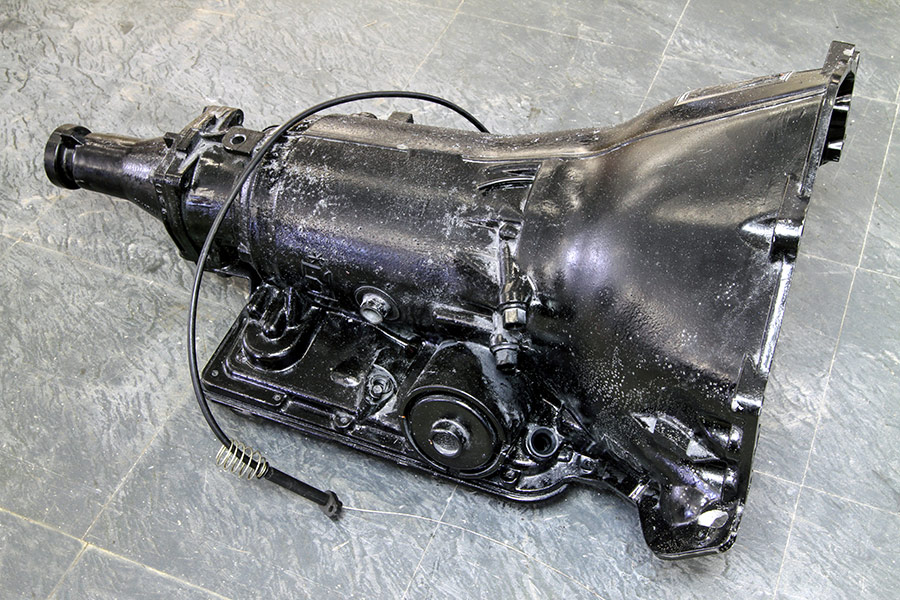
There are a number of automatic transmission choices for the LS engine. The electronically controlled 4L60E and 4L80E are the best options, because they’re plentiful, strong, relatively inexpensive, and bolt right up to the engine—as long as it was originally used with an LS engine. If you were thinking of going with something older, such as a 700-R4, Turbo 400, or even a 4L60 used with earlier small-block engines, you’ll need a flexplate spacer to provide the proper alignment between the torque converter hub and crankshaft.
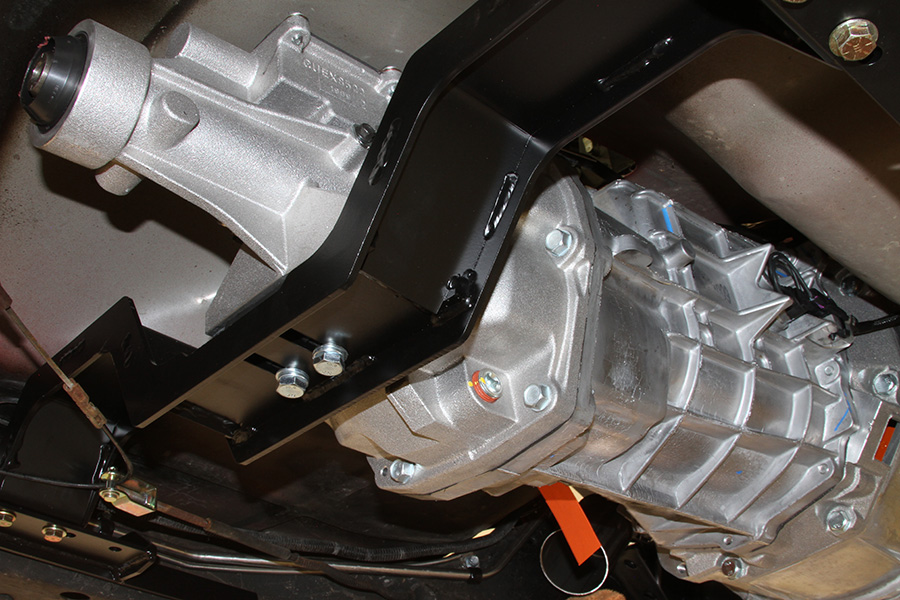
Your LS swap is going to require a new transmission mount. It’s included with most swap kits and available separately for most popular vehicle applications and transmissions. But if you’re shoving an LSA into a Chevette, you’re going to have to fabricate one.
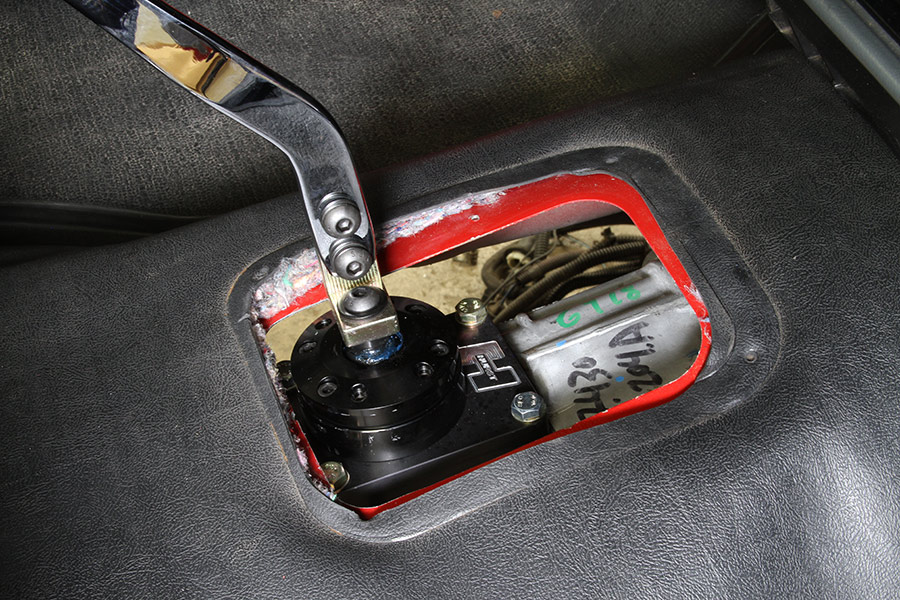
The mounting position of the transmission, regardless of whether it’s a manual or automatic, will likely affect where the shifter location pops up in relation to the trans tunnel. More than likely some trimming will have to be made, but even on this S-truck, which received an LS3 and a TREMEC six-speed, the shifter location didn’t move significantly and only minor trimming was required at the bottom of the opening.
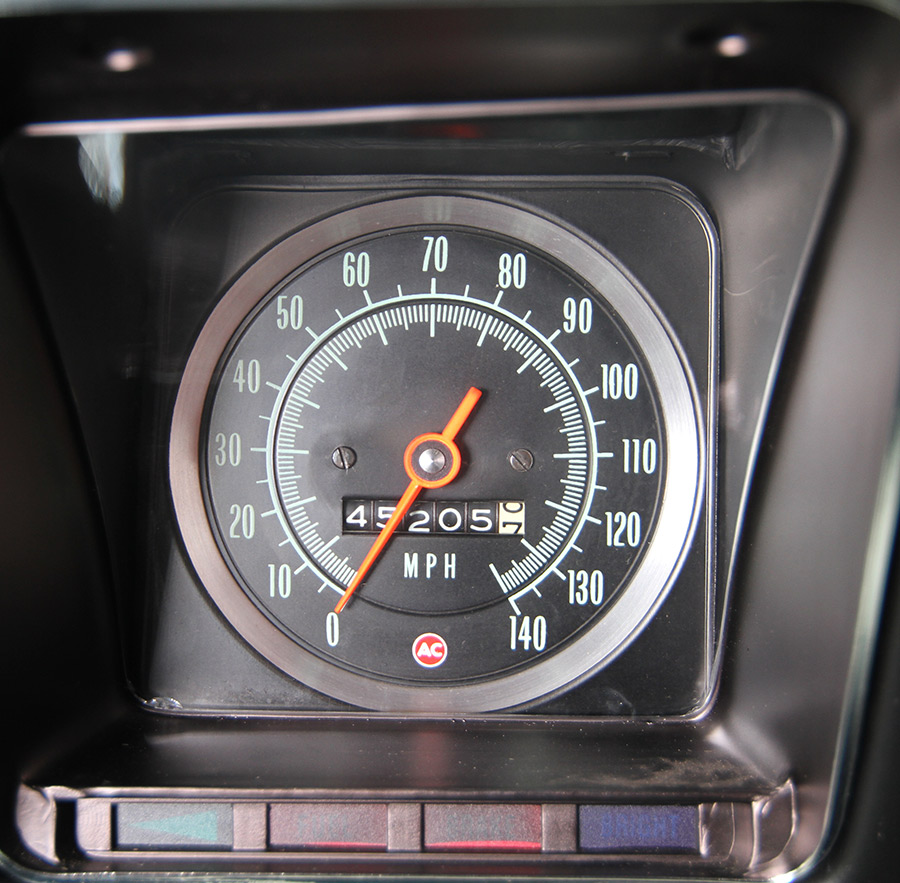
When using an electronically controlled transmission with your LS swap, the original, cable-driven speedometer won’t work with it. The aftermarket options include adding drive gears inside the trans, which is the most intrusive surgery, while a signal converter box will take the electronic signal in one side and drive the speedometer cable out the other side. There is even a system that uses GPS data to drive the cable. We’ve seen the converter box in action and it works well.
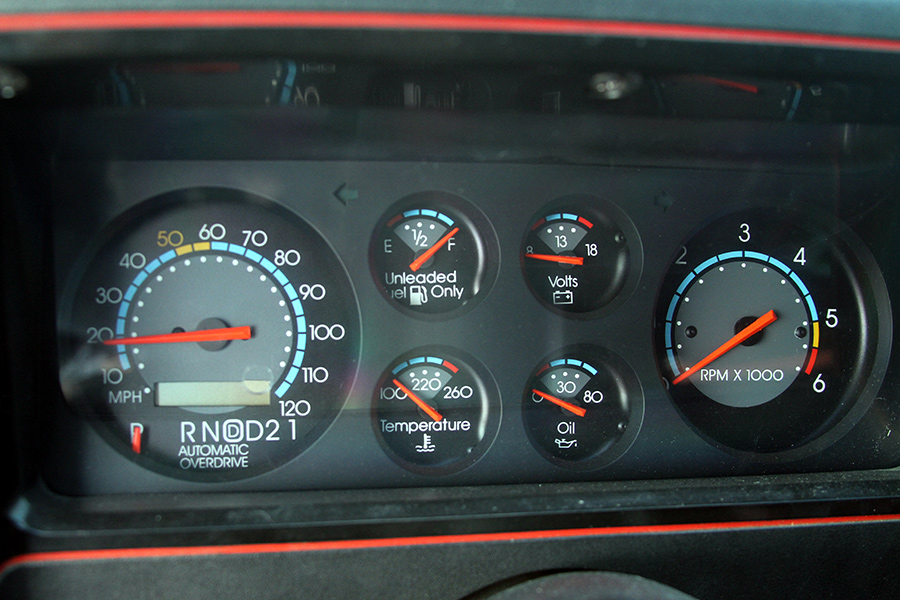
As for the rest of the gauges, the challenge is not only the conversion of the electronic signal to the mechanical instruments, which is doable, but the readouts on the original gauges most likely will read almost right off the charts. The best solution is a replacement gauge set designed for the LS engine and its control system. Systems from companies such as Dakota Digital and Classic Instruments are so well-designed, with original-style graphics, that it’s difficult to discern they’re not original. Like many LS swap parts, there are bolt-in systems for most popular vehicles and they plug right into the ECM’s CAN bus. The connections couldn’t be simpler, with the speedometer included. For those vehicles without a drop-in system, Dakota Digital offers universal gauge clusters that can be adapted to many dashboards.
 SOURCES
Speedway Motors
(800) 979-0122
www.speedwaymotors.com