ACP department heading TECH
InTheGarageMedia.com
man observing headlights of a 1963 Chevy II
1. MetalWorks’ Dave Williams contemplates doing what General Motors didn’t do: make the headlight bezels of this 1963 Chevy II Nova fit properly.
Nip & Tuck
Giving a Chevy II a Facelift
BY Ron Ceridono Images by Chadly Johnson
G

o to any automotive event and chances are the cars with the most outrageous features will draw the attention of the casual onlooker. But for true enthusiasts it’s the subtle details, like the extra effort put into body fit and panel alignment that catch the eye of the knowledgeable. These are the cars that get better the more you look at them, which is typical of the cars that come out of MetalWorks Classic Auto Restoration in Eugene, Oregon.

Case in point is a 1963 Chevy II. This GM line of compact cars was meant to compete with the likes of the Rambler, Ford’s Falcon, Chrysler’s Valiant/Lancer, and a number of GM products, including Chevy’s own Corvair. Like all the cars in this class, the Chevy II was affordable with a base price around $2,100.

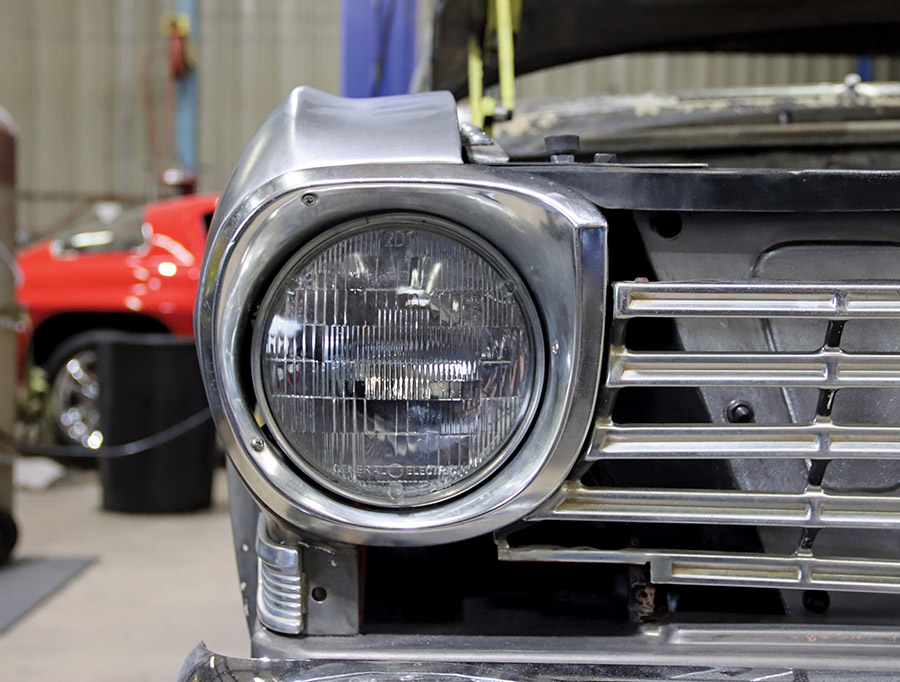
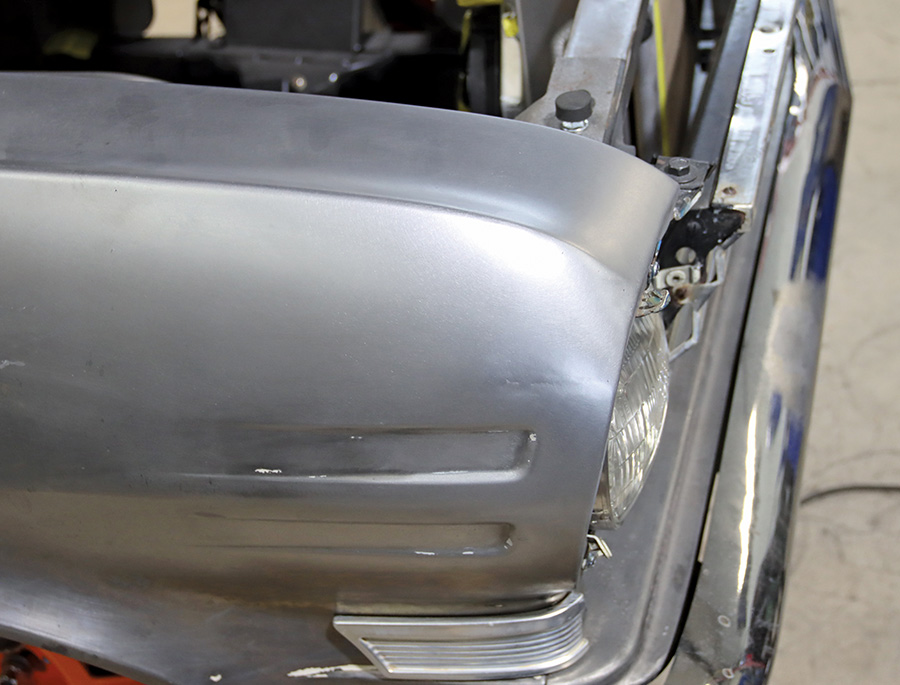
Like most cars of the era, Chevy’s quality control was described by some automotive writers as “lacking” in 1963. Poor door and window fit were common complaints and body panels were often gapped and aligned poorly. But one of the most noticeable issues with the Chevy II shown here was the mismatch between the headlight bezels and the front fenders. It makes one wonder if the team designing the fenders and those responsible for the headlight bezels ever met. There was no way the crew at MetalWorks was going to let something like this go unresolved, so master metal man Dave Williams was assigned the task of making things right.

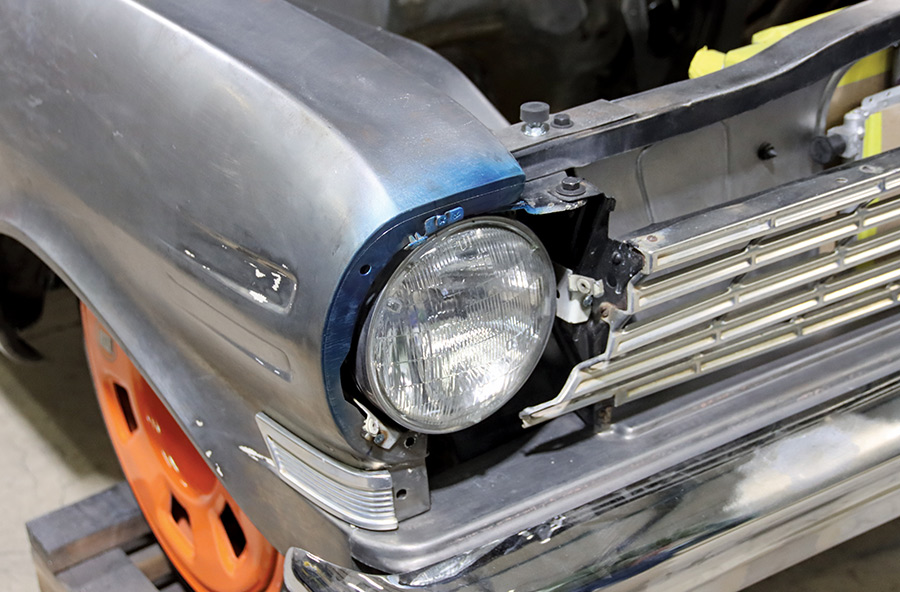
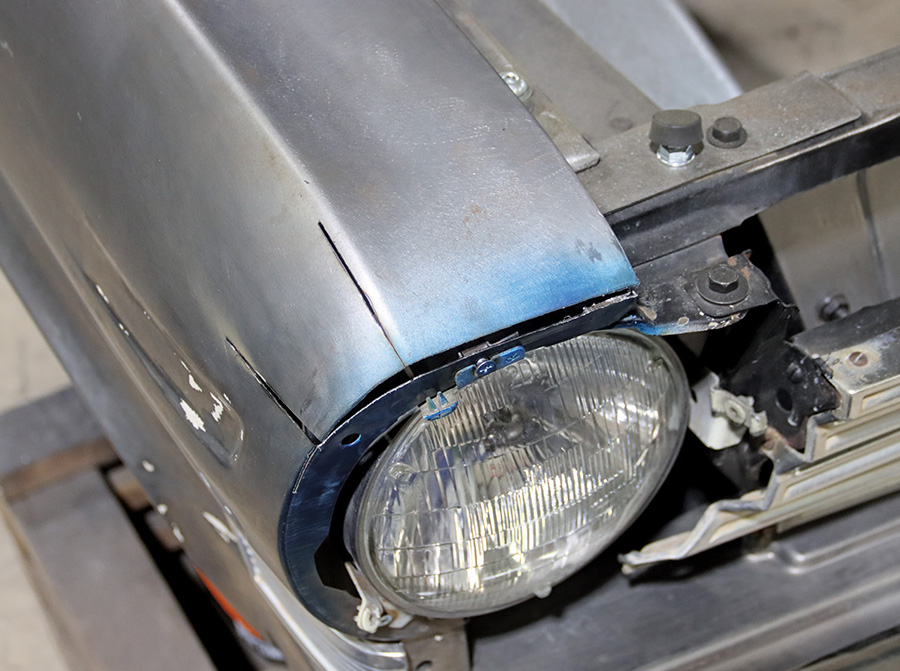
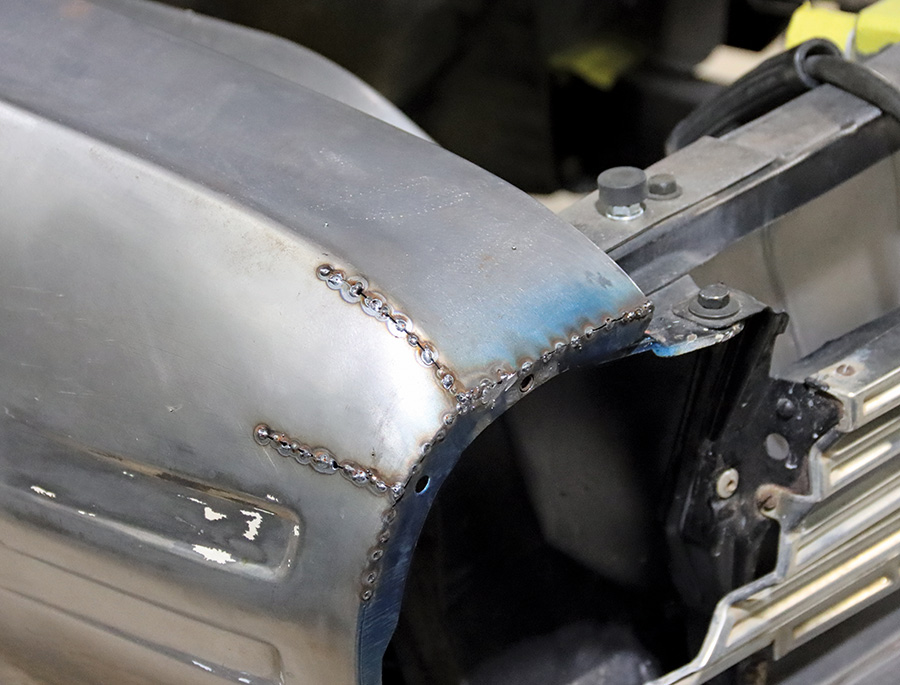
The first step in resolving the Chevy’s fitment issue was to come up with replacements for the rough original headlight bezels—fortunately a new old stock set was found on eBay. The next chore was to modify the fenders to make them fit. Williams carefully split the front edge of the first fender. He then made horizontal relief cuts to allow it to be recontoured to fit the headlight bezels properly. With the first fender altered, cardboard templates were made to be used to make the second fender the exact same shape.

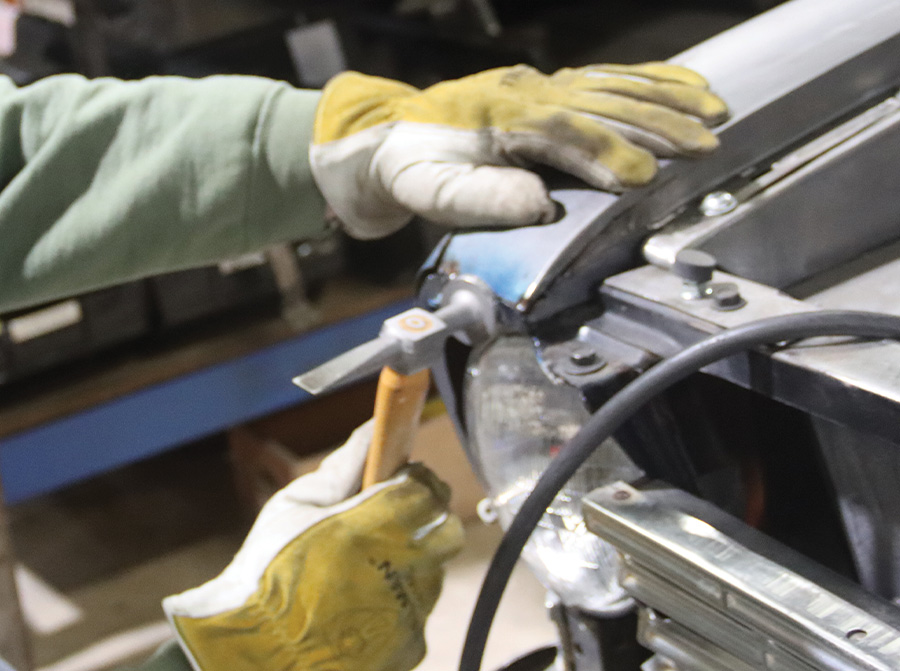
While talking to Williams about what was done, he did offer some advice. Although some builders use straight carbon dioxide when MIG welding mild steel (because it’s cheap), Williams suggests 75 percent argon and 25 percent carbon dioxide. He also suggests 0.023 “EZ Grind” welding wire. This softer wire makes grinding the welds much easier.

There’s no question that over-the-top modifications are attention getters, but it’s often the simple details that make a car stand out. Sometimes a nip and a tuck are all it takes.

closeup of headlight bezels and fenders of a 1963 Chevy II
2. This is the result of Williams’ metal sculpting expertise; the headlight bezels and the fenders of the Chevy now blend together perfectly.
closeup of headlight bezels and fenders
3. From the factory this is how the headlight bezels and the fenders fit together, or more to the point how they didn’t fit together.
3/4 view of a poor-fitting headlight bezel
4. The plan to correct the poor-fitting headlight bezels was to make a series of cuts in the fenders and reshape them.
closeup of a reciprocating saw being used to create a horizontal cut across the front of each fender
5. First, a horizontal cut was made across the front of each fender with a reciprocating saw.
a cut-off wheel being used to make short cuts in the edges of the fenders inside the hood opening
6. Next, a cut-off wheel was used to make short cuts in the edges of the fenders inside the hood opening.
closeup of the completed cuts made to the front of the first fender
7. Here are the completed cuts made to the front of the first fender to be modified.
relief cuts made to the front of the fender
8. To allow the front of the fender to be reshaped several relief cuts were also made.
top edge of the fender being recontoured with a body hammer
9. The top edge of the fender was recontoured with a few deft blows from a body hammer.
top of the first fender being modified by tack-welding in place
10. After a test-fit of the headlight bezel, the top of the first fender to be modified was tack-welded in place.
closeup of the top edge of the fender tack-welded to the headlight bucket support
11. Here, the top edge of the fender has been tack-welded to the headlight bucket support.
joint on the headlight bucket support being ground smooth
12. After welding the front edge of the fender to the headlight bucket support the joint was ground smooth.
relief cuts in the fender tack welded together
13. Here the relief cuts in the fender have been tack welded together and the fit of the headlight bezel was checked once more.
all the cuts completely welded
14. Satisfied with the fit all the cuts were completely welded.
finished welds ground smooth and metal finished to perfection
15. The finished welds were ground smooth and metal finished to perfection.
view of the finished hood
16. Here’s the finished project. Note the corners of the hood were also modified using the same techniques to match the new contours of the fenders.
SOURCE