![]() TECH
TECH
1. We’re adding seatbelts to the rear of our practical, four-door cruiser so the whole family can ride along.
By TOMMY LEE BYRD  Photography by The Author
here was once a time when no one wore seatbelts, and there was no such thing as a child seat. Kids had free reign, whether it was standing in the rear floorboard and holding onto the front seats or laying down in the package tray. These days, the laws are stricter, and we realize the dangers of driving amongst the general public. If you have kids, then it’s important for them to ride along in your vintage Chevy (in hopes of passing along your love of old cars). For this, seatbelts are a must, and proper installation is key to keeping your family safe in the event of an accident.
Our subject is a ’64 Chevelle sedan, which is already family friendly because it has two extra doors in the back that are practically designed for children. However, our car did not come equipped with rear seatbelts. A single rear seatbelt was installed several years ago, but it was time to complete the package and install a new set of belts and hardware throughout.
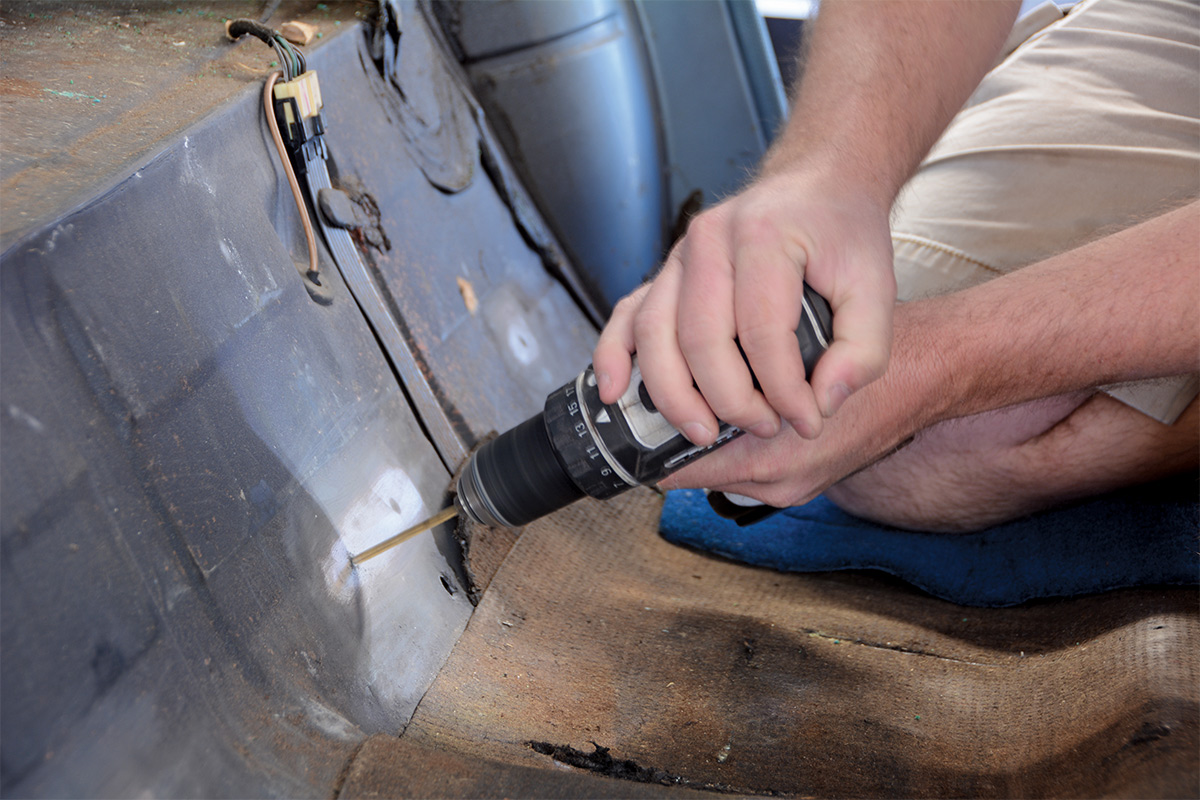
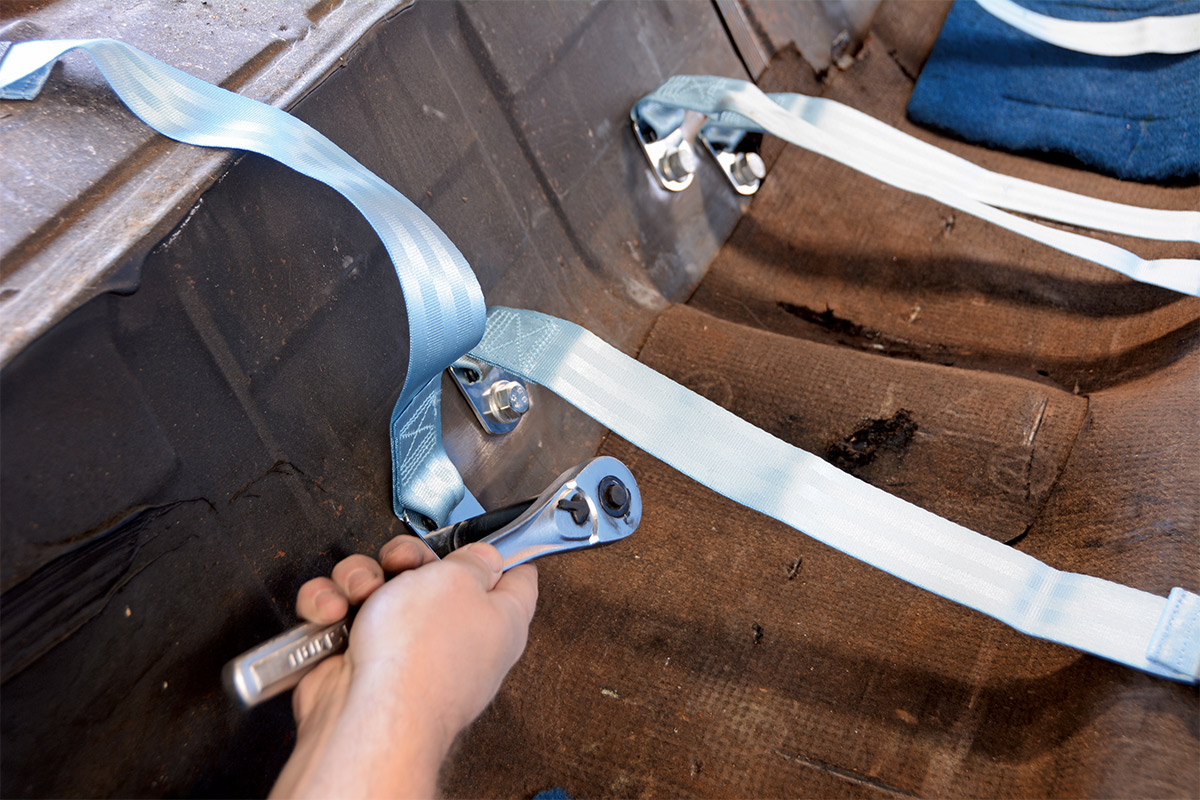
We ordered six Powder Blue aviation-style seatbelts from Retro Belt, and then ordered three Autoloc seatbelt anchor kits (two anchors each) from Summit Racing to secure the rear belts. The anchors help spread the load, so the bolt or washer doesn’t pull through the sheetmetal in an impact. The anchors are affordable and come with big ⅝-inch bolts and washers. The install requires a drill, and we used a step bit to open up the holes to ⅝ inch. The rest of the install requires simple hand tools to remove the seat, install the belt hardware, and then reassemble the rear seat. We spent an evening in the shop to add the rear seatbelts and freshen up the front belts as well. It was well worth the effort to make sure the kids can ride along to car shows and get the full experience, while also being safe.
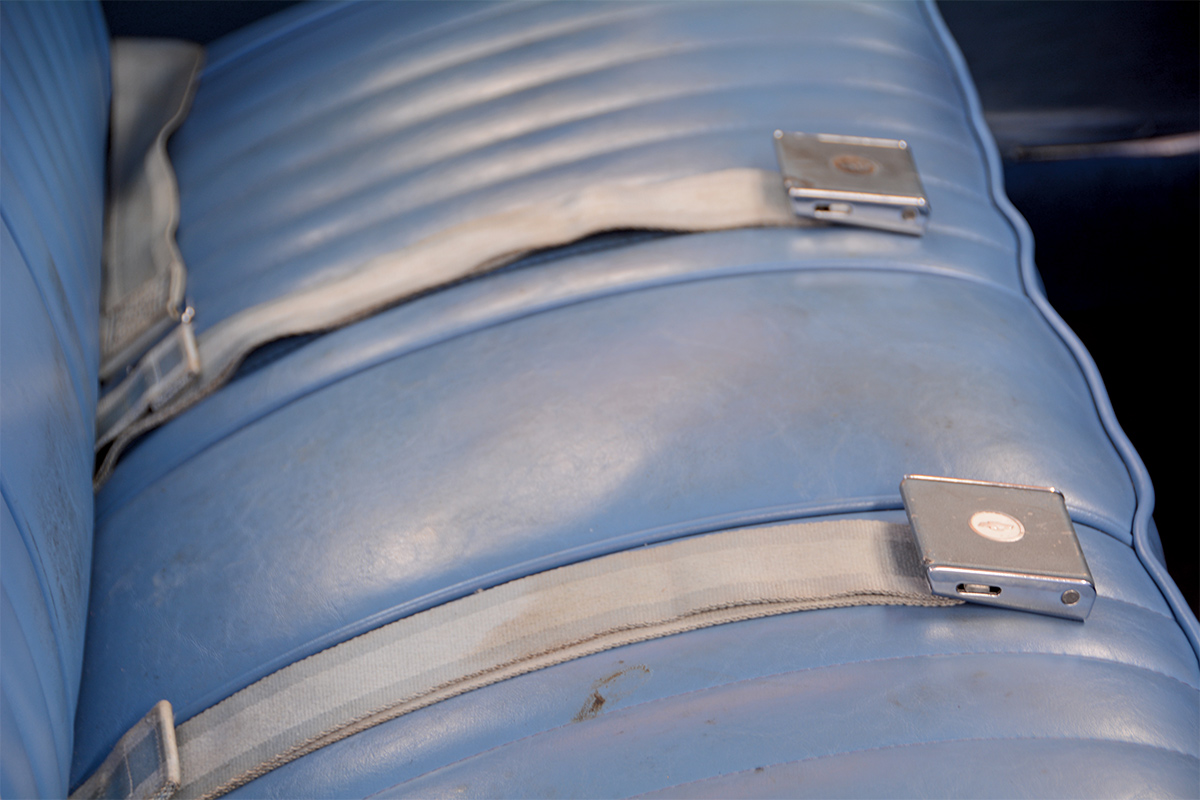
2. Our ’64 Chevelle came with two seatbelts up front, but it was not originally equipped with rear seatbelts. The front belts are looking a little rough, so we’ll order enough belts to safely secure six passengers.
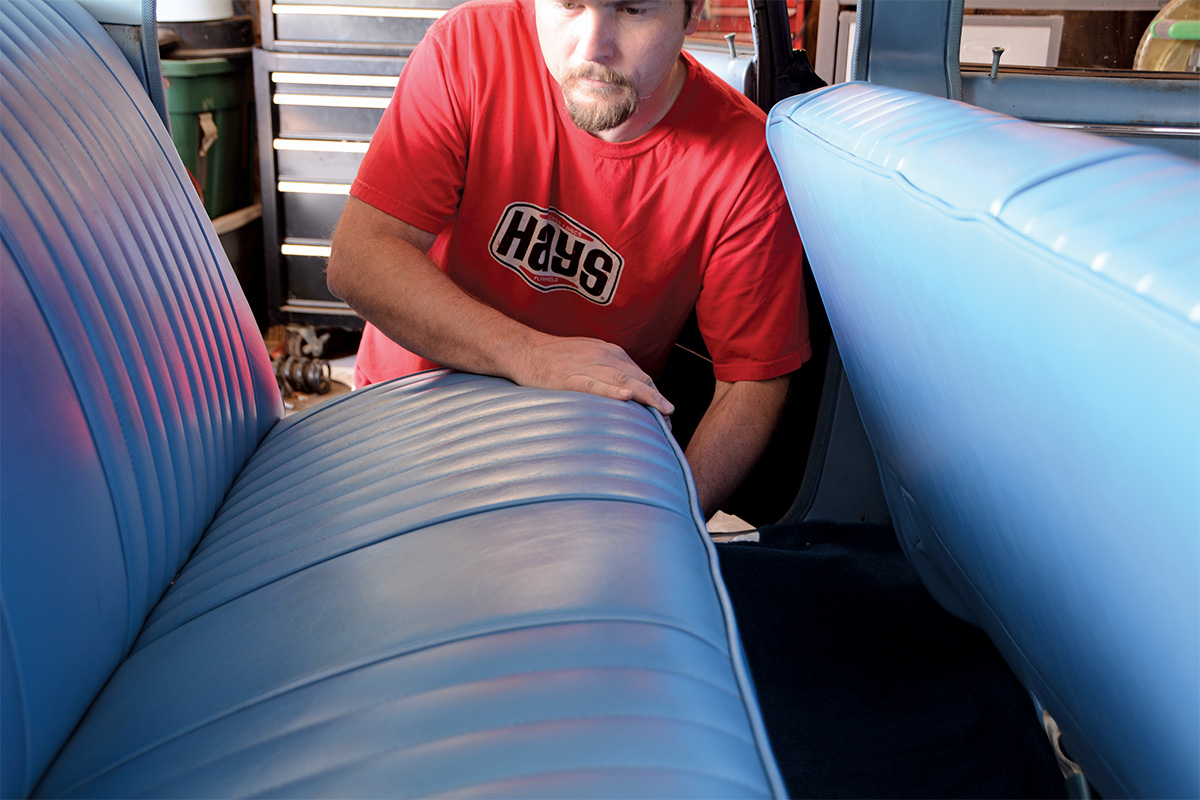
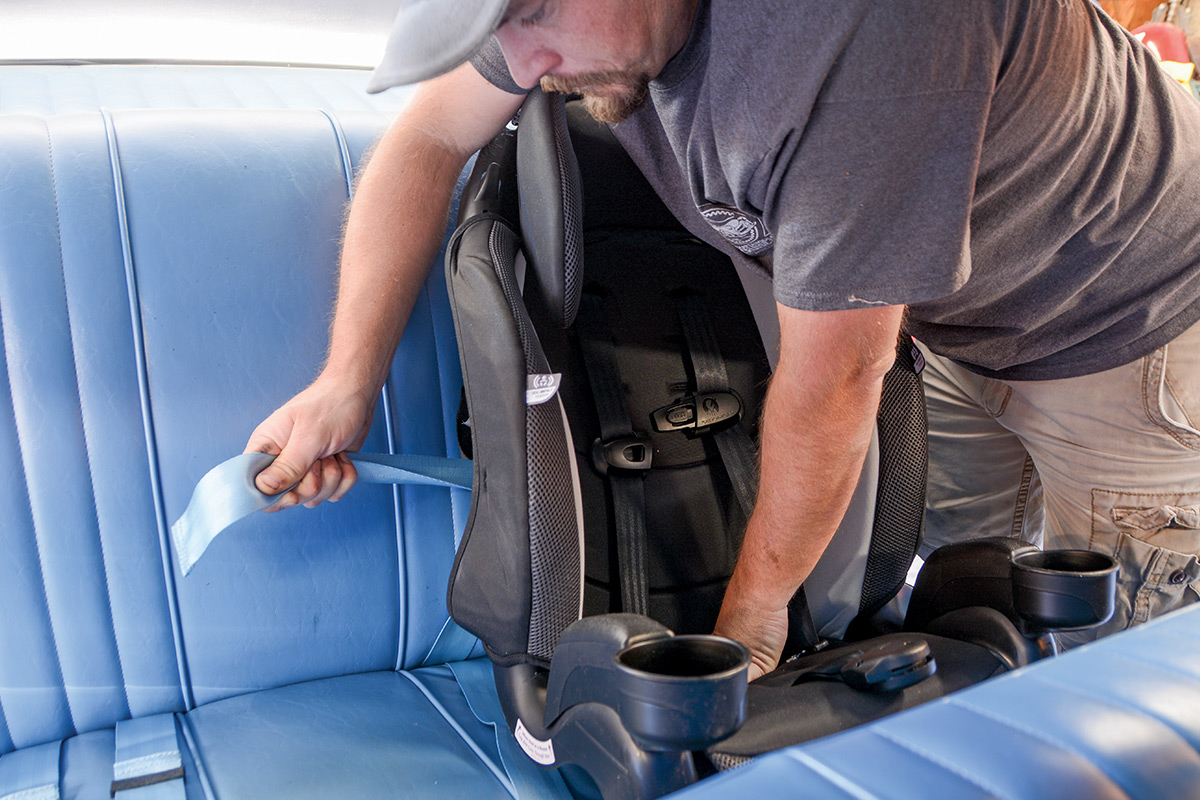
4. Most GM rear seats have two bolts at the bottom of the seat back, which are revealed when the seat bottom is out of the way. After the bolts are removed, lift up on the seat back to remove.
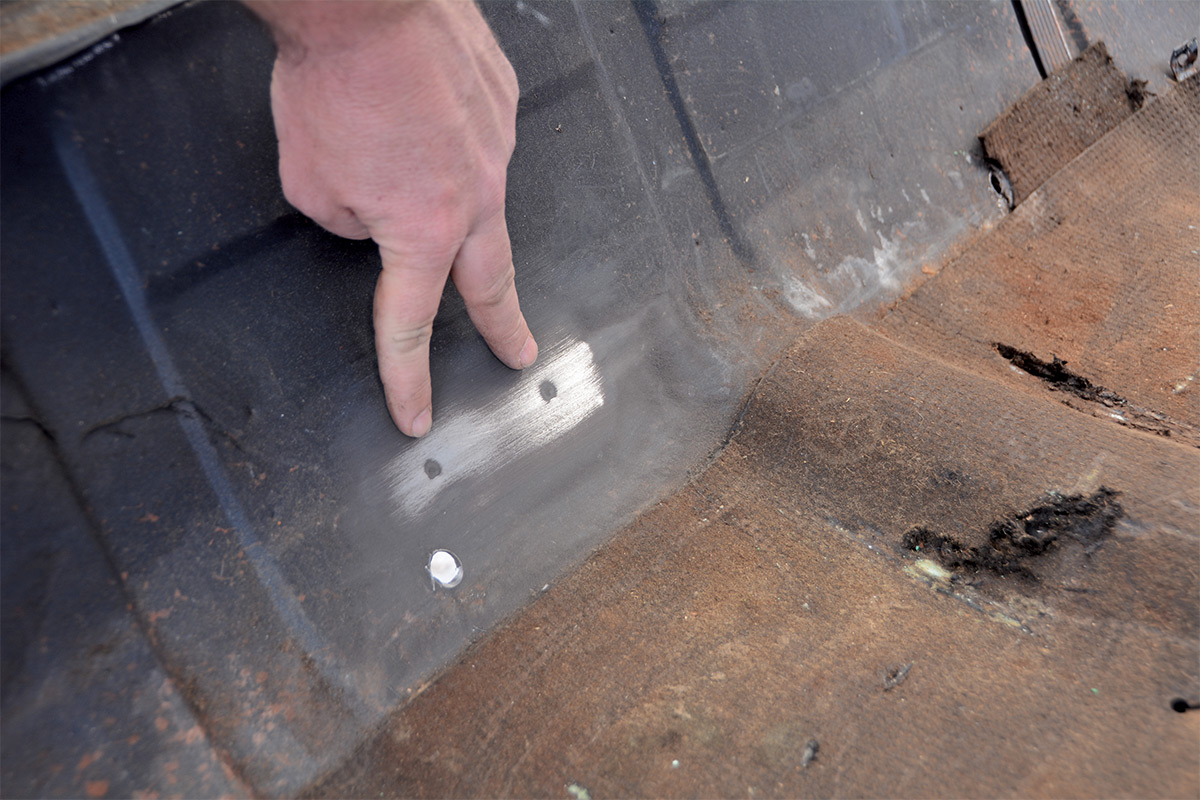
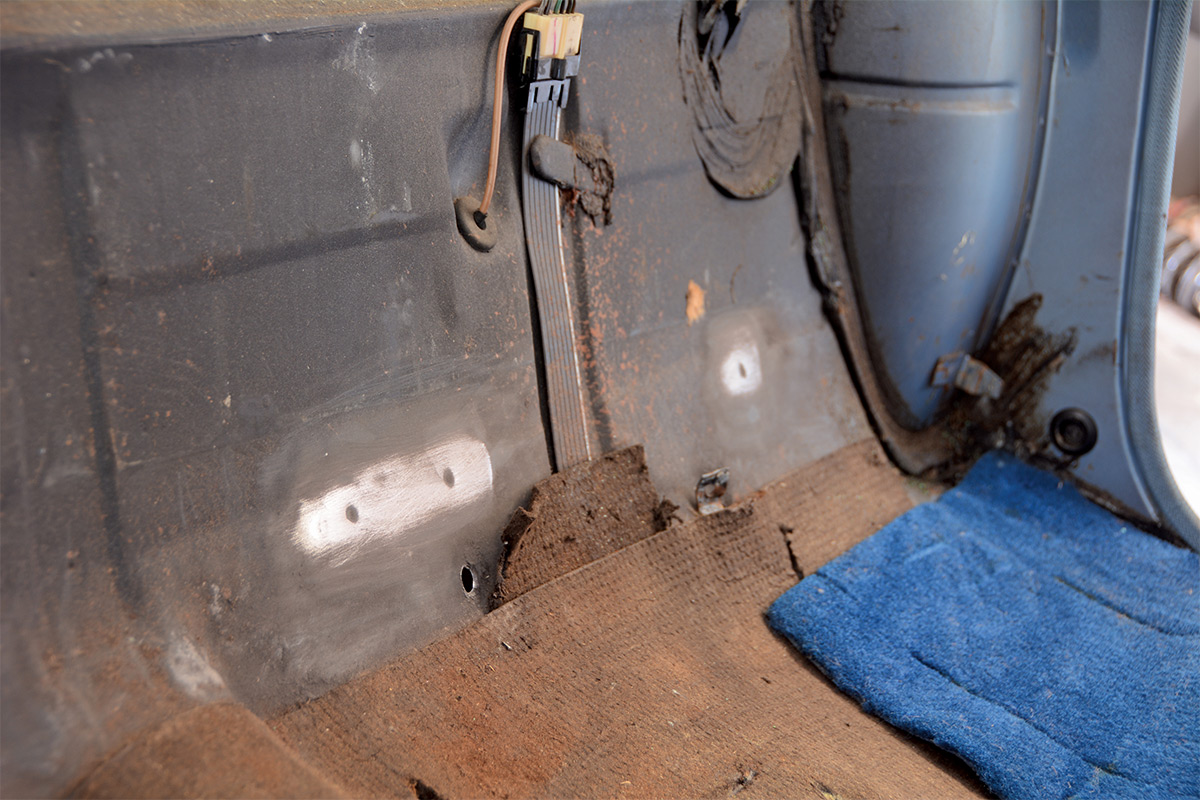
6. We found all six holes in the rear floor area and sanded the area to make them visible. Since the two existing holes are somewhat congruent with one set of factory dimples, we decided to use them instead of drilling new holes.
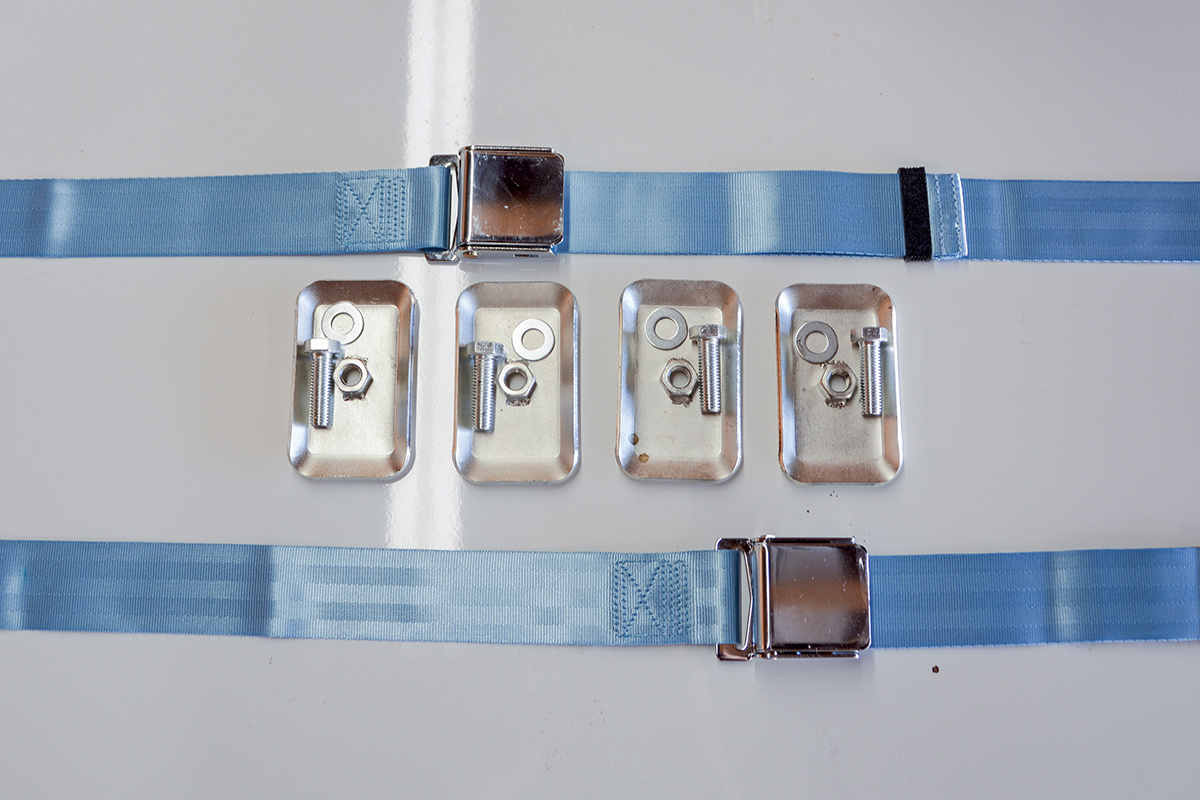
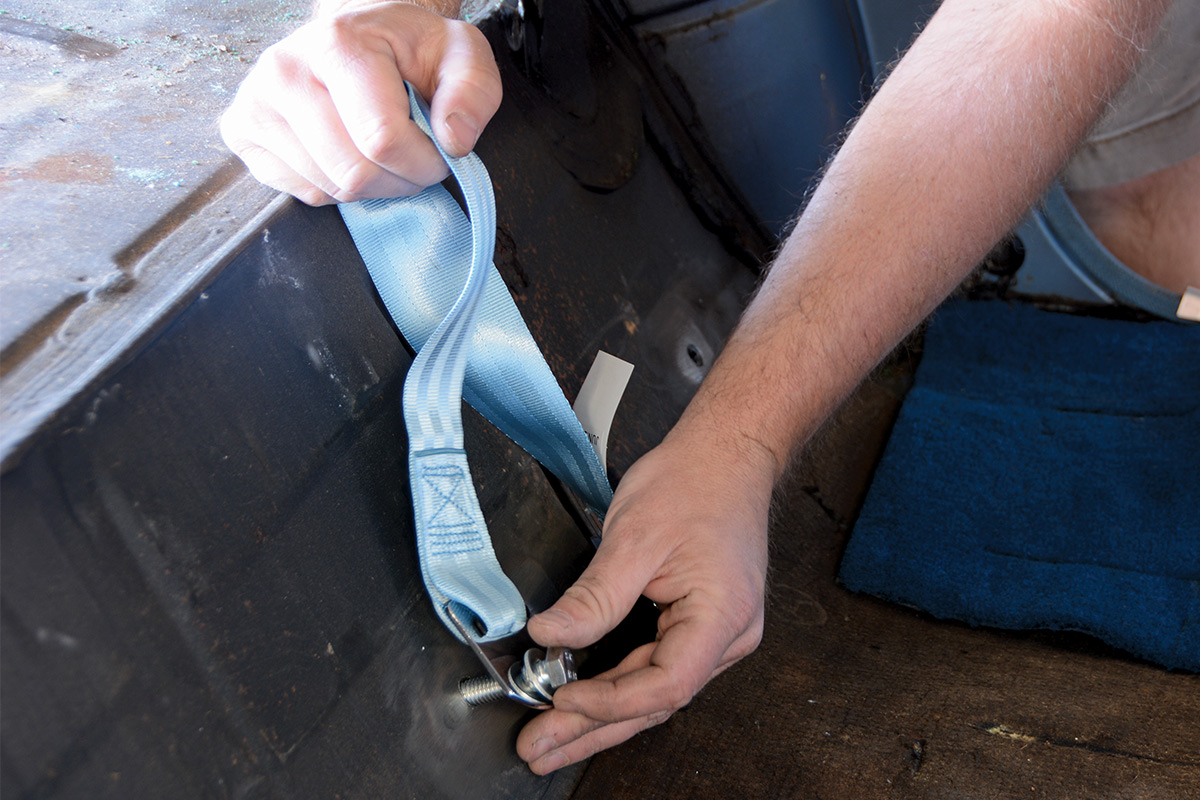
10. The Summit Racing anchors have a ⅝-inch bolt and washer, and we carefully thread it into place. The seatbelt should be positioned so the metal mounting bracket is pointing upward.
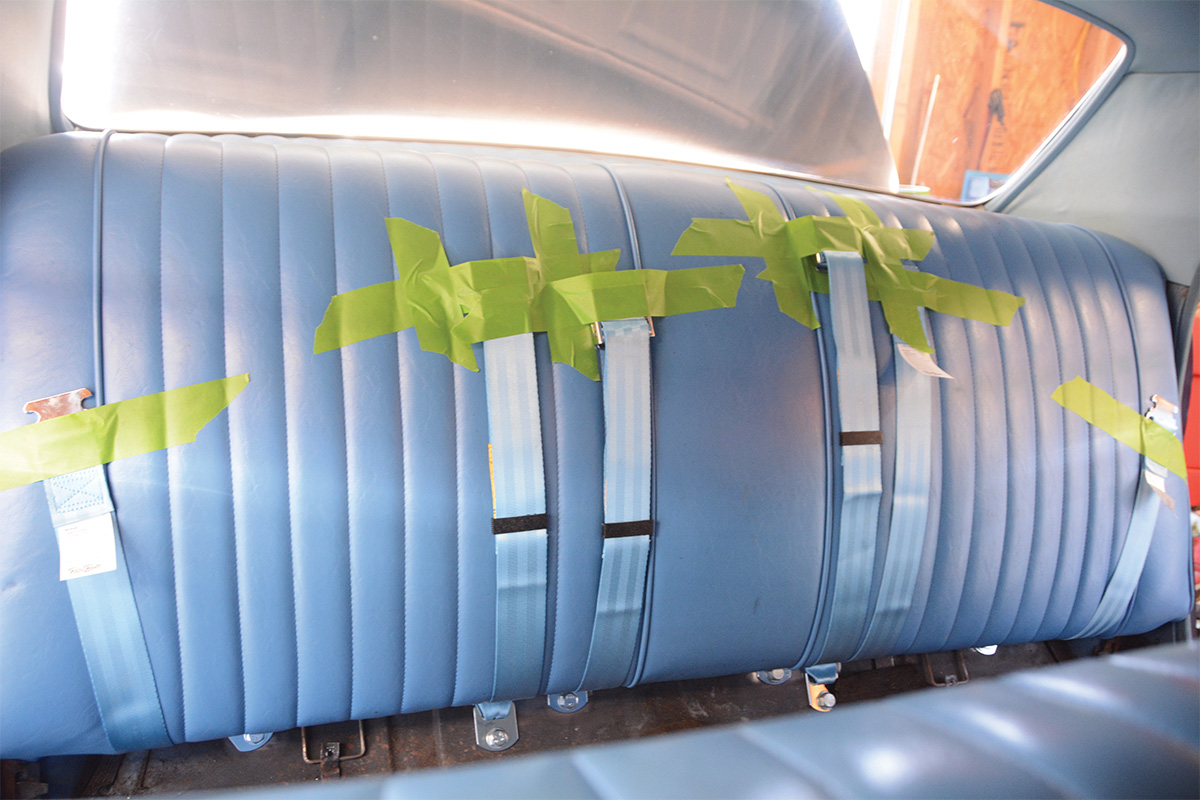
12. We put the seat back into position and then taped the seatbelts to the back while we wrestled the seat bottom into position. Taping the belts keeps them from getting stuck beneath the seat bottom during installation.
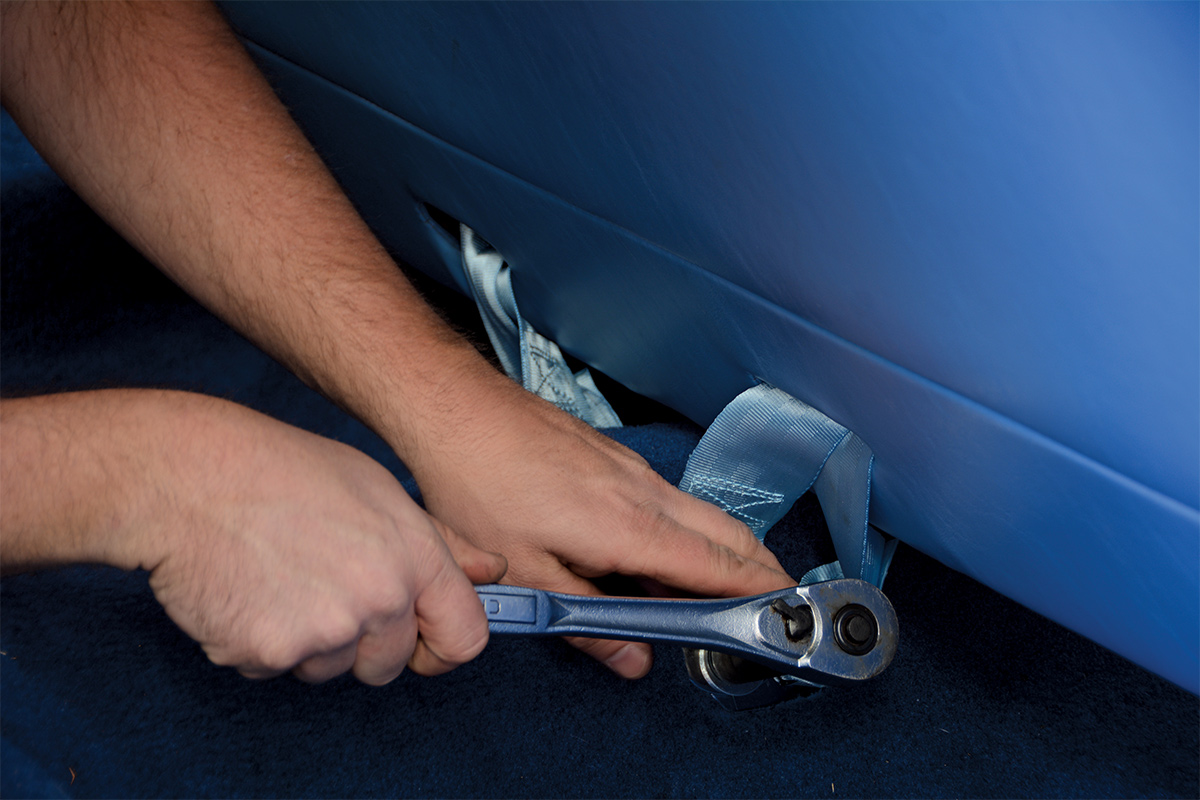

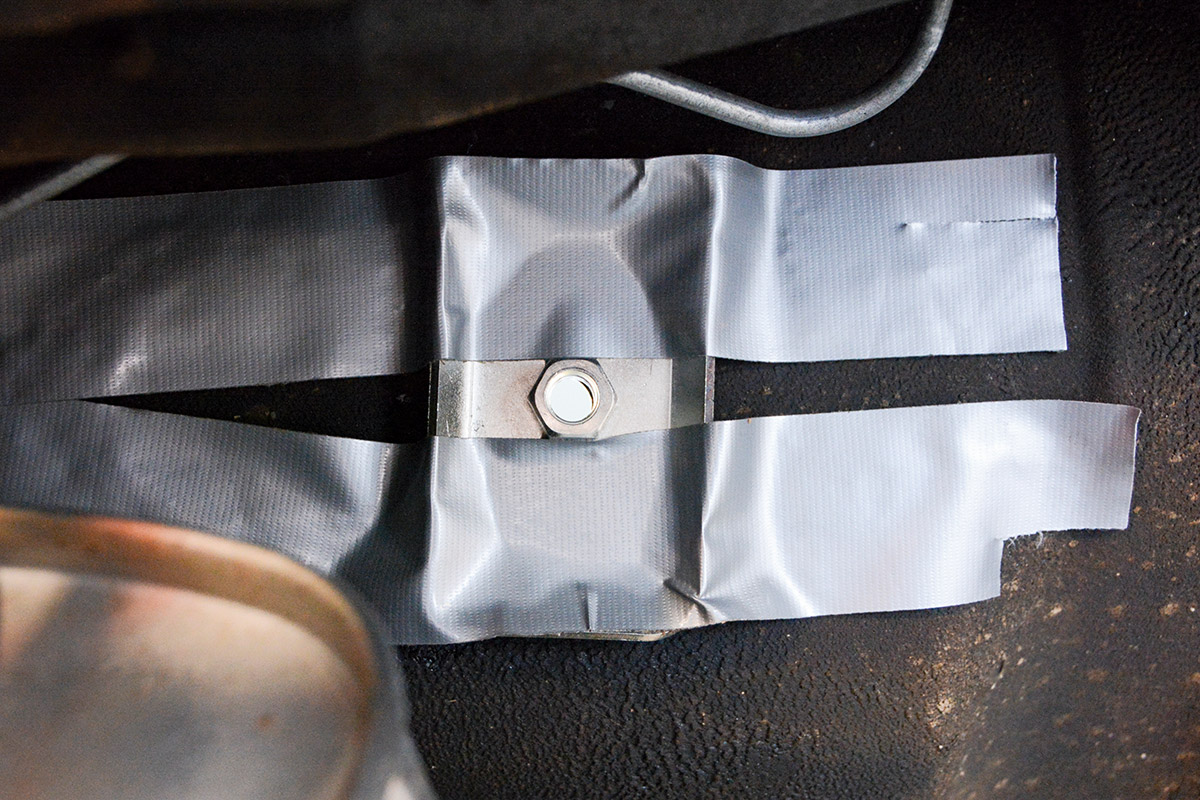
14. Originally, the seatbelts had a rubber cover over the brackets and bolts, but the new ones do not have any type of cover. The brackets bolt to the floor and use large washers to spread the load.
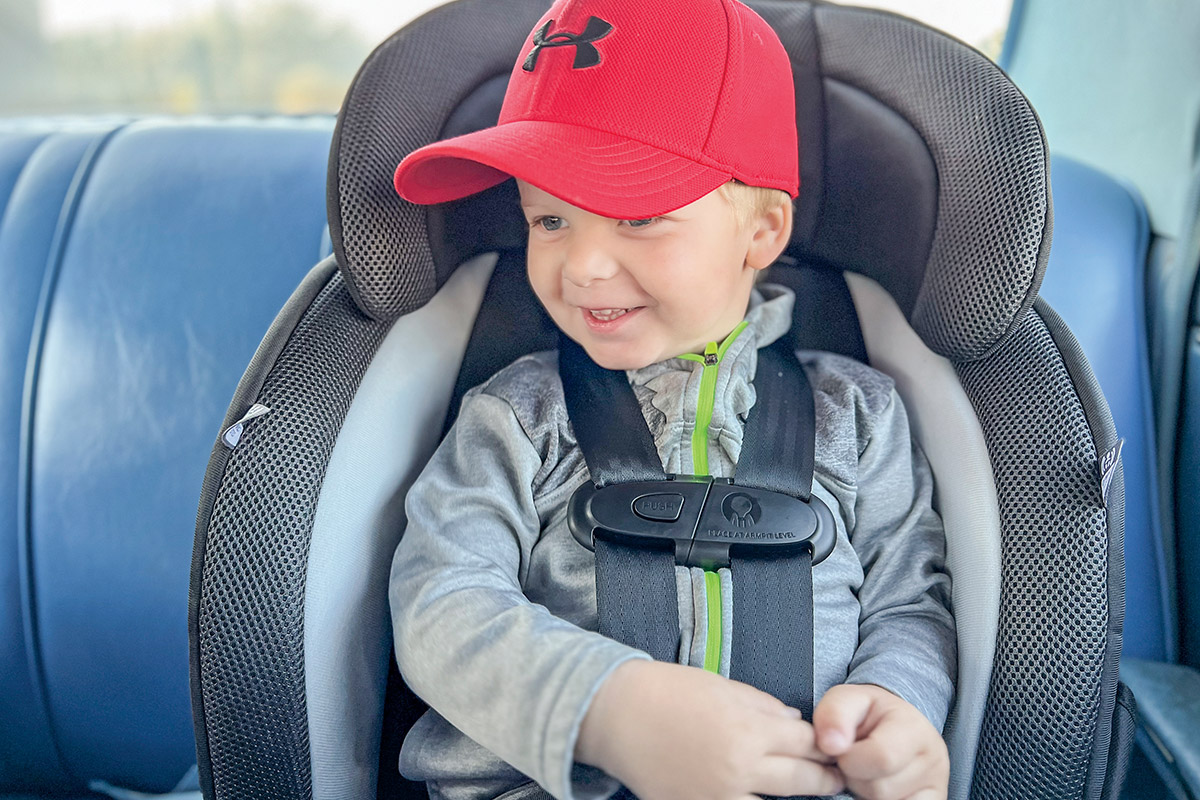
16. The result is a happy 3-year-old who can safely ride along with dear old dad. There is still plenty of room for two more kids in the back and two more passengers up front. Now, the whole family can ride along safely.
SOURCE