ACP department heading TECH
InTheGarageMedia.com
CPP's complete triangulated four-link rear suspension for 1964-1972 GM A-body cars
1. CPP offers a complete triangulated four-link rear suspension for 1964-1972 GM A-body cars, which includes bushings and hardware for easy installation.
Arm Wrestling
Replacing Weak and Worn-Out Rear Control Arms on an Early Chevelle
BY Tommy Lee ByrdImages by The Author
W

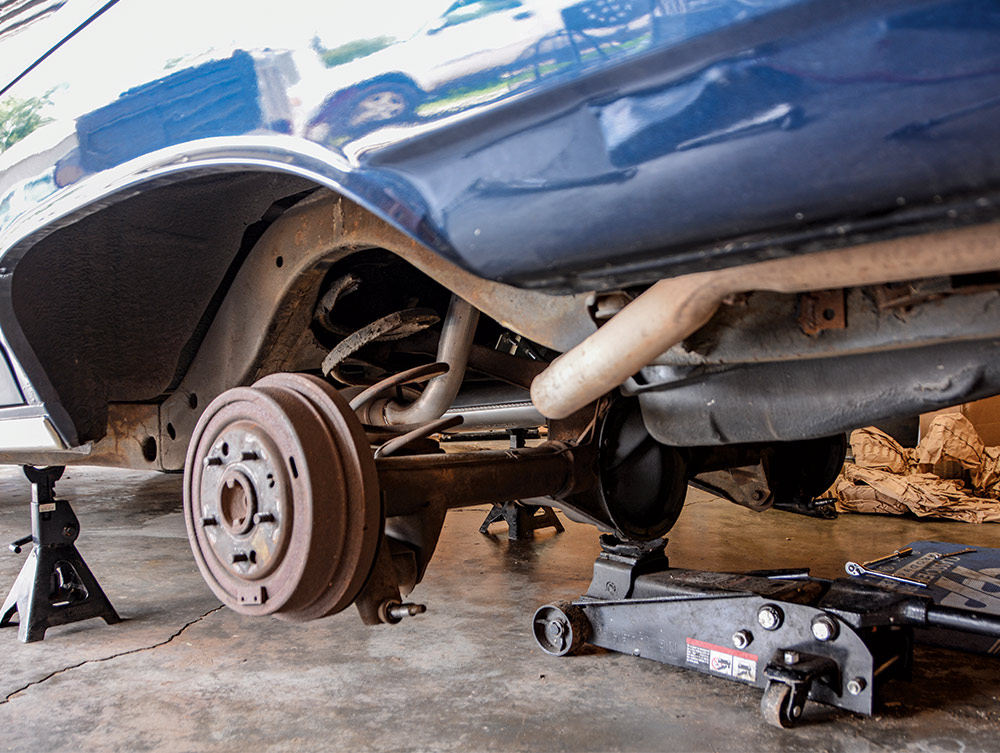
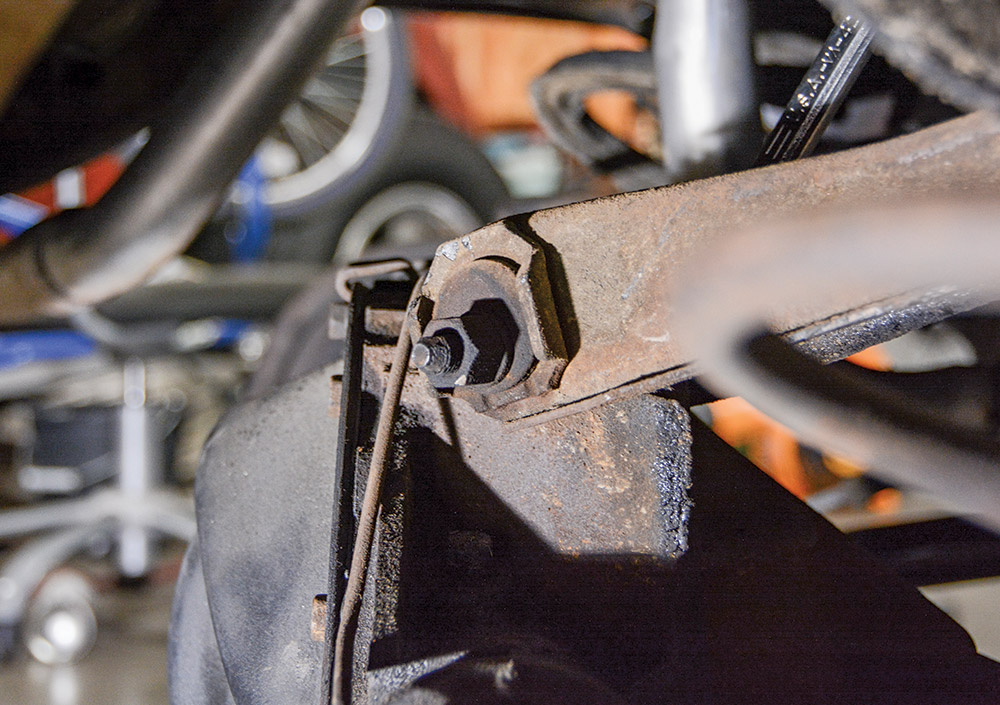
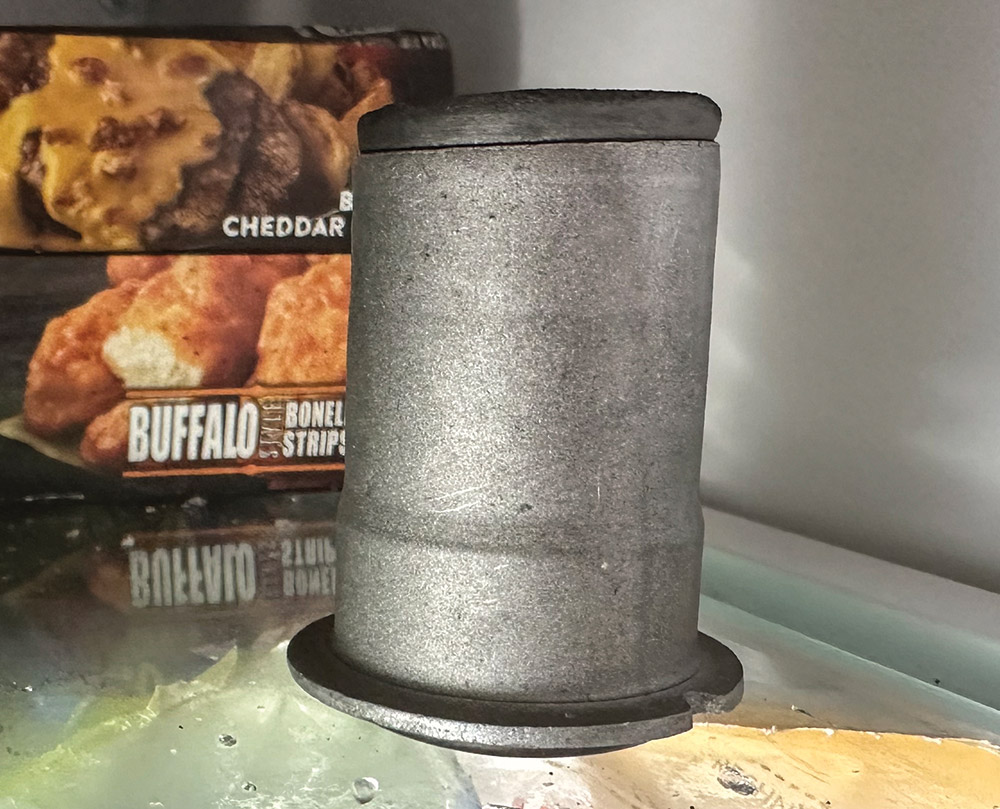
hen it comes to casual cruisers or even daily drivers, it’s easy to overlook certain items, especially if there isn’t any noticeable damage. The phrase “out of sight, out of mind” rings true in many situations as long as performance isn’t compromised. In the case of our trusty 1964 Chevelle four-door cruiser, the rear suspension has been trucking along for 60 years without any real maintenance. The coils were cut many years ago to lower the ride height, and we’ve been pleased with the ride quality and stability on the highway, so upgrading the suspension never made it very high on the to-do list.

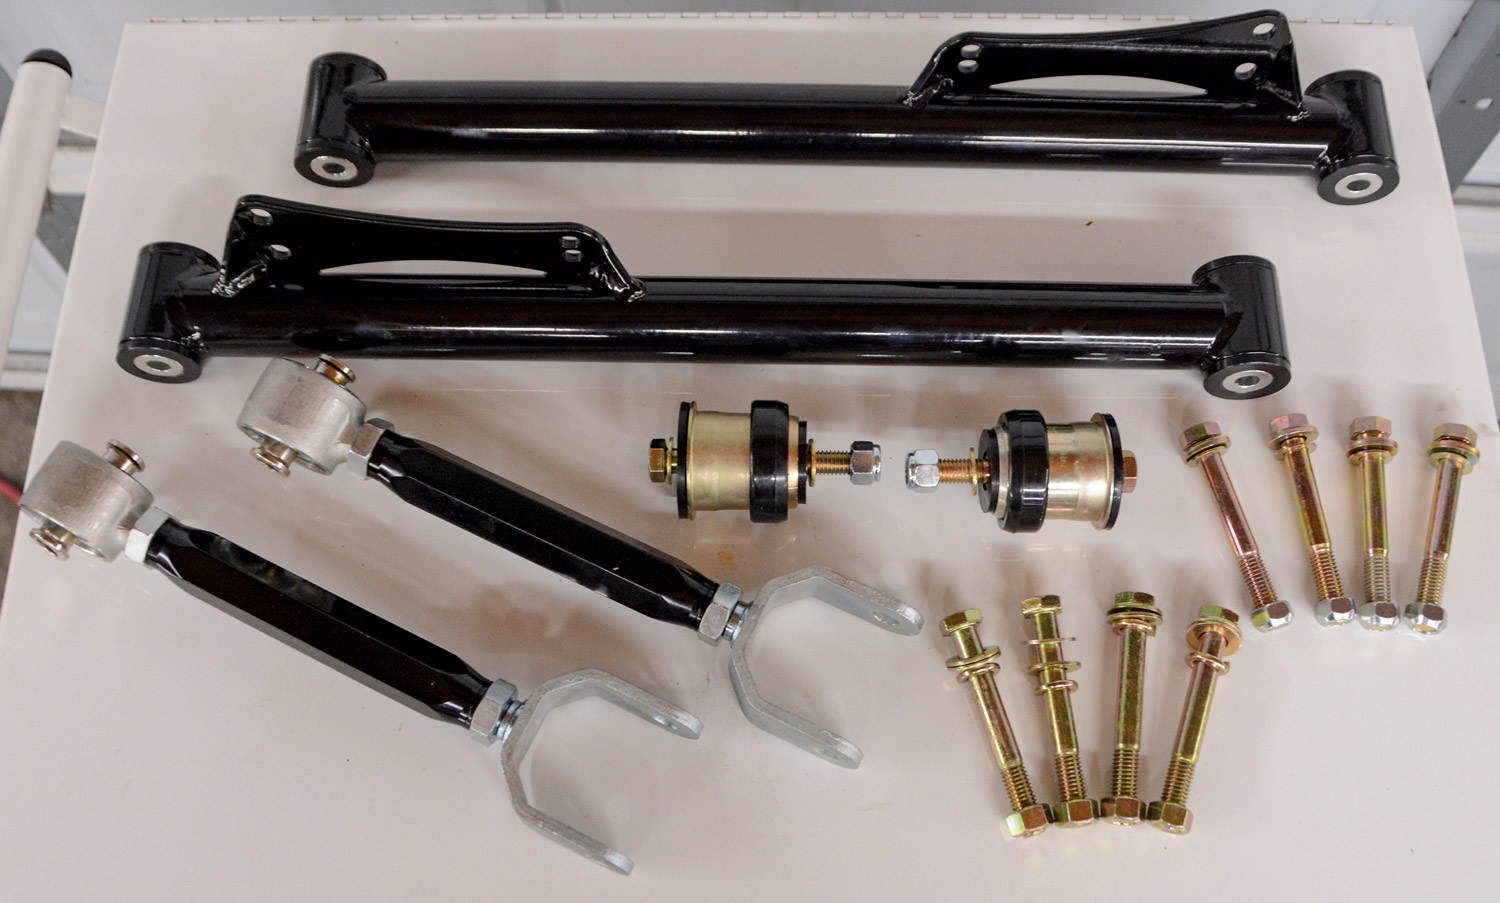
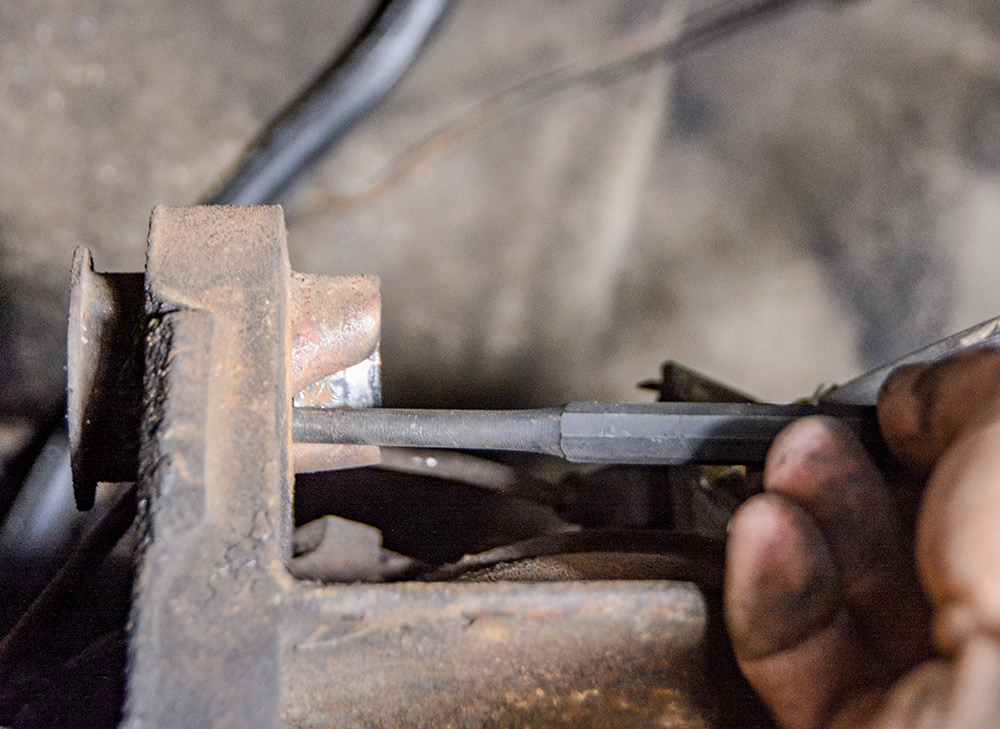
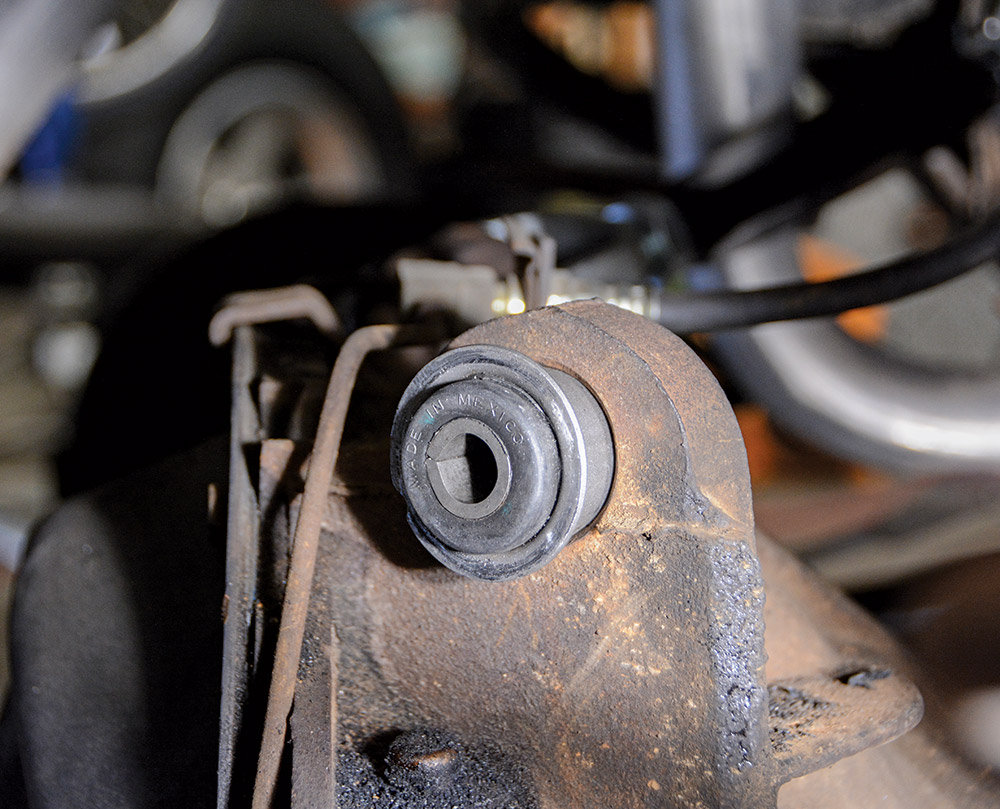
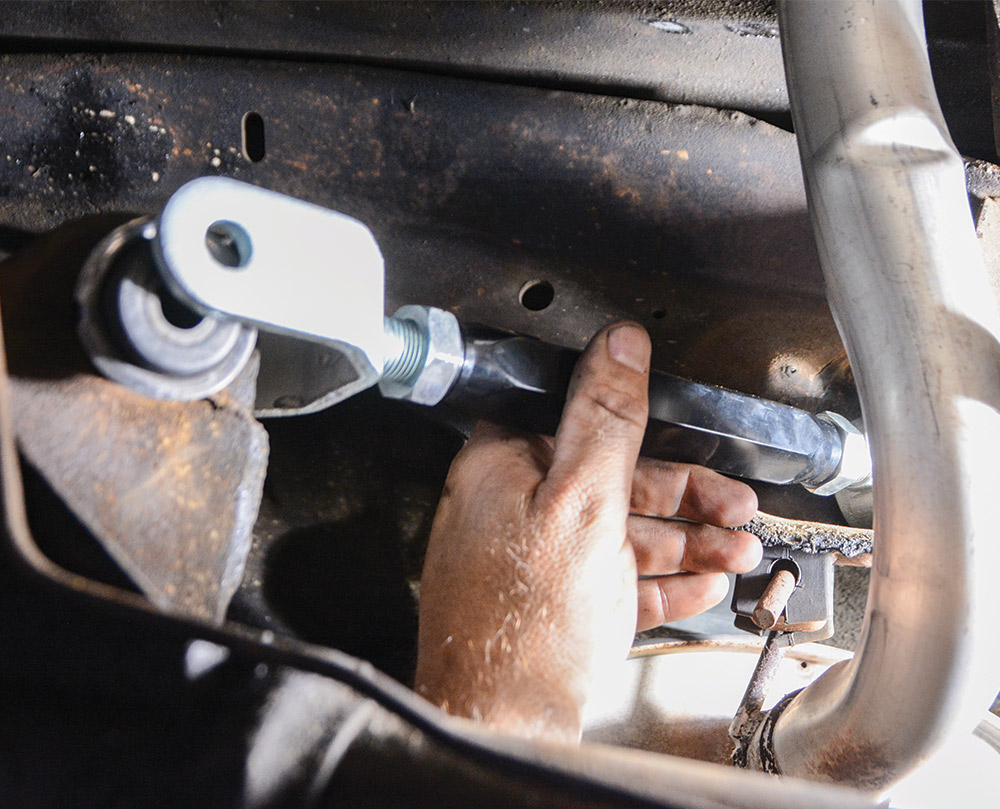
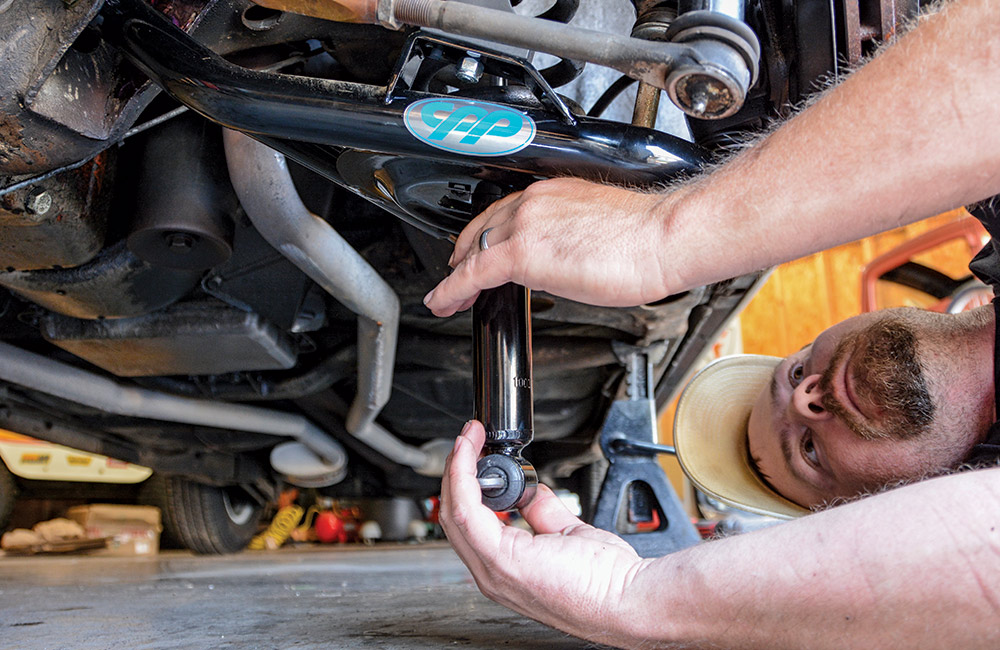
A while back, we decided to upgrade the front of the car with tubular front control arms. Classic Performance Products (CPP) manufactures the kit, so as we browsed classicperform.com we noticed a few options for rear control arms. Knowing that the bushings were likely toast, we thought it would be a practical upgrade to toss the stamped steel control arms in the scrap pile and replace them with tubular units from CPP. We found the appropriate kit (PN PT6467RTCA-KB) and added a pair of CPP Nitrogen Shocks (PN CPP-1007) as an upgrade to our parts store shocks.

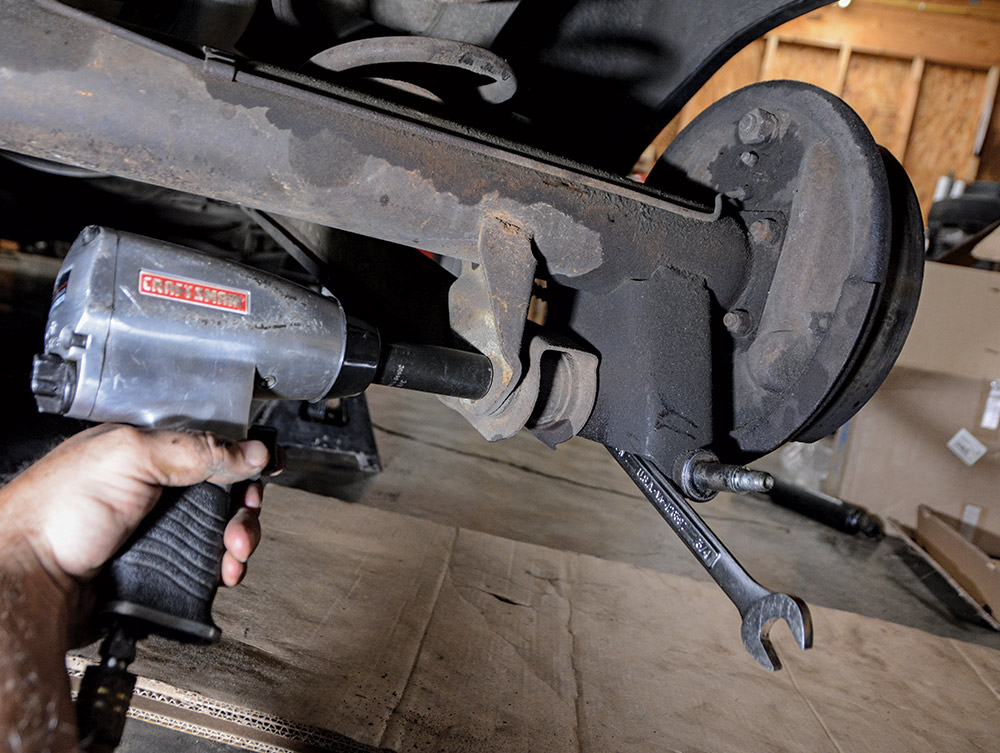
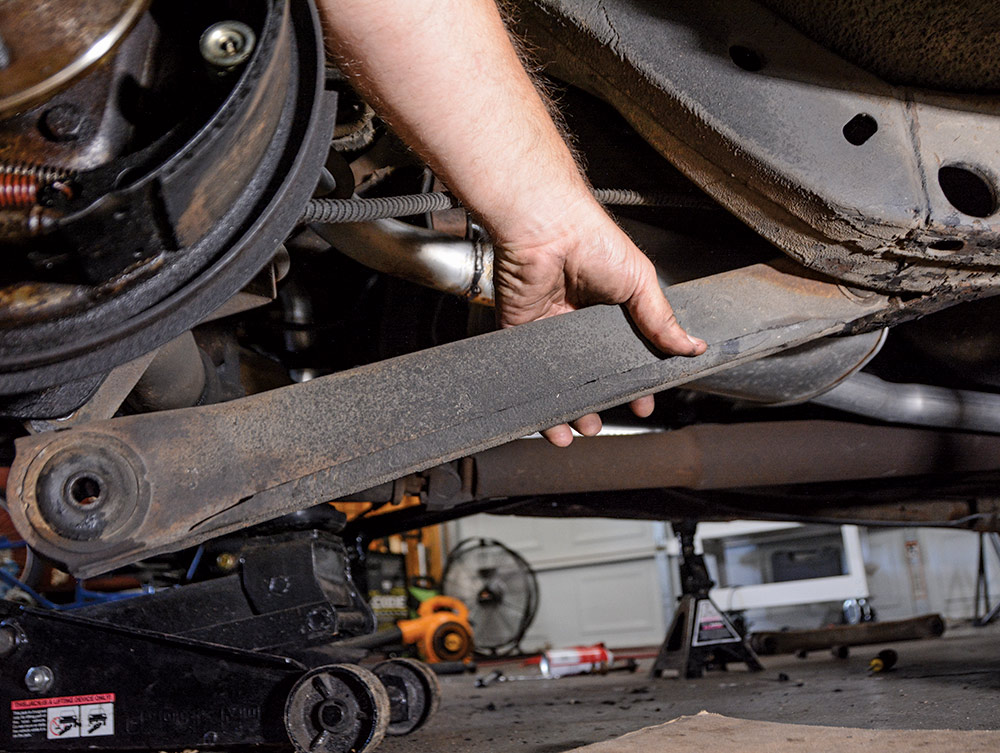
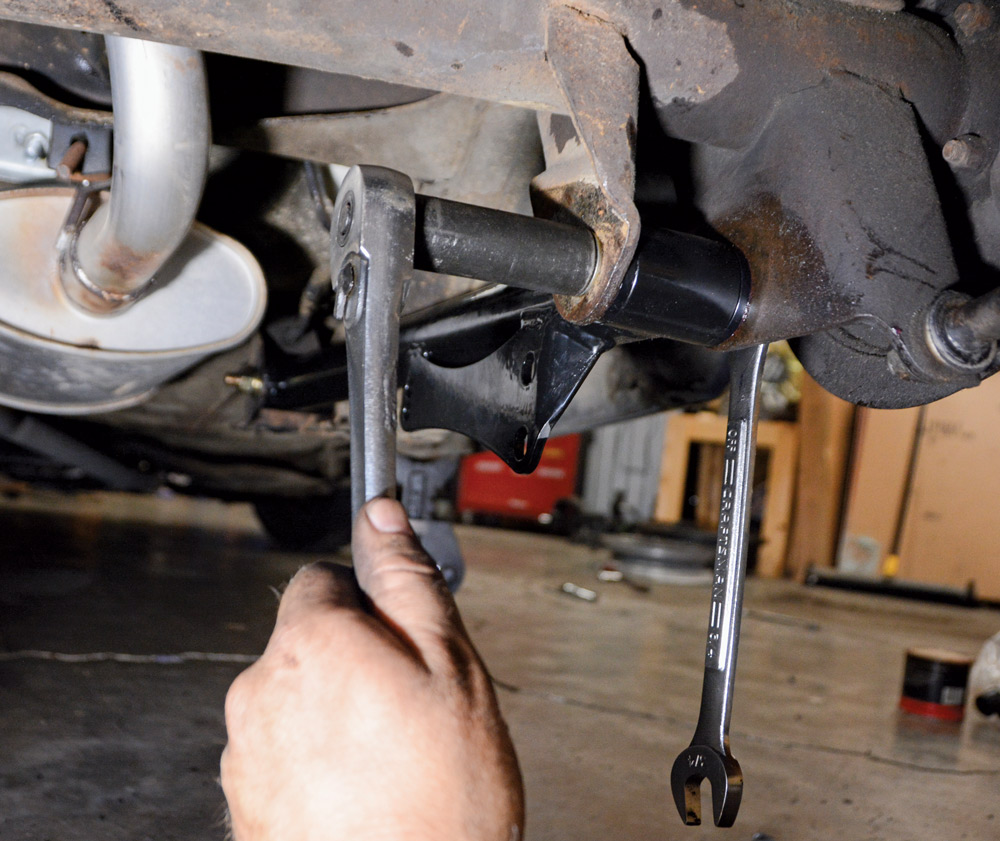
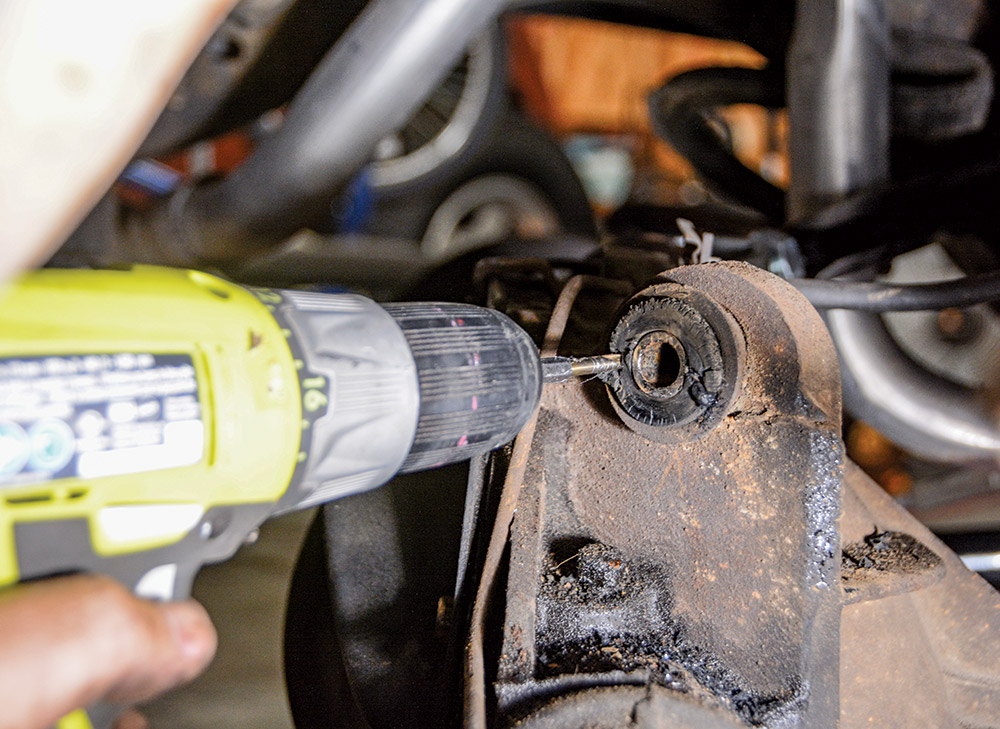
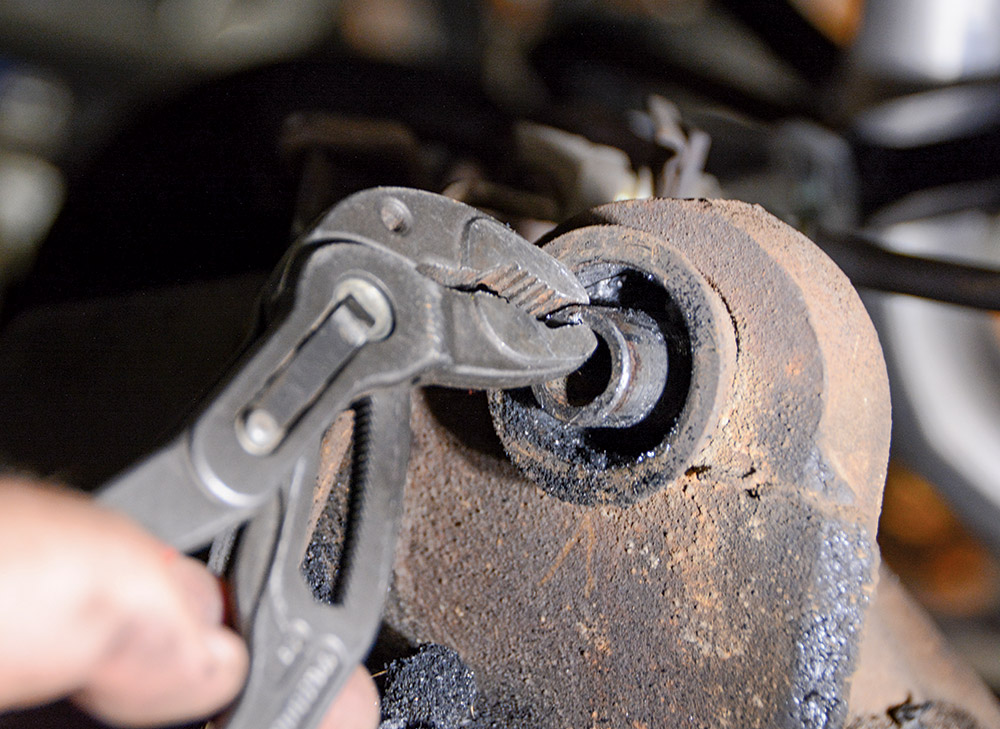
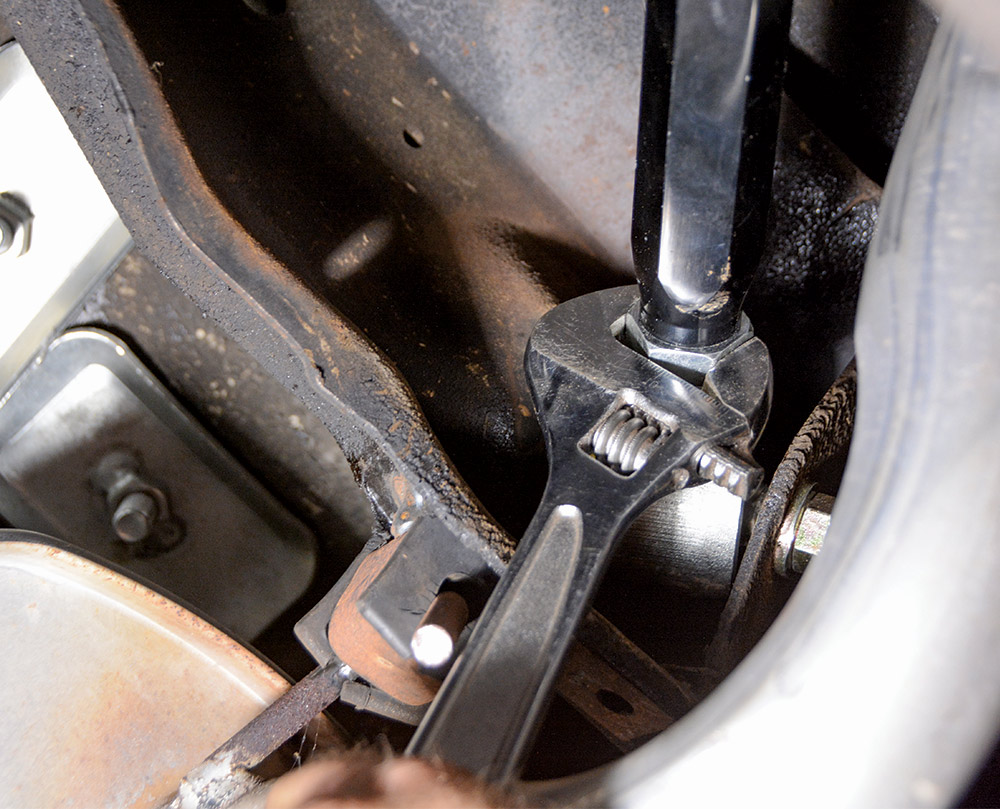
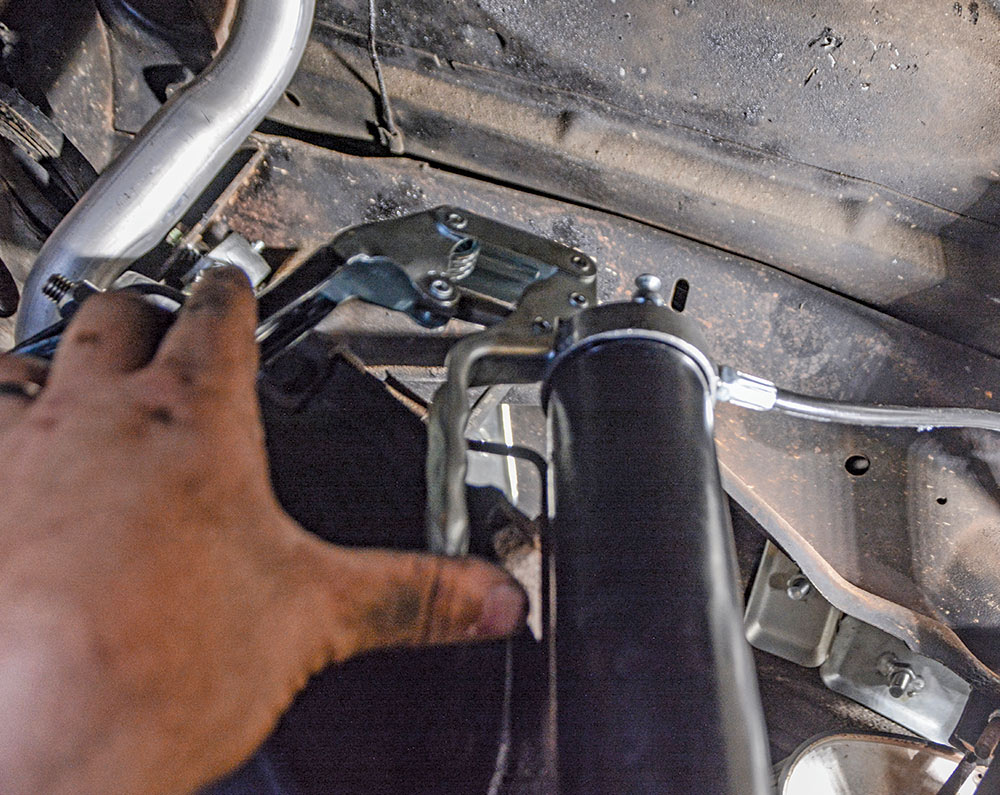
We didn’t want to completely remove the rearend housing, so we performed the install using a floor jack and jack stands in the garage floor. If we wanted to take the install to the next level, we could’ve disconnected the driveshaft and the flexible brake hose to roll the rearend out into the open. Instead, we swapped one control arm at a time, which made for a very simple install.

Overall, we spent a weekend in the shop and used general hand tools to get the job done. Now that it’s back on the ground, we noticed a huge difference in ride quality, as the new bushings offer smooth and quiet operation. Like many of our installs on this 1964 Chevelle, it’s all about practicality, so a weekend project that made a noticeable difference is always rewarding.

Follow along to see how we tackled the CPP triangulated four-link rear suspension install, as the same tactics can be used for any 1964-1972 General Motors A-body car.

view of bottom side of 1964 Chevelle
2. The bottom side of our 1964 Chevelle is a little crusty from 60 years of service, but it’s in great condition. The rear suspension has never been upgraded, so it’s past due for attention.
hand using tool to remove shocks
3. The first order of business is to remove the shocks. These parts store shocks have been on the car for 10-plus years and have very little action left in them.
underside of 1964 Chevelle with shocks removed
4. With the shocks removed, we can lower the rearend much further. The limiting factor is the flexible brake hose, so we want to keep a jack under the rearend so the hose doesn’t have pressure on it. We also kept the driveshaft attached.
hand using impact wrench to remove bolts from lower arms
5. An impact wrench is a valuable part of the disassembly process. The lower arms are held in place with long bolts that pass through the mount, arm, and bushing sleeve. A 3/4-inch socket and wrench are used to loosen the bolts.
closeup of hand using impact wrench to disassemble lower arms
6. The lower control arms attach to the frame with a single bolt and nut. You can access the bolt head through a hole in the frame. Again, the hardware requires a 3/4-inch socket and wrench.
hand removing one of the four lower arms
7. After the two bolts are removed, the lower control arm is removed. Our method is to replace one arm at a time, instead of removing all four arms at the same time.
CPP tubular control arms
8. The new tubular control arms from CPP offer a much stronger design, utilizing round tubing to replace the original stamped steel arms. The lower arms feature CPP’s self-lubricating bushings, as well as a built-in mount for a rear sway bar.
person installing mounting brackets after grease was applied for application
9. We smeared a dab of grease on the mounting brackets to make installation easier. After we line up the boltholes, the new bolts slide into place easily.
ratchet tightening bolts
10. Using a 1/2-inch ratchet with 3/4-inch socket, we snug the new bolts but we will wait until the car is sitting at ride height for final tightening.
ratchet tightening bolt in front mounting location
11. The front mounting location of the control arm retains the original configuration, with the bolt passing through the frame. After this side is snugged, we can repeat the process on the other side to complete the lower arm swap.
closeup of upper arms bolt
12. The upper control arms are a little more complicated than the lowers. Notice the original cam washer, which allows for rearend alignment and pinion angle adjustments. The CPP arms are fully adjustable, eliminating the cam washer design.
impact wrench loosening hardware
13. Busting the crusty hardware loose is easy work for the impact. All hardware in the rear control arms feature a pass-through design with a nut on the other side.
hand holding impact wrench with extension to pass through coil spring to loosen bolt
14. The forward position is a little tougher to reach, so we grabbed a long extension that could pass through the coil spring, into the control arm pocket.
old and new upper control arms
15. Comparing the original stamped upper control arms to the new CPP arms shows a drastic difference in strength and performance. Instead of a standard rubber bushing, the forward mounting point features a greaseable ball and socket arrangement.
new upper control arms adjusted to original
16. Before we install the upper arms, we adjust them to match the originals. We did this by using the new bolts as guides and adjusted the arms to match. This will get us in the ballpark, and we can fine-tune it once the car is back on the ground.
closeup of bushings in rearend housing
17. By far, the most challenging part of the install was the upper control arm bushings on the rearend housing. These are pressed in, and have 60 years of crust, so we knew it would be a big job.
hand using drill to loosen up dirt and debris on bushing
18. While it’s much easier to reach the bushing if the rearend housing is out of the car, it’s possible to do the job with the rearend installed. We start by taking a drill and going around the outer area of the rubber bushing.
pliers removing rubber from bushing
19. After the drill chews through most of the rubber, we take pliers to pull the steel sleeve out of the bushing. This leaves behind a steel shell that is pressed into the cast iron ears on the rearend housing.
hand removing shell out of bushing housing
20. We used a punch with a blunt end to collapse the un-flanged end of the bushing shell. Then, the same punch is used to drive the shell out of the housing. A mini sledgehammer is the perfect tool for the job, but it still requires some finesse if you’re working underneath the car.
bushings from CCP kit
21. 1965-1972 Chevelles use the same type of bushings, which is what’s included in the CPP kit. Since our example is a 1964, we discovered that the first-year Chevelle featured smaller bushings.
CH36488 bushing inside freezer
22. We ordered a set of CH36488 bushings from OPGI, which are the one-year-only 1964 A-body bushings. We stuck them in the freezer overnight to contract the steel shell for easy installation.
shell in rearend housing
23. With the bushings still frosty cold, we seated the shell in the rearend housing. It’s important to get it started straight before you start hammering.
hand holding large socket in bushing shell
24. Using a large socket that fits on the flanged area of the bushing shell, we once again use the mini sledgehammer to carefully drive the bushing into the housing. Once the beveled part of the shell reaches the rearend housing, it’s good to go.
new upper control arm being installed
25. Now, we can install the new CPP upper control arms. We start by seating the front part of the arm in its pocket and pushing the bolt through. Then, we can do the same for the rearend housing attachment point.
closeup of wrench tightening bolt
26. After both upper arms are bolted in, we can tighten the nuts to lock down the adjustments. This would be a good time to adjust the pinion angle if your combination needs some fine-tuning.
closeup of hand tightening
27. The only bushing that requires grease is the upper control arm in the forward position. We squeezed some grease into the fitting and then brought the car down to ride height for final tightening.
These CPP-1000 nitrogen shocks are several steps above the quality of the standard parts store equipment
28. Finally, we wrapped up the rear suspension refresh with a set of CPP Nitrogen Shocks. These shocks are an affordable option and are significantly better than what you can get at the parts store.
side view of 1964 blue chevelle
29. The difference in ride quality is noticeable after installing the CPP triangulated four-link rear suspension. We’re confident that the stronger design is overkill for our lowkey cruiser, but we know the new arms and bushings will last a long time.
SOURCES