ACP department heading TECH
InTheGarageMedia.com
1968 Chevy Camaro in LeMans Blue with 350 badging and rally wheels sits in original condition
1. This project was started with the cleanest 1968 Camaro that could be found. It pays to start with a sound car, even knowing from the start that extensive modifications will be made.
Fresh Metal typography
1968 Camaro Floor and Firewall Install
BY Ron CovellImages Courtesy of Roadster Shop
I

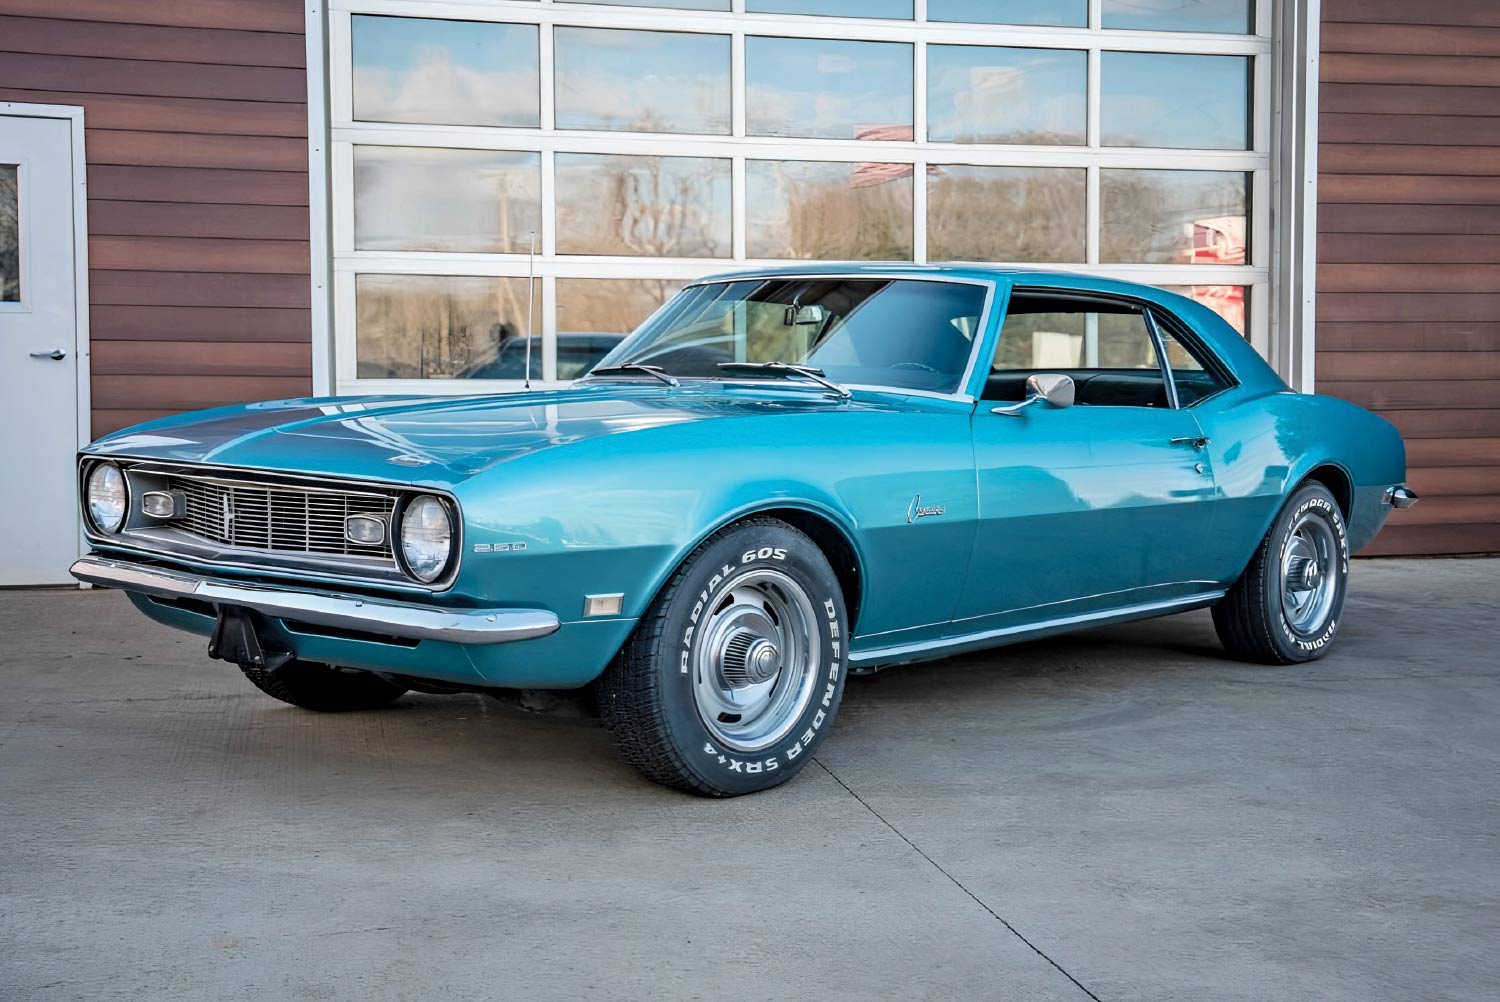
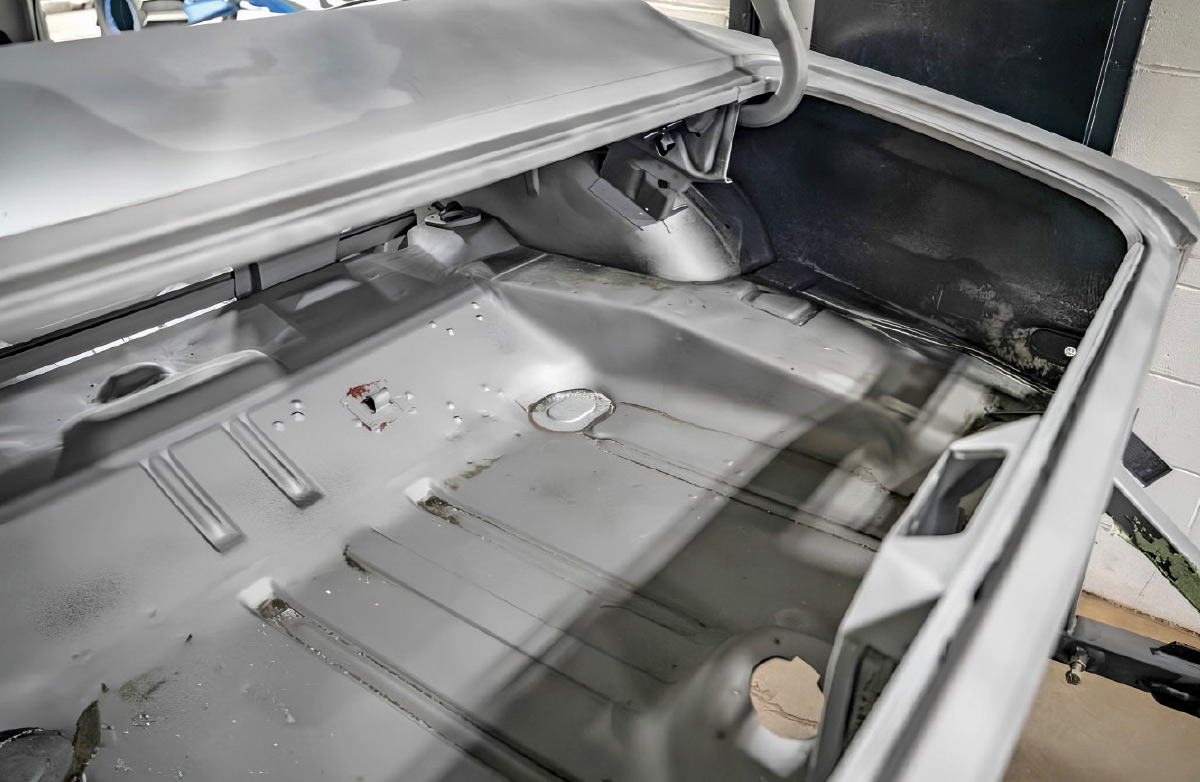
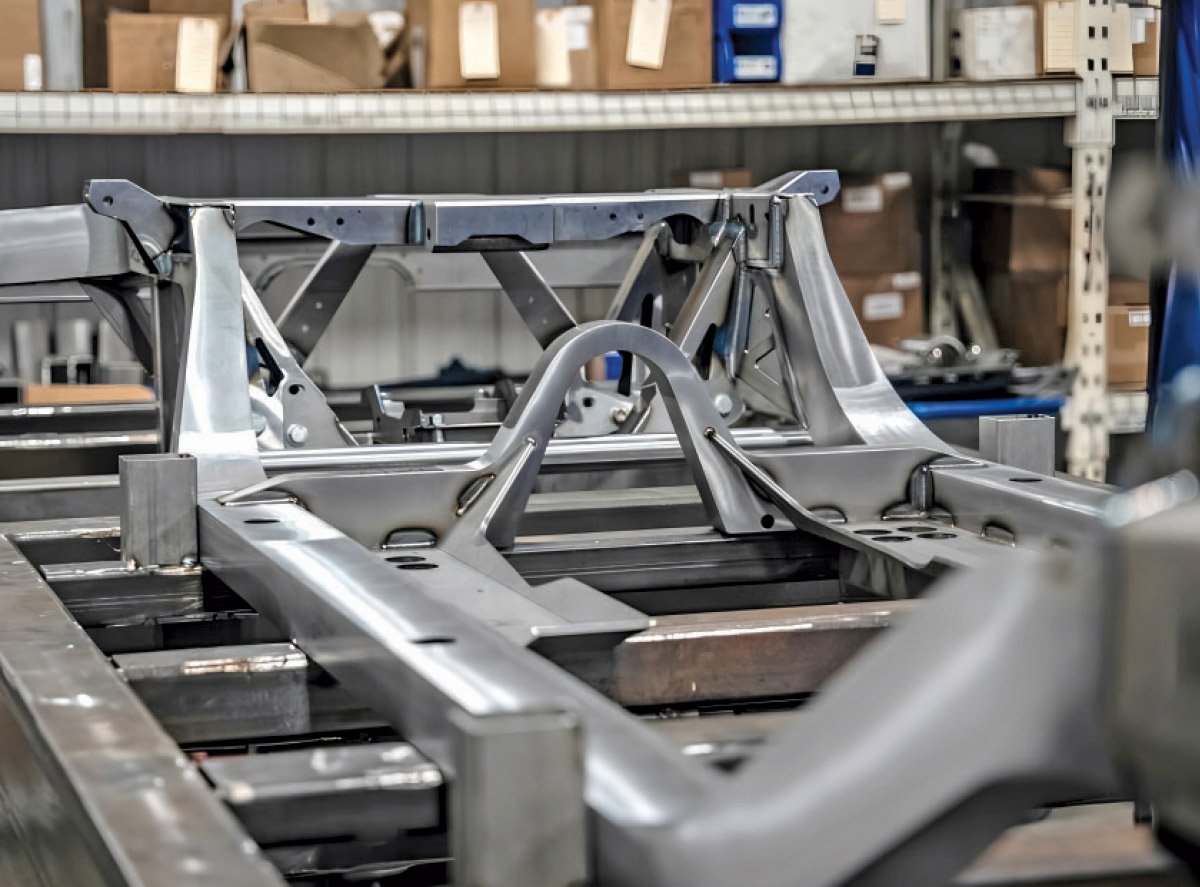
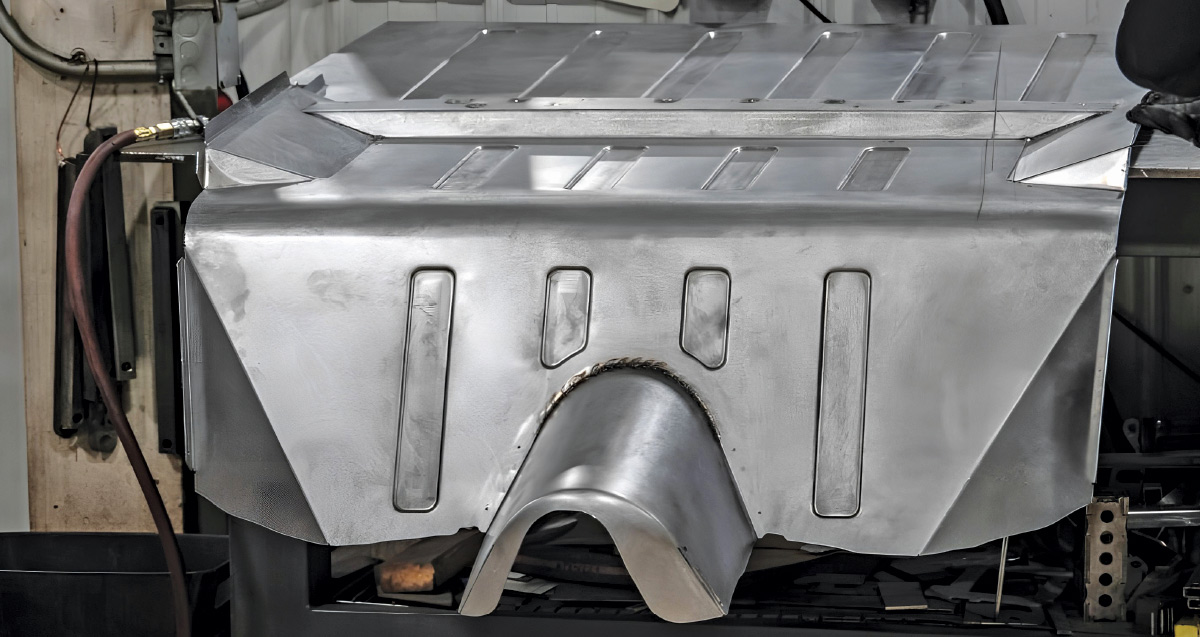
n this article, we’re looking at a 1968 Camaro being built at Roadster Shop. As is typical for a high-end build like this, they started with the best-quality donor vehicle that could be found. After fitting the Camaro body onto one of their Fast Track chassis, they did a complete scan of the body, and Mike O’Brien, the lead engineer at Roadster Shop, carefully designed a new floor to fit over the chassis, which kicks up in the rear to clear the independent rear suspension system.

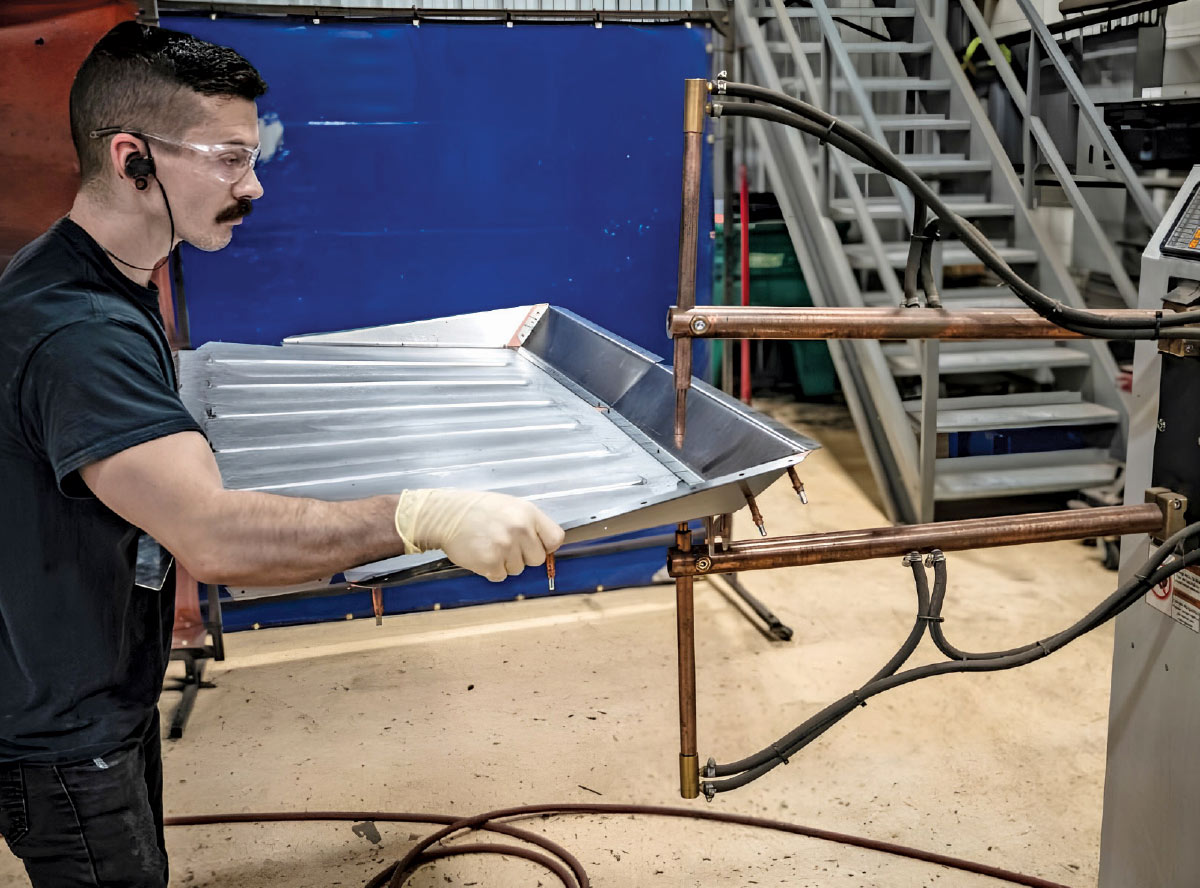
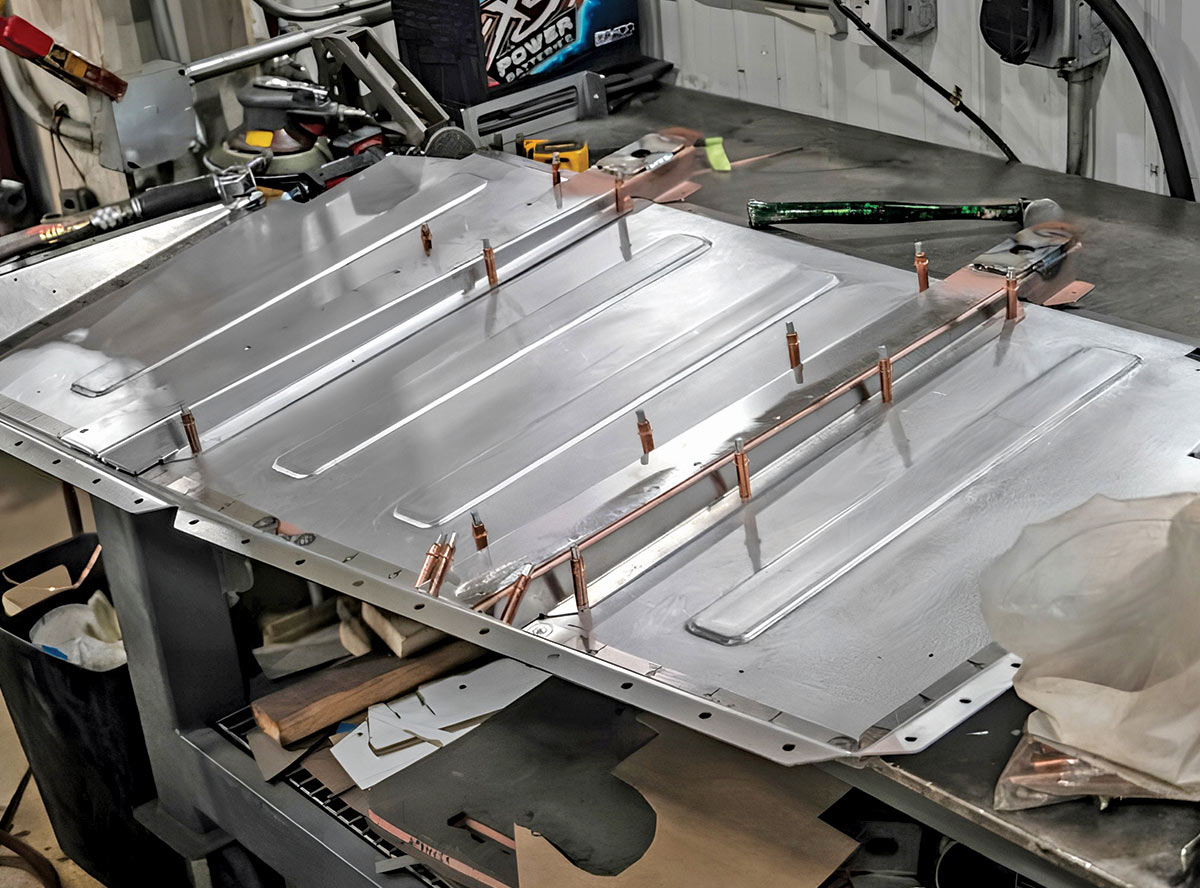
Doing this work in CAD has many advantages. It was a straightforward process to determine the dimensions and shapes for all the panels, and to pinpoint the location of each reinforcing rib in the floor panels. All Roadster Shop chassis are CAD-designed, so that data was called into play to help design the floor, so it fits neatly to both the body and chassis in every critical area.

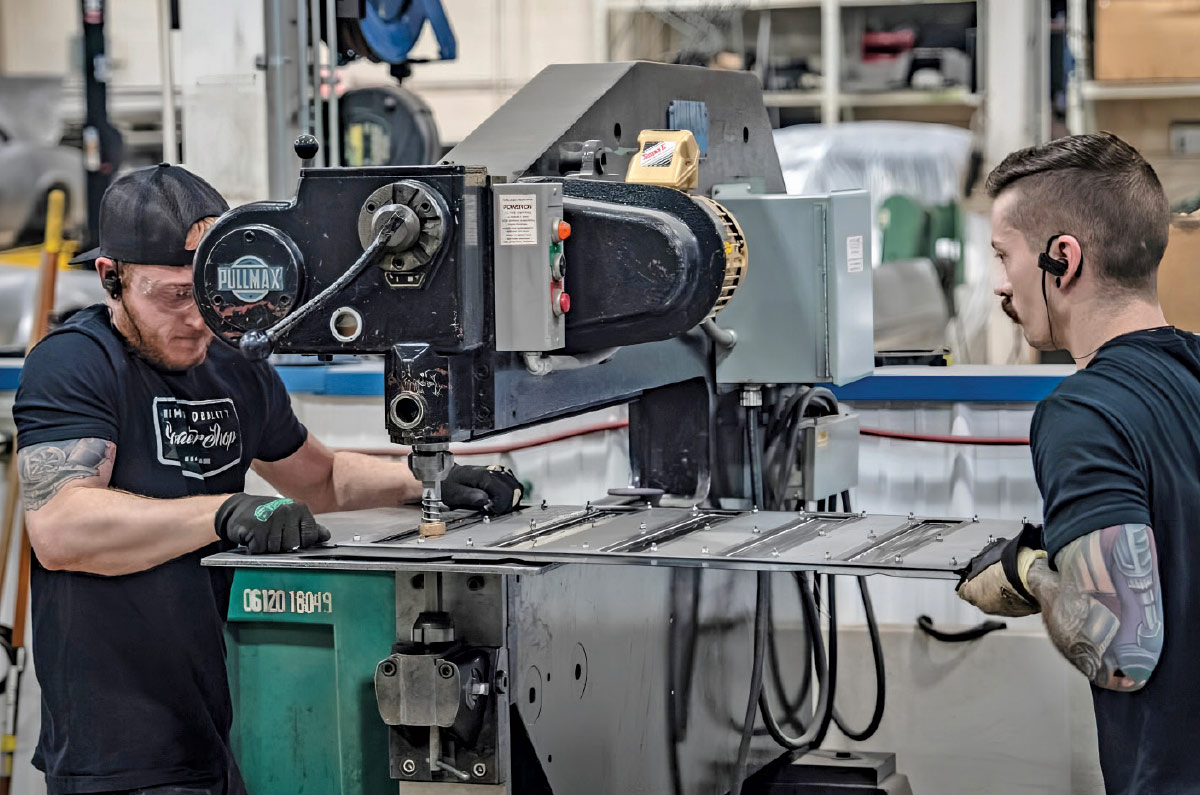
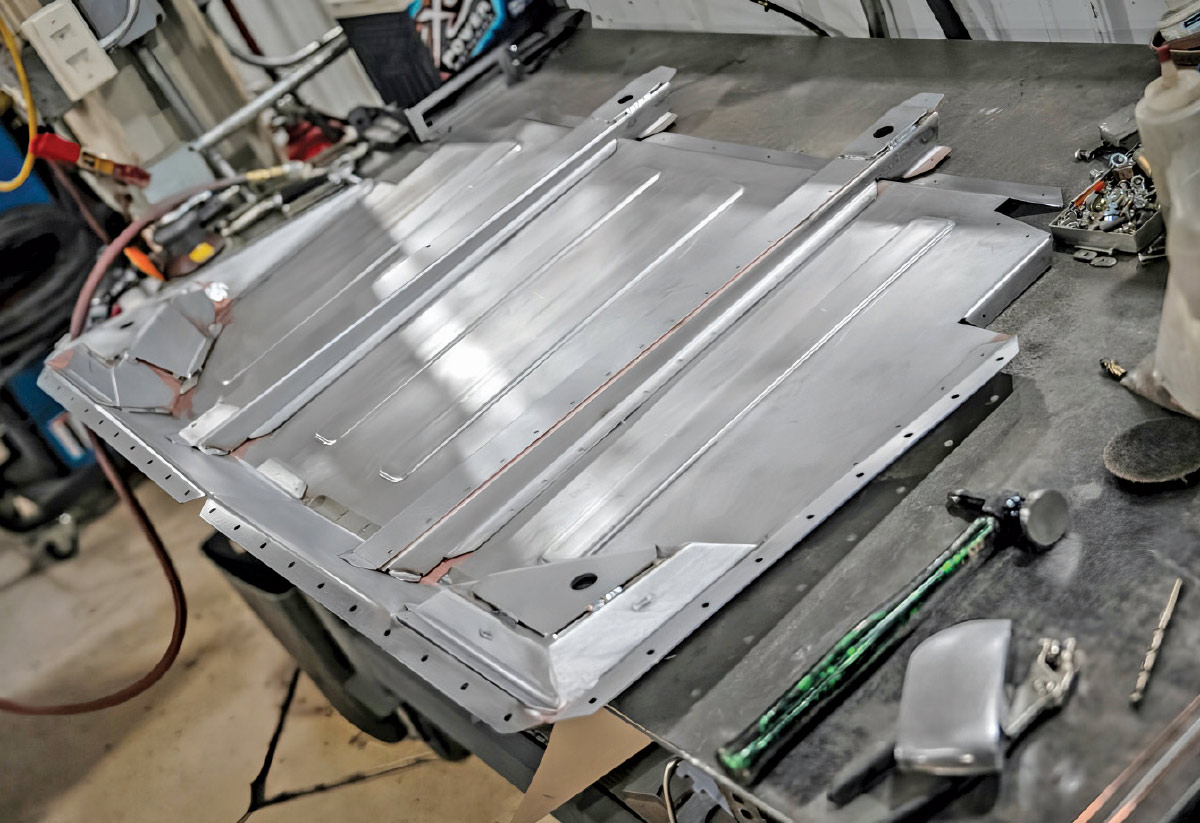
This digital information was also used to laser-cut guideplates to use on the Pullmax machine to precisely locate and form each rib. Some of the body mounts are located on the new floor, and these areas were heavily reinforced to provide the necessary strength.

An arched crossmember was placed in the chassis just ahead of the independent rear suspension, so an extension was attached to the new floor panel to clear it.

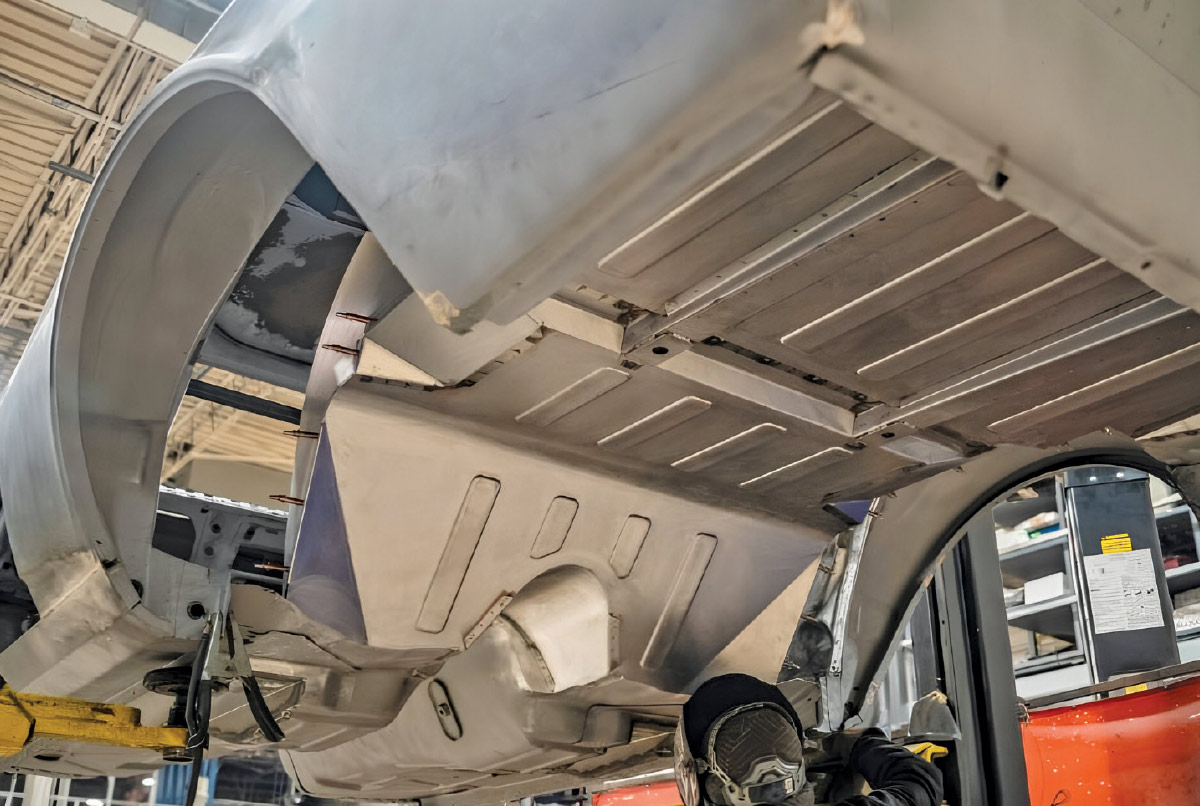
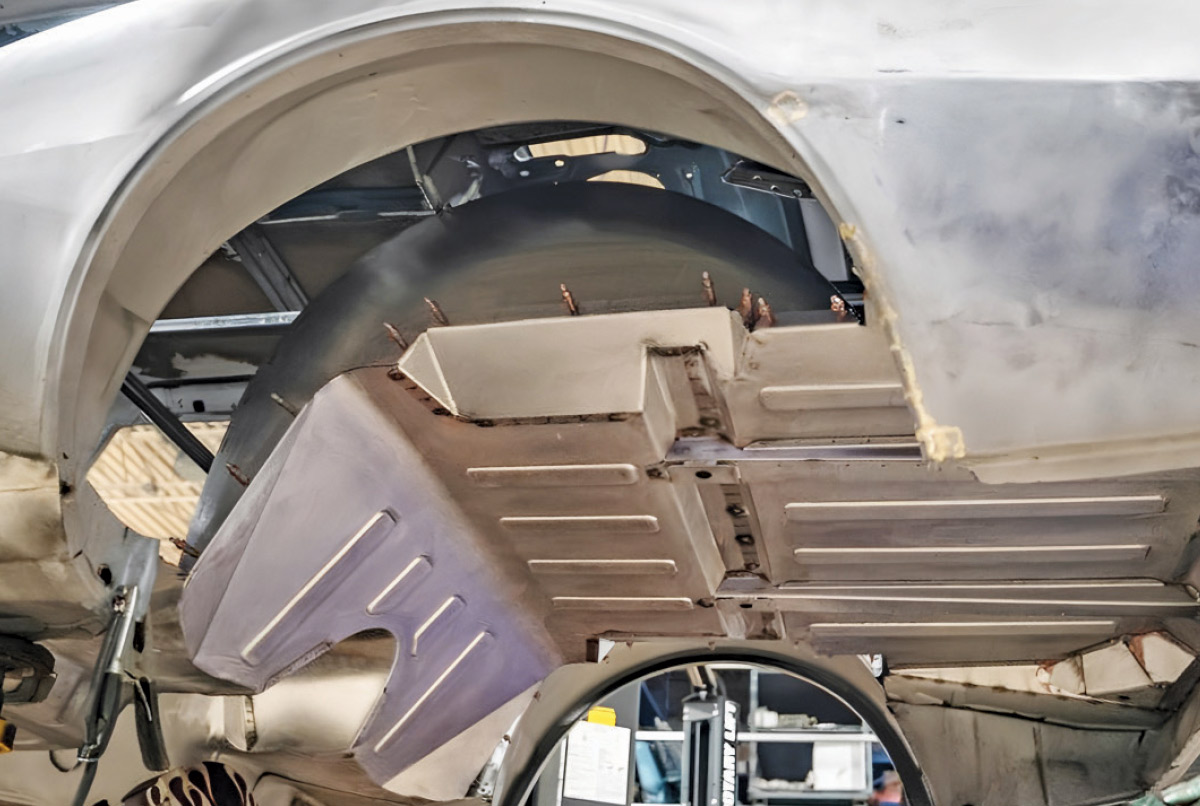
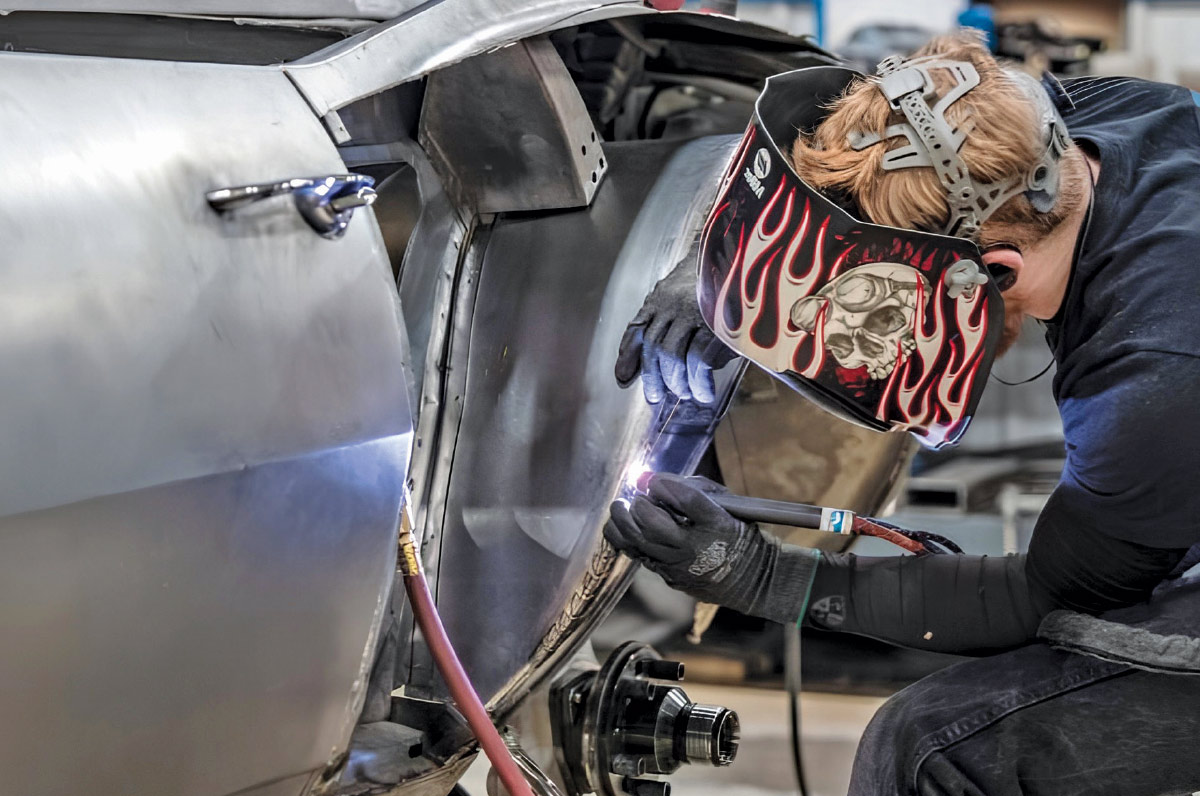
The rear wheelwells were enlarged to accept the wheels and tires selected for this car. Since aftermarket quarter-panels will be installed on this car, the original quarters were removed to provide access for working in this area.

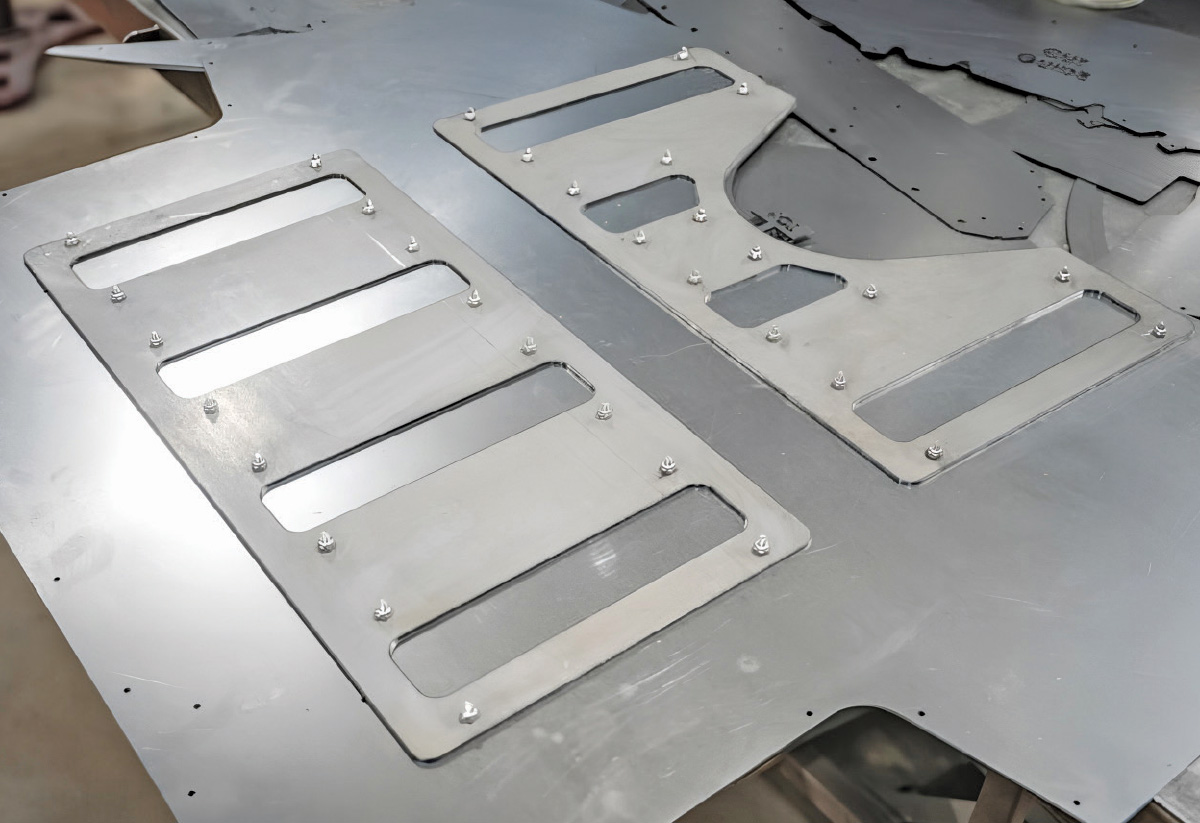
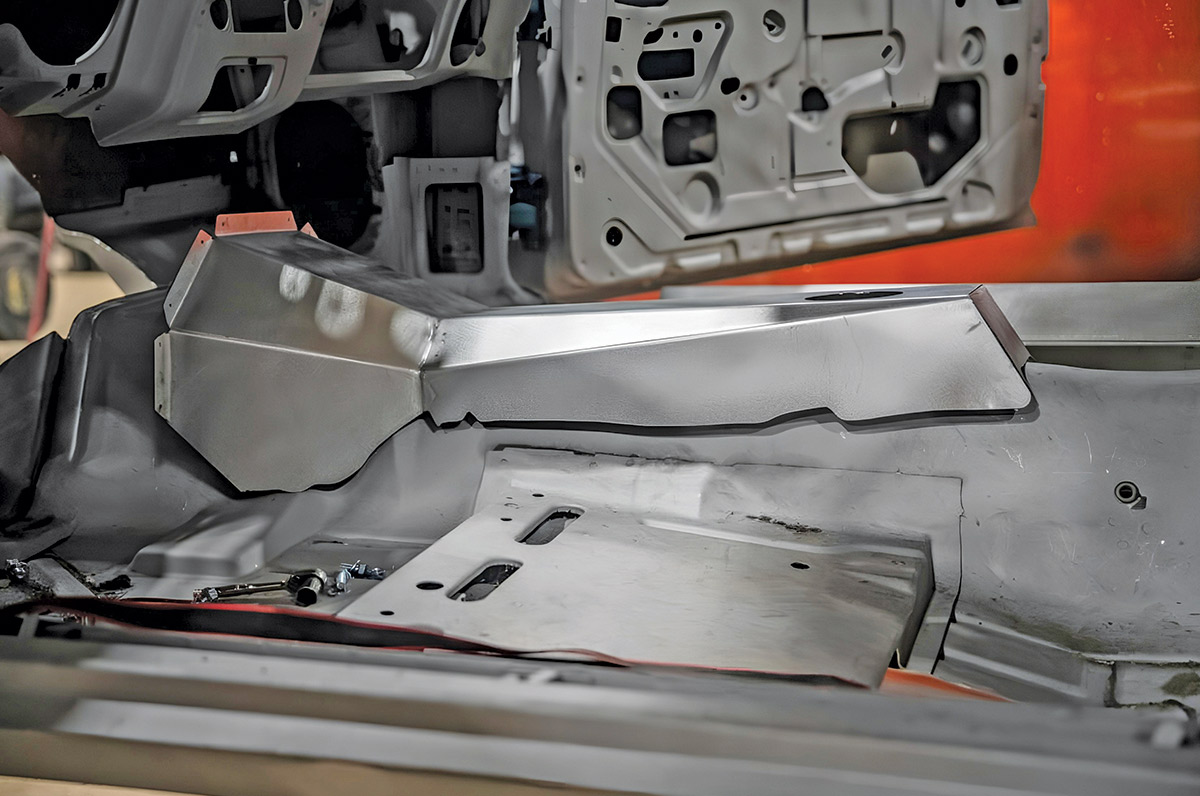
Extra clearance was needed for the shifter on the transmission, so a new sheetmetal construction was added to the top of the original transmission hump. This was CAD designed, laser cut, precision formed, and carefully TIG welded into place.

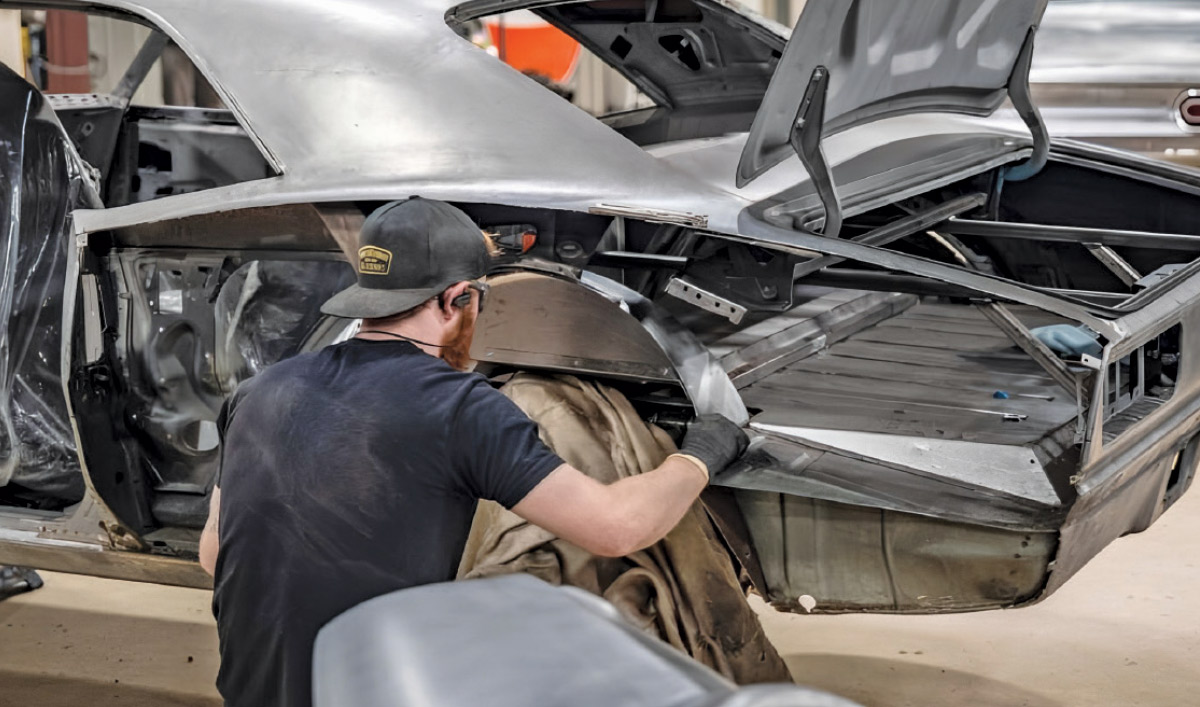
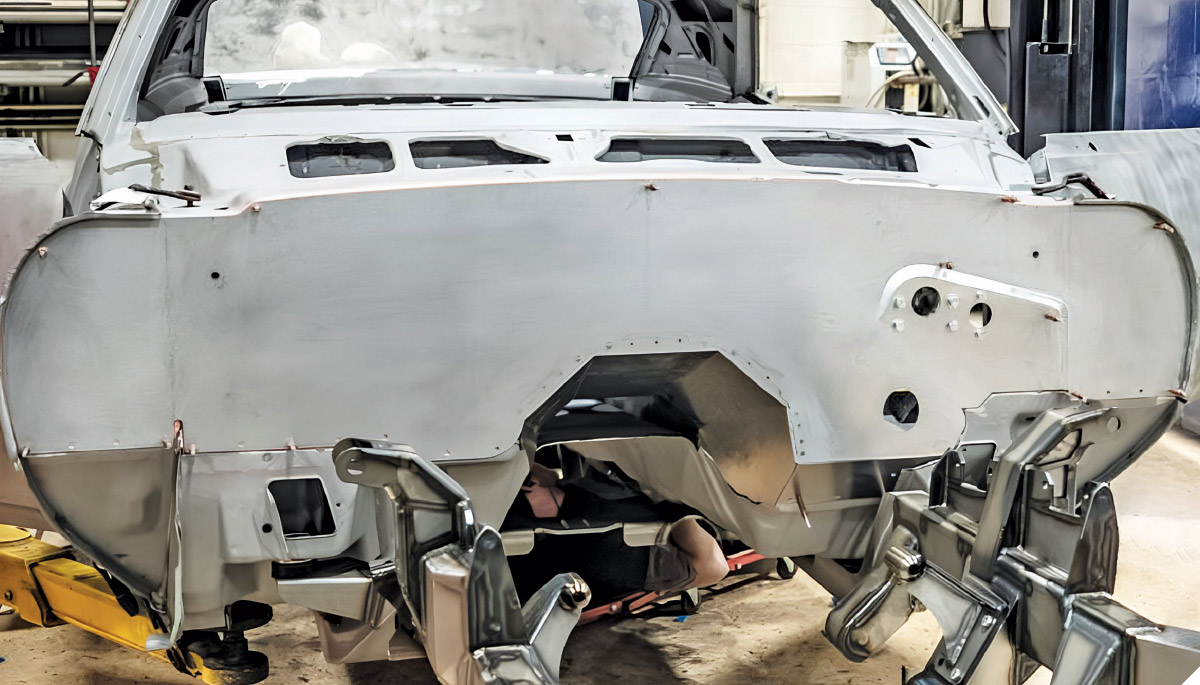
A new, smooth firewall was fabricated from heavy-gauge sheetmetal and was fitted to the cowl. This will give the car a much cleaner look when the hood is open.

Lots more work is planned for this project, and next time we’ll look at how the wheelwell flares were designed and fitted to match the new wheels and tires. You may be surprised to see all the steps involved in this job, where lots of effort was expended to achieve a particular look.

1968 Camaro interior stripped to bare metal floor pan showing rust and age before restoration
2. Typical rust damage was uncovered after stripping the interior of the car, but the majority of the floor will be replaced, so this was not much of a problem.
1968 Camaro trunk pan sandblasted clean and prepped for fabrication work
3. After the body was removed from the frame, it was completely media blasted inside and out.
1968 Camaro trunk bracing being installed with a power tool during restoration
4. The rear portion of the floor was cut out with a Sawzall.
1968 Camaro full-frame chassis mockup under construction on a fixture table
5. The Roadster Shop Fast Track chassis is taller at the rear than the stock chassis to clear the independent rear suspension system. The new floor will be designed to clear the frame and connect solidly to the body.
1968 Camaro custom trunk floor design shown in 3D CAD mockup with mini-tub clearance
6. The new floor panels were designed in CAD, and tweaked until they fit both the body and the chassis perfectly. All of the stiffening ribs were designed and positioned at this stage, as well as all the flanges needed for mounting and for strength.
1968 Camaro trunk floor fabrication in progress, featuring bead-rolled sheetmetal panel
7. Templates were laser-cut to guide the panels in the Pullmax machine as the ribs are formed. The templates are being bolted temporarily into place here.
1968 Camaro rear floor panel being bead-rolled by Roadster Shop fabricators
8. It’s a two-person job to guide large, heavy panels like this through the machine.
1968 Camaro rear pan team fabrication in action using Pullmax machine
9. The guides must be held snugly against the edges of the tooling as the ribs are formed.
1968 Camaro custom rear floor panel partially assembled with Cleco fasteners
10. Properly done, this process makes a very clean embossed rib, which adds considerable strength to the panel.
1968 Camaro trunk pan spot welded in fixture using dual-arm resistance welder for precision
11. Angled flanges were spot welded to the sides and rear edge of the largest panel.
1968 Camaro trunk floor panel mocked up with Cleco pins for alignment on fab bench
12. Reinforcements are added to the center of the panel to provide extra strength.
1968 Camaro rear pan nearing final assembly with support structures tacked in place
13. Heavily reinforced body mounts are placed in the corners of this panel.
1968 Camaro sheetmetal panel prepped with bead-rolled vented inserts and bolted mockup
14. Guides for the Pullmax are attached to the panel, which fits over the third member.
1968 Camaro trunk floor panel bead-rolled with transmission tunnel clearance notch
15. The ribs have been fully formed, and a brake was used to make some bends in the panel.
1968 Camaro full-width rear floor panel shaped with recesses and contoured sides
16. A brake with a radius die was used to form the rounded curve near the front of this panel.
1968 Camaro rear trunk panel with welded tub arch and recessed details completed
17. An extension is added to the front of this panel to go over the driveline and chassis crossmember.
1968 Camaro mini-tub trunk pan mocked in place inside body shell for fitment
18. The floor panel is test-fitted inside the car.
1968 Camaro full trunk floor and wheel tubs tacked from underside during test fit
19. Looking up from the bottom you can see how perfectly all the components fit together.
1968 Camaro full mini-tub system and floor pan fitted and braced under body rails
20. A flat piece of metal is held to the edge of the new floorpan with Clecos. This will be the inner face of the new wheelwell.
1968 Camaro driver-side mini-tub mocked up for fitment with trunk and wheelhouse alignment
21. Since the quarter-panels will be replaced with aftermarket units, they have been removed at this stage to gain access to the wheelwells. The top arch of the wheelwell is being fitted into place here.
person welding wheelwell components together
22. On the workbench, the components of the wheelwell are welded together.
1968 Camaro mini-tub fully installed inside trunk, welded and boxed for frame clearance
23. Clecos hold the new wheelwell in place as the fit is checked.
outer portion of wheelwell
24. The outer portion of the wheelwell is made as a separate piece.
1968 Camaro quarter panel TIG welded to inner mini-tub with precision edge seam
25. Here the new outer panel is being TIG-welded into place.
1968 Camaro full trans tunnel fabricated in bead-rolled aluminum and TIG welded
26. A new cover was made for transmission, shifter, and bellhousing. It provides extra clearance where needed.
1968 Camaro passenger-side mini-tub and trunk floor welded and installed from underside view
27. Here the cover is welded to the original front floorpan.
flat firewall made of heavy-gauge sheetmetal
28. A new, flat firewall was fabricated from heavy-gauge sheetmetal.
1968 Camaro custom firewall installed and fitted with transmission tunnel notch cutout
29. The firewall is held with Clecos as the fit is checked against the body. This clean, smooth firewall will really improve the appearance of the engine compartment.
SOURCE