ACP department heading TECH
InTheGarageMedia.com
Hidden In Plain Sight typography
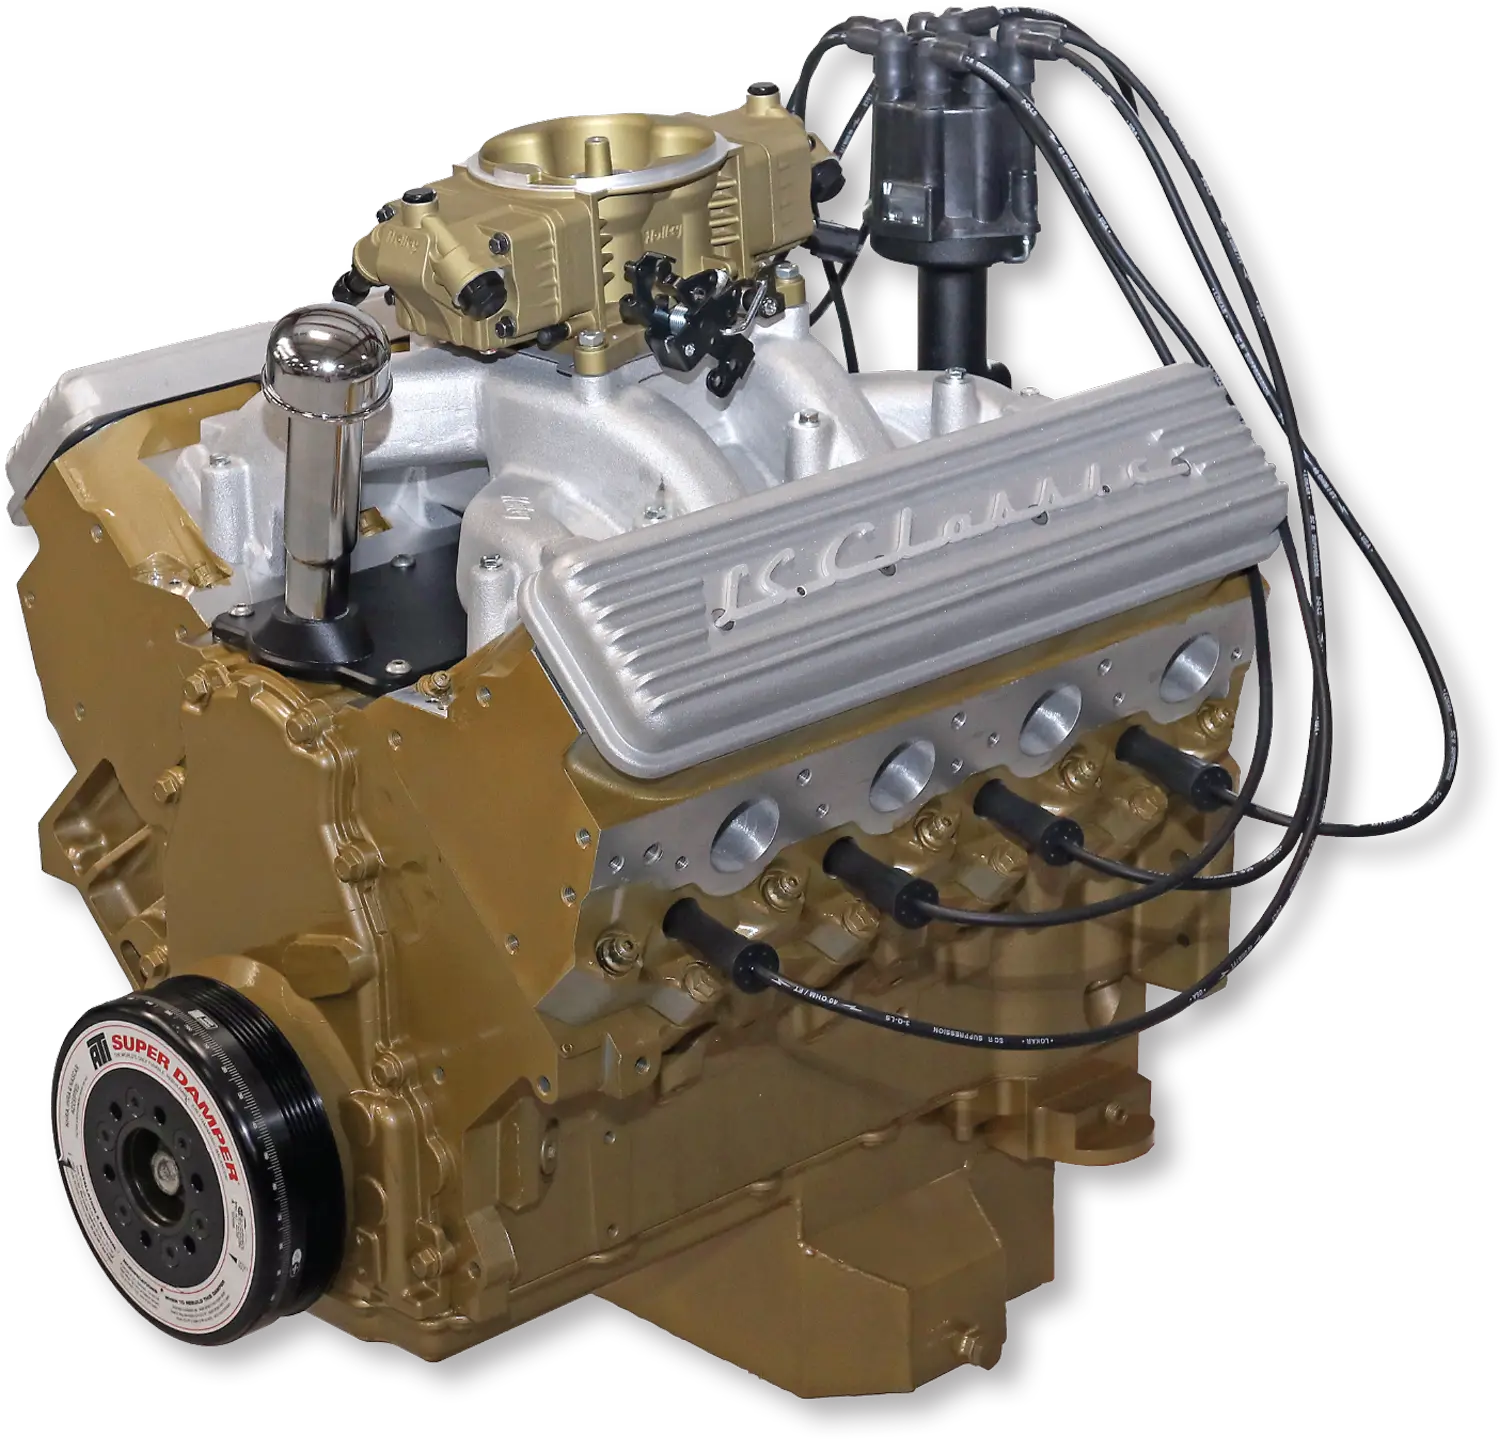
quarter view of an LS classic engine
1. Admittedly, there is very little you can do to fool an expert on engines, which likely includes many of you reading this article, when it comes to disguising a modern LS to look like a classic small-block. For example, you aren’t going to change the shape of the timing cover or the exhaust port alignment without some serious fabwork and expense. But smart changes can completely change the vibe of an engine bay, and the vast majority of people who see your car will totally buy it.
Camouflaging an LS to Pass for a Classic Small-Block
BY Jeff Huneycutt Images by THE AUTHOR
T

his is the opposite of putting lipstick on a pig (or whatever you want to call it).

We’re talking about taking one of the all-time-great engines—Chevrolet’s LS series—and dressing it to look like a classic, first-generation small-block. First off, when done right the LS engine is a great-looking powerplant all on its own. But sometimes you may want to disguise exactly what it is you’ve got powering your ride.

Sometimes you just don’t want your LS to look like an LS. This is particularly true when you are building a classic and you want to keep that old-school feel. If the outside of your Chevy car or truck looks all original, it can be a bit jarring to open the hood and find a modern powerplant sitting between the framerails. A first-generation small-block, or maybe even a 409 or rat motor, would look more at home in the engine bay. Or maybe you’re running a sleeper and want your potential victims to think you are running a workaday carbed small-block and not a big-inch LS with modern ignition controls and horsepower numbers a stock small-block 350 could only dream of.

If either one of these scenarios describes you, there are a few ways to dress up (or camouflage, depending on your point of view) a modern LS to look like a classic Chevrolet engine. Some kits are obviously more effective than others, and at All Chevy Performance we’ve recently covered mocking up a crate LS engine to look like an old-school big-block engine (inthegaragemedia.com/the-ls-classic-series-big-block-kit-installation-overview-with-detailed-images/) that turned out extremely well. This time around we’re taking a look at some tips for disguising your modern LS as a first-gen small-block—sort of taking a perfectly great engine and making it your own. The end result is modern power and dependability—and even the ability to find replacement parts easily—and giving it the look of a classic without all the hassles and drawbacks.

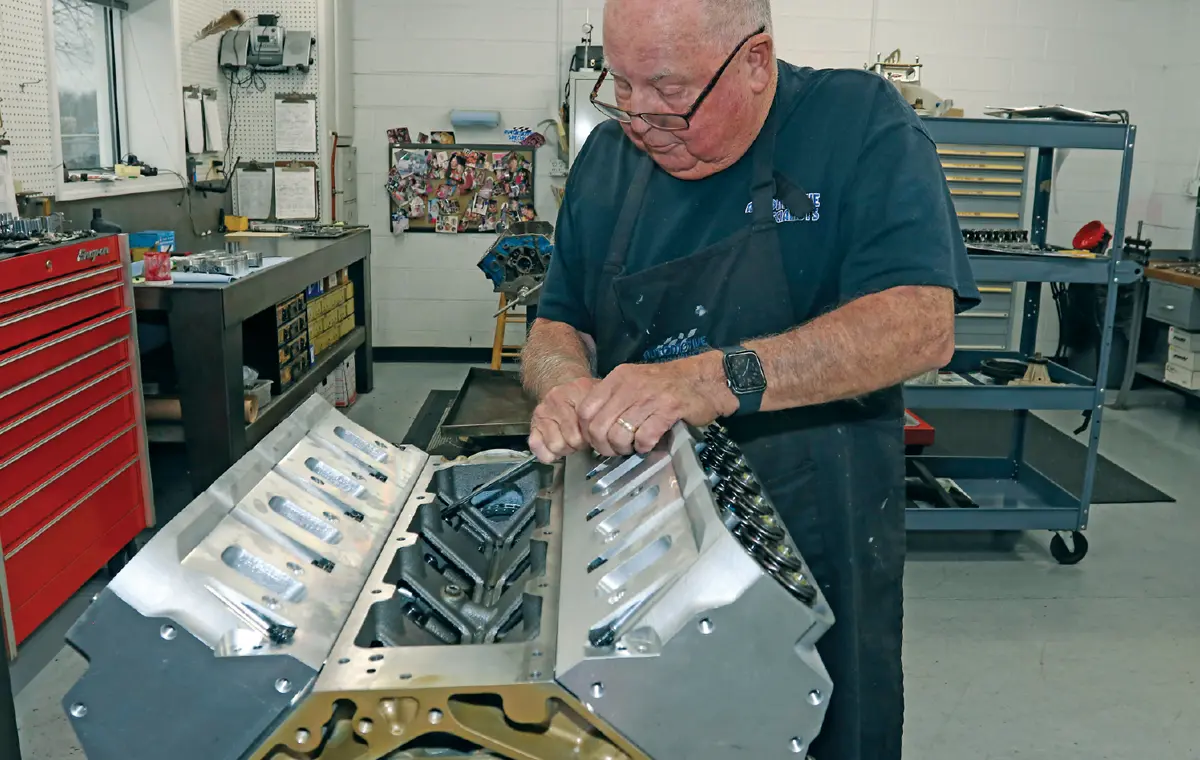
But first, a caveat: We aren’t starting with a crate engine, or even an LS that is anywhere close to stock. We caught up with father-son engine building duo Keith and Jeff Dorton at Automotive Specialists, who were building this custom engine for a car builder who is putting together a bucks-down ride for his customer. We can’t talk too much about the finished product quite yet, but we wanted to show you some of the tricks the folks at Automotive Specialists used during the course of this build. You will also notice that the engine isn’t completely dressed out. That’s because the car builder will be doing some things like potentially fabricating an air cleaner cover as well as changing up the accessory setup and front drive system.

Automotive Specialists also put on a first coat of paint, but as you will see there are still more touch-ups that will need to be made further down the line. But they didn’t want to do the final detail painting until everything was complete and the engine was off the dyno.

The good news here is that you can replicate everything you see here without any fabrication skills or special tools. Most of the heavy lifting was already done by Lokar and their LS Classic Series. They have developed a handful of packages that camouflage the LS engine with very different looks, from the famous “fuelie” to a big-block, which we’ve already mentioned.

And while Lokar nailed most of the details for our camouflage LS, we did turn to Holley to square up one very important feature. Nothing gives away a modern engine dressed up as a classic faster than a pair of fuel rails mounted just above the intake manifold runners. A classic engine requires a carburetor, but we didn’t want to give up four-season reliability, excellent part-throttle response, and the improved fuel economy that comes with fuel injection. So, we dialed up one of Holley’s Sniper Stealth EFI units in gold that mimics a classic 4150-sized double-pumper. The Sniper Stealth does have some modern wiring that must be hidden, but it is much less than most EFI systems, and because it is throttle-body fuel injection it eliminates those giveaway fuel rails.

Check out the build for yourself and see if you can pick up some tips for your next project!
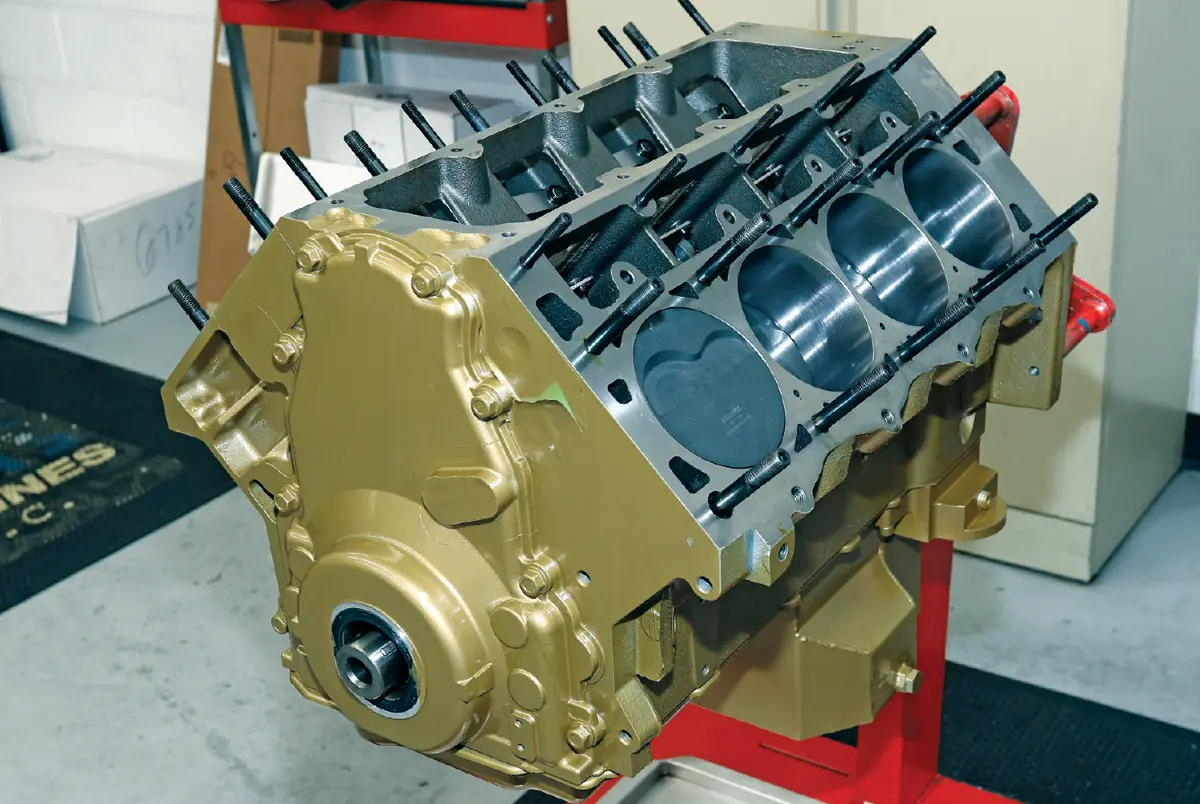
an LS engine, bored and stroked to 427 ci with almost zero stock components, is held by an engine stand
2. Instead of simply swapping out a bunch of parts on a stock crate engine we decided to bump the difficulty up to level 10 with a custom-built, high-horsepower build at Automotive Specialists out of Concord, North Carolina. This LS is bored and stroked to 427 ci and uses almost zero stock components. The block is a Dart LS Next unit with a 4.00-inch forged Molnar crank and 4.125-inch Mahle pistons. That’s a Holley cast oil pan designed to fit F-body cars because it offers maximum chassis clearance without hurting power or oil capacity.
mechanic Keith Dorton bolts up the ported LS3-style cylinder heads
3. Keith Dorton bolts up the ported LS3-style cylinder heads. The excellent LS port design helps produce power that even a built small-block can barely reach, but bare aluminum will ruin the classic engine vibe, so it will be painted to match the rest of the engine shortly.
close view of the fasteners securing the cylinder heads to the block
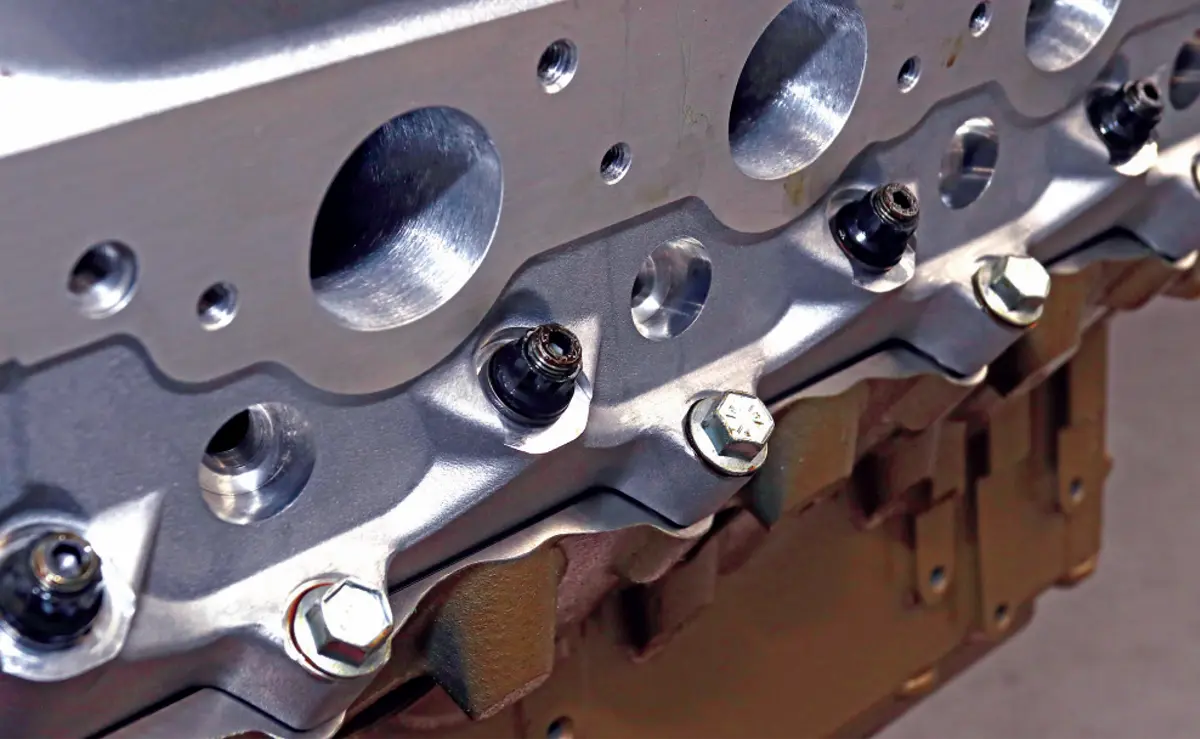
4. For the majority of the fasteners securing the cylinder heads to the block, Dorton is using ultrahigh-strength ARP head studs. Most will be underneath the valve covers, and this row will mostly be hidden by the exhaust manifold. But the lowermost row of fasteners will be exposed, so instead of ARP studs, Dorton chose a set of high-strength bolts with a flange head. Once they are painted the same color as the rest of the block they will look appropriately old school.
cropped view of hands adjusting a part of the rocker setup
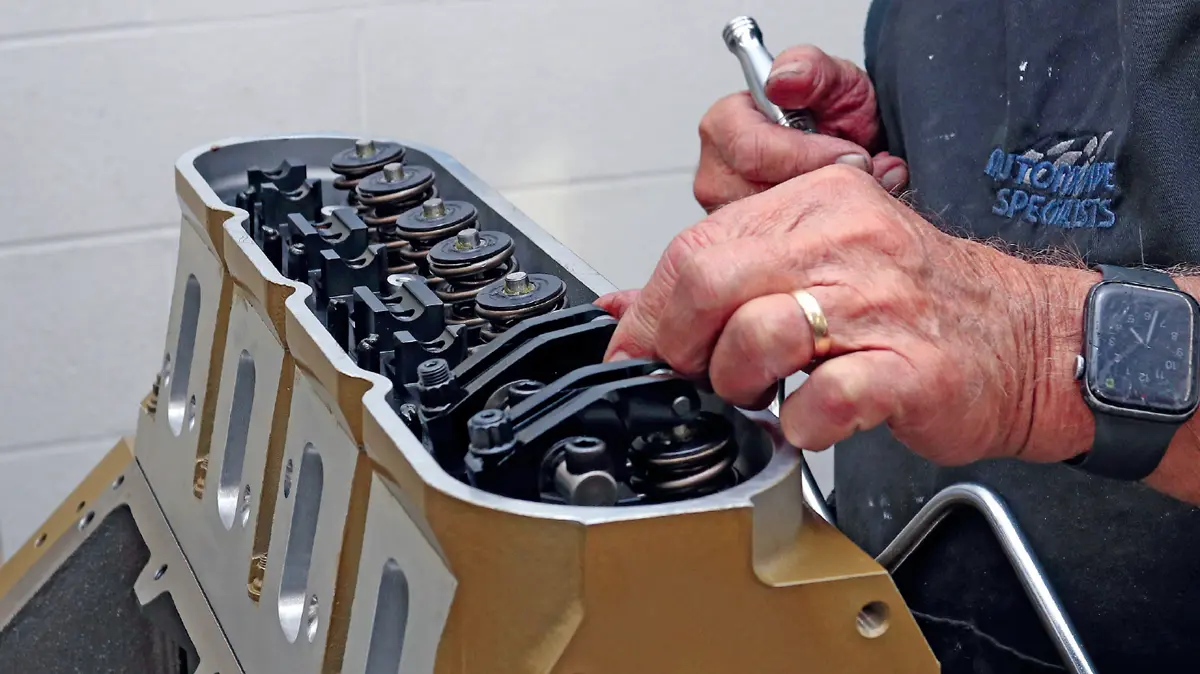
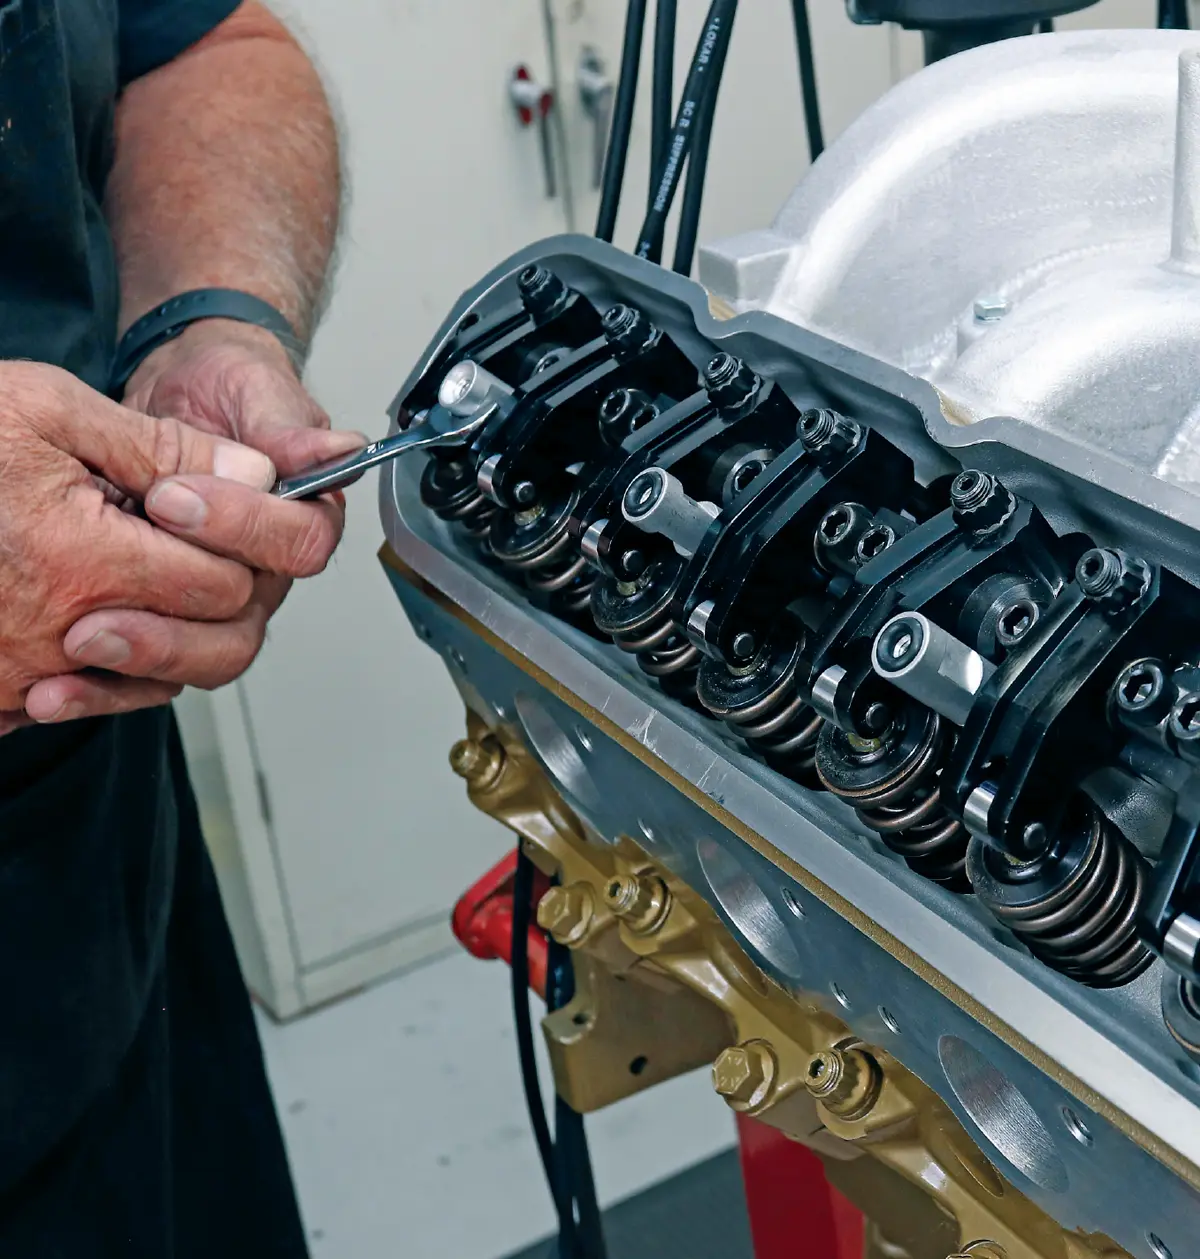
5. The rocker setup is a set of performance shaft-mount rockers from Liberty Performance. They are the same 1.7:1 ratio as stock rockers but have extra beef (that will be important for us later) for extra rigidity. The rest of the valvetrain is a set of solid roller lifters and a camshaft from Comp Cams ground with 239/255 degrees of duration at 0.050 tappet lift. Lobe lift is 0.367 inch for both the intakes and exhaust (making for 0.624 gross valve lift) with 114 degrees of lobe separation.
view of the valley cover plate underside up as hands thread the O-ring gasket that seals the plate to the block
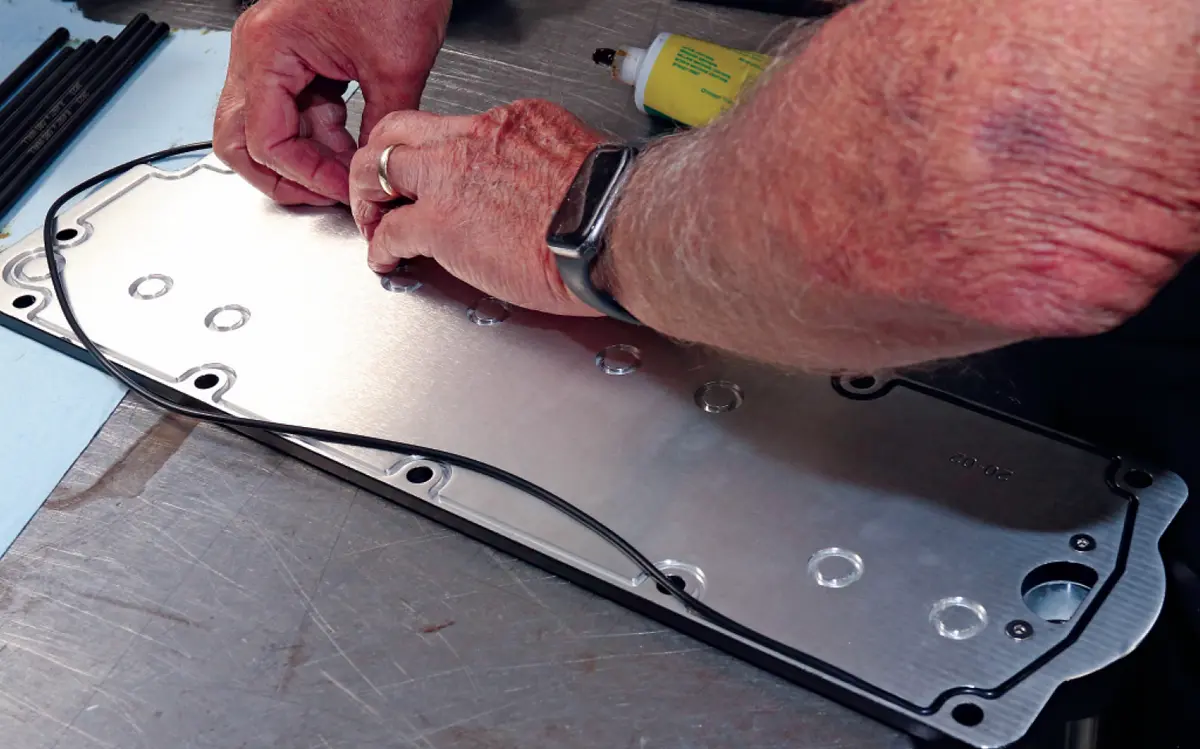
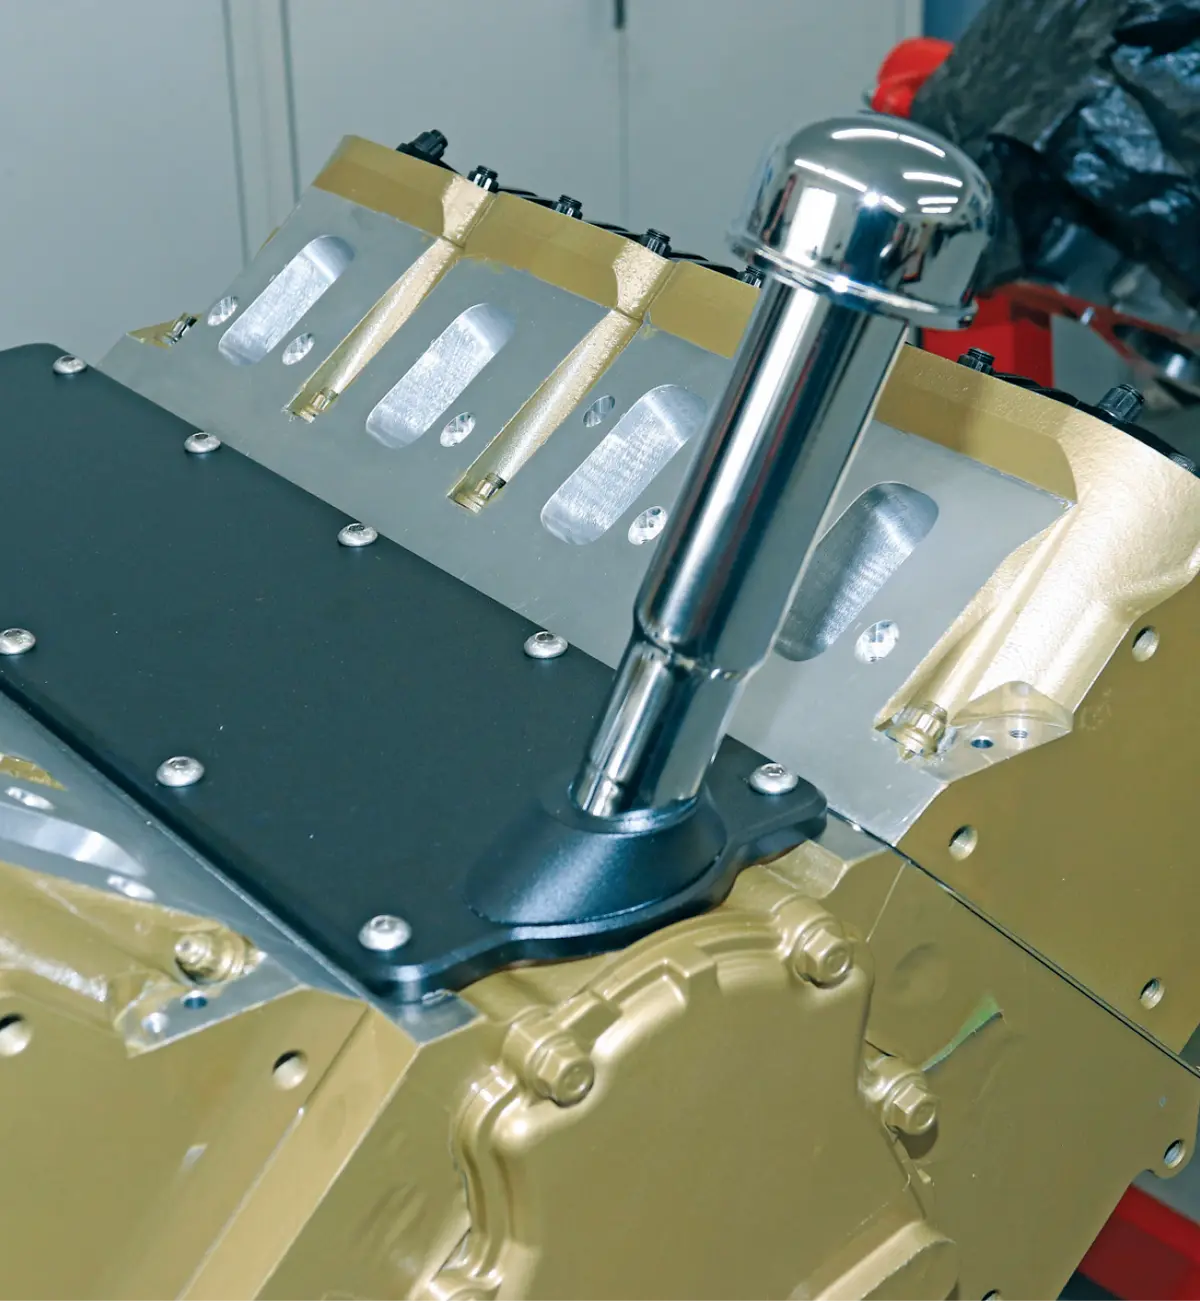
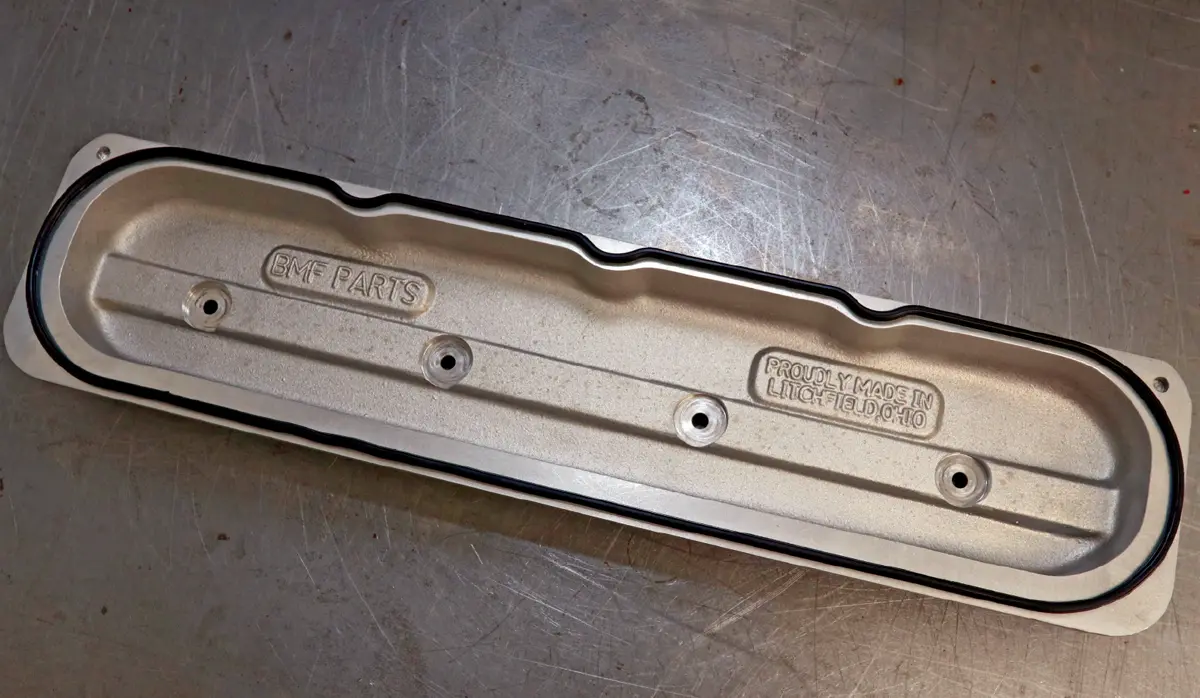
6. The valley cover plate is part of Lokar’s LS Classic line. We’re showing you the underside first because we wanted you to see the O-ring gasket that seals the plate to the block. This is the LS3 version, so there are also O-rings for the cylinder deactivation system, if you want to include that. The Dart LS Next block doesn’t have provisions for that, so we left them off. Please note that the valley covers for the LS3 and the earlier LS1 do not interchange because the LS1 version makes room for the cam position sensor. Lokar has versions for both, so make sure you order the correct one.
a look at the business side of the cover
7. Here’s a look at the business side of the cover. The road draft tube up front functioned as a PCV valve in older engine designs. Lokar has versions where the tube slants both to the left and the right, depending on your needs. You can also get the plate in black like you can see here or in bare aluminum. We chose black but as this went to press there was discussion whether the plate should be painted gold to match the rest of the engine. Because of the O-ring seal, it isn’t a big deal to pull the plate off later and make a change.
Dorton sets the dual-plane intake from Holley in place on the LS
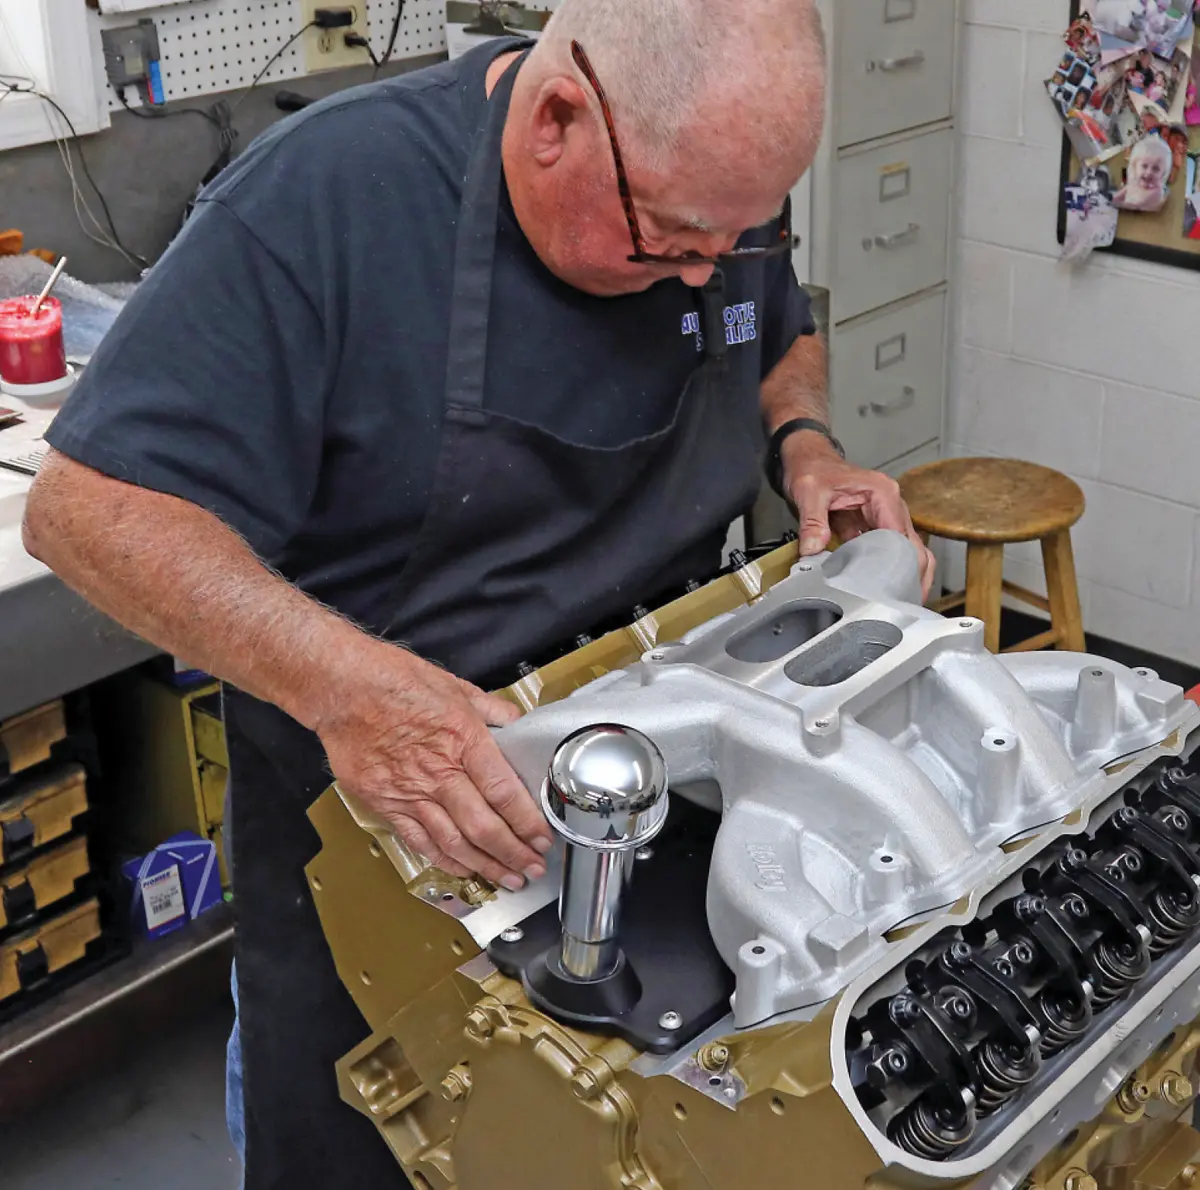
8. A carbureted-style intake manifold is a must. Dorton chose this dual-plane intake from Holley because it looks the part and has also been proven to allow enough flow to feed all 427 ci for excellent power production. Despite optimized runner lengths, it also has a short flange height to help keep the carburetor or throttle body down low enough so you don’t have to cut a hole in your hood. Holley also has single-plane intakes like this but Dorton chose this intake partly because the dual plane helps minimize the gap between the top of the valley plate and the bottom of the intake so that it looks just a bit more like a one-piece intake/valley cover like you would normally find on a first-gen small-block.
top view of a plug wire on a workshop surface
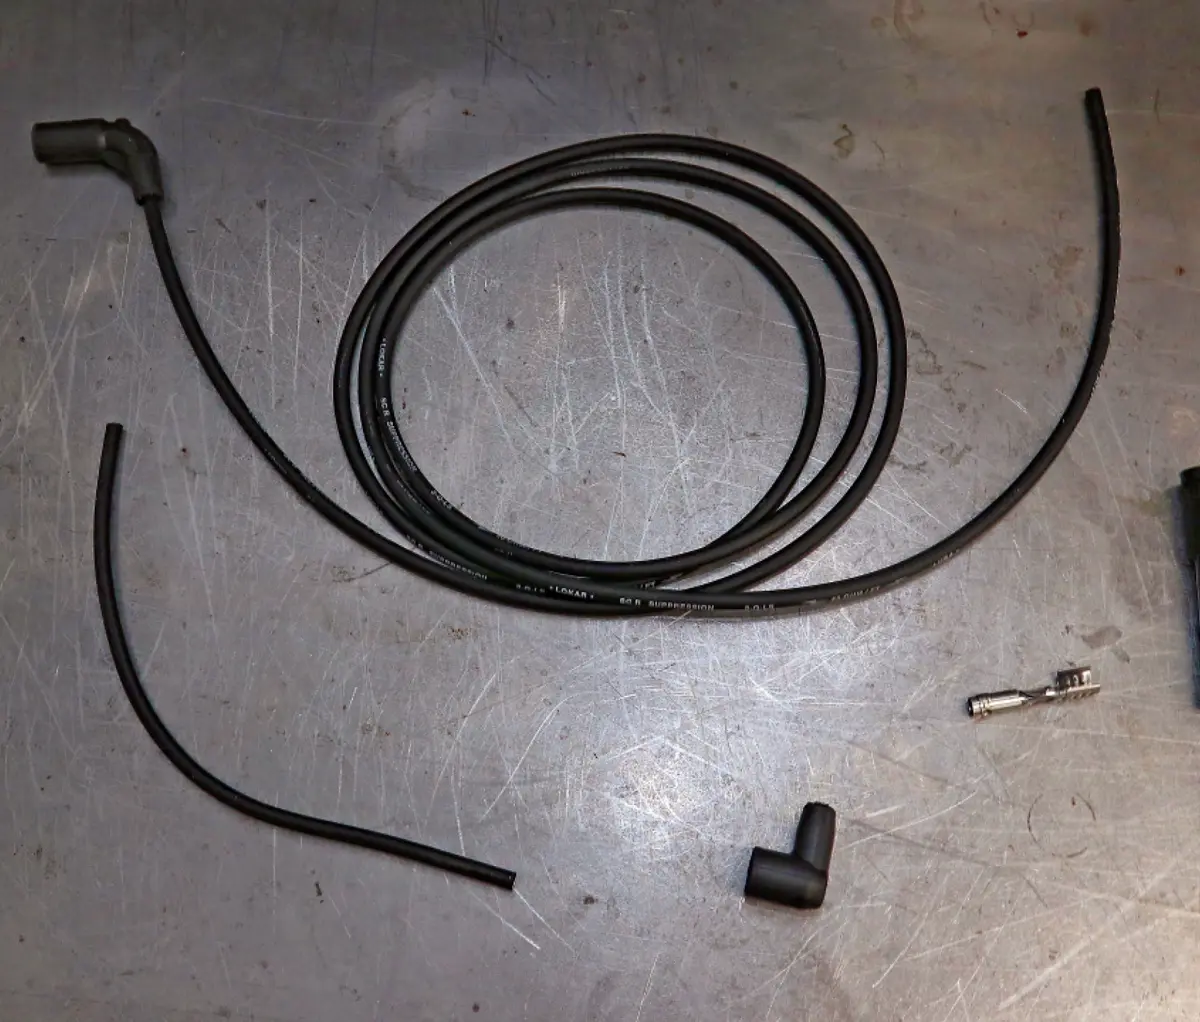
9. Another big giveaway for modern LS engines is the individual coil packs that normally mount on top of the valve covers. A lot of kits utilize a false valve cover that goes over the coils and the real valve covers, but these wind up being too tall and just look weird. We’re going with Lokar’s coil relocation kit, which utilizes a dummy distributor to route the wires and looks really good. Lokar utilizes high-quality, low-resistance plug wires in the kit, and each one is an incredible 9-feet long to give you lots of options for locating your coils. You just cut the wire to the proper length and install the spark plug ends with the included components. There’s also a short length of wire to function as a dummy coil wire.
view of the false distributor housing with plug wires routed through it
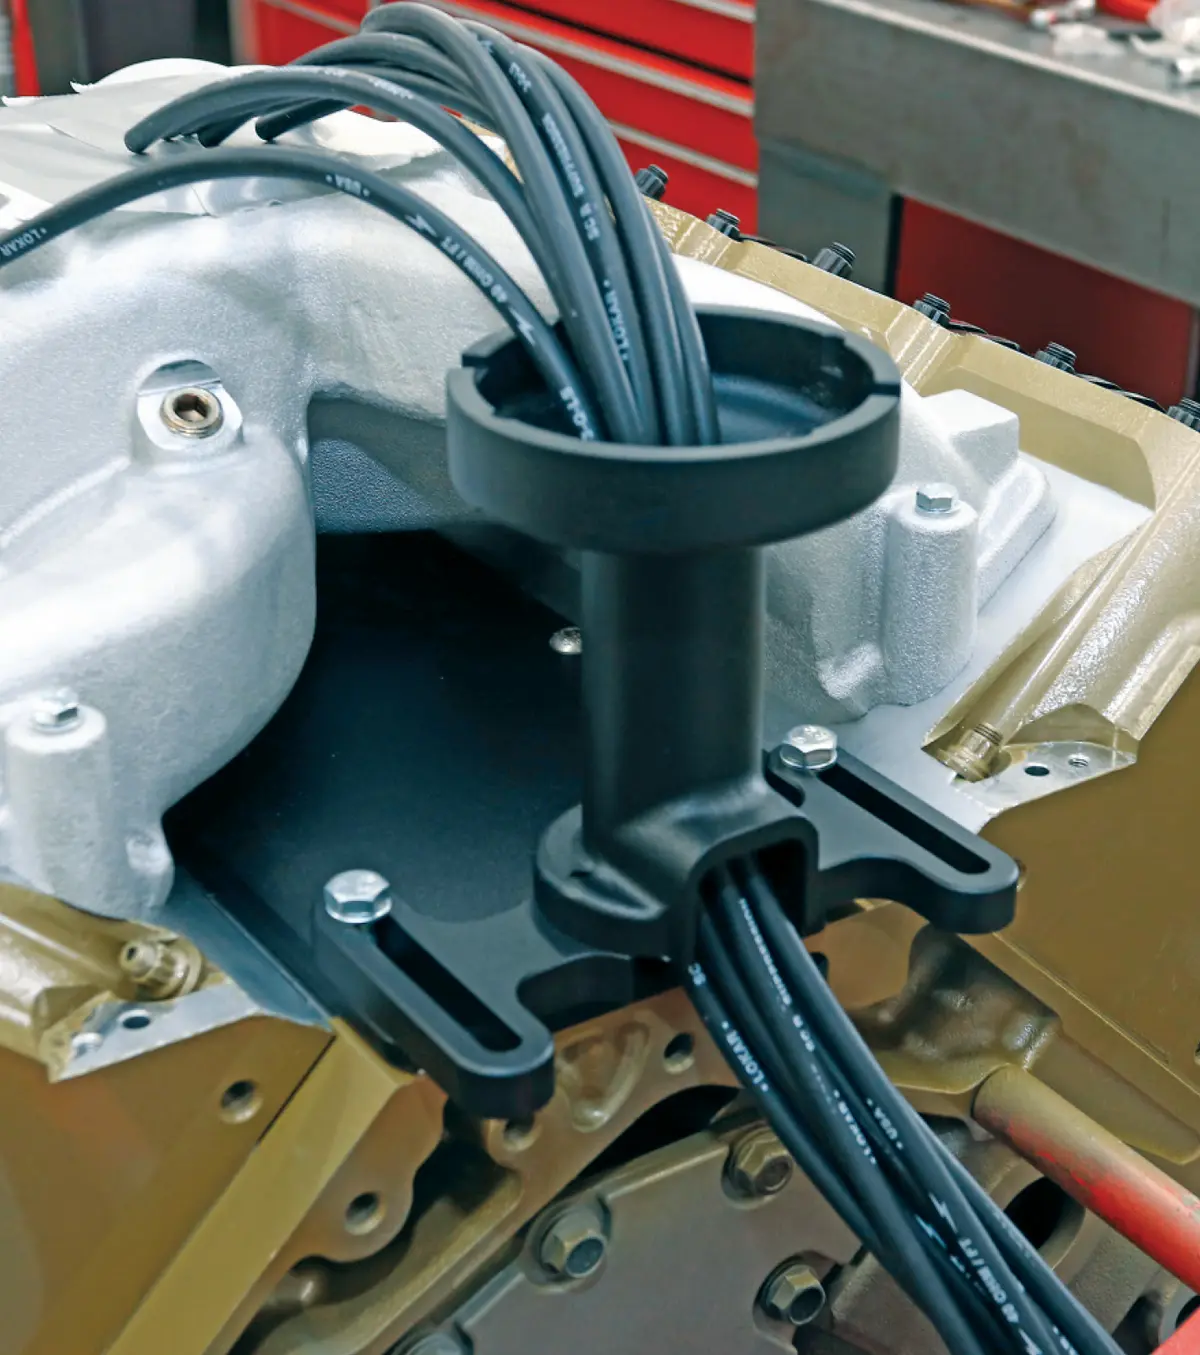
10. Here, you can see the false distributor housing and how the plug wires route through it. The housing bolts up to the rear of the valley cover.
most of the dummy distributor plug boots installed with one left off for comparison
11. The plug wires thread through the holes in the top of the fake distributor cap. We routed ours in the small-block standard “1-8-4-3-6-5-7-2” firing order even though the LS uses its own firing order, but it doesn’t really matter because the wires just come out of the bottom of the fake distributor in a bundle. We’ve installed most of the dummy distributor plug boots so you can see how well the finished product looks but left one off just for comparison.
two bare Lokar coil mounts
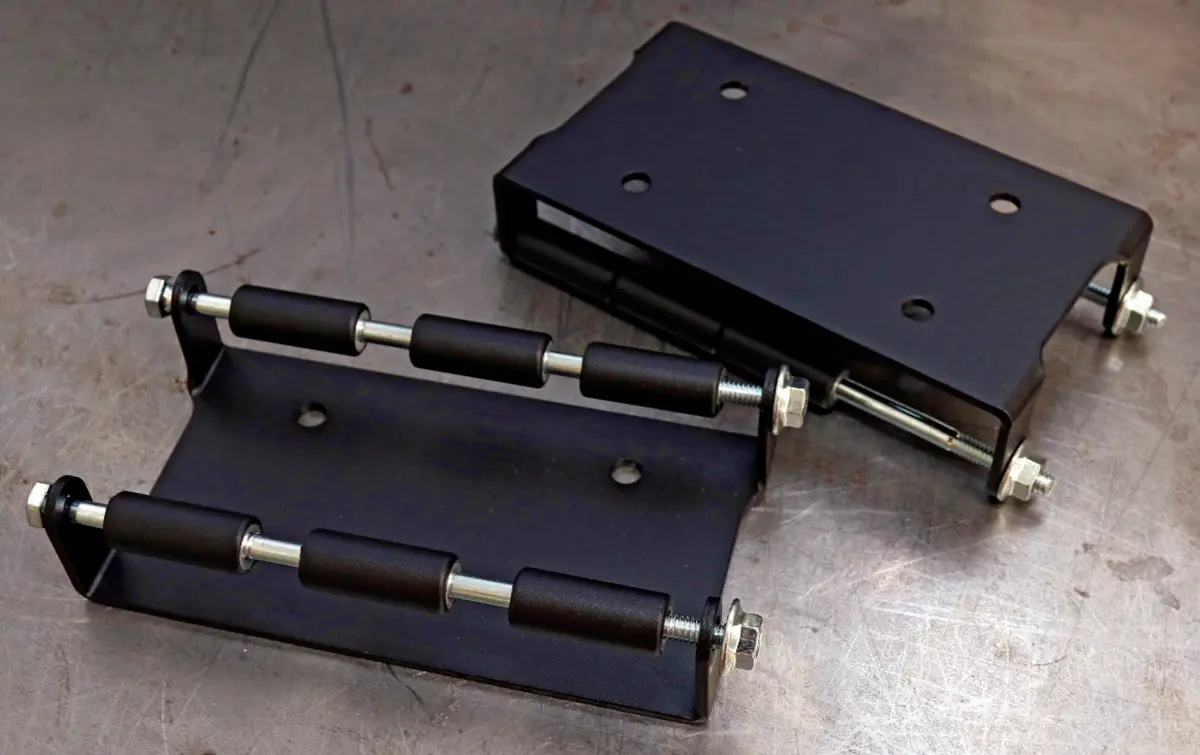
12. Lokar also has these coil mounts that you can use with the system if you like. Here, they are just bare, but we like how compactly they arrange the coils and allow you to put them out of the way on the firewall, or even low on a framerail if you like.
bottom view of a cast-aluminum valve cover from Lokar
13. Because we have the coil relocation kit, we can go with a set of valve covers that more look the part. These are cast-aluminum covers from Lokar, and we’re showing you the bottom first to point out a very cool feature. Like all LS engines, the valve covers use a center bolt setup to secure it to the head. But classic small-blocks all have perimeter-bolt valve covers with straight rails. We’re not going to drill and tap the outside edge of the cylinder heads because there is just not enough meat there, but these castings have straight rails to mimic an old-school valve cover, while the valve cover gasket is scalloped to properly seal against the LS cylinder heads. Nice touch.
an adjustment is made to one of the valve cover's aluminum stands
14. Here’s one of the few issues we had with the build, and it was the common problem that comes with mixing and matching high-performance aftermarket components. Remember when we mentioned the rocker setup used is extra beefy? The Lokar valve covers use a set of aluminum stands that screw into the cylinder heads, and then the valve covers bolt to them. There wasn’t quite enough room with the beefy rockers to get them in place, so Dorton just turned the base of the aluminum stands down in a lathe about a 1⁄4 inch in diameter. There is still plenty of material left, and with a stock-style rocker system this wouldn’t even be an issue. But it is just something you have to be prepared for when building custom engines. If you don’t have access to a lathe, you can easily achieve the same result with a sanding disc on a die grinder. Also notice the O-rings to seal the connection between the stands and the valve covers themselves so no oil will weep out.
top view of a ribbed valve cover installed on the block
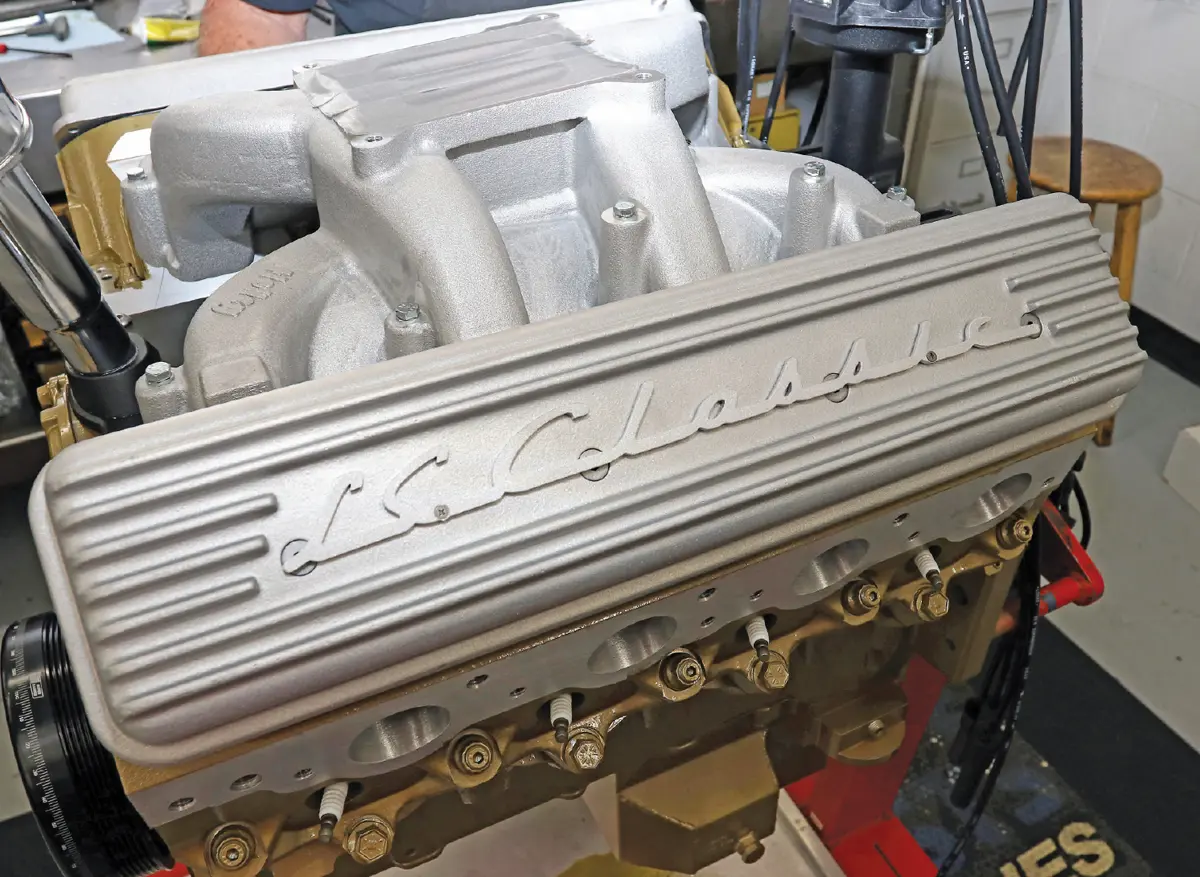
15. Here’s a look at the top of the valve covers. The ribs are definitely nice, and the center bolts are disguised by the “LS Classic” script that bolts over the top. If you don’t like the script you can just have whatever you want made from thin aluminum plate either cut on a laser or water jet. There are even places online that will do that now. We also like the idea of painting the valve covers to match the engine and then machining the top of the ribs to make them shine in bare metal. The paint should also hide the center bolts.
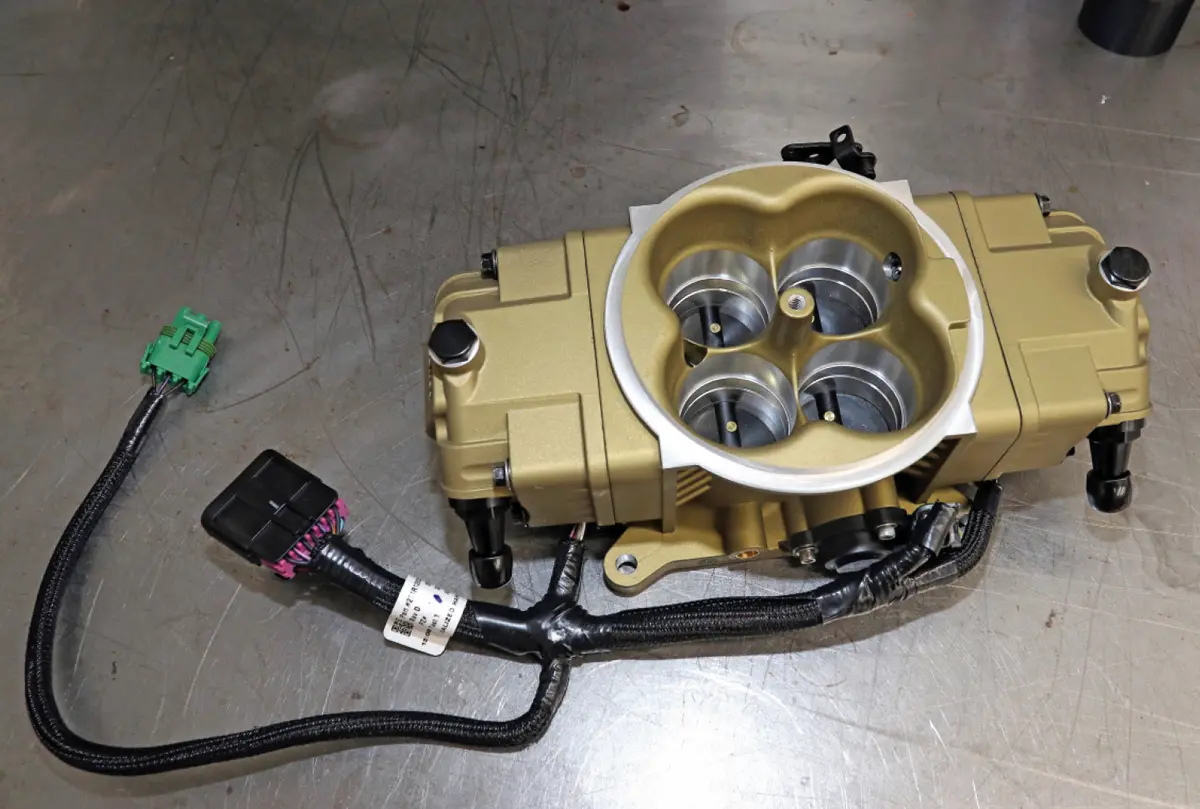
a Holley Sniper Stealth unit sits on a workshop surface
16. We needed a carbureted look but definitely didn’t want to give up all the advantages that come with electronic fuel injection. So, the solution was obvious: A Holley Sniper Stealth unit gives us the best of both worlds. And that classic gold is perfect. This is the eight-injector version that can handle up to 1,500 hp naturally aspirated. This unit also comes with transmission controls built in so the car builder can mate this engine to a modern transmission simply and cleanly. There are a few necessary wiring hookups, but we think they can be hidden relatively well underneath a stock-style air cleaner.
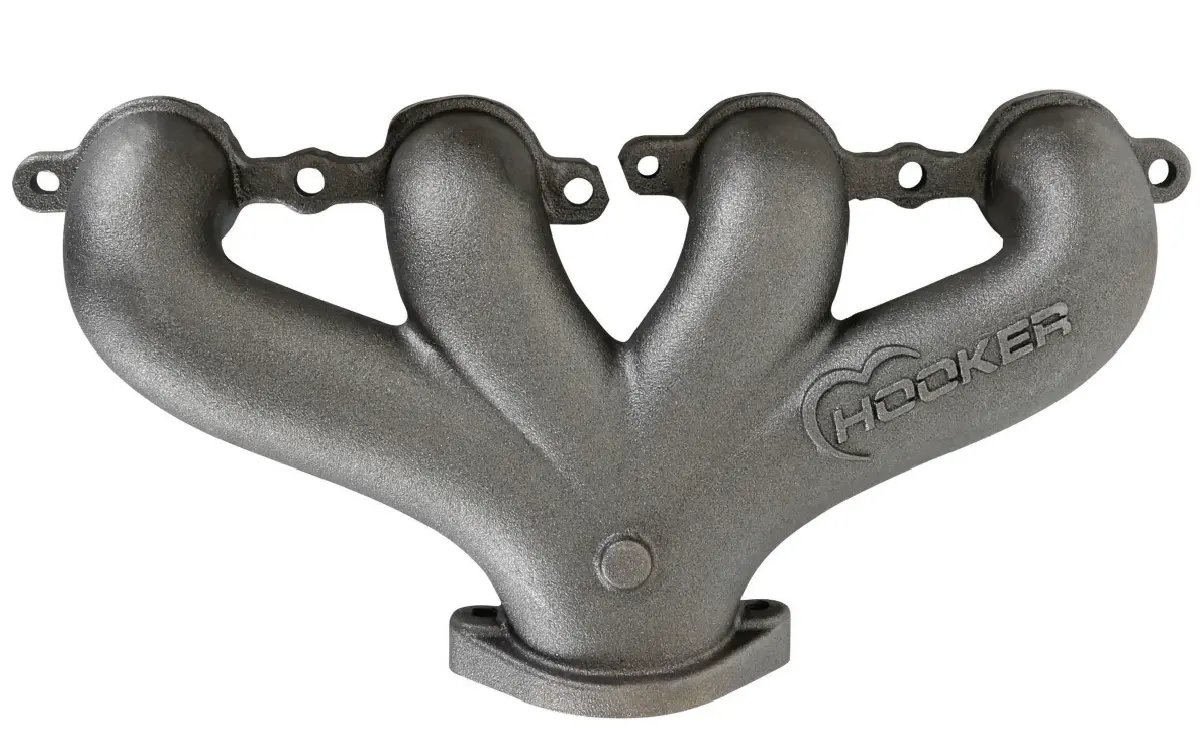
a Hooker Headers cast-iron exhaust manifold
17. On the dyno we’ll be running a set of headers for simplicity, but another option for giving more of an old-school look is a set of cast-iron exhaust manifolds. These are from Hooker Headers, but there are options from many manufacturers. We couldn’t find anything that mimicked the classic “ram’s horn” exhaust, but these, in either a center or rear-dump configuration, would look nice.
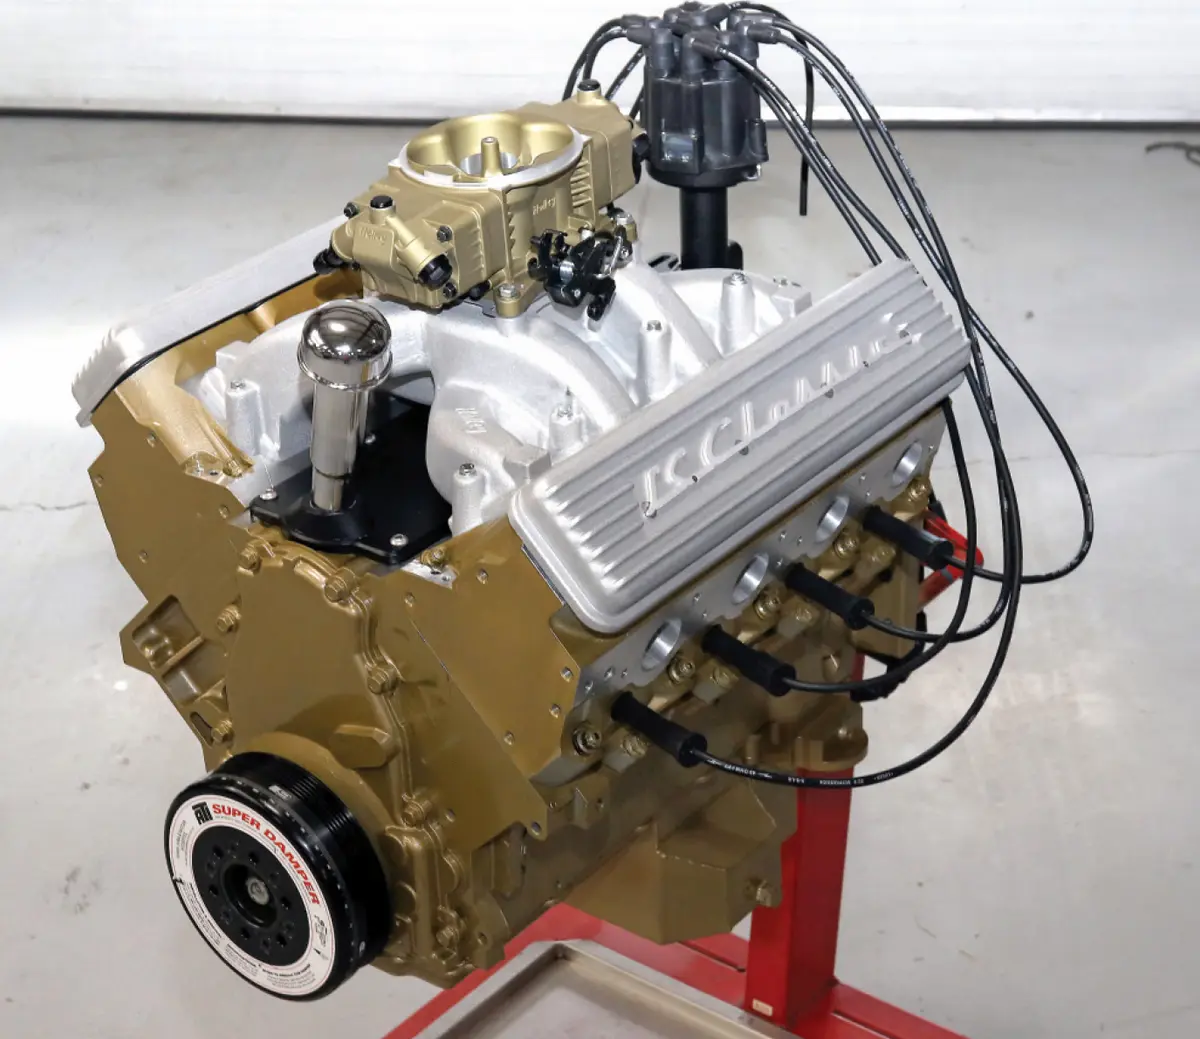
quarter view of the work-in-progress LS classic engine block on an engine stand
18. Here’s a look at our progress. As you can tell we still need to decide on a belt system for the engine accessories, and a bolt-on pulley will cover the front of the ATI super damper. If not, it can just be painted plain black. A custom steam-line setup is being made to blend in with the scenery, and a few places still need to be touched up with a bit more paint. As this went to press, Automotive Specialists and the car builder were still deciding whether to bead blast the valley cover and paint it to match the rest of the engine. (If you decide to go this route, Lokar offers a valley cover in raw aluminum that would be a better option.) Still, it’s shaping up for a very nice overall look.
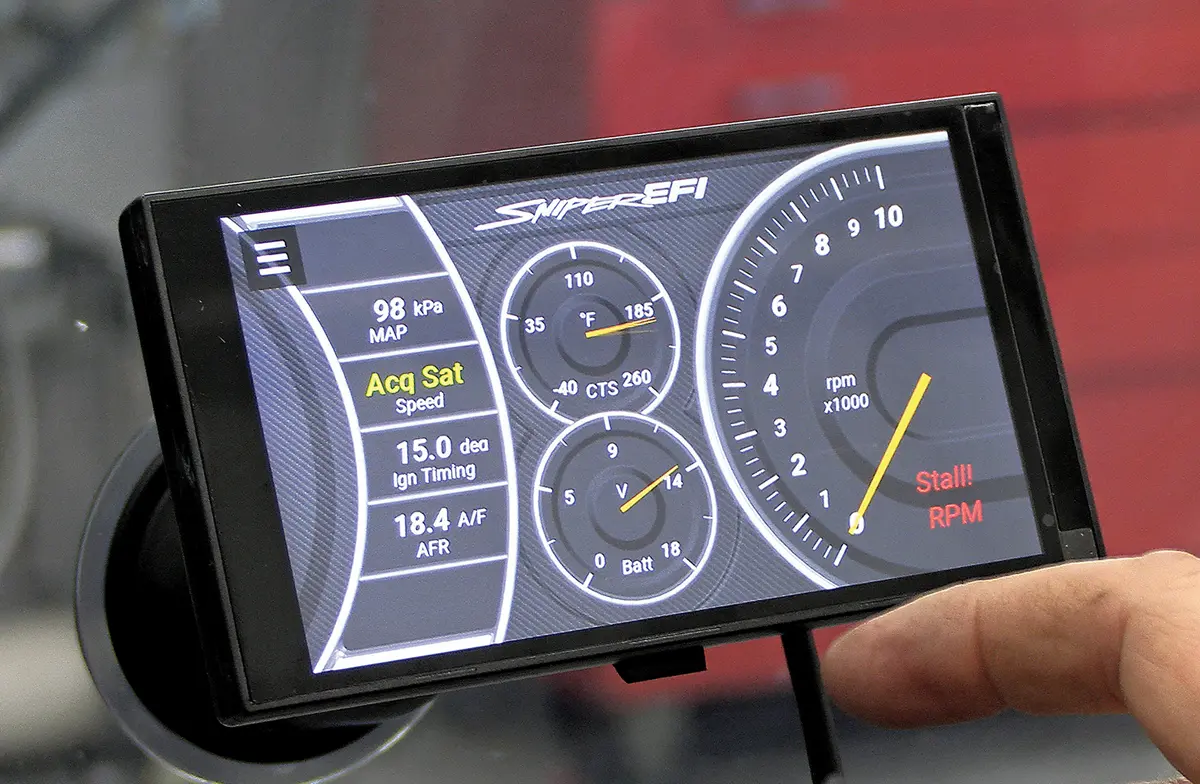
close view of a Holley SniperEFI 5-inch digital dash screen
19. One last note. If you go to all this trouble to give an old-school vibe to your engine bay, the last thing you want to do is ruin it with modern gauges in your interior. Still, if you want to be able to monitor critical values for modern engines, you might want to consider one of Holley’s 5-inch digital dashes. The Sniper comes with a smaller handheld touch screen, but the larger 5-inch dash is about the perfect size to stick to the windshield with the included suction mount to monitor engine conditions or even do a little tuning, and then hide away when you don’t need it.
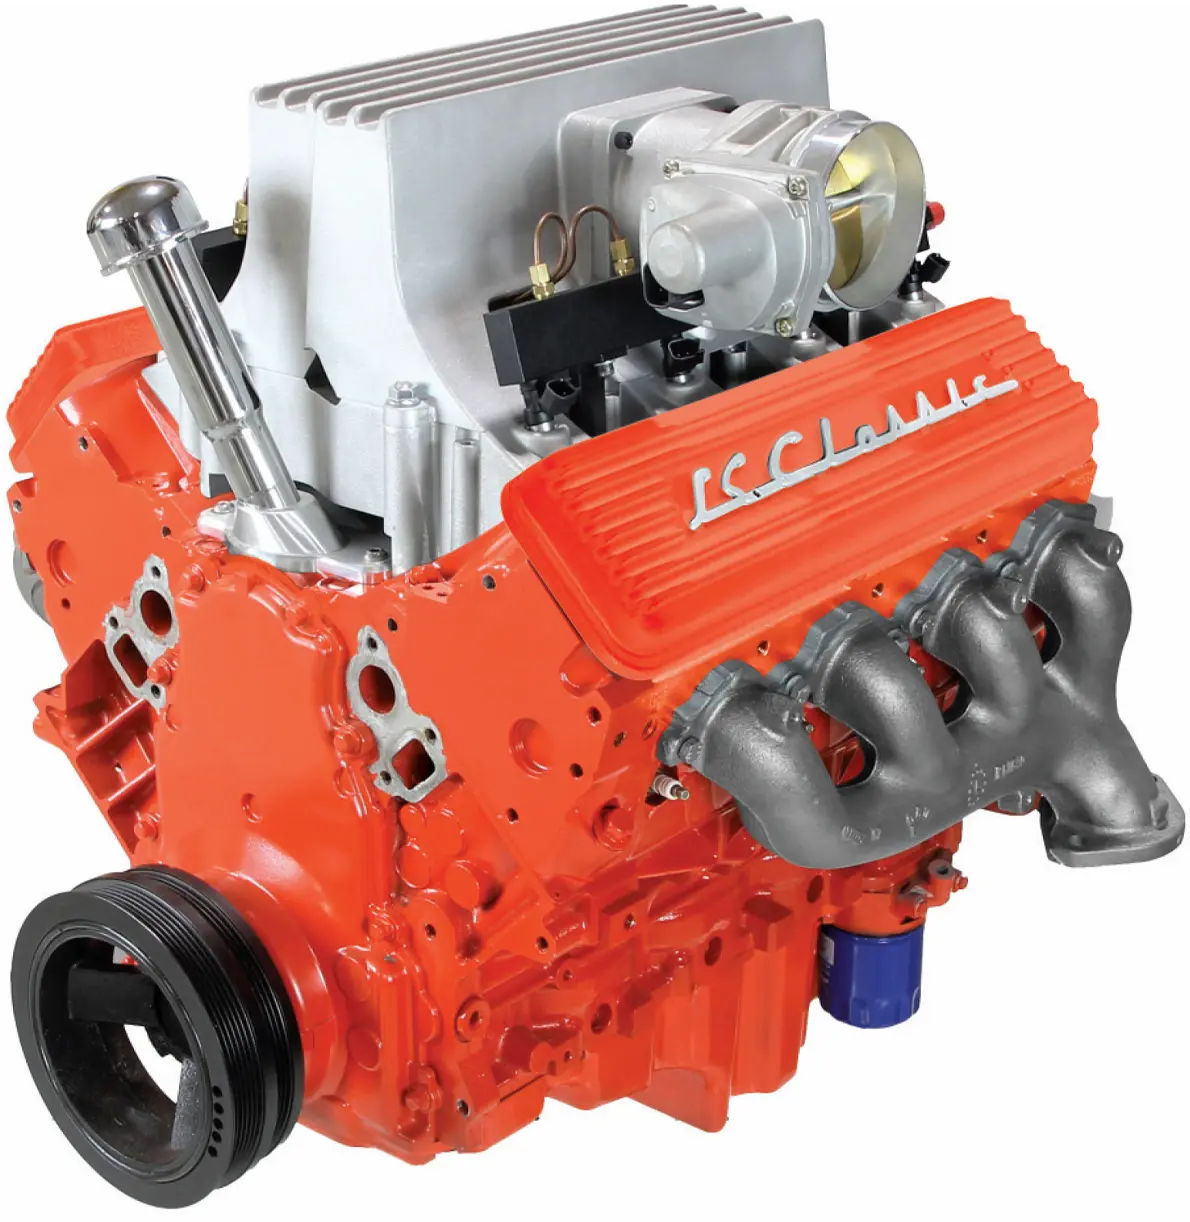
quarter view of a bright orange Chevrolet “Fuelie” engine
20. One of the most famous small-blocks is Chevrolet’s “Fuelie” engine that appeared in ’50s-era Corvettes and some other cars. Our engine is a bit more straightlaced, but if you want to go all-out Lokar’s Fuelie kit is hard to beat.
SOURCES